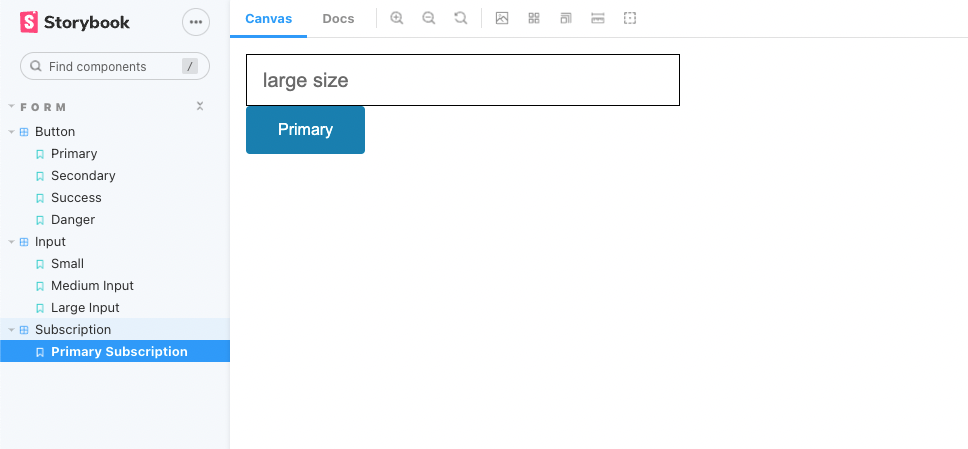
지난 챕터에서는 *.stories.js파일에 직접 스토리를 작성해보았다. 이번 챕터부터는 실제로 사용할 때 편리한 스토리북의 기능들에 대해서 알아보자.
1. Input story
지난 챕터에서는 버튼 스토리만 작성했었는데 Input Story도 추가해보자. 자세한 설명은 생략한다.

src 폴더 밑에 components > Button, Input 폴더를 생성한다.
Input.js
import React from 'react';
import './Input.css';

const Input = (props) => {
  const { size = 'medium', ...rest } = props;
  return <input type="text" className={`input ${size}`} {...rest} />;
};

export default Input;
Input.css
.input {
  display: block;
  width: 400px;
  padding-left: 1rem;
  padding-right: 1rem;
  border: 1px solid;
  border-color: inherit;
  background-color: #fff;
}

.small {
  height: 20px;
  font-size: 0.865rem;
}

.medium {
  height: 2.5rem;
  font-size: 1rem;
}

.large {
  height: 3rem;
  font-size: 1.25rem;
}
Input.stories.js
import Input from './Input';
import React from 'react';

export default {
  title: 'Input',
  component: Input,
};

export const SmallInput = () => <Input size="small" placeholder="small size" />;
export const MediumInput = () => (
  <Input size="medium" placeholder="medium size" />
);
export const Large = () => <Input size="large" placeholder="large size" />;
2. form heirarchy
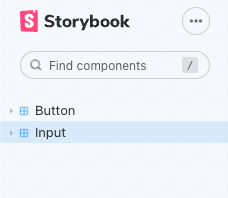
비슷한 폼 요소끼리 그룹핑을 해서 계층구조를 만들어보자. 간단하다.
작성된 Button.stories.js 와 Input.stories.js 파일에서 타이틀 부분을 수정해보자.
// Input.stories.js
export default {
  title: 'Form/Input',
  component: Input,
};

// Button.stories.js
export default {
  title: 'Form/Button',
  component: Button,
};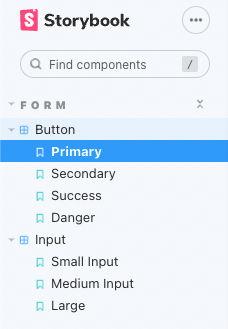
FORM 이라는 큰 계층 구조가 생긴 것을 확인할 수 있다.
3. Rename
Storybook v6에서는 이름을 다시 짓는 것도 가능하다.
Input.stories.js
SmallInput.storyName = 'Small';SmallInput은 컴포넌트를 뜻하고 뒤에 storyName은 스토리북 애플리케이션에서 보여질 이름을 뜻한다.
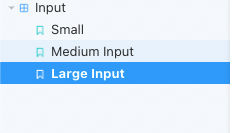
그래서 좀 더 구체적인 이름으로 보여줄 수 있게 된다.
아무래도 협업측면에서 사용하면 더 좋을 것 같다.
4. Sorting
스토리북 애플리케이션에서 알파벳 순서로 정렬해서 보여주고 싶은 사람이 많을 것이다. 그런 상황을 위해 Sort 기능도 제공한다.
다음 코드를 root의 .storybook > preview.js에 추가해보자.
export const parameters = {
  actions: { argTypesRegex: '^on[A-Z].*' },
  options: {
    storySort: (a, b) =>
      a[1].kind === b[1].kind
        ? 0
        : a[1].id.localeCompare(b[1].id, undefined, { numeric: true }),
  },
  controls: {
    matchers: {
      color: /(background|color)$/i,
      date: /Date$/,
    },
  },
};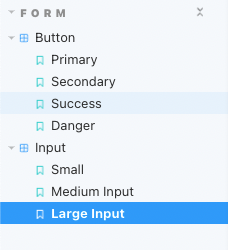
Button 다음에 Input이 표시되는 것을 확인할 수 있다.
5. story 내부의 story
매우 유용한 기능 중 하나이다. 하나의 폴더를 추가해보자.
src 폴더 밑에 Subscription 폴더를 추가하고 Subscription.stories.js 파일을 하나 만들자.
그리고 미리 작성된 Story 파일에서 컴포넌트들을 가져온다.
src/Subscription/Subscription.stories.js
import React from 'react';
import { Primary } from '../Button/Button.stories';
import { LargeInput } from '../Input/Input.stories';

export default {
  title: 'form/Subscription',
};

export const PrimarySubscription = () => {
  return (
    <>
      <LargeInput />
      <Primary />
    </>
  );
};