배운 내용 요약
결과 반환 방식에 따른 Trace 종류
- Single : 트레이스 경로를 따라가다가 가장 먼저 부딪힌 객체의 정보만 반환하며 Block만 인식
- Multi : 가장 먼저 부딪힌 객체에서 멈추지 않고, 경로를 관통하며 부딪힌 모든 객체의 정보를 배열 형태로 반환하고 Overlap도 인식하며 마지막 Block을 감지 시 멈춤
- Async Single/Multi: 위 두 가지 방식의 비동기 트레이스로, 계산을 다른 쓰레드에 넘기고 완료되면 Delegate로 결과를 반환
데미지 처리
- 데미지는 Any(일반), Point(점), Radial(방사)로 분류
- 각각 ApplyDamage/ApplyPointDamage/ApplyRadialDamage로 데미지 부여
- TakeDamage로 데미지 수신
Template Pattern & SandBox Pattern
- Template Pattern: 실행 흐름만 구현하며, 각 세부 사항(기능)은 직접 구현
- SandBox Pattern: 세부 사항(기능)만 만들고, 실행 흐름은 직접 구현
SandBox Pattern을 활용한 샷건 제작
교안에서 제공한 템플릿을 기반으로 샷건의 틀이 될 SandBoxWeaponBase를 제작했다.
// SandBoxWeaponBase.h
UCLASS()
class CONTAINERTEST_API ASandboxWeaponBase : public AWeaponBase
{
    GENERATED_BODY()

public:
    ASandboxWeaponBase();

    virtual void Fire() override;

    // 블루프린트에서 실행 흐름을 구현할 함수. Fire에 virtual 키워드를 못붙이므로 따로 구현.
    UFUNCTION(BlueprintImplementableEvent, Category = "Weapon")
    void SandboxFire();
	// 샷건 LineTrace
    UFUNCTION(BlueprintCallable, Category = "Weapon")
    void LinetraceOneShot(FVector Direction);
	// 반동 구현
    UFUNCTION(BlueprintCallable, Category = "Weapon")
    void ApplyRecoil();
};

// SandBoxWeaponBase.cpp
void ASandboxWeaponBase::Fire()
{
	Super::Fire();

	SandboxFire();
}

void ASandboxWeaponBase::LinetraceOneShot(FVector Direction)
{
	// FirePoint는 총구 방향을 나타내는 ArrowComponent
	if (!IsValid(FirePoint))
	{
		return;
	}

	const FVector Start = FirePoint->GetComponentLocation();
	const FVector End = Start + Direction.GetSafeNormal() * Range;

	TArray<AActor*> ActorsToIgnore;
	ActorsToIgnore.Add(this);
	if (AActor* Actor = GetOwner())
	{
		ActorsToIgnore.Add(Actor);
	}

	FHitResult HitResult;
	const EDrawDebugTrace::Type DrawType = bDrawDebug ? EDrawDebugTrace::ForDuration : EDrawDebugTrace::None;
	// Visibility Trace 적용
	const bool bHit = UKismetSystemLibrary::LineTraceSingle(
		GetWorld(),
		Start,
		End,
		UEngineTypes::ConvertToTraceType(ECC_Visibility),
		false,
		ActorsToIgnore,
		DrawType,
		HitResult,
		true,
		FLinearColor::Red,
		FLinearColor::Green,
		DebugDrawTime
	);
	// 맞은 액터가 있다면
	if (bHit && IsValid(HitResult.GetActor()))
	{
		AController* InstigatorController = nullptr;
		if (APawn* Pawn = Cast<APawn>(GetOwner()))
		{
			InstigatorController = Pawn->GetController();
		}

		UGameplayStatics::ApplyDamage(
			HitResult.GetActor(),
			DamagePerHit,
			InstigatorController,
			this,
			UDamageType::StaticClass()
		);
	}
}

void ASandboxWeaponBase::ApplyRecoil()
{
	APawn* Pawn = Cast<APawn>(GetOwner());
	if (!IsValid(Pawn))
	{
		return;
	}

	APlayerController* PC = Cast<APlayerController>(Pawn->GetController());
	if (!IsValid(PC))
	{
		return;
	}

	// 정조준 중이면 반동 감소
	const float Multiplier = IsOwnerAiming() ? AimingRecoilMultiplier : 1.0f;

	const float PitchRecoil = -RecoilPitch * Multiplier;
	const float YawRecoil = FMath::RandRange(-RecoilYaw, RecoilYaw) * Multiplier;

	PC->AddPitchInput(PitchRecoil);
	PC->AddYawInput(YawRecoil);
}
이를 기반으로 자식 블루프린트 클래스인 BP_Shotgun을 만들고 이벤트 그래프에 실행 흐름을 작성한다.
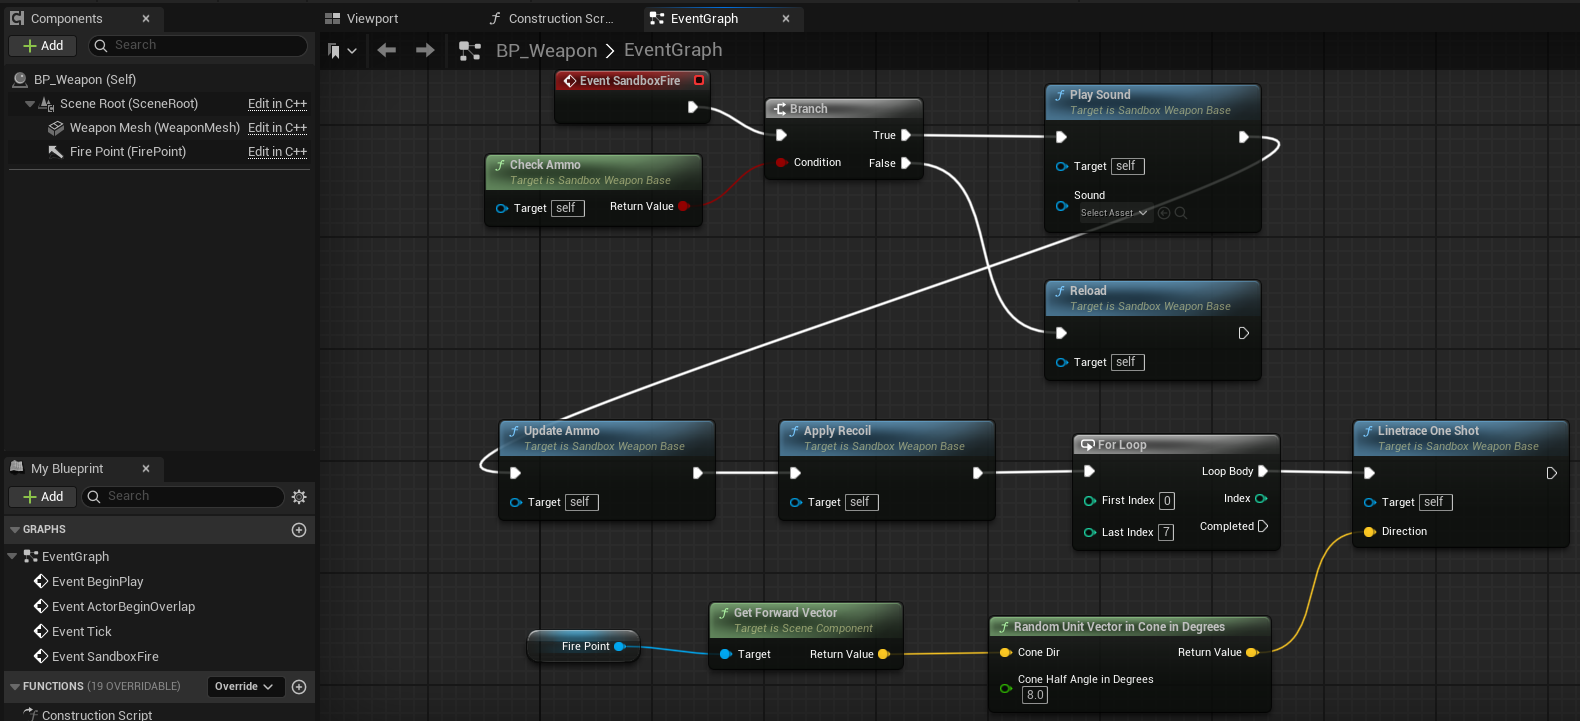
이전에 작성한 컨테이너 과제 프로젝트와 이어지는 과제라 이미 Interact가 구현이 되어있어서, Weapon에 Interact(E)키를 누르면 손에 부착하도록 세팅했다.
// AContainerTestCharacter.h

private:
  UPROPERTY(EditAnywhere, BlueprintReadOnly, Category = Input, meta = (AllowPrivateAccess = "true"))
  UInputAction* InteractAction;

  void Interact();
  bool EquipWeapon(AWeaponBase* WeaponActor);

// AContainerTestCharacter.cpp
void AContainerTestCharacter::Interact()
{
    // 감지된 타겟이 무기(AWeaponBase)인 경우 장착 함수 호출
    if (AWeaponBase* WeaponActor = Cast<AWeaponBase>(ThisActor.Get()))
    {
       EquipWeapon(WeaponActor);
       return;
    }

    // 감지된 타겟이 일반 아이템(AItemActor)인지 확인
    AItemActor* ItemActor = Cast<AItemActor>(ThisActor.Get());
    if (!IsValid(ItemActor))
    {
       ShowDebug(FString::Printf(TEXT("아이템이 존재하지 않음: %s"), *ThisActor->GetName()), FColor::Red);
       return;
    }

    // 아이템 획득(PickupItem) 조건을 만족하여 성공하면 월드에서 해당 아이템 삭제
    if (PickupItem(ItemActor))
    {
       ItemActor->Destroy();
    }
}

bool AContainerTestCharacter::EquipWeapon(AWeaponBase* WeaponActor)
{
	if (!IsValid(WeaponActor))
	{
		return false;
	}

	if (EquippedWeapon == WeaponActor)
	{
		ShowDebug(TEXT("이미 장착 중인 무기입니다."), FColor::Yellow);
		return true;
	}

	EquippedWeapon = WeaponActor;
	WeaponActor->SetOwner(this);

	if (USkeletalMeshComponent* MeshComp = GetMesh())
	{
		WeaponActor->AttachToComponent(MeshComp, FAttachmentTransformRules::SnapToTargetNotIncludingScale, WeaponSocketName);
	}

	ShowDebug(FString::Printf(TEXT("무기 장착: %s"), *WeaponActor->GetName()), FColor::Green);
	return true;
}
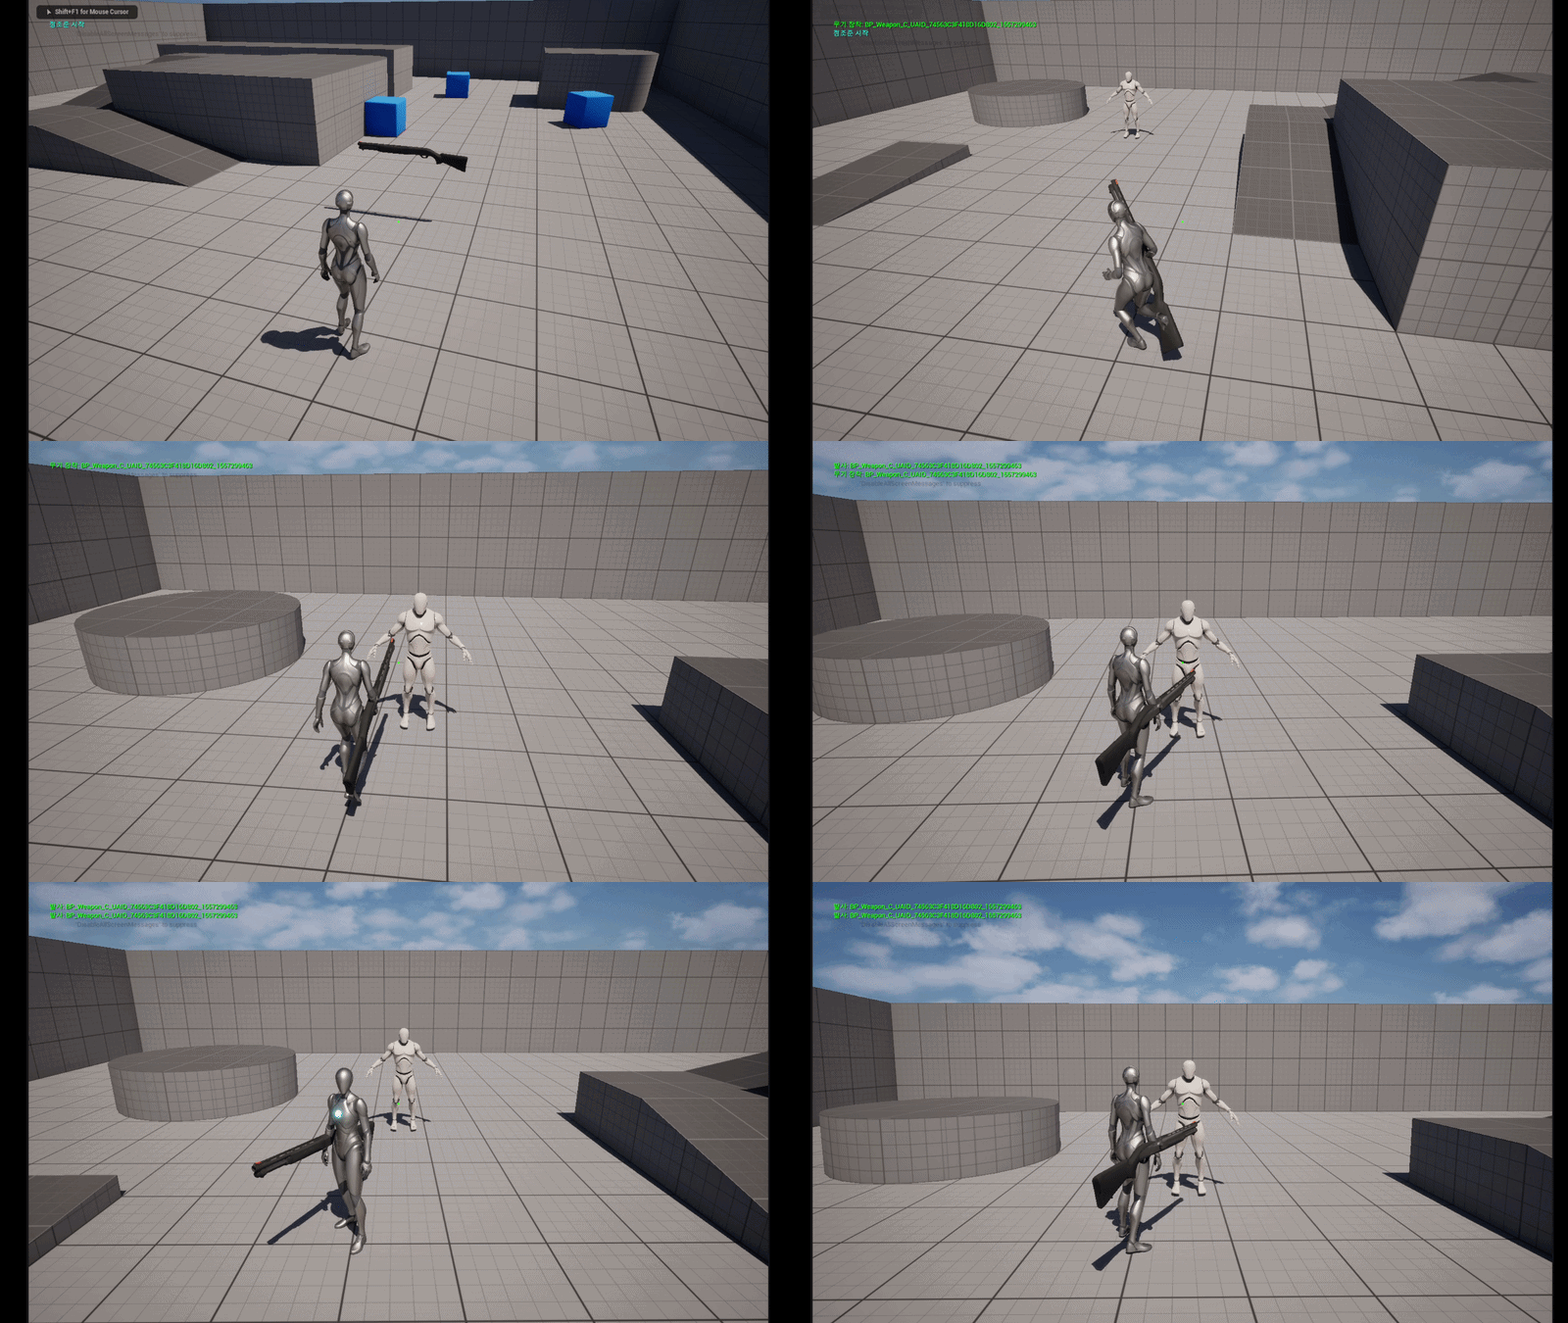
이후 잘 작동되는 지 테스트를 해주었다. 애니메이션까지 해주면 좋겠지만, 시간이 부족했다보니 따로 애니메이션까지 세팅해주진 않았다.
비동기 라인 트레이스 구현
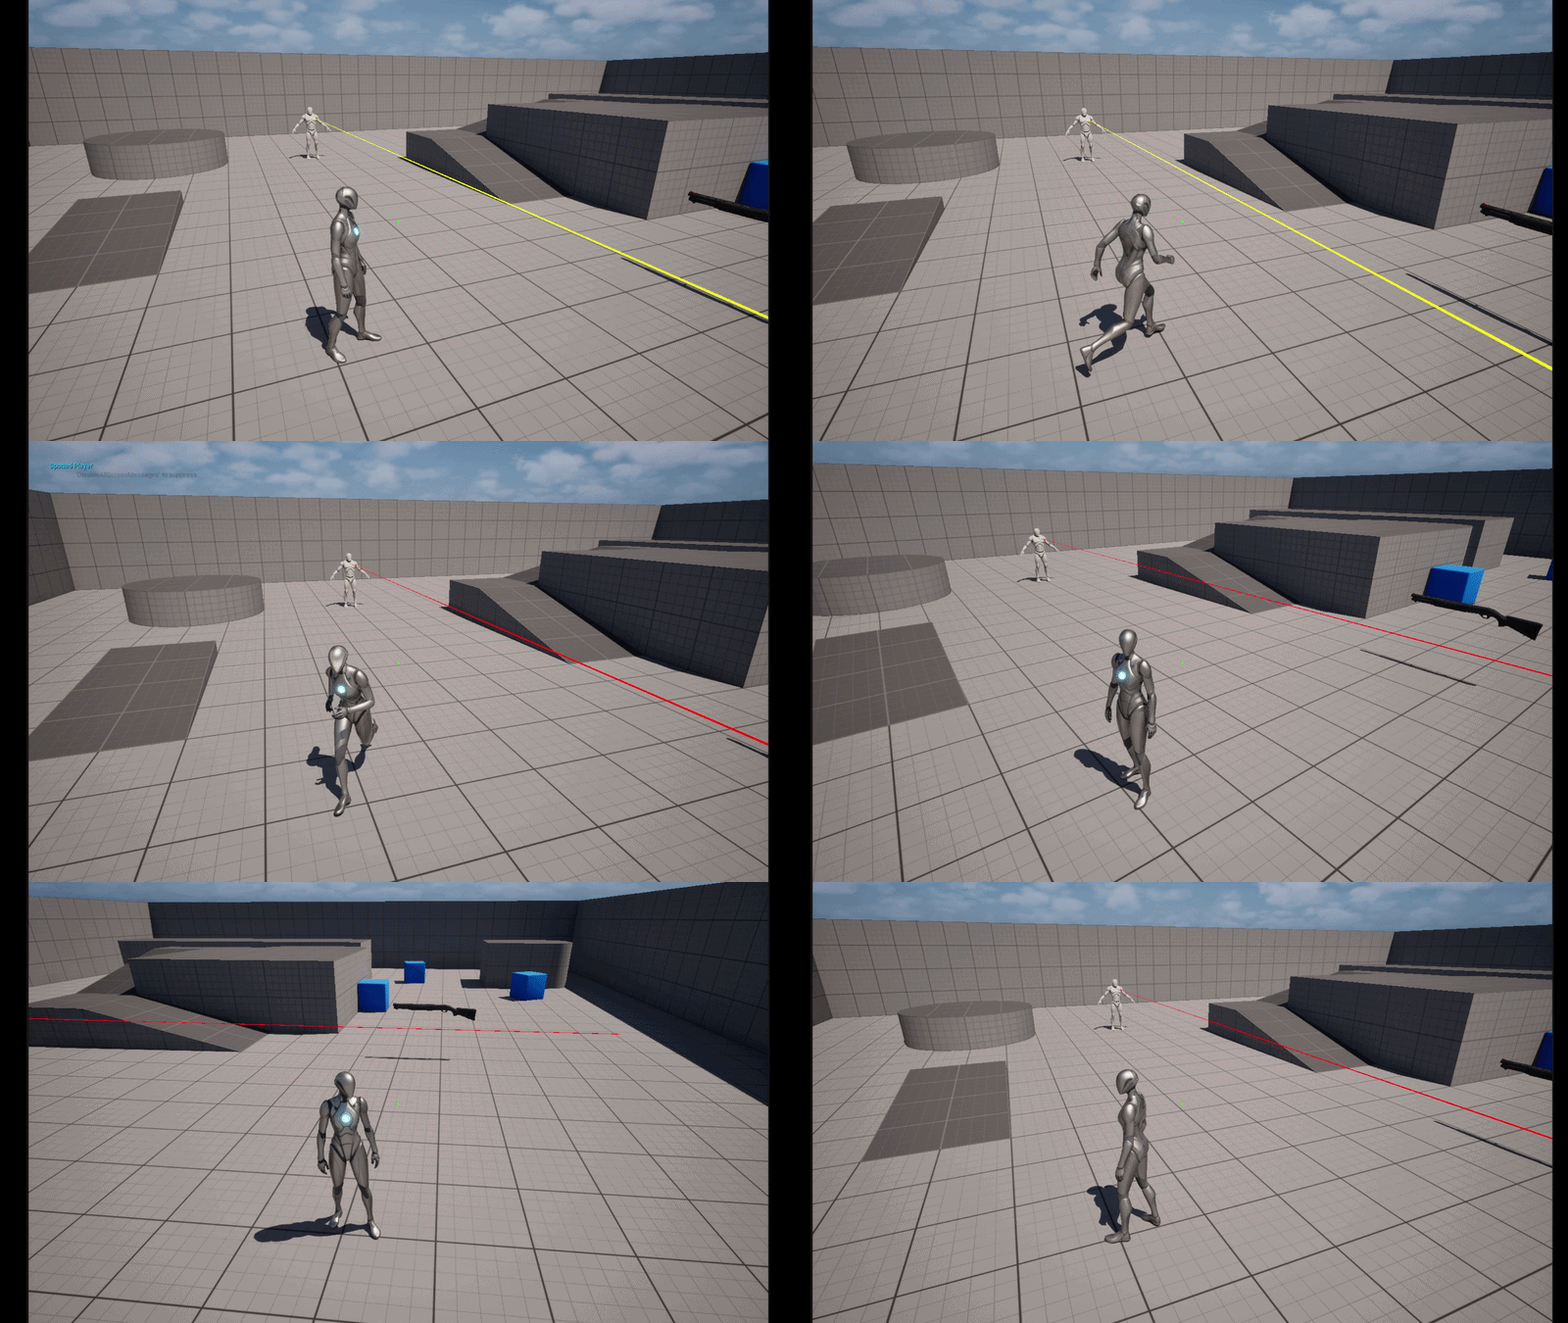
적이 비동기 라인 트레이스를 통해 플레이어(Player 태그)가 감지되면 라인트레이스가 수행되도록 해주었다.
순찰이나 추격과 같은 애니메이션을 넣을 수 있었지만, 이것도 따로 추가하진 않았다.
// EnemyCharacter.h
public:
    // 비동기 트레이스를 실행할 함수
    void StartAsyncTrace();

    // 비동기 트레이스 완료 시 호출될 콜백 함수
    void OnAsyncTraceCompleted(const FTraceHandle& Handle, FTraceDatum& Data);

private:
    // 비동기 결과를 수신할 델리게이트
    FTraceDelegate AsyncTraceDelegate;

// EnemyCharcter.cpp
void AEnemyCharacter::BeginPlay()
{
    Super::BeginPlay();

    // 델리게이트 바인딩
    AsyncTraceDelegate.BindUObject(this, &AEnemyCharacter::OnAsyncTraceCompleted);
}

void AEnemyCharacter::StartAsyncTrace()
{
    UWorld* World = GetWorld();
    if (!IsValid(World))
    {
       return;
    }

    const FVector Start = GetActorLocation() + FVector(0.f, 0.f, EyeHeightOffset);
    const FVector End = Start + GetActorForwardVector() * SightRange;

    FCollisionQueryParams QueryParams(SCENE_QUERY_STAT(EnemySightTrace), true, this);

    // 비동기 라인 트레이스 요청
    World->AsyncLineTraceByChannel(
       EAsyncTraceType::Single,
       Start,
       End,
       SightChannel,
       QueryParams,
       FCollisionResponseParams::DefaultResponseParam,
       &AsyncTraceDelegate
    );
}

void AEnemyCharacter::OnAsyncTraceCompleted(const FTraceHandle& Handle, FTraceDatum& Data)
{
    // 충돌한 액터 확인
    for (const FHitResult& Hit : Data.OutHits)
    {
       AActor* HitActor = Hit.GetActor();
       if (!IsValid(HitActor))
       {
          continue;
       }

        // Player 태그가 있으면 발견 처리
       if (HitActor->ActorHasTag(TEXT("Player")))
       {
           break;
       }
    }
}
해당 클래스를 기반으로 한 블루프린트 자식 클래스를 만들고, 플레이어를 발견하면 디버그 메시지만 띄우도록 해주었다.
줌 기능 구현
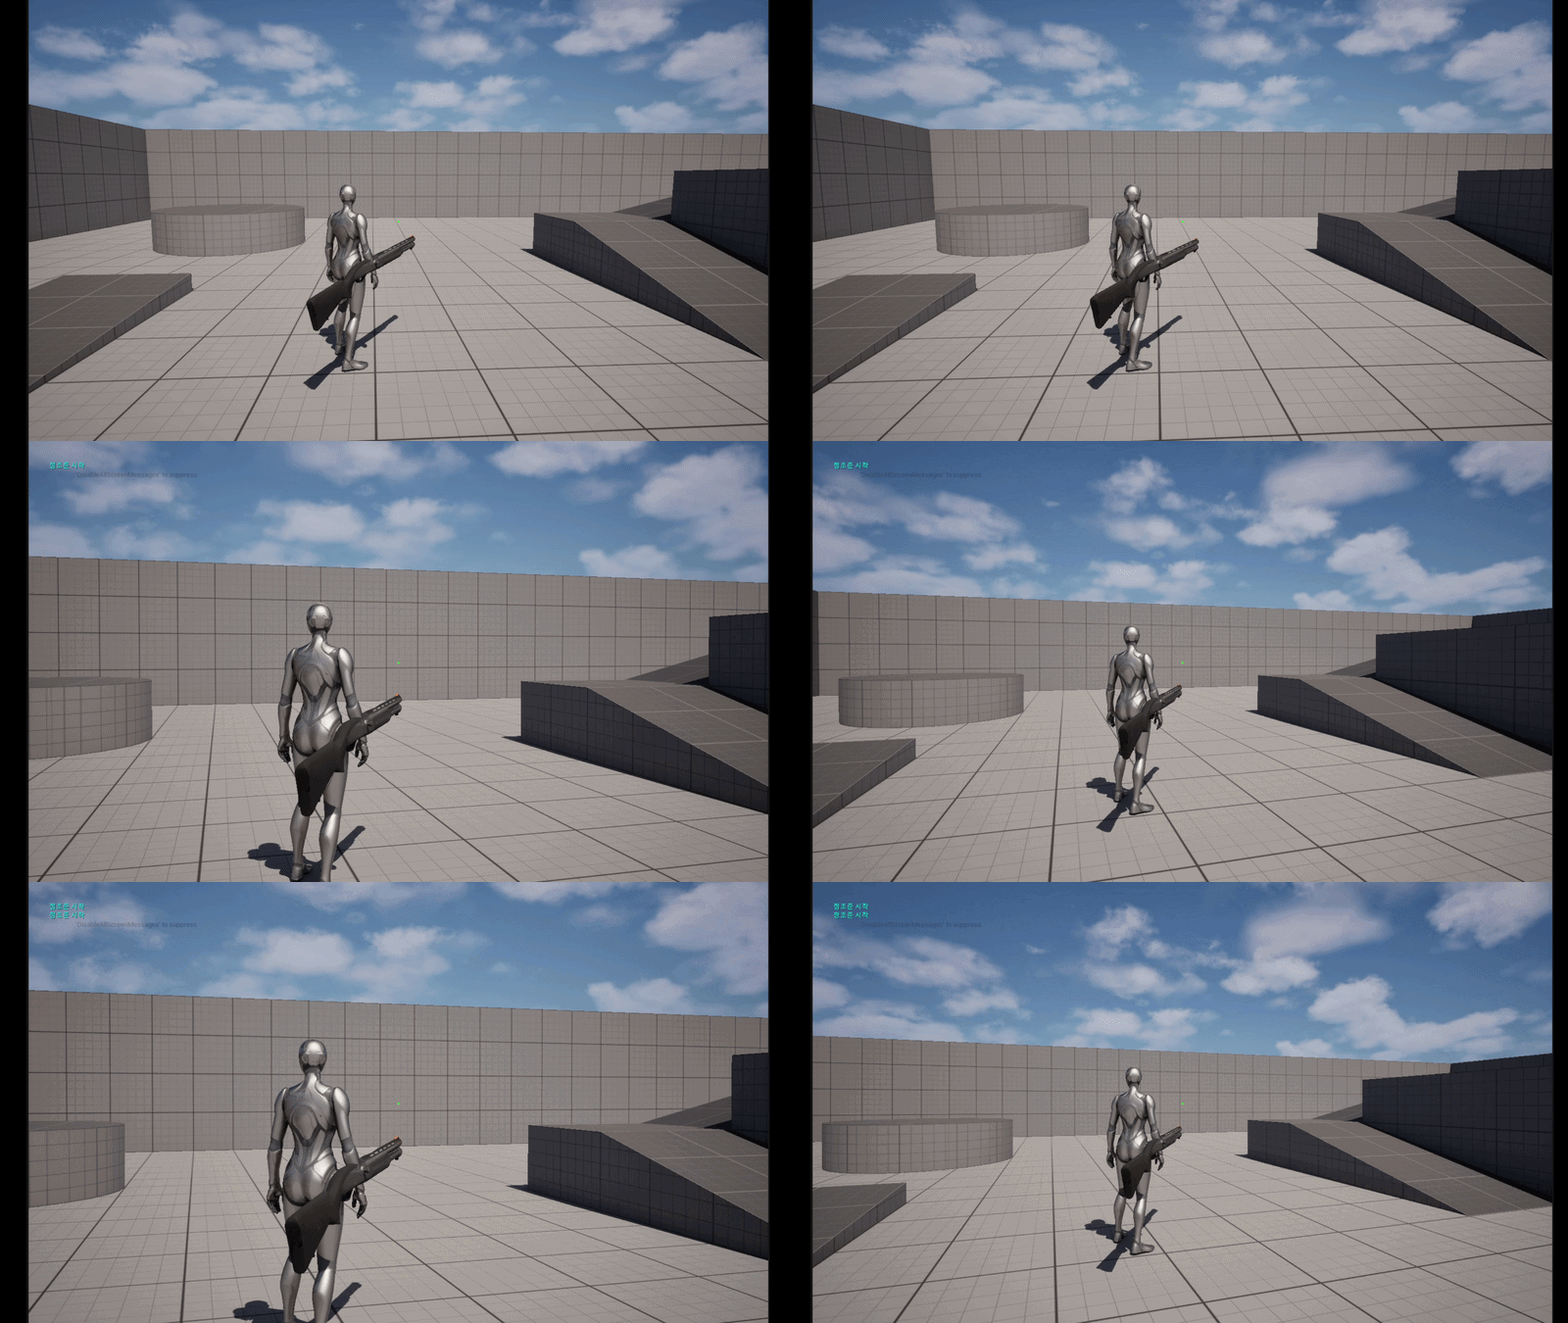
이 부분은 정말 단순하게 Input Action으로 우클릭을 누르면 카메라의 Fov가 변하는 방식으로 간단하게 구현하였다.
// ContainerTestCharacter.cpp
void AContainerTestCharacter::Tick(float DeltaTime)
{
	Super::Tick(DeltaTime);

	TraceForItem();

	if (IsValid(FollowCamera))
	{
    	// bIsAiming은 Input Binding을 통해 변동
		const float TargetFOV = bIsAiming ? AimFOV : DefaultFOV;
		const float CurrentFOV = FollowCamera->FieldOfView;
		const float NewFOV = FMath::FInterpTo(CurrentFOV, TargetFOV, DeltaTime, AimInterpSpeed);
		FollowCamera->SetFieldOfView(NewFOV);
	}
}

게임 개발 지망생