
Intro
React Router Library v6를 이용 하여 라우팅 하는 방법을 소개한다.
What is react-router and react-router-dom?
- react-router: This package implements common core logic for react-router-dom and react-router-native packages by including React-specific code
- react-router-dom: This package offers routing features for React web applications by importing code from the react-router and @remix-run/router packages
react-router-dom은 react-router 핵심 코드 팩키지를 이용한 Web용 팩키지.
Install
yarn add react-router-domCreating routes with React Router v6
- BrwoserRouter: It is used to wrap different routes.
- Routes: It includes features like relative routing and linking, automatic route ranking, nested routes, and layouts.
- Route: element rendering
<BrwoserRouter>
  <Routes>
  	<Route path="/" element={<Home />} /> // rendering
Building functional components
open and edit src/App.jsx
import React from "react";
import {BrowserRouter as Router, Routes, Route} from "react-router-dom";
const Home = ()=>{
return (
<div className="bg-red-300">
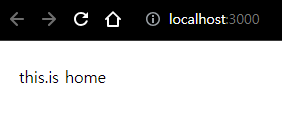
this is home
</div>
);
}
const App = () => {
return (
<div className="p-6">
<Router>
<Routes>
<Route path="/" element={<Home />} />
</Routes>
</Router>
</div>
);
};
export default App;browser test localhost:3000
add the Route for the Page1 component:
import ...\
const Home ...
const Category1 = () => {
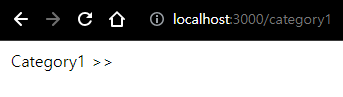
return <div>Category 1 {">>"} </div>;
};
const App = () => {
return (
<div className="p-6">
<Router>
<Routes>
<Route path="/" element={<Home />} />
<Route path="/category1" element={<Category1 />} />
</Routes>
</Router>
</div>
);
};
export default App;browser test localhost:3000/category1
Implementing a 404 view
...
...
const NotFound = () => {
return (
<div style={{padding: 20}}>
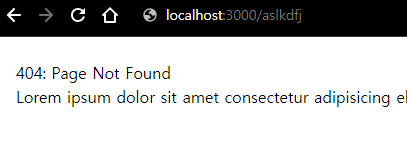
<h2>404: Page Not Found</h2>
<p>Lorem ipsum dolor sit amet, consectetur adip.</p>
</div>
);
};
function App() {
return (
<div className="p-6">
<Router>
<Routes>
<Route path="/" element={<Home />} />
<Route path="/category1" element={<Category1 />} />
<Route path="*" element={<NotFound />} />
</Routes>
</Router>
</div>
);
}
...test localhost:3000/잘못된주소입력
Adding a navigation menu
작성된 두개의 페이지 (Home, Page1)의 링크를 나타내는 Navigation 컴포넌트를 작성한다.
// Link를 추가 한다.
import { BrowserRouter as Router , Routes , Route , Link } from 'react-router-dom' ;
...
<Router>
// nav tag안에 Link 작성
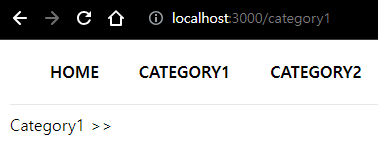
<nav className="px-10 border-b">
<Link to="/" className="p-5">
HOME
</Link>
<Link to="/category1" className="p-5">
CATEGORY 1
</Link>
</nav>
<Routes>
<Route path="/" element={<Home />} />
<Route path="/category1" element={<Category1 />} />
<Route path="*" element={<NotFound />} />
</Routes>
</Router>
...test localhost:3000/category1
full source
- App.jsx
- Home 과 Category1을 클릭하여 잘 이동 하는지 검사
- Category2 확장 해보기
- nav 부분 component로 분리하기
- props인자로 받아 style 하기
import React from "react";
import {BrowserRouter as Router, Routes, Route, Link} from "react-router-dom";

const Home = () => {
  return <div>this is home</div>;
};

const Category1 = () => {
  return <div>Category 1 {">>"} </div>;
};

const Category2 = () => {
  return <div>Category 2 {">>"} </div>;
};

const NotFound = () => {
  return (
    <div style={{padding: 20}}>
      <h2>404: Page Not Found</h2>
      <p>Lorem ipsum dolor sit amet, consectetur adip.</p>
    </div>
  );
};

const Navigation = ({className}) => {
  return (
    <nav className={className + " " + "px-5 space-x-5"}>
      <Link to="/">HOME</Link>
      <Link to="/category1">CATEGORY 1</Link>
      <Link to="/category2">CATEGORY 2</Link>
    </nav>
  );
};
const App = () => {
  return (
    <div className="flex flex-row justify-center min-h-screen">
      <div className="w-[1080px]">
        <Router>
          <Navigation className="bg-blue-200 h-32 flex items-center" />
          <div className="bg-blue-50">
            <Routes>
              <Route path="/" element={<Home />} />
              <Route path="/category1" element={<Category1 />} />
              <Route path="/category2" element={<Category2 />} />
              <Route path="*" element={<NotFound />} />
            </Routes>
          </div>
        </Router>
      </div>
    </div>
  );
};

export default App;- 다음과 같은 에러가 발생 할수 있다.
ERROR
[eslint]
src\App.jsx
  Line 25:22:  'className' is missing in props validation  react/prop-types

Search for the keywords to learn more about each error.
Navigation component의 인자에 대한 prototype 정의가 없을 경우 eslint에서 발생 시키는 에러 코드이다.
PropTypes 모듈을 이용하여 정의를 할수 있지만 여기서는 에러코드 발생하지 않는 선에서 처리
// .eslintrc
"rules": {
    "react/prop-types": "off"
  }
다음 문서에서는 Nested Router와 useRoutes hook에 대해 작성함으로써
React Project에 꼭 필요한 프레임 구성을 완성 한다.
References

ENFJ
유익한 자료 감사합니다.