"스포티파이로 로그인" 기능을 구연하기 위해 두가지 API를 만들것이다.
- getSpotifyOAuthUrl // 스포티파이로 로그인 할 수 있는 URL을 제공한다.
- getSpotifyCustomToken // 로그인후 받는 Spotify토큰을 파이어베이스 토큰으로 변환
사전작업
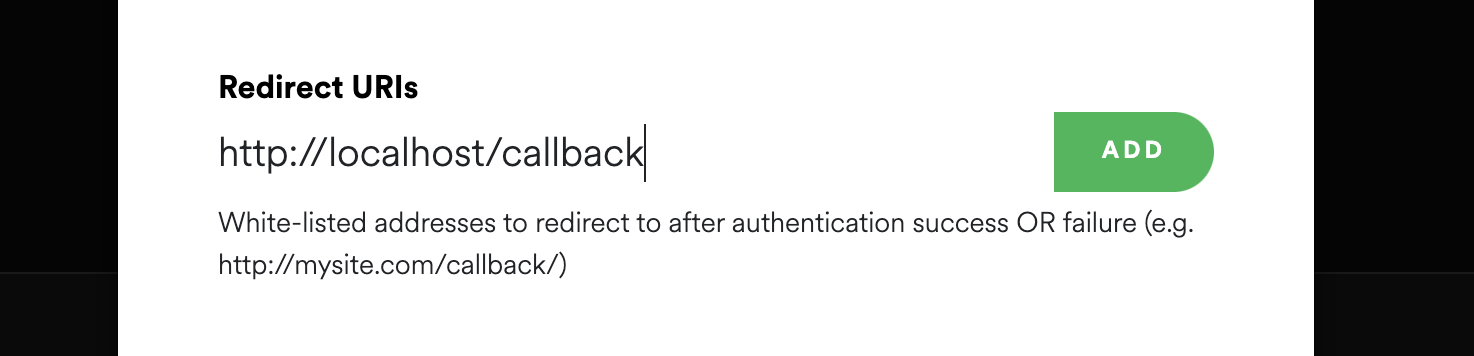
Spotify developers dashboard에 접속하여 Redirect URIs에 http://localhost/callback을 추가해준다. 스포티파이로 로그인후 redirect 될 주소이다.
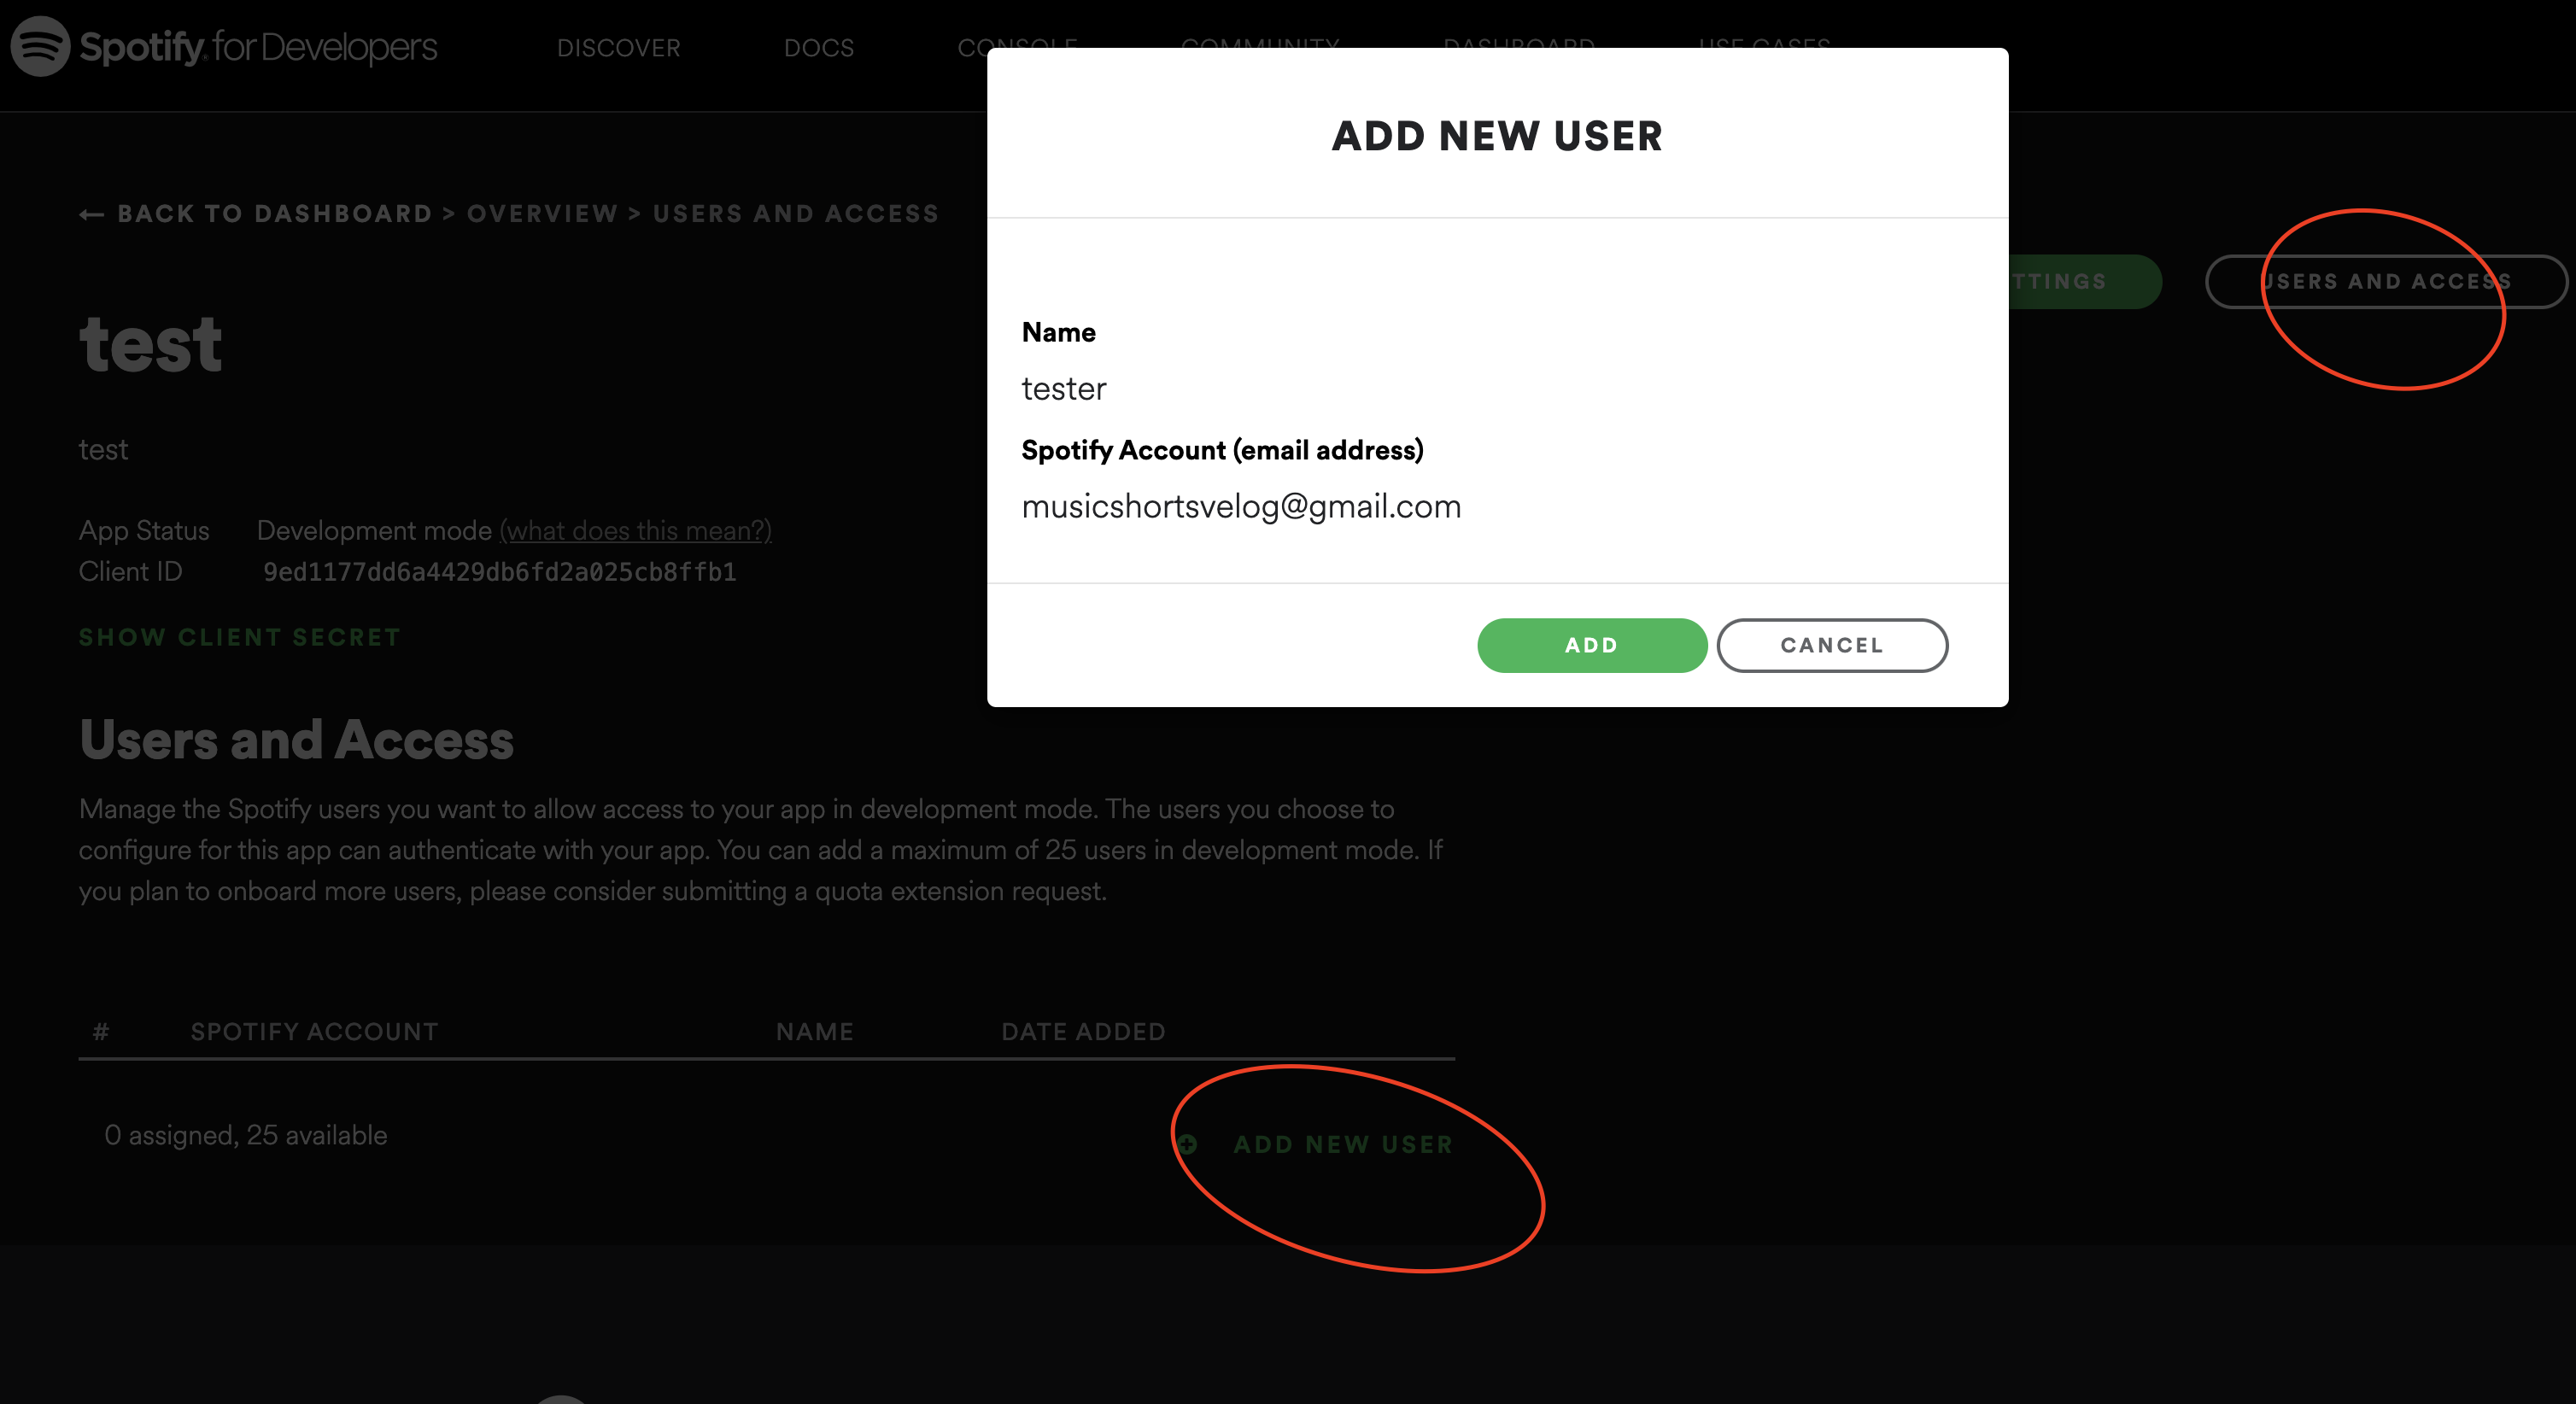
대시보드에서 사용할 테스트 계정을 테스터로 추가해준다.
테스트 환경에서는 파이어베이스와 직접적인 연결이 되지 않아 직접 인증키를 발급받아 적용해야함. 보통의 경우 "music-shorts-test"같이 새로운 파이어베이스 프로젝트를 생성한 후 그 프로젝트에서 인증서를 발급받아 사용하나 우선은 기존의 프로젝트 인증키를 사용.
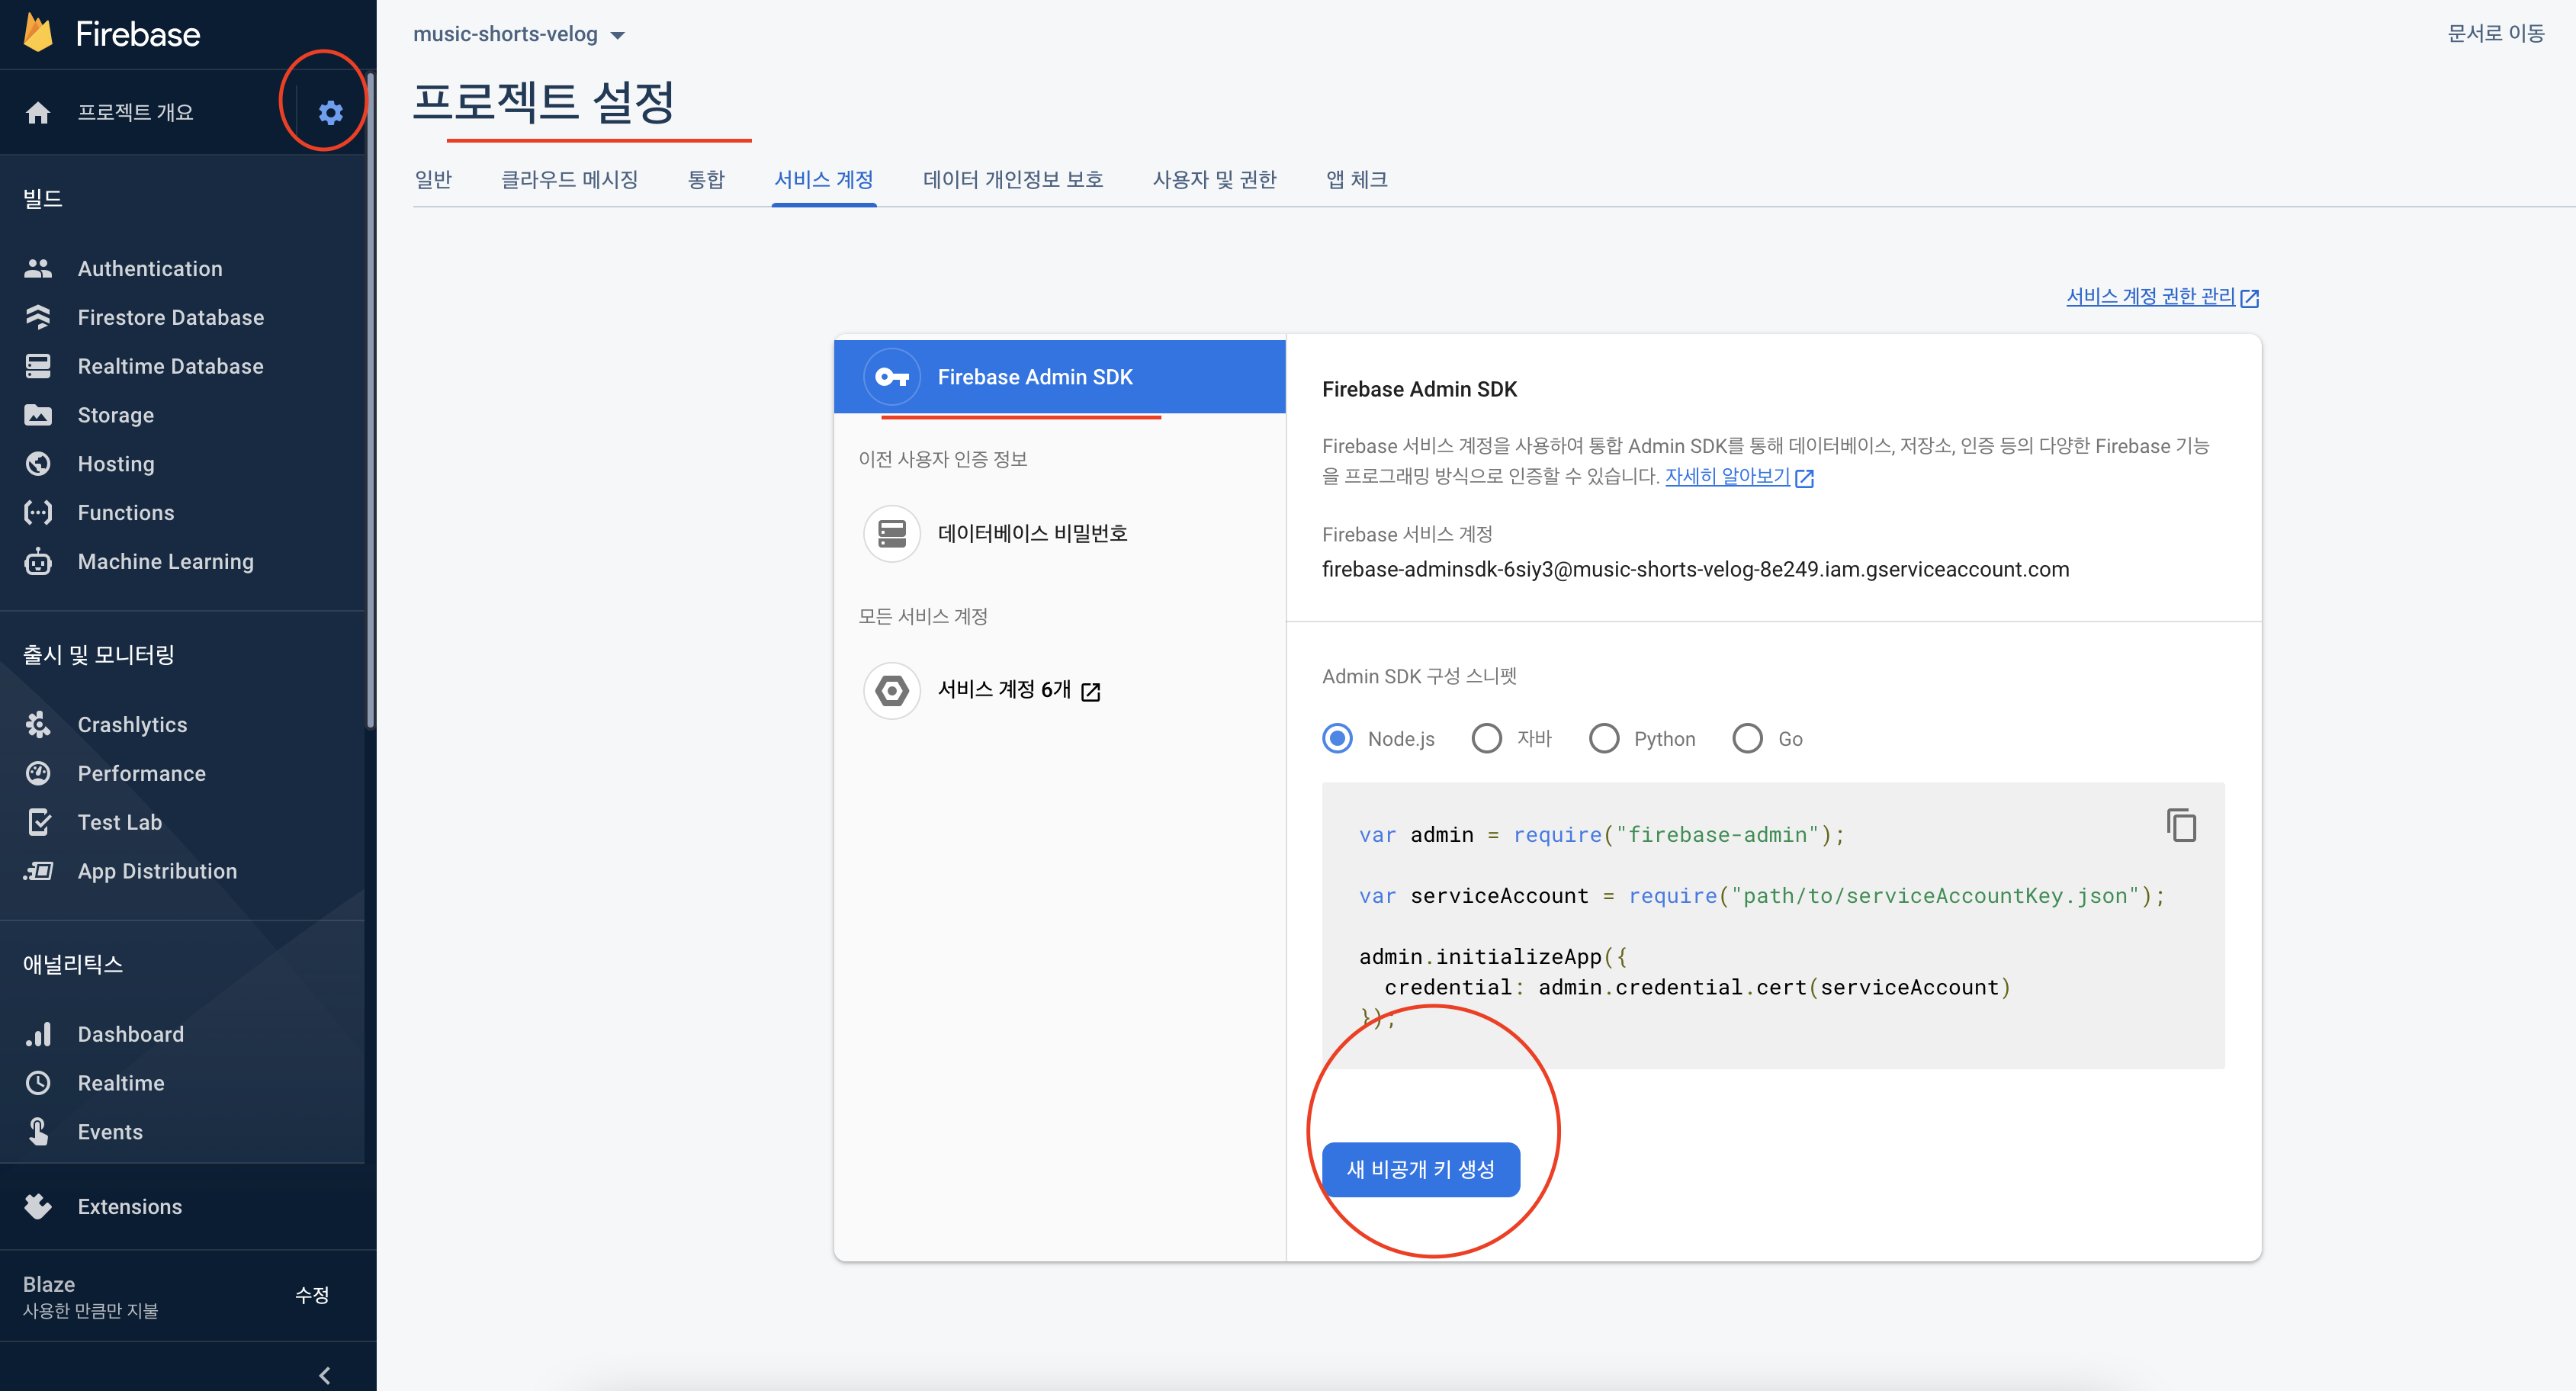
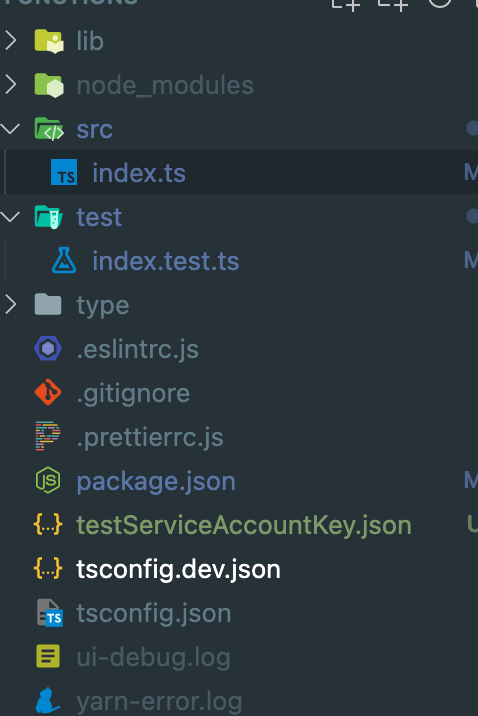
인증서를 발급받은후 /functions/testServiceAccountKey.json위치에 저장
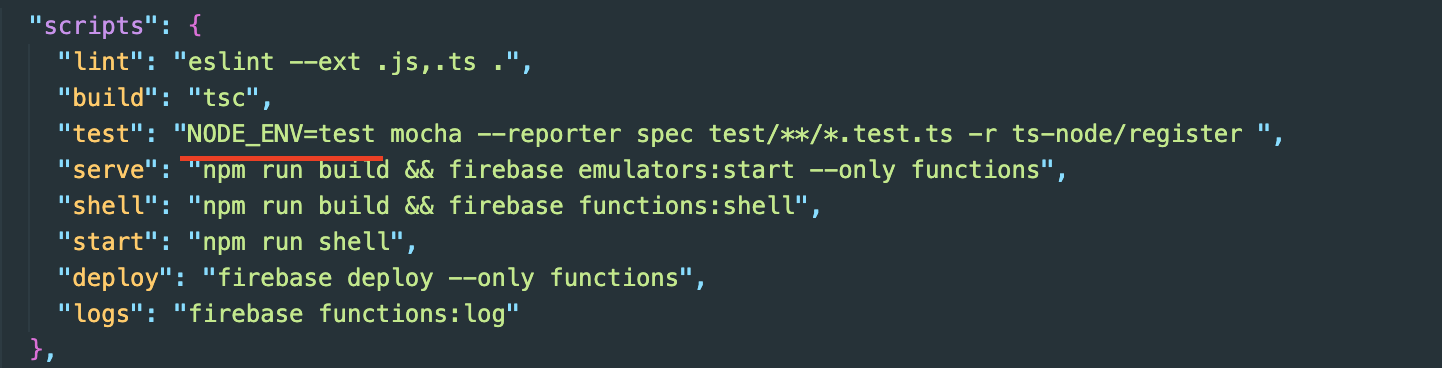
테스트 환경 구분을 위해 package.json의 test스크립트에 환경변수 지정
getSpotifyOAuthUrl
기존의 코드를 삭제하고 index.ts에 코드를 작성하였다.
// src/index.ts
import {https} from "firebase-functions";
import Spotify from "spotify-web-api-node";

const spotify = new Spotify({
  clientId: "9ed1177dd6a4429db6fd2a025cb8ffb1",
  clientSecret: "97081903623b4ffb8654043f8c8d553e",
  redirectUri: "http://localhost/callback",
});

export const getSpotifyOAuthUrl = https.onCall(async (data, context) => {
  const url = spotify.createAuthorizeURL(["user-read-email"], "");
  return url;
});
테스트 코드를 작성하여 테스트를 해보자.
// test/index.test.ts
import {expect} from "chai";
import firebaseFunctionsTest from "firebase-functions-test";
const testFunctions = firebaseFunctionsTest();
describe("/", () => {
let Functions: any;
before(() => {
Functions = require("../src/index.ts");
});
context("getSpotifyOAuthUrl", () => {
it("스포티파이로 로그인 할 수 있는 주소를 반환합니다.", async () => {
const result = await testFunctions.wrap(Functions.getSpotifyOAuthUrl)({});
console.log(result);
expect(result).to.be.a("string"); // 문자열로 반환하는지 테스트
expect(result).to.include("https://accounts.spotify.com/authorize"); // 유효한 주소인지 확인
});
});
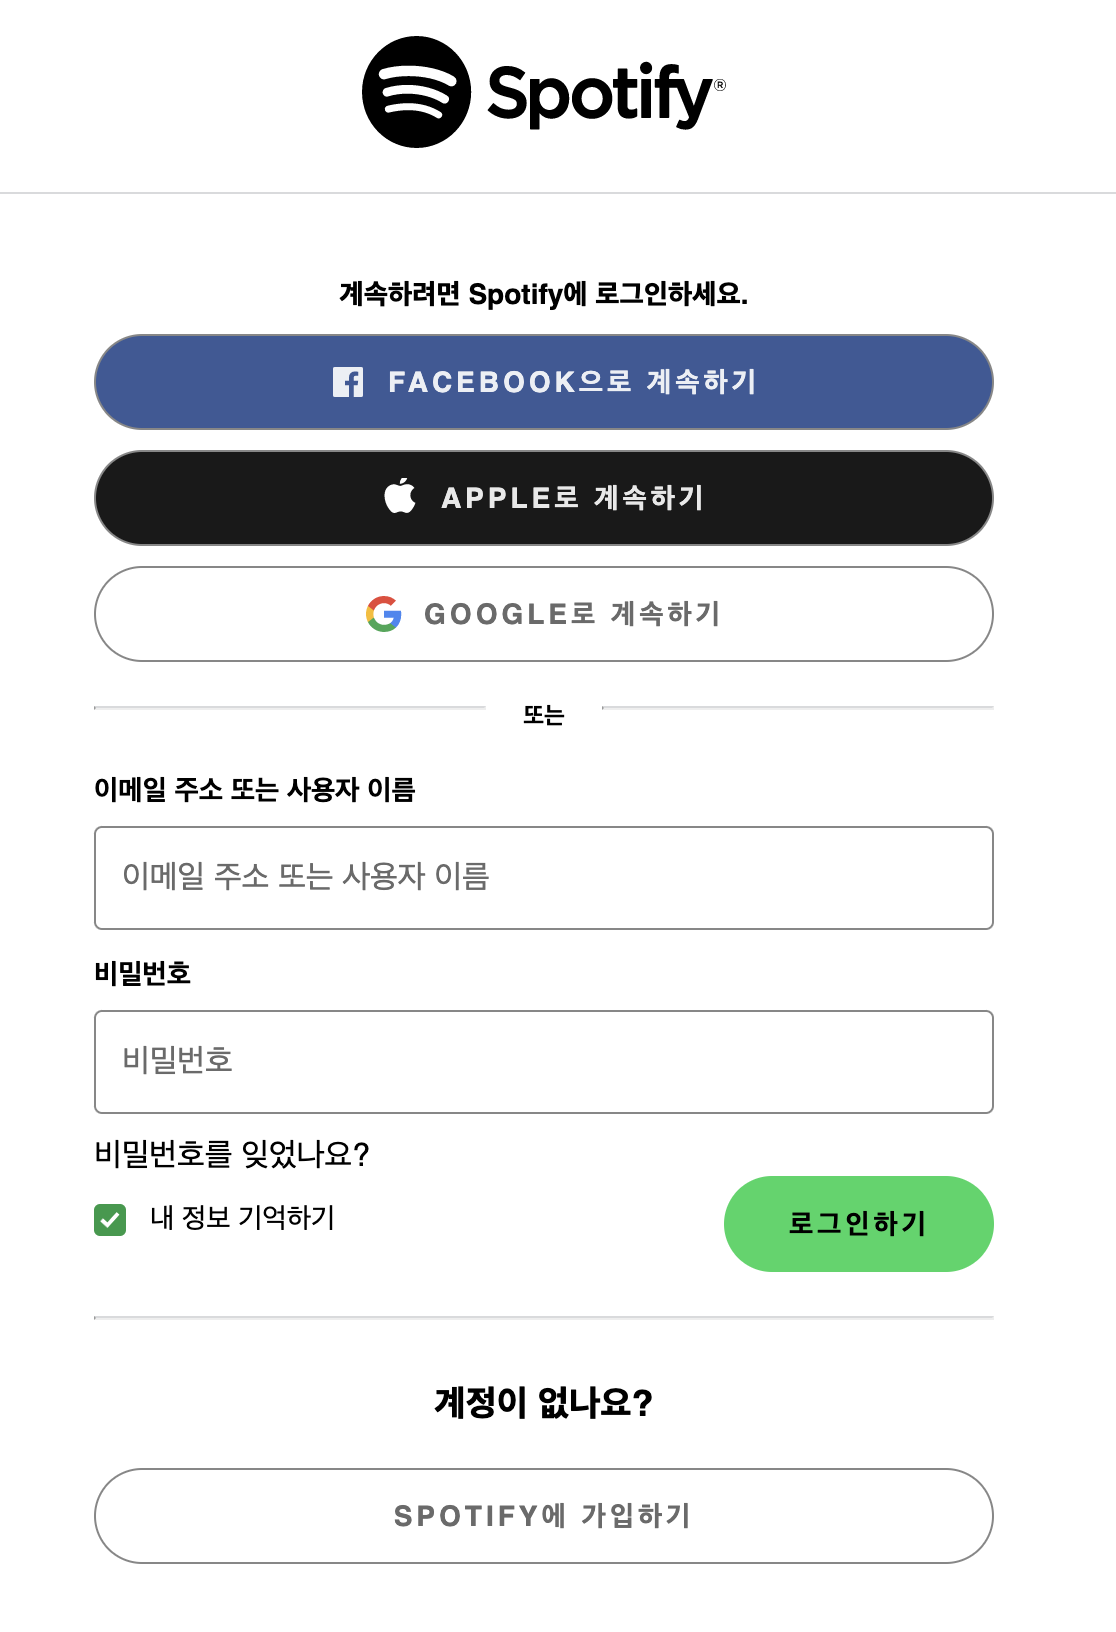
});getSpotifyOAuthUrl 함수의 반환값을 웹브라우저에서 열어보면 이러한 페이지로 연결된다.
getSpotifyFirebaseCustomToken
// src/index.ts
// ... 위의 코드
import _admin from "firebase-admin";
import {UserRecord} from "firebase-functions/v1/auth";

export const admin =
  process.env.NODE_ENV === "test" // 테스트 환경이라면
    ? _admin.initializeApp({
        // 로컬에서 인증서를 가져옴
        credential: _admin.credential.cert(
          // eslint-disable-next-line @typescript-eslint/no-var-requires
          require("../testServiceAccountKey.json"),
        ),
      })
    : // 테스트 환경이 아니라면 firebase의 명령어로 실행하기에 자동으로 초기화됨
      _admin.initializeApp();

export const getSpotifyFirebaseCustomToken = https.onCall(
  async (data: {spotifyCode: string}, context) => {
    const {spotifyCode} = data;

    // 로그인 토큰을 받아와서 accessToken과 refreshToken으로 변환함
    const credential = await spotify.authorizationCodeGrant(spotifyCode);

    spotify.setAccessToken(credential.body.access_token); // getMe() accessToken을 기준으로 정보를 가져오기 때문에 적용
    // 유저 세부 정보를 가져옴
    const me = await spotify.getMe();

    const uid = me.body.id; // firebase auth에서 id로 사용할 값
    const email = me.body.email; // firebase auth에 저장할 이메일

    let user: UserRecord;

    try {
      // 이미 유저가 있다면 내용을 업데이트함
      user = await admin.auth().updateUser(uid, {email});
    } catch (_error) {
      // 유저가 없다는 내용의 에러인지 확인
      const error = _error as any;
      if (error.errorInfo.code !== "auth/user-not-found") throw error;
      // 없다면 유저를 생성함
      user = await admin.auth().createUser({uid, email});
    }

    // 앱에서 firebase auth를 사용하여 로그인을 관리할 수 있도록 firebase token을 생성
    const token = await admin.auth().createCustomToken(user.uid);
    return token;
  },
);
테스트 코드 작성
테스트를 하기 위해서는 유효한 spotifyCode를 파라미터로 제공해야 하는데 이는 getSpotifyOAuthUrl를 통해 직접 로그인을 해야 받을 수 있는 데이터이다.
따라서 웹뷰를 띄워 직접 로그인을 한 후에 spotifyCode를 받아 getSpotifyFirebaseCustomToken를 테스트 해보겠다.
puppeteer설치
puppeteer라는 라이브러리를 사용하여 웹뷰를 띄울 것이다. yarn add -D puppeteer명령어로 설치 할 수 있다.
실제 테스트코드
// test/index.test.ts
import {expect} from "chai";
import firebaseFunctionsTest from "firebase-functions-test";
import puppeteer from "puppeteer";

const testFunctions = firebaseFunctionsTest();

describe("/", () => {
  let Functions: any;
  let loginUrl: string;
  let token: string;

  before(() => {
    Functions = require("../src/index.ts");
  });

  context("getSpotifyOAuthUrl", () => {
    it("스포티파이로 로그인 할 수 있는 주소를 반환합니다.", async () => {
      const result = await testFunctions.wrap(Functions.getSpotifyOAuthUrl)({});
      loginUrl = result; // 웹뷰에서 띄우기 위해 변수로 저장해둠
      expect(result).to.be.a("string"); // 문자열로 반환하는지 테스트
      expect(result).to.include("https://accounts.spotify.com/authorize"); // 유효한 주소인지 확인
    });
  });

  context("실제 로그인 테스트", () => {
    it("웹뷰로 로그인 중...", async () => {
      // 브라우저 실행
      const browser = await puppeteer.launch({
        headless: false, // 백그라운드에서 웹뷰를 띄울지, 실제 배포시에는 true로 변경
        timeout: 15000,
      });
      const page = await browser.newPage(); // 페이지 하나 생성
      await page.goto(loginUrl); // getSpotifyOAuthUrl에서 받은 url로 이동
      await page.type("#login-username", "musicshortsvelog@gmail.com"); // 아이디 input에 테스트계정 아이디 삽입
      await page.type("#login-password", "musicshorts12!@"); // 페스워드 input에 비밀번호 삽입
      await page.waitForTimeout(1000); // 삽입된데이터 적용시간
      await page.click("#login-button"); // 로그인 작동
      await new Promise<void>(res =>
        page.on("response", event => {
          // 302 리다이렉트 요청이 왓을때
          if (event.status() === 302) {
            // 리다이렉트할 주소의 url query에 "code"를 가져와 token 저장
            token = event.headers().location.split("code=")[1].split("&")[0];
            res(); // 프로미스 탈출
          }
        }),
      );
      await browser.close(); // 브라우저 닫기
      expect(token.length).to.be.greaterThanOrEqual(1); // 유효한 토큰인지 테스트
    }).timeout(15000);
  });

  context("getSpotifyFirebaseCustomToken", () => {
    it("함수 호출시 파이어베이스 토큰을 반환합니다.", async () => {
      const result = await testFunctions.wrap(
        Functions.getSpotifyFirebaseCustomToken,
      )({spotifyCode: token});
      expect(result).to.be.a("string"); // 토큰을 반환하는지
    }).timeout(5000);
  });
});
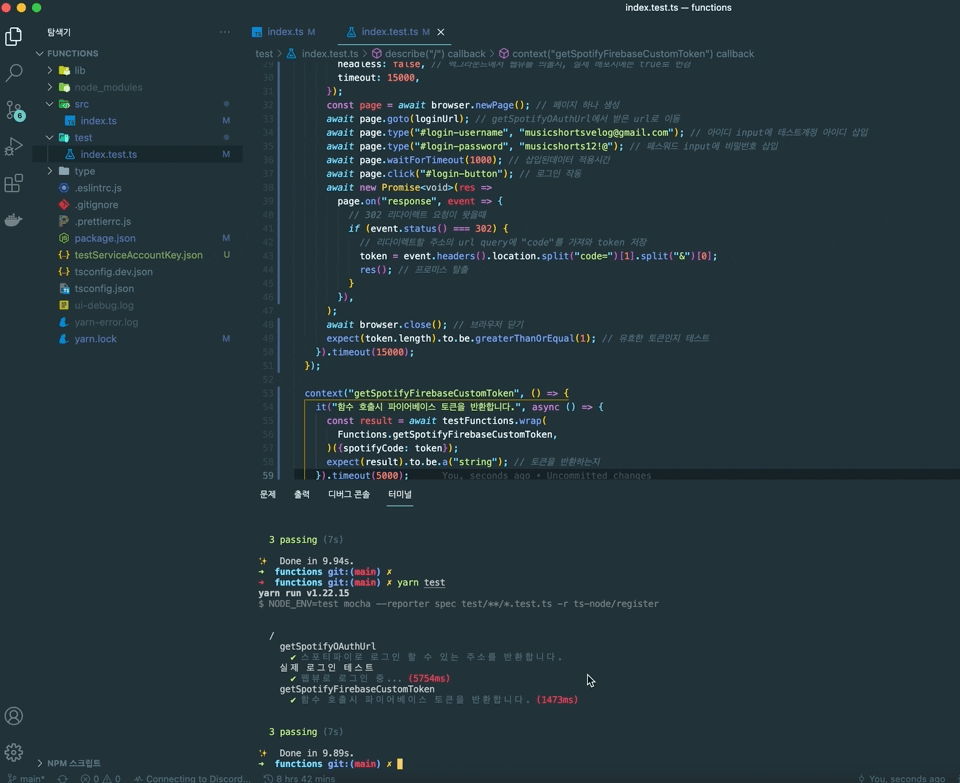
결과
yarn test명령어 실행시 이런식으로 테스트가 되는 것을 확인 할 수 있다.