오늘은 자바스크립트를 중점으로 직접 실행되는 계산기를 코딩할 예정입니다.
bare - minimum
const calculator = document.querySelector('.calculator'); // calculator 엘리먼트와, 그 자식 엘리먼트의 정보를 모두 담고 있습니다.
const buttons = calculator.querySelector('.calculator__buttons'); // calculator__keys 엘리먼트와, 그 자식 엘리먼트의 정보를 모두 담고 있습니다.
const firstOperend = document.querySelector('.calculator__operend--left'); // calculator__operend--left 엘리먼트와, 그 자식 엘리먼트의 정보를 모두 담고 있습니다.
const operator = document.querySelector('.calculator__operator'); // calculator__operator 엘리먼트와, 그 자식 엘리먼트의 정보를 모두 담고 있습니다.
const secondOperend = document.querySelector('.calculator__operend--right'); // calculator__operend--right 엘리먼트와, 그 자식 엘리먼트의 정보를 모두 담고 있습니다.
const calculatedResult = document.querySelector('.calculator__result'); // calculator__result 엘리먼트와, 그 자식 엘리먼트의 정보를 모두 담고 있습니다.
function calculate(n1, operator, n2) {
let result = 0;
// TODO : n1과 n2를 operator에 따라 계산하는 함수를 만드세요.
// ex) 입력값이 n1 : '1', operator : '+', n2 : '2' 인 경우, 3이 리턴됩니다.
//앞서 배웠던 if ,else if 문을 사용해
//각 부호에 맞게 n1과n2를 대입했을 때 결과값이 나오도록 설정
// 그냥 n1값으로 하게되면 문자열이기 때문에 앞에 넘버로 형변환.
if(operator === '+'){
result =Number(n1)+Number(n2);
}else if(operator === '-'){
result = Number(n1)-Number(n2);
}else if(operator === '*'){
result = Number(n1)*Number(n2);
}else if(operator === '/'){
result = Number(n1)/Number(n2);
}
return String(result);
}
buttons.addEventListener('click', function (event) {
// 버튼을 눌렀을 때 작동하는 함수입니다.
const target = event.target; // 클릭된 HTML 엘리먼트의 정보가 저장되어 있습니다.
const action = target.classList[0]; // 클릭된 HTML 엘리먼트에 클레스 정보를 가져옵니다.
const buttonContent = target.textContent; // 클릭된 HTML 엘리먼트의 텍스트 정보를 가져옵니다.
// ! 위 코드(Line 19 - 21)는 수정하지 마세요.
if (target.matches('button')) {
// TODO : 계산기가 작동할 수 있도록 아래 코드를 수정하세요. 작성되어 있는 조건문과 console.log를 활용하시면 쉽게 문제를 풀 수 있습니다.
// 클릭된 HTML 엘리먼트가 button이면
if (action === 'number') {
// 그리고 버튼의 클레스가 number이면
// 아래 코드가 작동됩니다.
//첫 번째 숫자에 세팅된 문자열이 '0'이면
//버튼을 누른 숫자로 변경되게 세팅한다.
//두번째 숫자는 '0'이 아닐때 그냥 누르는 값으로 변경되게 세팅.
if(firstOperend.textContent === '0'){
firstOperend.textContent = buttonContent;
} else if(firstOperend.textContent !== '0'){
secondOperend.textContent = buttonContent;
}
console.log('숫자 ' + buttonContent + ' 버튼');
}
if (action === 'operator') {
operator.textContent = buttonContent;
console.log('연산자 ' + buttonContent + ' 버튼');
}
if (action === 'decimal') {
console.log('소수점 버튼');
}
// 클리어 버튼을 눌렀을때
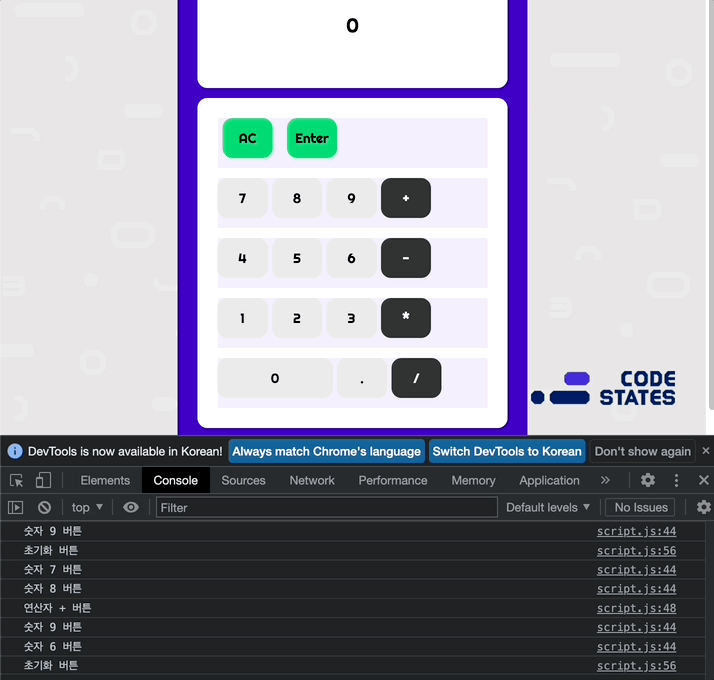
// 첫번째 입력된값, 부호, 두번째 입력된값, 결과 값을 모두 0으로 설정해두어 초기화면으로 돌아가게끔 설정
if (action === 'clear') {
console.log('초기화 버튼');
firstOperend.textContent = "0";
operator.textContent ="+";
secondOperend.textContent ="0";
calculatedResult.textContent ="0";
}
// 계산하기 버튼을 눌렀을때 결과값에 위에 작성해두었던 calculate 함수에
//각각 첫번째 값, 부로, 두번째 값을 대입해 결과 값이 나오도록 설정
if (action === 'calculate') {
return calculatedResult.textContent = calculate(firstOperend.textContent, operator.textContent, secondOperend.textContent);
console.log('계산 버튼');
}
}
});초기 베어 단계 문제는 배웠던 내용들을 이용해 비교적 간단하게 풀수 있었습니다.
advanced challenge
이 부분은 베어미니멈과 로직은 비슷하나 변수가 있고 더 활용해야되기에 중간 단계 정도 되는 레벨이다.
// ! Advanced Challenge test와 Nightmare test를 위해서는 아래 주석을 해제하세요.

const display = document.querySelector('.calculator__display--for-advanced'); // calculator__display 엘리먼트와, 그 자식 엘리먼트의 정보를 모두 담고 있습니다.
let firstNum, operatorForAdvanced, previousKey, previousNum;
// 아래에 문제들을 풀기 위해서는 문제에서 지정해둔 변수들을 잘 활용해야 한다.

buttons.addEventListener('click', function (event) {
  // 버튼을 눌렀을 때 작동하는 함수입니다.

  const target = event.target; // 클릭된 HTML 엘리먼트의 정보가 저장되어 있습니다.
  const action = target.classList[0]; // 클릭된 HTML 엘리먼트에 클레스 정보를 가져옵니다.
  const buttonContent = target.textContent; // 클릭된 HTML 엘리먼트의 텍스트 정보를 가져옵니다.


  // ! 여기서부터 Advanced Challenge & Nightmare 과제룰 풀어주세요.
  if (target.matches('button')) {
    if (action === 'number') {
      //화면에 숫자에 0이 할당 되었거나 이전 키 즉 전에 입력했던연산자키가 부호였을때
      //화면에는 입력한 버튼의 숫자가 나오게 설정.
      if(display.textContent === '0' || previousKey === 'operator'){
        display.textContent =buttonContent;
      }else if(display.textContent !== '0'){
        //만약 화면에 출력 값이 0이 아닐때 이미 입력한 값에 추가로 입력한 값이 추가로 입력되게 설정
        // ex) 4를 입력하고 6를 입력했을때 '4'+'6' = 즉 46이 되게 설정
        display.textContent = display.textContent + buttonContent;
      }
      //이 부분이 중요! if else if 값을 벗어난 곳에
      // 이전키 즉 전에 입력했던 숫자 값을 기억하게한다.
      // 이전에 클릭한 버튼이 숫자인지 연산자인지 구분하는 코드
      // 이렇게 구분해 주지 않으면 위에 입력했던 숫자들이 추가로 입력되지 않음
      previousKey = 'number';
      previousNum = display.textContent;
    }
    // 베어 미니멈에서 봤던것처럼 부호가 입력되었을때
    //오퍼레이터어드밴스드는 입력한 부호값이 설정되게끔하고
    // 이전키를 기억하게 하는 이유는
    // 이전에 입력한 값을 저장해 초기화 되고 뒤에 누른 숫자가 보여야 하기 때문이다.
    // 4000이라는 숫자를 입력하고 부호를 누른 다음에 다른 숫자를 입력하기 때문에
    // 이전에 눌렀던 숫자도 첫번째 숫자에 할당되게끔 설정
    if (action === 'operator') {
      operatorForAdvanced = buttonContent;
      previousKey = 'operator';
      firstNum =previousNum;
    }
    if (action === 'decimal') {
      if(!display.textContent.includes(buttonContent)){
        display.textContent = display.textContent + buttonContent;
      }
      //if(previousKey === 'operator'){
       // display.textContent = 0 +buttonContent;
      //}

    }
    // 입력값은 제외한 모든 부분은 '0'이아니라 undefined를 설정한다.
    // null 값이나 '0'을 입력하게되면 0이란 값이 생기게되고
    // null 값자체도 빈공간 어떤 값이 의도적으로 비어있다는 뜻이고
    // 값이 입력되지 않았다는 뜻인 undefined를 입력해준다.
    if (action === 'clear') {
      display.textContent = '0';
      operatorForAdvanced = undefined;
      previousKey = undefined;
      firstNum = undefined;
      previousNum = undefined;
    }

    if (action === 'calculate') {
      previousKey = display.textContent;
      display.textContent = calculate(firstNum, operatorForAdvanced, previousKey);
    }
  }

});

캐치테이블 QA