Zabbix Agent를 통한 모니터링은 Active 방식과 Passive 방식으로 나뉘어진다.
Active 방식
사전조건으로 agent 설정 파일에서 serverActive의 ip를 지정해주어야 그 ip를 참조해서 데이터를 전송할 수 있다.
Agent -> Server로 데이터를 전송하는 방식 (TCP 10051 포트를 이용)
Item 구성 시 Zabbix Agent (active)를 선택하면 Active 방식으로 사용 가능
Passive 방식 (Default)
별다른 설정 없이 기본 동작 방식임.
Server -> Agent로 데이터를 수집하는 방식 (TCP 10050 포트를 이용)
Item 구성 시 Zabbix Agent 를 선택하여 구성
운영체제 확인
uname -a

cat /etc/*release
NAME="Amazon Linux"
VERSION="2"
ID="amzn"
ID_LIKE="centos rhel fedora"
VERSION_ID="2"
PRETTY_NAME="Amazon Linux 2"
ANSI_COLOR="0;33"
CPE_NAME="cpe:2.3:o:amazon:amazon_linux:2"
HOME_URL="https://amazonlinux.com/"
Amazon Linux release 2 (Karoo)
Agent download
rpm -ivh http://repo.zabbix.com/zabbix/5.0/rhel/7/x86_64/zabbix-agent-5.0.3-1.el7.x86_64.rpmActive 방식설치 - Config 설정
vi /etc/zabbix/zabbix_agentd.conf

Server=Zabbix 서버 IP
StartAgents=0
ServerActive=Zabbix 서버 IP
Hostname=sre-svc-01
passive check를 처리하는 zabbix_agentd의 사전 분기 된 인스턴스 수이다. 이 실습에선 Active 방식으로 진행하므로 0으로 설정해준다(passive check 비활성화)
Passive 방식설치 - Config 설정
vi /etc/zabbix/zabbix_agentd.conf

Server=Zabbix 서버 IP
Hostname=sre-svc-01
서비스 실행(공통)
systemctl enable zabbix-agent
systemctl start zabbix-agent
#상태값
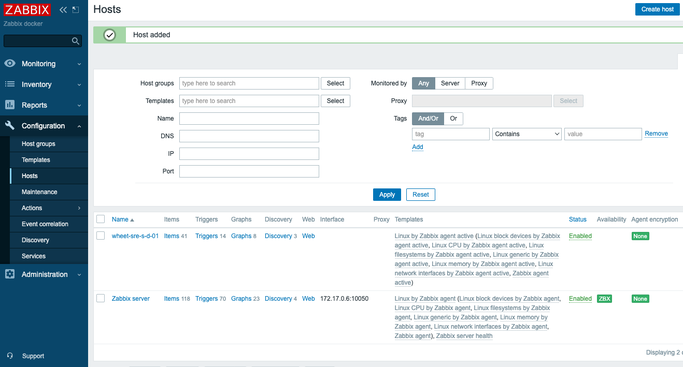
systemctl status zabbix-agentServer에서 Agent 등록

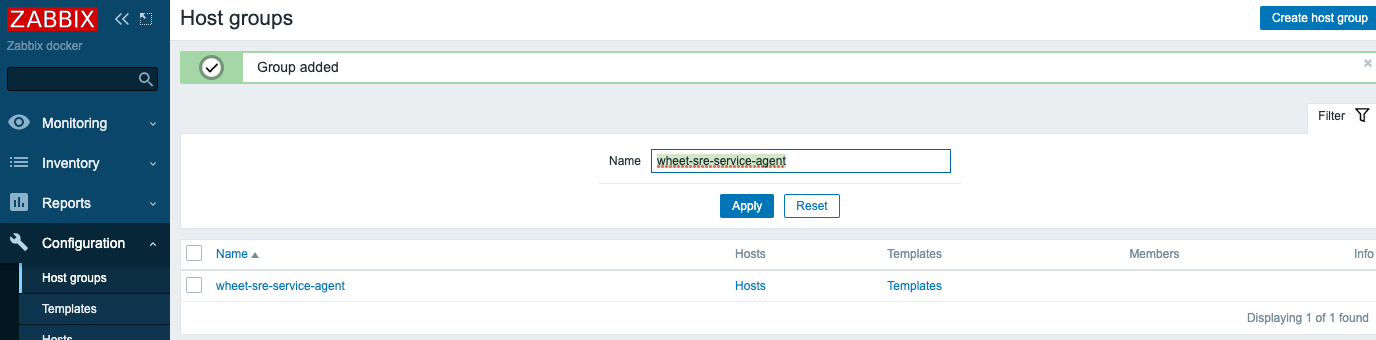
설정> 호스트그룹 > 추가
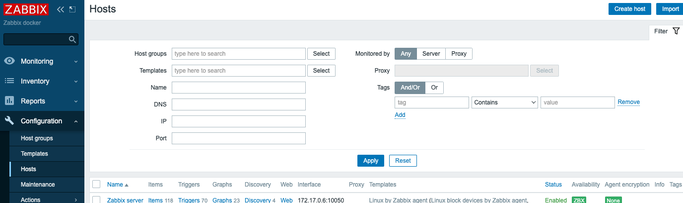
설정> 호스트 > 호스트 생성
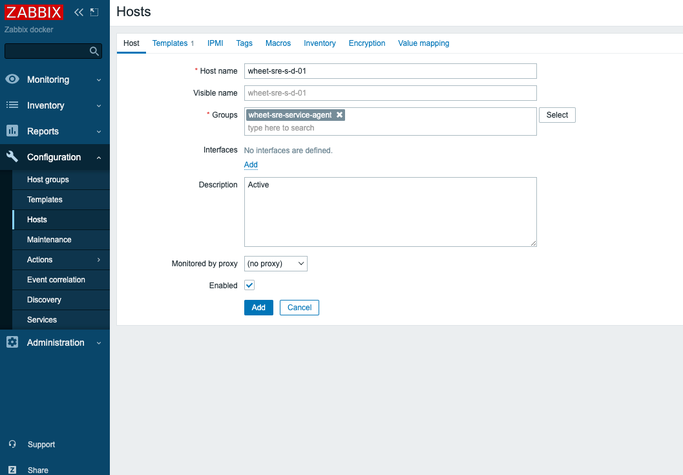
agent가 설치된 서버의 hostname을 입력
hostname
hostnamectl set-hostname sre-svc-01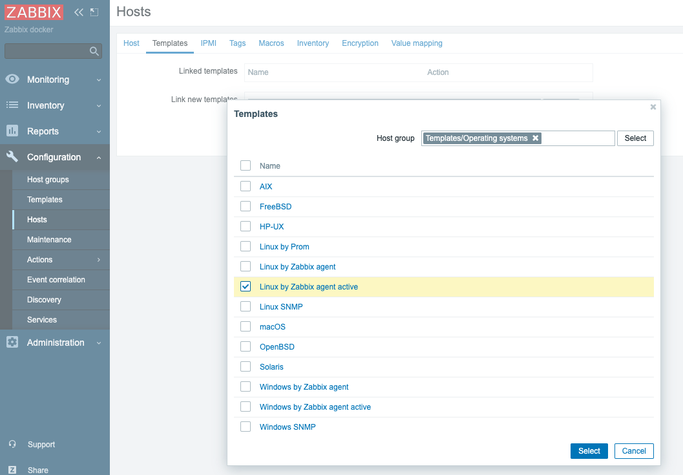
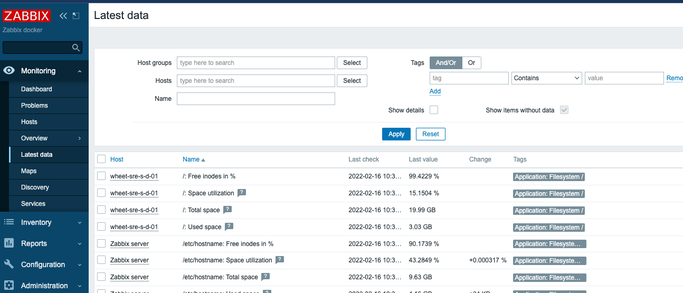
Active 방식은 ““에 초록색이 없다고 한다.
확인방법은 모니터링 > 최근데이타로 보기

Creative - DevOps in Korea