Section 1. Django 배포를 위한 설정
1. Debug 모드 해제
- settings.py 에서 DEBUG 를 False 로 설정
2. ALLOWED_HOSTS 지정
- 접근 가능한 URL 지정
ALLOWED_HOSTS = [
    '*'
]

또는

ALLOWED_HOSTS = [
    'codren.pythonanywhere.com'
]
3. STATIC_URL 지정
STATIC_URL = '/static/'

# 원래 지정된 staticfiles_dir 주석처리한 후에 아래에 STATIC_ROOT 지정
# STATICFILES_DIRS = [
#     os.path.join(BASE_DIR, 'static'),
# ]

STATIC_ROOT = os.path.join(BASE_DIR, 'static')
Section 2. Pythonanywhere 배포
1. Pythonanywhere
Python 프로그래밍 언어를 기반으로하는 온라인 통합 개발 환경 및 웹 호스팅 서비스
2. Pythonanywhere 배포 과정
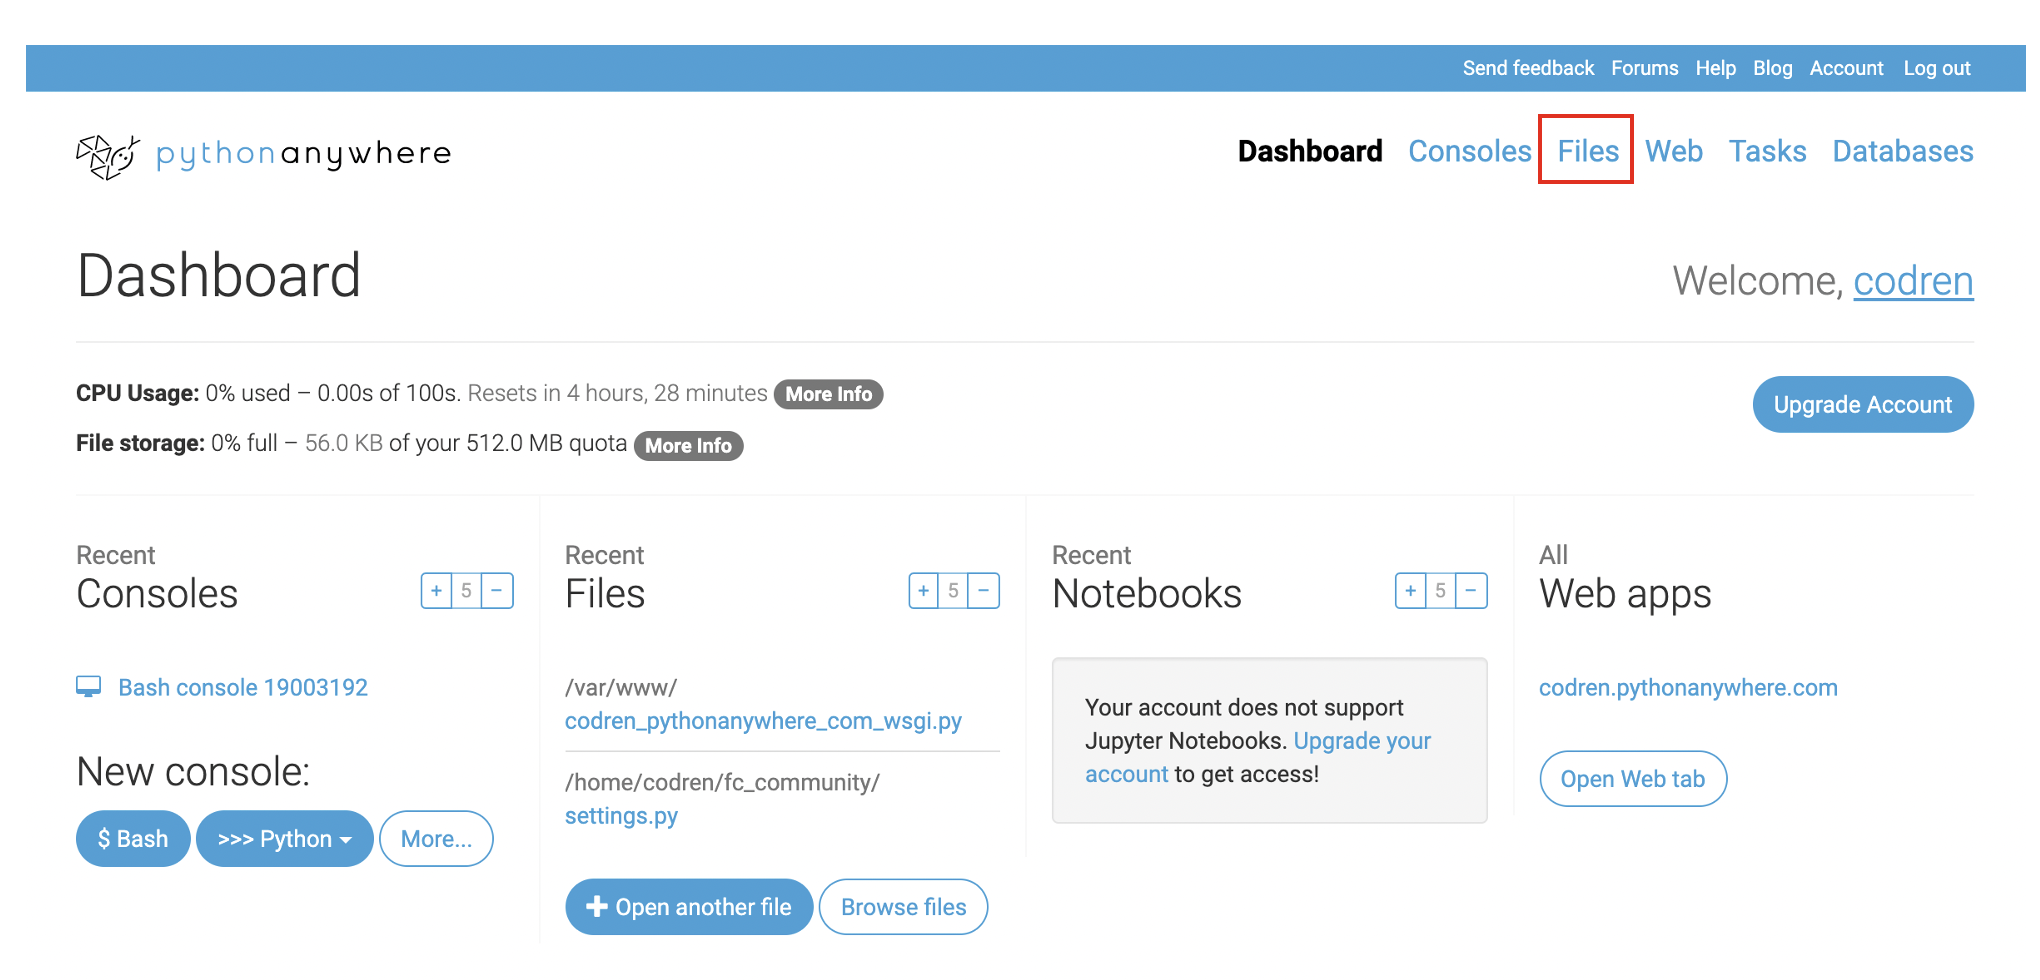
① Pythonanywhere 회원가입
② Files 메뉴 클릭
③ django_basic 프로젝트 폴더 압축해서 .zip 형태로 업로드
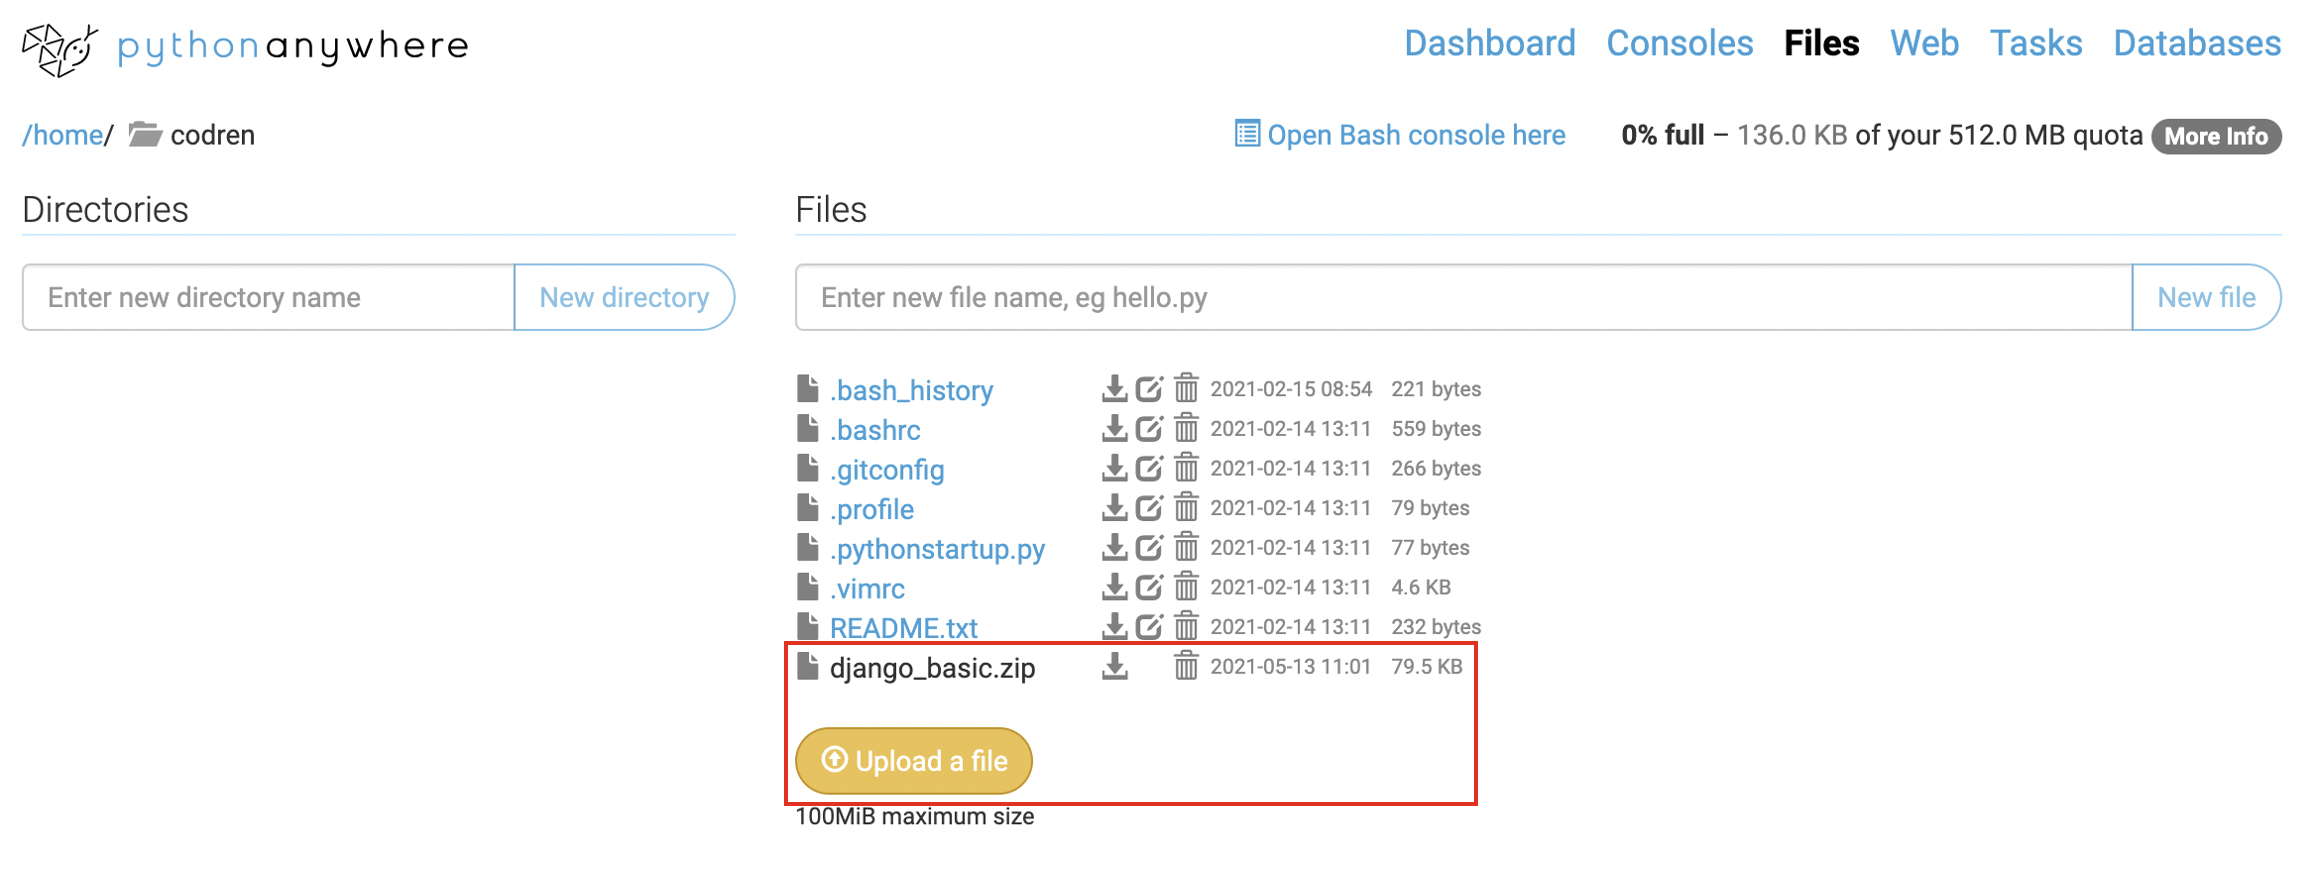
④ Open Bash console here 메뉴 클릭
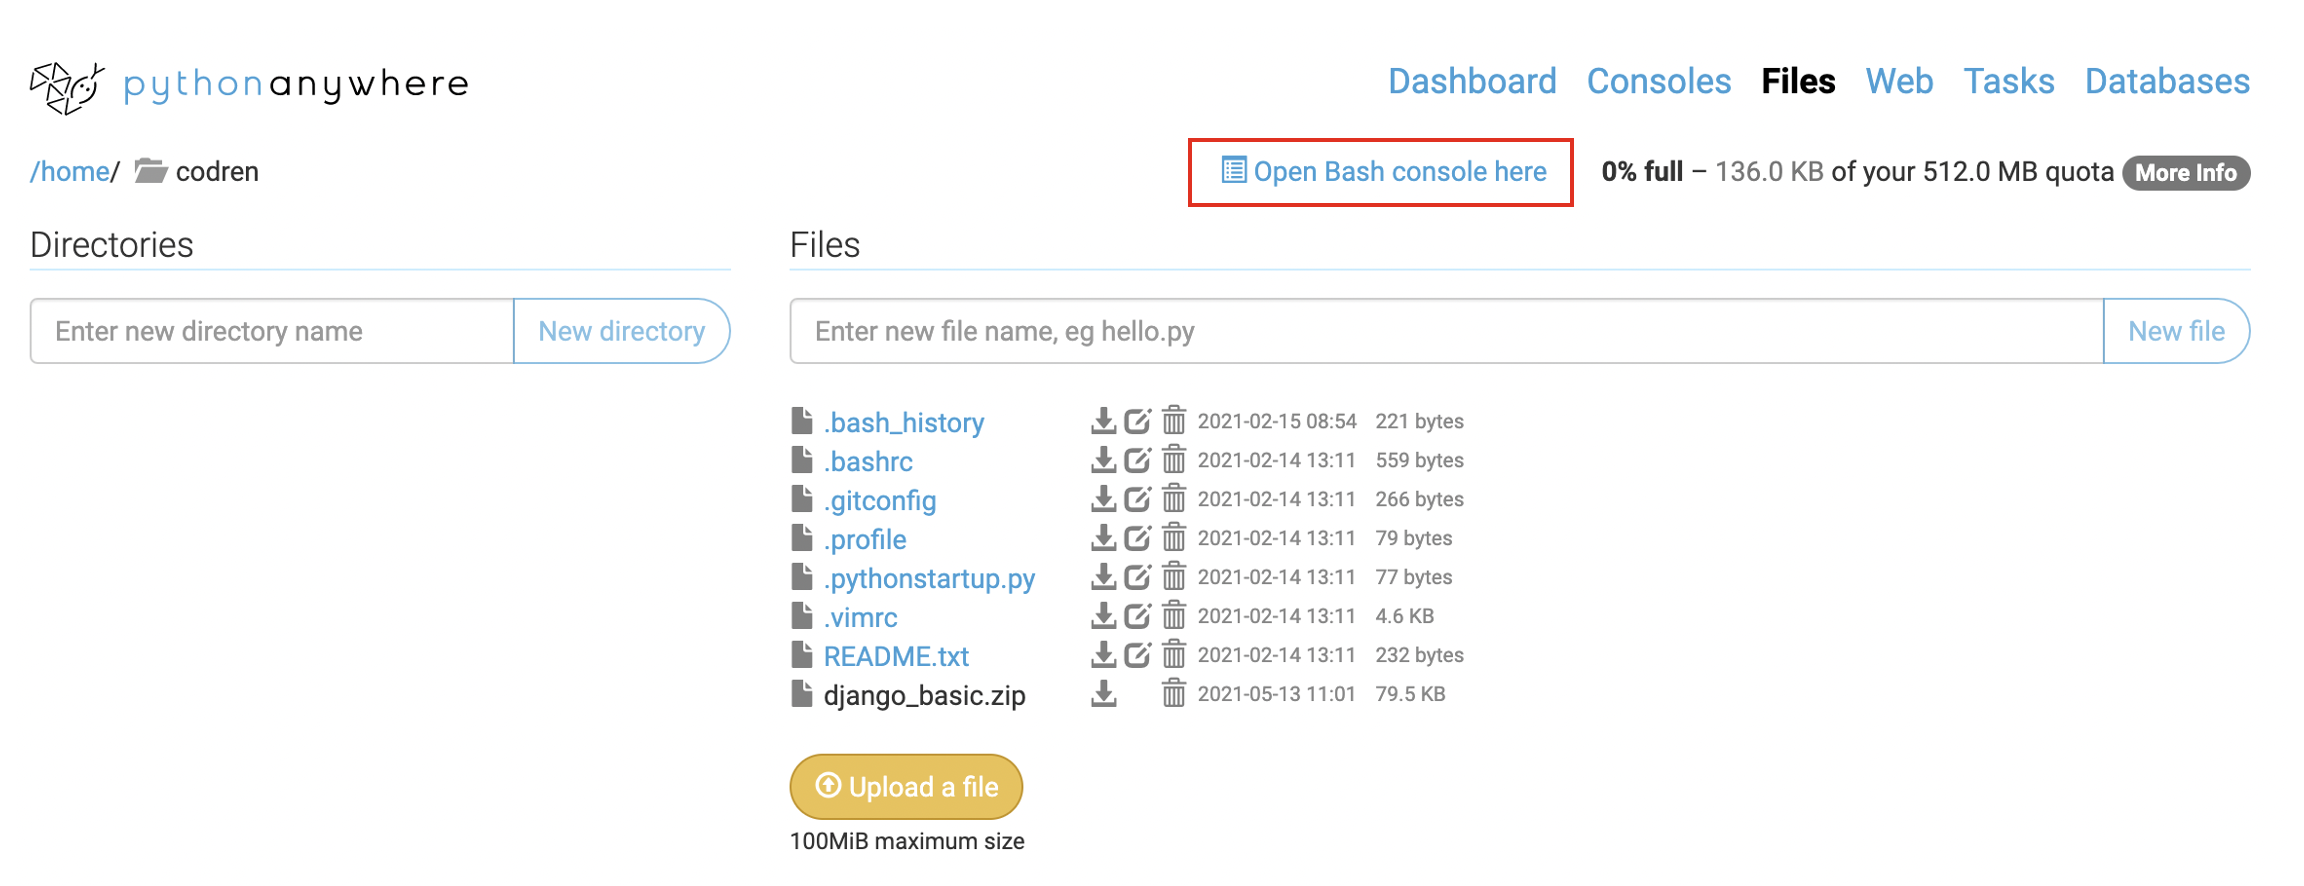
⑤ django_basic 프로젝트 zip 파일 압축해제 (unzip 명령어)
unzip django_basic.zip⑥ virtualenv 가상환경 구축
virtualenv --python=python3.7 virtualenv
source virtualenv/bin/activate
⑦ django 설치
pip install django⑧ django_basic 프로젝트 폴더 내에서 static collect 수행
python manage.py collectstatic⑨ db 파일을 포함하지 않았다면 migration 수행
python manage.py migrate ⑩ Web 메뉴 클릭
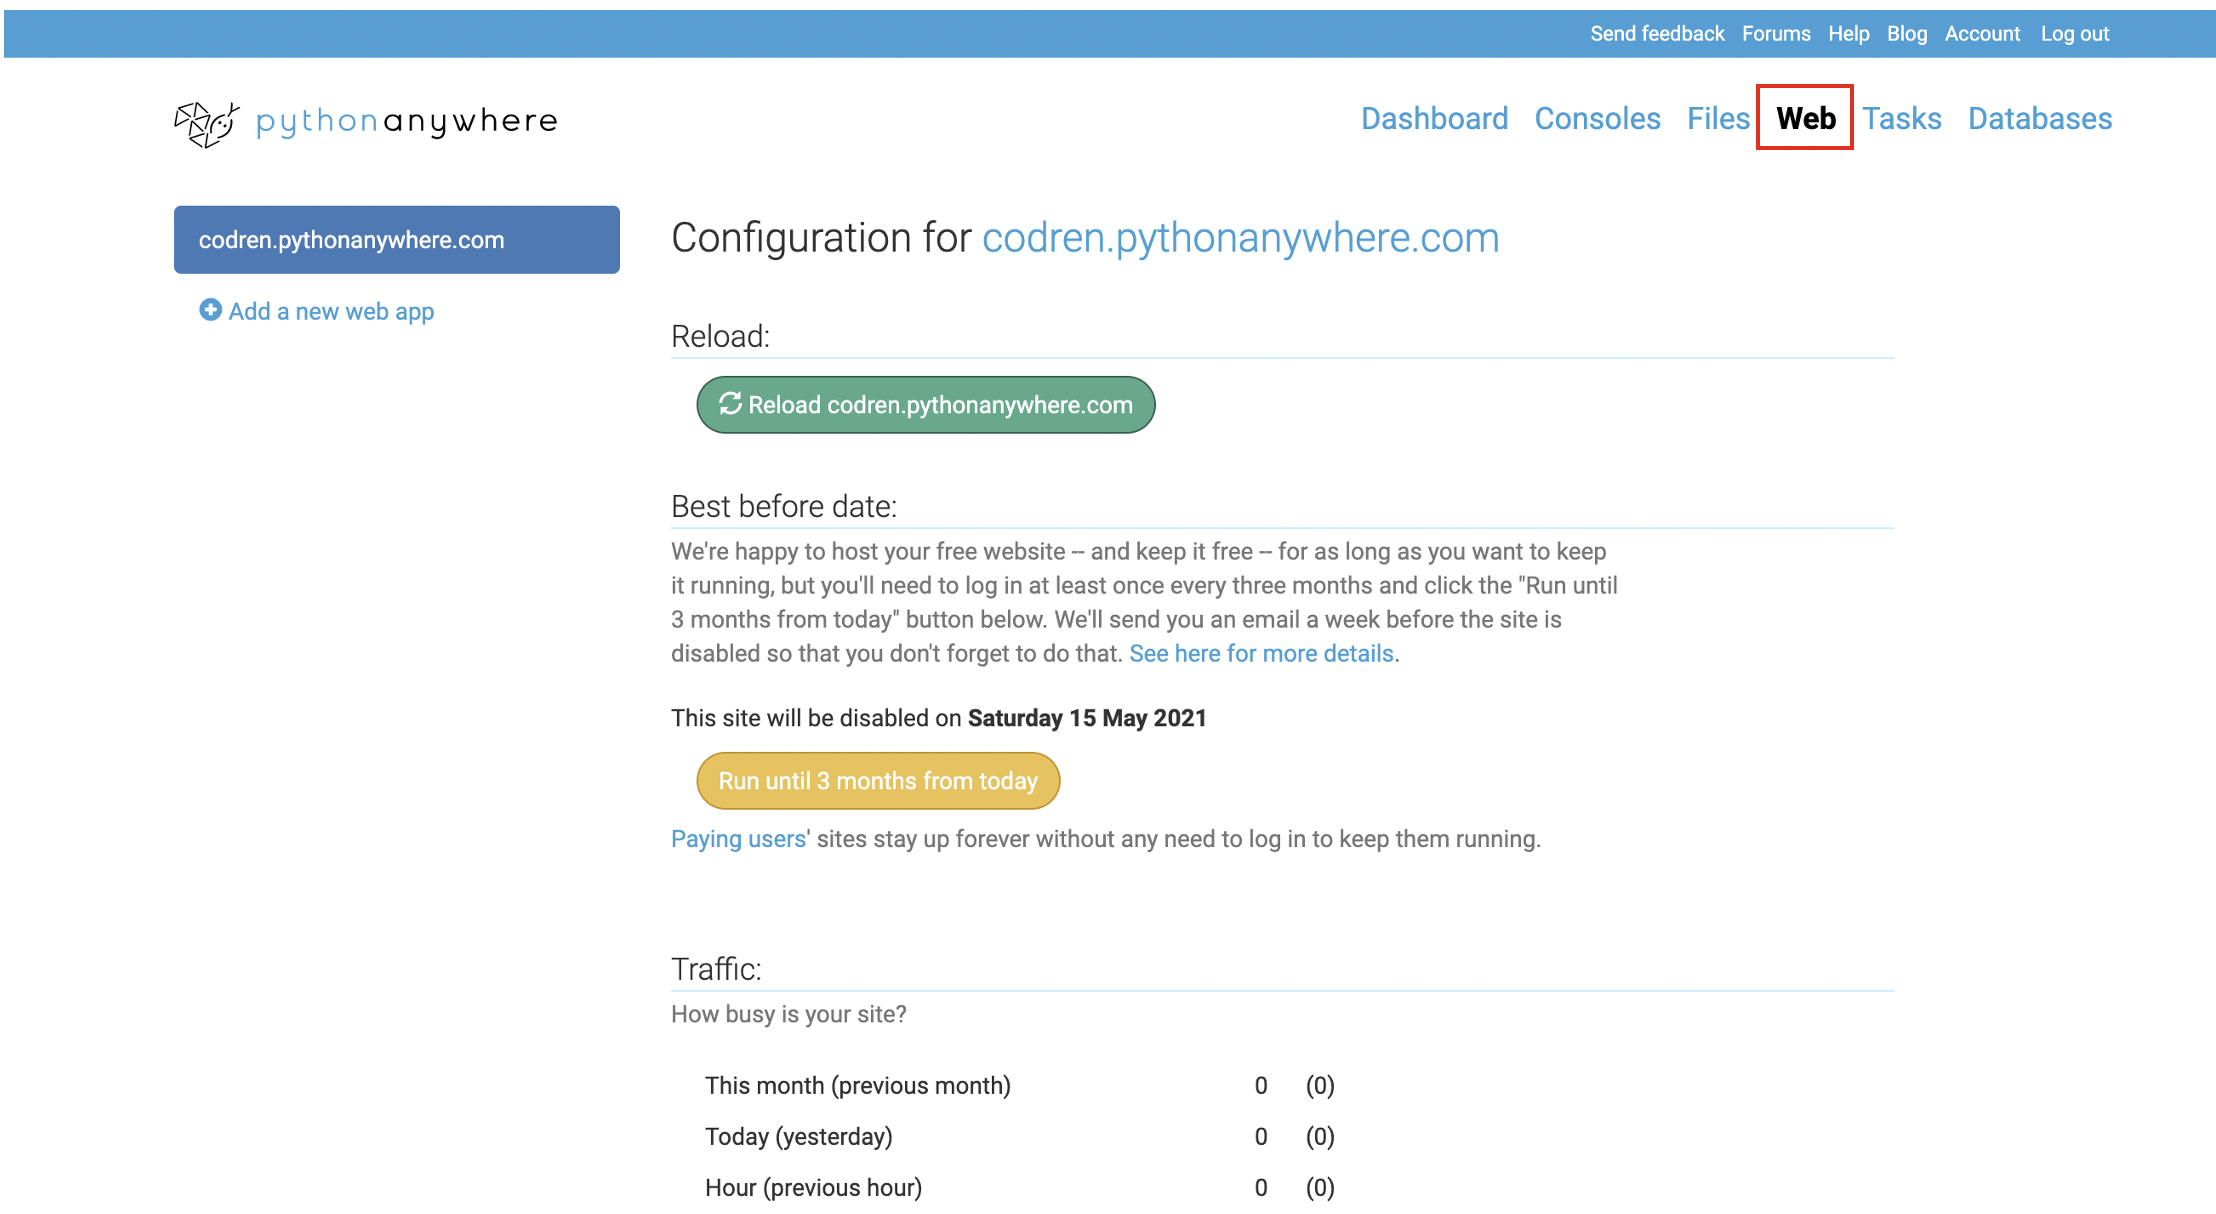
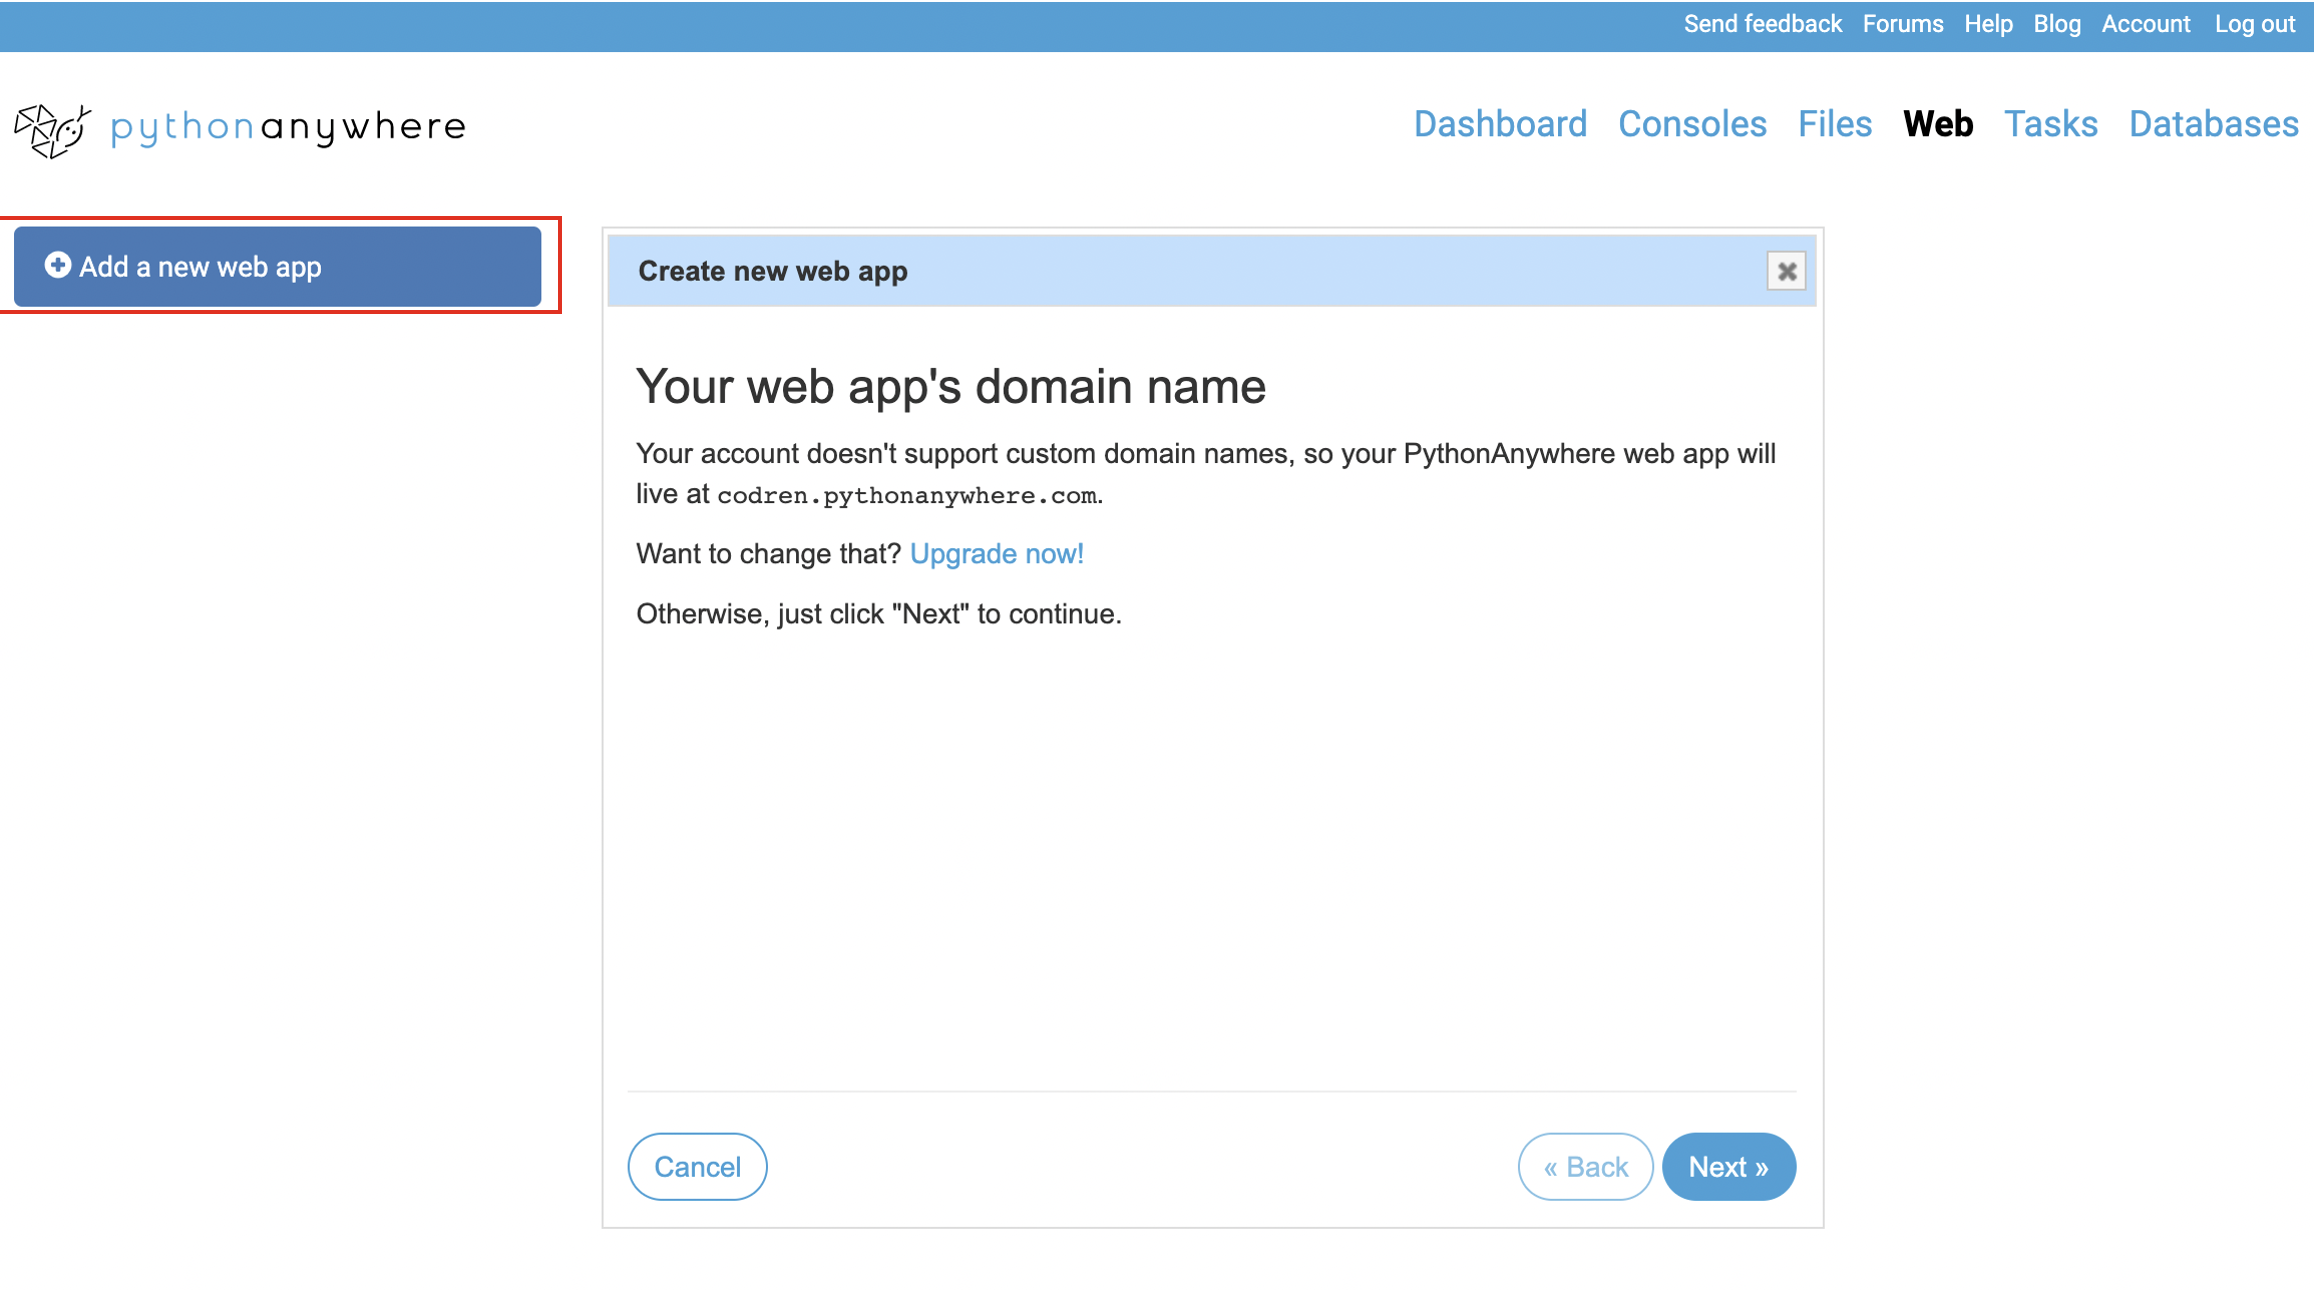
⑪ Add a new web app 클릭
- Manual configuration (including virtualenvs) -> Python3.7
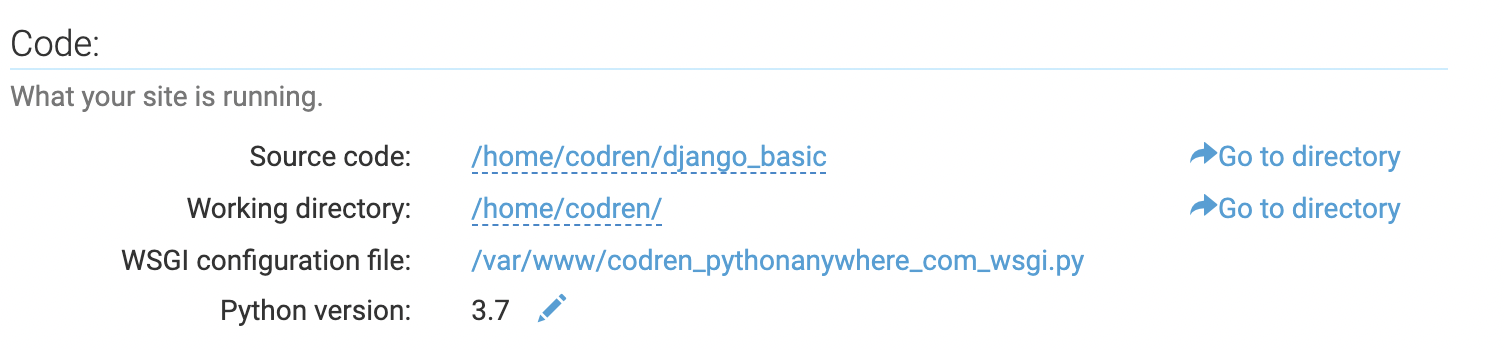
⑫ Code 영역 설정
- Source code 부분 프로젝트 폴더 경로로 지정
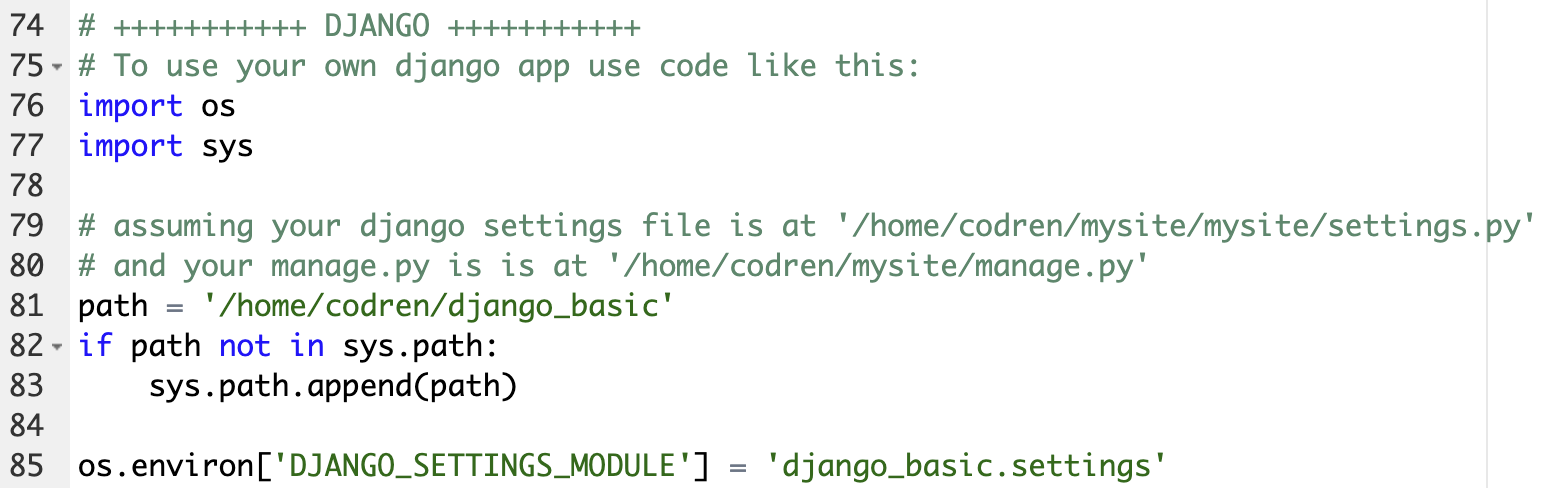
⑬ WSGI configuration file 설정 변경
- Hello World 부분 주석 처리 후 Django 다음과 같이 수정
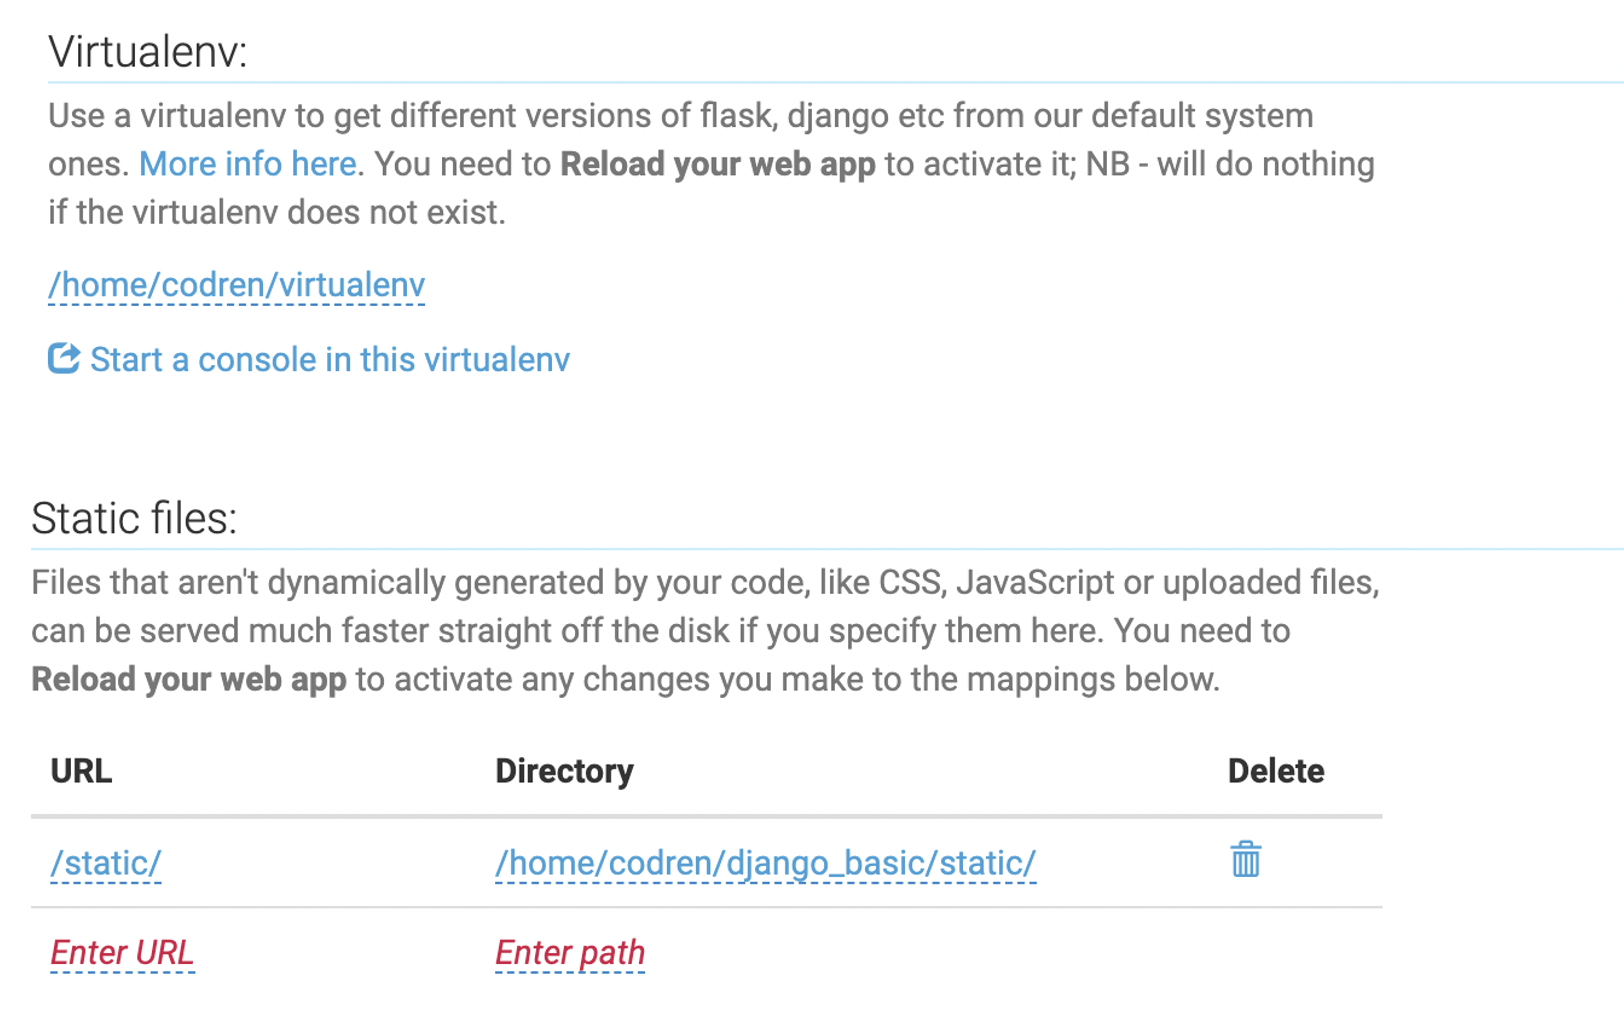
⑭ 가상환경 및 static file 경로 지정
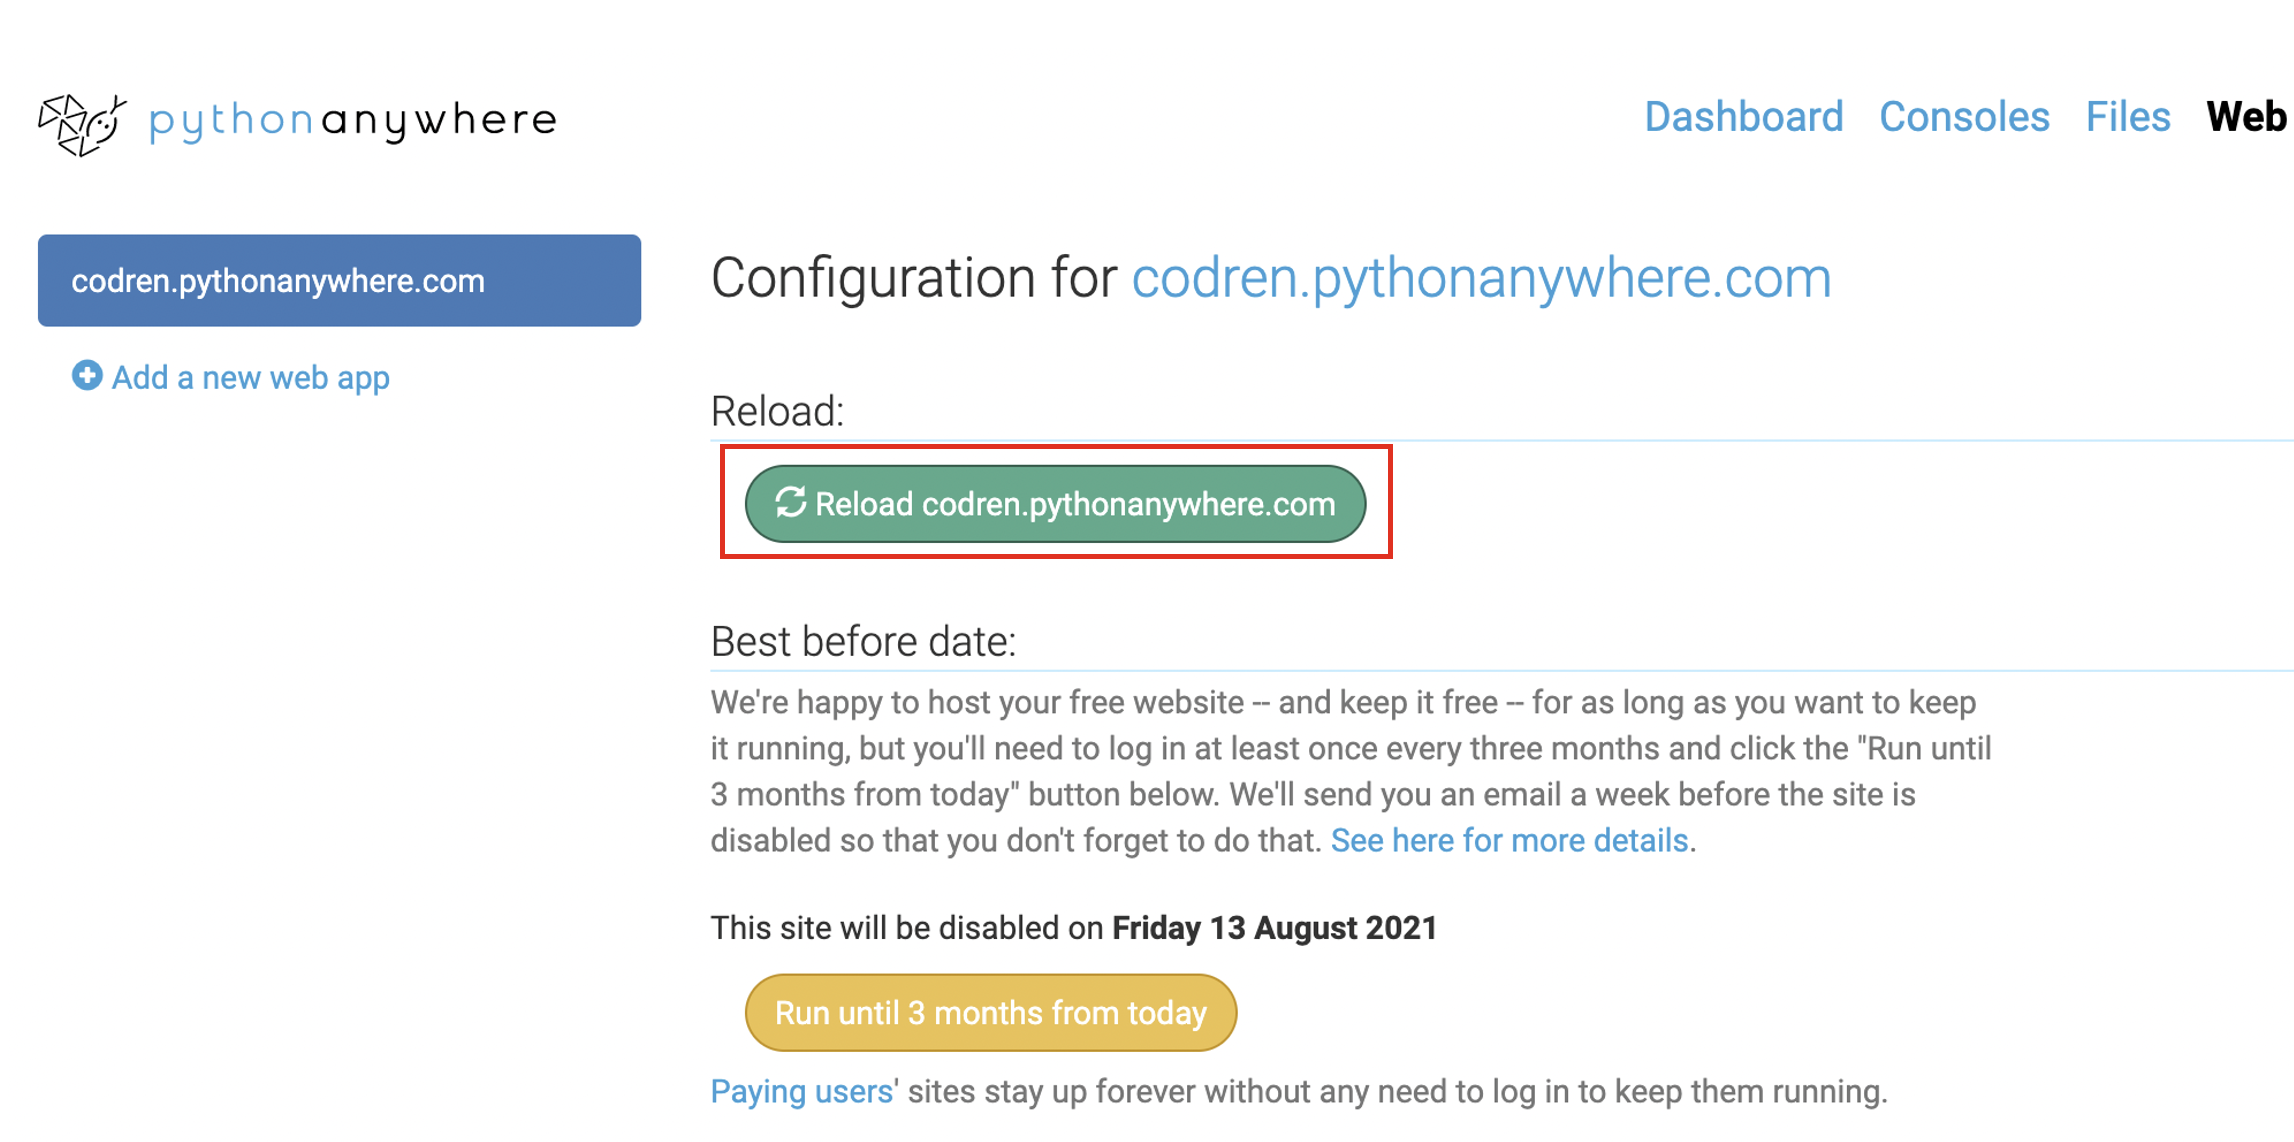
⑮ 리로드
- 참고로 pythonanywhere 무료 버전은 3개월 동안만 서버 Run
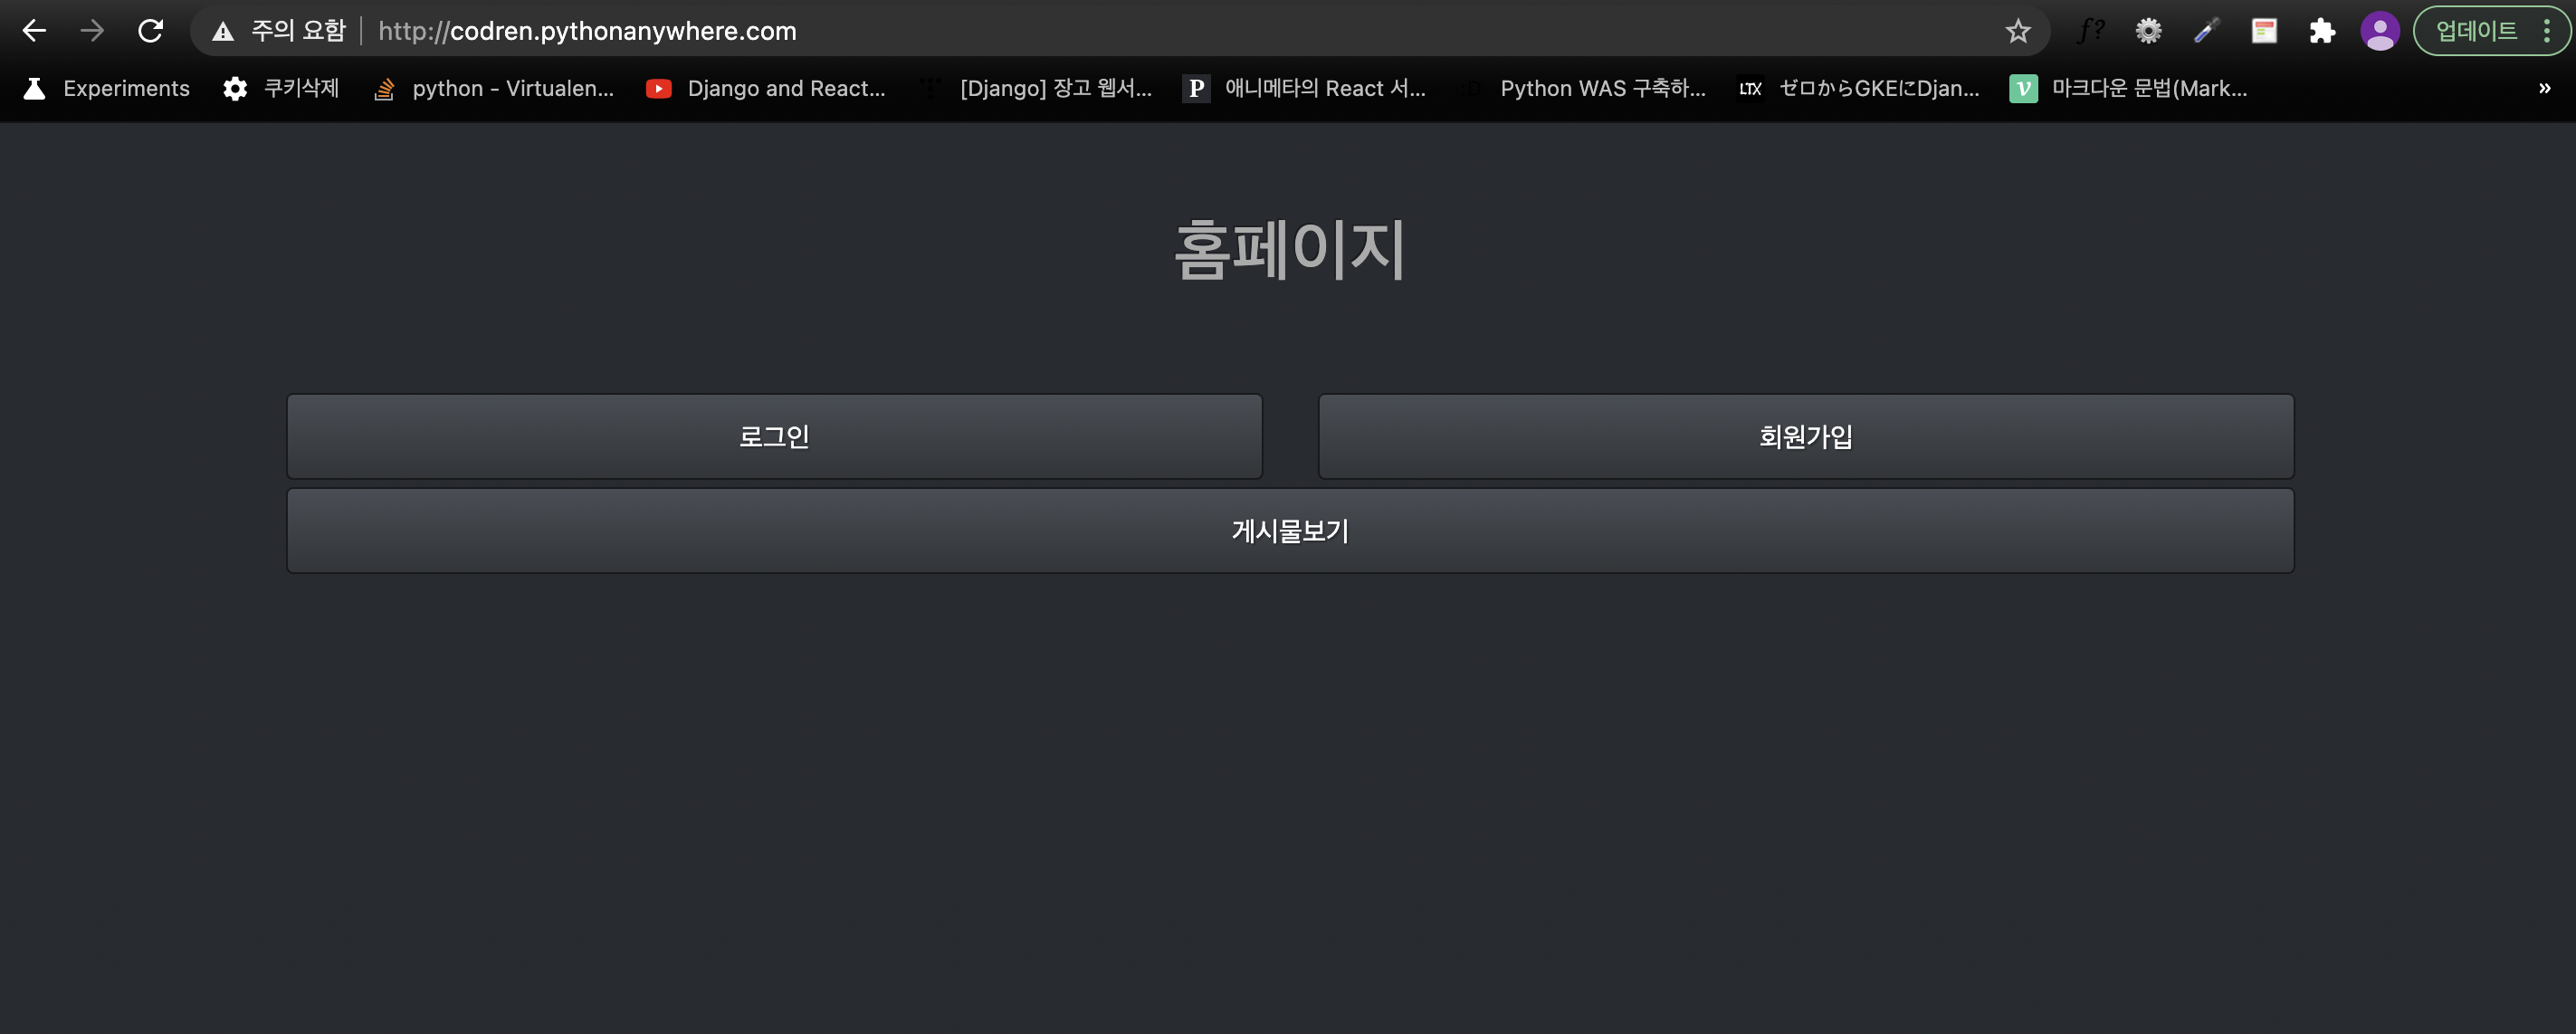
3. Pythonanywhere 배포 결과