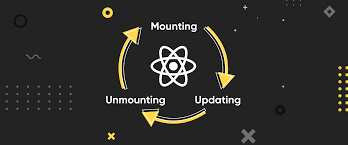
React에서 컴포넌트는 특정 생명 주기(Lifecycle) 를 가진다.
즉, 컴포넌트는 생성(Mounting) → 업데이트(Updating) → 소멸(Unmounting) 단계를 거치면서 동작하게 된다.
라이프사이클을 제대로 이해하면, 언제 API를 호출해야 하는지, 언제 상태를 변경해야 하는지, 불필요한 렌더링을 어떻게 방지할 수 있는지 등을 알 수 있다.
지금부터 하나씩 자세히 알아보자!
1. Mounting (마운팅) – 컴포넌트가 처음 등장할 때
컴포넌트가 최초로 생성되어 DOM에 추가되는 과정을 마운팅(Mounting)이라고 한다.
이 과정에서 실행되는 주요 라이프사이클 메서드는 다음과 같다.
constructor()
- 컴포넌트가 생성될 때 가장 먼저 실행되는 메서드
- 주로 초기 state 설정 또는 이벤트 핸들러 바인딩에 사용
constructor(props) {
  super(props);
  this.state = { count: 0 }; // 초기 state 설정
}
render()
- UI를 화면에 그리는 메서드
state나props값이 변경되면 다시 호출
render() {
	return <div>{this.state.count}</div>
}
componentDidMount()
- 컴포넌트가 화면에 마운트된 직후 실행
- API 호출, 타이머 설정, DOM 조작 등의 비동기 작업을 수행하기에 적절한 위치이다.
componentDidMount() {
	fetch('/api/data')
  	.then(response => response.data)
}
2. Updating (업데이트) – 상태나 props가 변경될 때
컴포넌트는 상태(state)나 props가 변경되면 자동으로 리렌더링된다.
이 과정에서 실행되는 주요 라이프사이클 메서드는 다음과 같다.
shouldComponentUpdate(nextProps, nextState)
- 컴포넌트가 리렌더링될 지 여부를 결정하는 메서드
- 기본적으로
true를 반환하지만, 성능 최적화를 위해 필요에 따라false를 반환하여 불필요한 렌더링을 방지할 수 있다.
shouldComponentUpdate(nextProps, nextState){
	return nextState.count !== this.state.count; // count가 변경될 때만 렌더링
}
render()
- 상태(state)나 props가 변경되면 다시 호출됨
- 이전 상태(prevState)와 현재 상태(this.state)를 비교하여 특정 작업 수행이 가능하다.
componentDidUpdate(prevProps, prevState) {
	if(prevState.count !== this.state.count) {
    	console.log("count 값이 변경되었습니다.");
    }
}componentDidUpdate는 componentDidMount와 비슷하지만,
"마운트 이후 모든 업데이트에서 실행된다" 라는 차이점이 있다.
3. Unmounting (언마운팅) - 컴포넌트가 사라질 때
컴포넌트가 더 이상 필요하지 않아 DOM에서 제거될 때 실행되는 단계다.
이때 메모리 누수를 방지하기 위해 정리 작업을 수행해야 한다.
componentWillUnmount()
- 컴포넌트가 제거되기 직전에 실행됨
- 타이머 제거, 이벤트 리스너 해제 등 리소스 정리 작업 수행
componentWillUnmount() {
	clearInterval(this.timer)
}
라이프사이클 정리
Mounting 단계 (컴포넌트가 생성될 때)
constructor()→ 초기 state 설정render()→ UI 생성componentDidMount()→ API 호출, DOM 조작
Updating 단계 (컴포넌트가 업데이트될 때)
shouldComponentUpdate()→ 리렌더링 여부 결정render()→ 새로운 UI 렌더링componentDidUpdate()→ 상태 변경 후 추가 작업
Unmounting 단계 (컴포넌트가 제거될 때)
componentWillUnmount() → 리소스 정리
라이프사이클이 중요한 이유는?
✔ 언제 API를 호출해야 하는지 알 수 있다.
✔ 불필요한 렌더링을 방지하여 성능을 최적화할 수 있다.
✔ 이벤트 리스너와 타이머를 정리하여 메모리 누수를 방지할 수 있다.
React를 제대로 활용하려면 라이프사이클을 꼭 이해해야 한다!
이제 다음에는 useEffect()를 활용한 함수형 컴포넌트에서의 라이프사이클 관리도 알아보면 좋을 것 같다.