
본 시리즈는 인프런의 김영한 선생님 강좌 정리입니다.
프로젝트 생성 정보
OS: Windows 11
IDE: IntelliJ
DB: H2
https://start.spring.io/
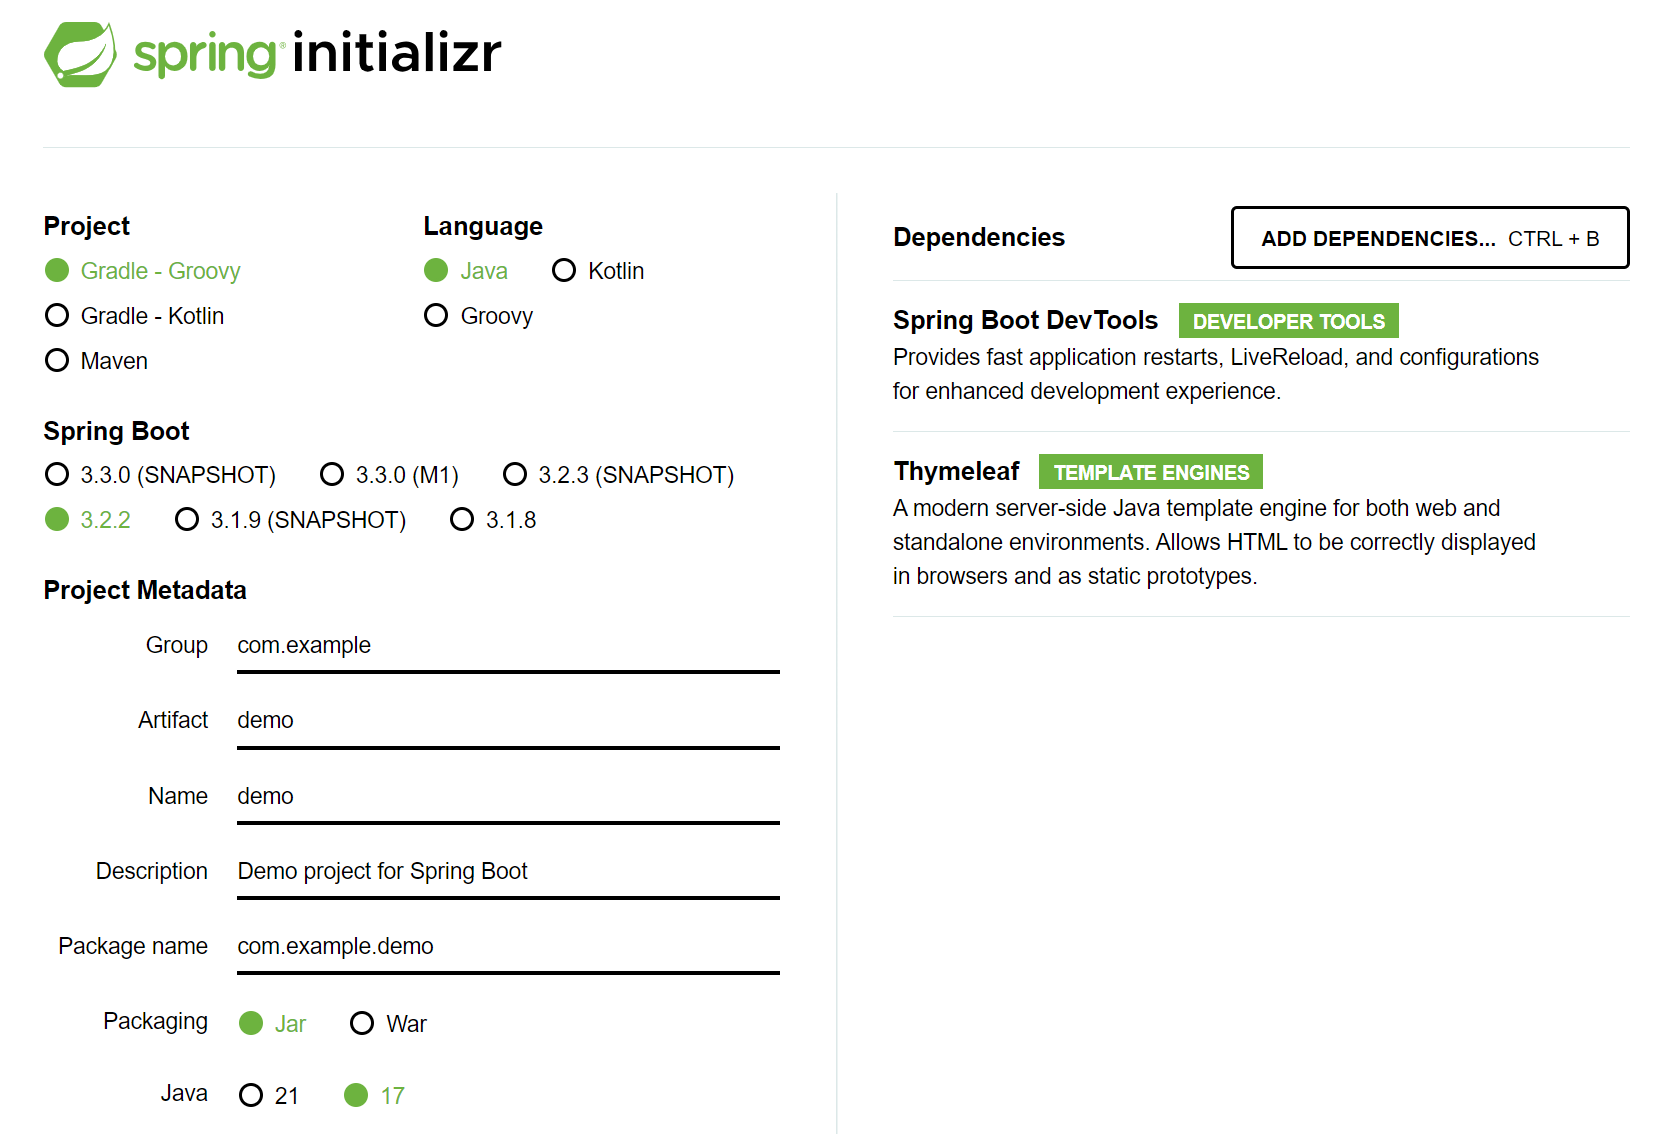 *SNAPSHOT이나 M1 버전은 불안정할 수 있음
-Gradle 대신 IntelliJ로 실행(더 빠름)-
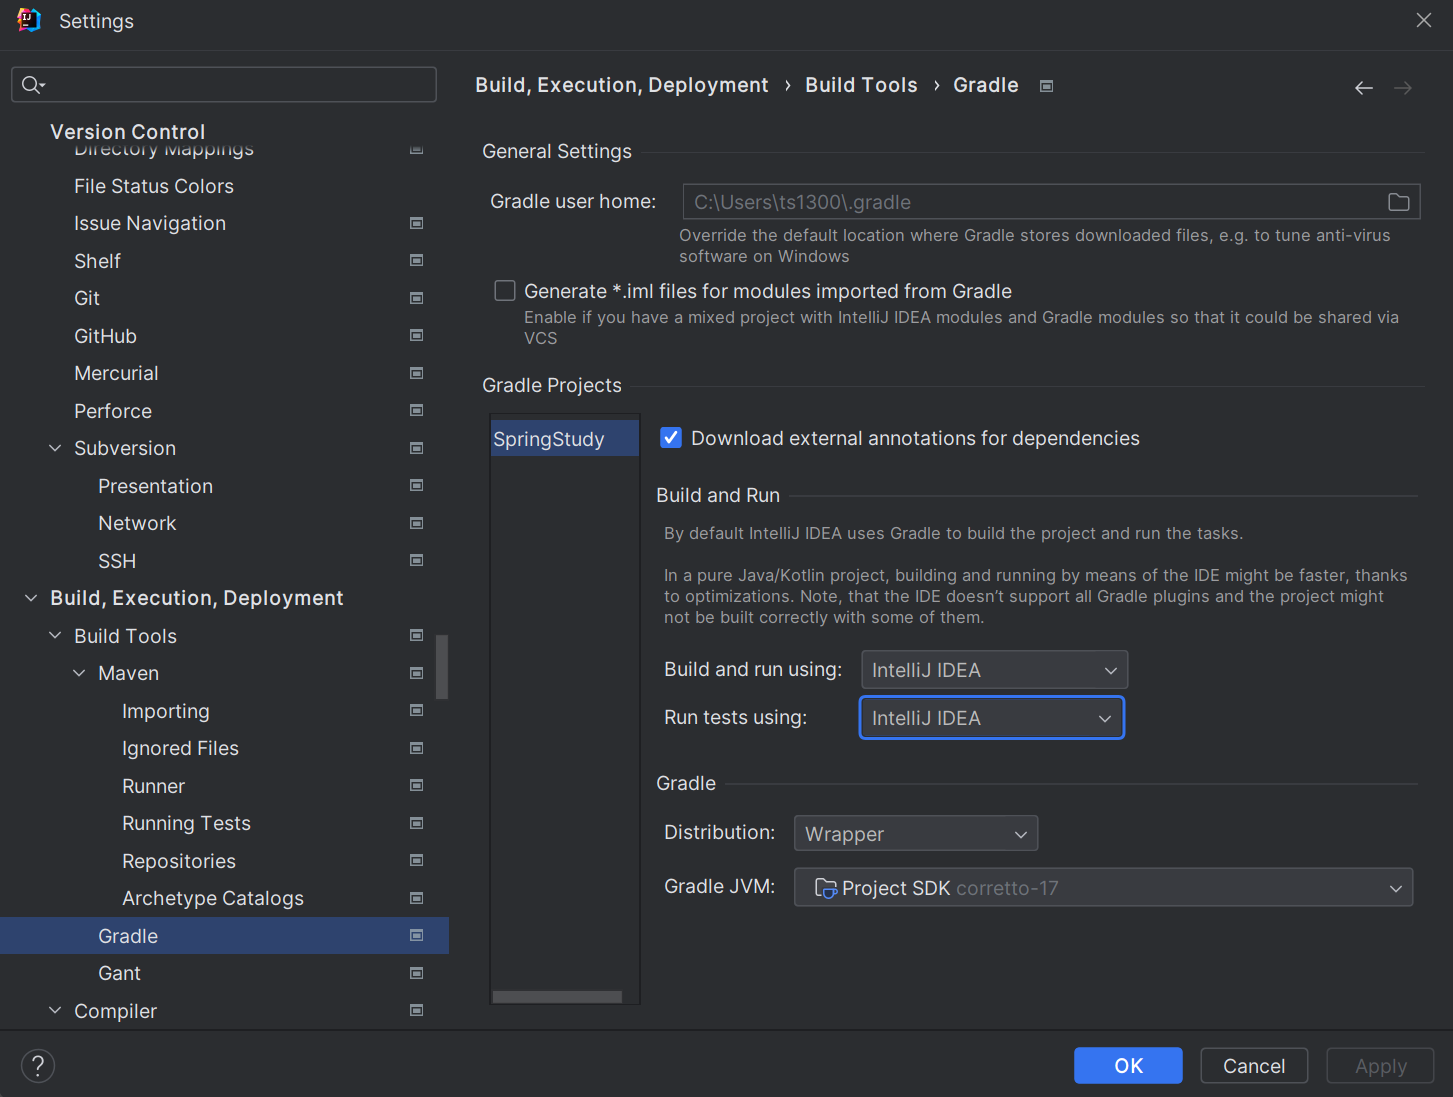 Settings -> Build, Execution, Deployment -> Build Tools
-> Gradle -> Build and run using:/Run tests using:
-> 둘 다 IntelliJ IDEA로 변경
-자바 실행이 되지 않는다면-
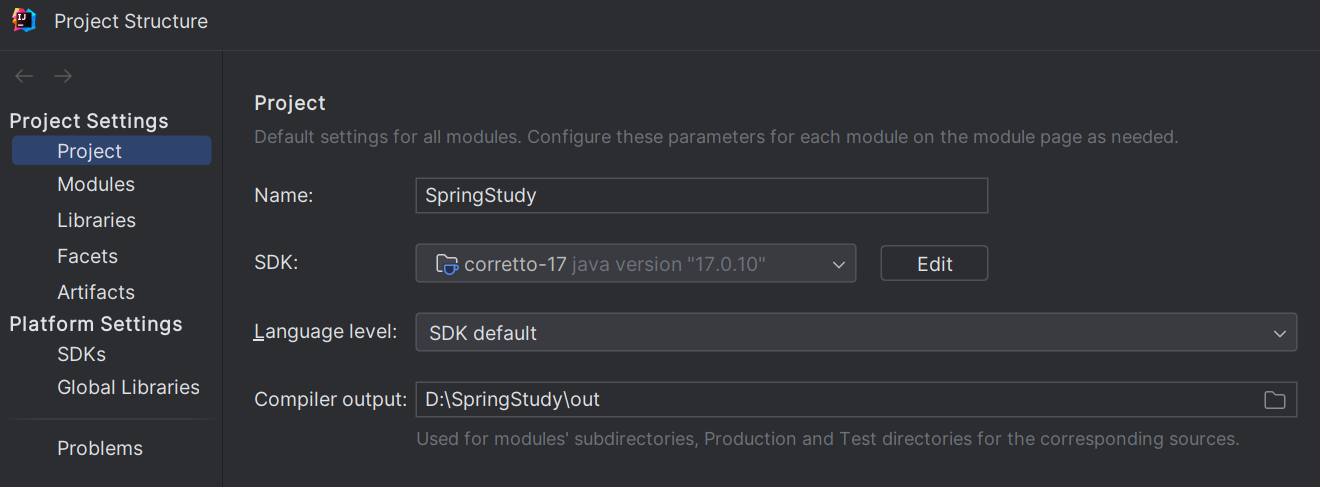 Project Structure(Ctrl+Alt+Shift+S) -> Project Settings -> Project -> SDK: 설치한 자바 버전 선택(17)
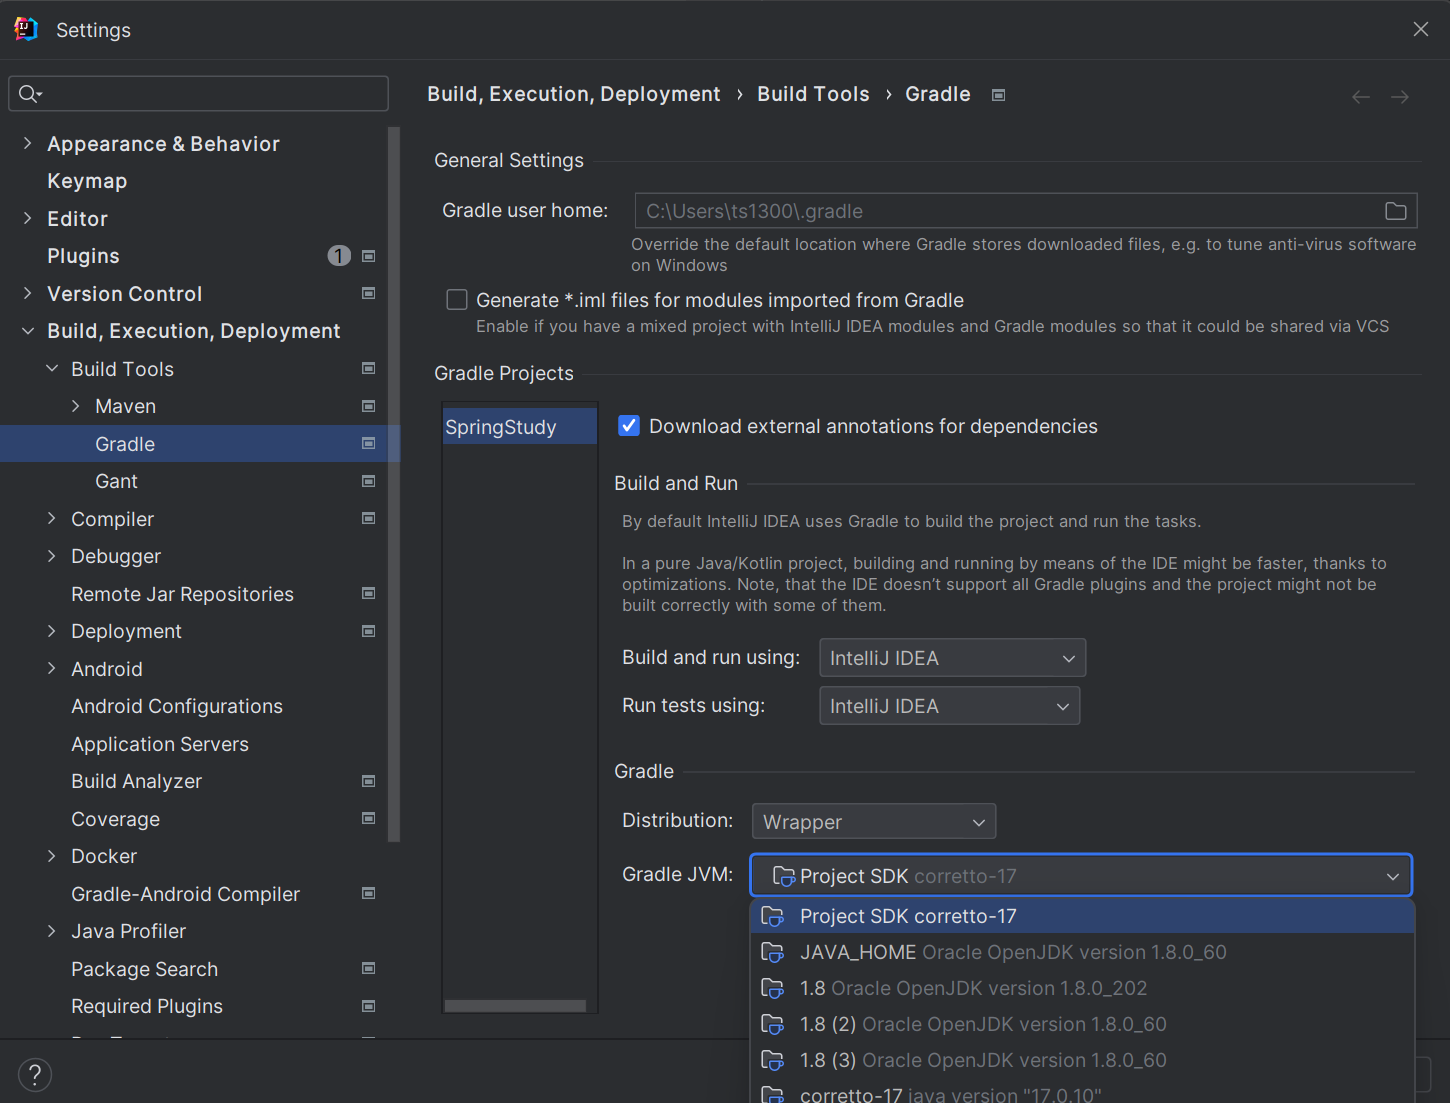 Settings -> Build, Execution, Deployment -> Build Tools
-> Gradle -> Gradle JVM: 설치한 자바 버전 선택(17)
View 환경설정
-Welcome Page-
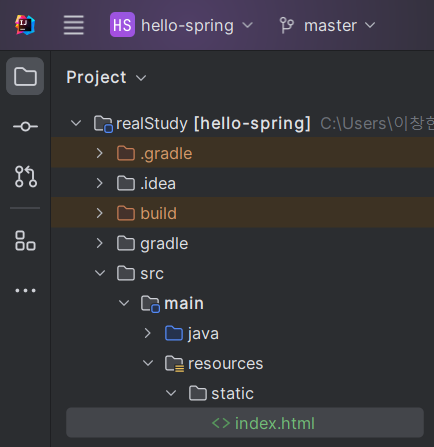
resources/static/index.html
<!DOCTYPE HTML>
<html>
<head>
	<title>Hello</title>
	<meta http-equiv="Content-Type" content="text/html; charset=UTF-8" />
</head>
<body>
Hello
<a href="/hello">hello</a>
</body>
</html>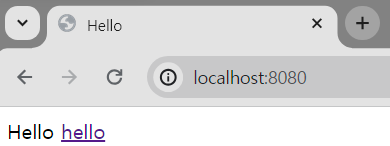
- 스프링 부트 프로젝트에서는 resources/static 폴더에 index.html을 만들면 Welcome Page로 쓰인다.
-Thymeleaf 템플릿 엔진-
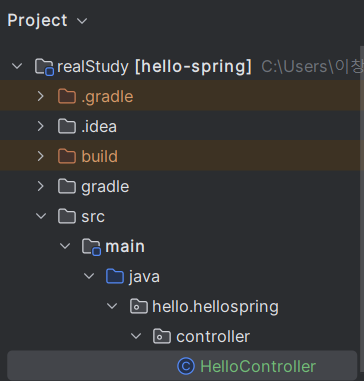
java/hello/hellospring/controller/HelloController.java
@Controller
public class HelloController {

 @GetMapping("hello") //localhost:8080/ 에 이어질 URL
 public String hello(Model model) {
 	model.addAttribute("data", "hello in English!"); // hello.html 파일의 th:text 속 ${data}에 들어갈 값 설정
 	return "hello"; // templates/hello.html
 }
}
resources/templates/hello.html
<!DOCTYPE HTML>
<html xmlns:th="http://www.thymeleaf.org">
<head>
<title>Hello</title>
<meta http-equiv="Content-Type" content="text/html; charset=UTF-8" />
</head>
<body>
<p th:text="'안녕하세요. ' + ${data}" >안녕하세요. 손님</p>
</body>
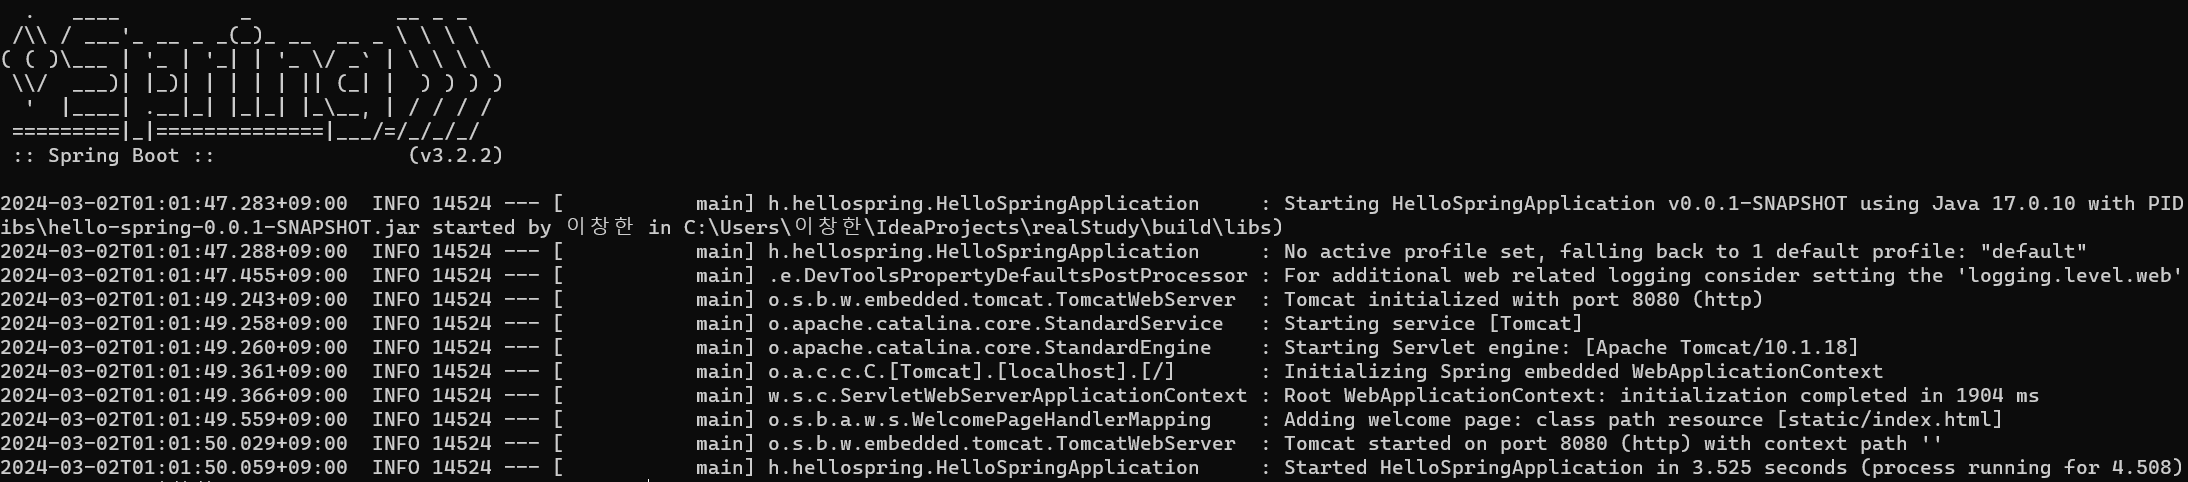
</html>서버 재시작 - http://localhost:8080/hello 입력 후 확인
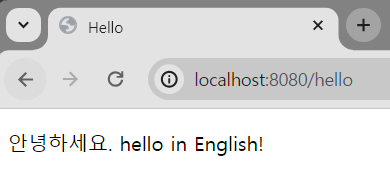
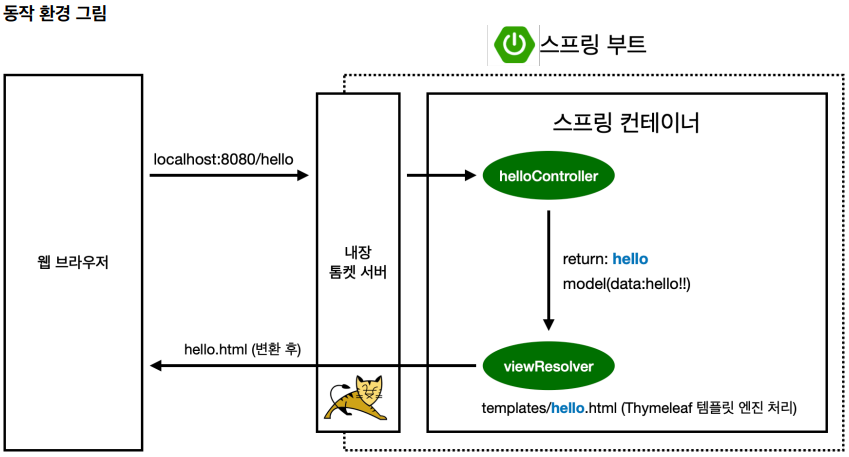
- 컨트롤러에 매핑된 메소드에서 viewName문자를 return하면, 뷰 리졸버(viewResolver)가 해당 화면을 찾아 보여준다.
- 스프링 부트 템플릿엔진 기본 viewName 매핑
- resources: templates/+{viewName}+.html
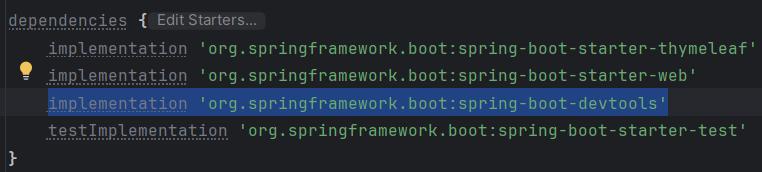
참고: spring-boot-devtools 라이브러리 추가시, 서버를 재시작하지 않고 view 파일을 변경할 수 있다.
implementation 'org.springframework.boot:spring-boot-devtools'
IntelliJ 메뉴 - Build - Recompile~ (Ctrl+Shift+F9)
jar파일 빌드 및 실행
IDE 콘솔에서(혹은 프로젝트 폴더 - cmd 실행하여)
1. ./gralew build
2. cd build/libs
3. java -jar hello-spring-0.0.1-SNAPSHOT.jar
4. 실행 확인
여러 일정들과 핑계들을 이겨내어 글 하나 작성하는 것이 이렇게나 오래 걸릴 줄이야..
회사 업무를 위해 설치해놓은 jdk1.8로 인한 호환성 문제를 해결하느라 더 오래걸렸는데, 모두 해결하였으므로 정말 박차를 가해봐야겠다. 시작이 반이다!