지난 포스팅에서 LayoutInflater 클래스의 inflate() 메소드에 대하여 설명하였고, 아래 코드를 보면서 attachToRoot는 레이아웃을 현재의 부모 뷰에 즉시 추가할지 여부를 결정하는 옵션이라고 설명하였습니다.
LayoutInflate.inflate(resource: Int, root: ViewGroup?, attachToRoot: Boolean)대부분의 블로그에서 위와 같이 설명하기 때문에 어떤 느낌으로 사용하는지는 알겠지만, 정확하게 알고 써야하기 때문에 별도의 포스팅으로 작성하여 설명하려고 합니다.
용어 정리:
설명에 들어가기에 앞서 이제부터 설명할 때 용어를 정하고자 합니다.
레이아웃: inflate() 메소드에 의해 View 객체로 변환할 XML 레이아웃.
View 객체: inflate() 메소드에 의해 변환된 XML 레이아웃의 객체.
즉, 레이아웃은 XML이 메모리에 올라가기 전, View 객체는 XML이 메모리에 올라간 후가 되겠다.
시점:
많은 블로그에서 이를 "바로 적용된다" 혹은 "적용되지 않는다"로 설명하지만, 좀 더 정확하게 말하자면, 지금 적용할 것이냐, 나중에 적용할 것이냐로 이해하는 것이 더 적합하다고 생각합니다.
public View inflate (int resource, ViewGroup root, boolean attachToRoot)inflate()메소드의 반환형은 View 클래스인데 이것은 지금 바로 추가하지 않아도, View 객체를 나중에 추가할 수 있다는 의미가 됩니다.
예를 들어, attachToRoot가 false일 경우, inflate()는 View 객체를 반환하지만 해당 View 객체는 레아아웃이 객체화된 것으로 아직 root와 결합되지 않는 상태입니다. 이를 개발자가 이후에 수동으로 추가할 수 있습니다. 반면 true일 경우, View 객체가 root에 추가되며, 반환된 View 객체는 이미 상위 뷰에 속해 있는 상태가 됩니다.
이러한 차이점을 이해하는 것이 중요한 이유는, 레이아웃을 동적으로 추가할 때 어느 시점에서 뷰 계층 구조에 포함시킬지에 따라 UI 동작 방식이 달라질 수 있기 때문입니다. 즉, 객체만 미리 생성해놓고 이후에 조건문을 통해서 추가한다던가 특정 조건이 되었을 때 추가하는 등의 구현을 할 수 있습니다.
의문:
attachToRoot를 알아가면서 정말 많은 의문들이 생겼는데 이 의문들을 하나씩 하나씩 해결해보려고한다.
1. attachToRoot에 따른 반환 값 차이
2. attachToRoot가 false 일 때, root의 null 여부에 따른 차이점
3. attachToRoot가 false 일 때, root가 아닌 다른 ViewGroup의 자식뷰로 추가해도 되는가?
우선 root 뷰가 될 activity_main.xml을 아래와 같이 구성하였다.
<?xml version="1.0" encoding="utf-8"?>
<androidx.constraintlayout.widget.ConstraintLayout xmlns:android="http://schemas.android.com/apk/res/android"
    xmlns:app="http://schemas.android.com/apk/res-auto"
    xmlns:tools="http://schemas.android.com/tools"
    android:id="@+id/main"
    android:layout_width="match_parent"
    android:layout_height="match_parent"
    tools:context=".MainActivity">

    <LinearLayout
        android:id="@+id/ll_button_list_01"
        android:layout_width="match_parent"
        android:layout_height="0dp"
        android:orientation="vertical"
        app:layout_constraintTop_toTopOf="parent"
        app:layout_constraintBottom_toTopOf="@id/ll_button_list_02">

        <Button
            android:layout_width="match_parent"
            android:layout_height="wrap_content"
            android:text="Button 01"/>

    </LinearLayout>

    <LinearLayout
        android:id="@+id/ll_button_list_02"
        android:layout_width="match_parent"
        android:layout_height="0dp"
        app:layout_constraintTop_toBottomOf="@id/ll_button_list_01"
        app:layout_constraintBottom_toBottomOf="parent">

        <Button
            android:layout_width="match_parent"
            android:layout_height="wrap_content"
            android:text="Button 02"/>

    </LinearLayout>

</androidx.constraintlayout.widget.ConstraintLayout>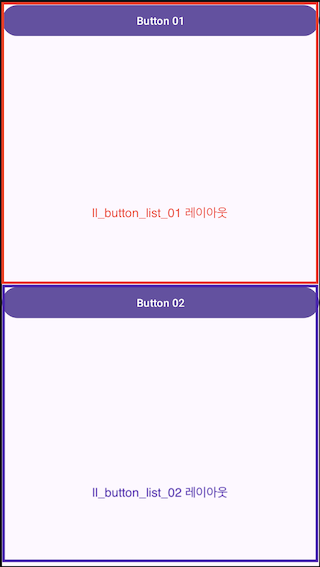
그리고 root 뷰에 추가할 layout_inflate_sample.xml을 아래와 같이 구성하였다.
<?xml version="1.0" encoding="utf-8"?>
<androidx.constraintlayout.widget.ConstraintLayout xmlns:android="http://schemas.android.com/apk/res/android"
    android:layout_width="match_parent"
    android:layout_height="match_parent"
    xmlns:app="http://schemas.android.com/apk/res-auto">

    <Button
        android:layout_width="match_parent"
        android:layout_height="wrap_content"
        android:text="INFLATE BUTTON"
        app:layout_constraintTop_toTopOf="parent"/>

</androidx.constraintlayout.widget.ConstraintLayout>
위에 예제 코드를 기반으로 문제를 하나씩 해결해보고자 합니다.
1. attachToRoot에 따른 반환 값 차이
attachToRoot가 true, false 일 때, inflate() 메소드가 반환하는 View 객체가 어떻게 다른지 알아보기 위해 디버깅을 진행했습니다.
val rootView = findViewById<LinearLayout>(R.id.ll_button_list_01)
val view = layoutInflater.inflate(R.layout.layout_inflate_sample, rootView, true)
attachToRoot == true인 경우:
layout_inflate_sample.xml 레이아웃이 ll_button_list_01라는 root 뷰에 바로 추가되며, inflate() 메소드가 반환하는 객체는 root 뷰인 ll_button_list_01입니다. 즉, 레이아웃을 root에 붙인 후 해당 root를 반환하는 것입니다.

attachToRoot == false인 경우:
이 때는 root 뷰에 레이아웃이 추가되지 않으며, inflate() 메소드는 layout_inflate_sample.xml에서 정의된 레이아웃을 객체화한 View 자체를 반환합니다. root 뷰는 변경되지 않은 상태로 남아있습니다.

결론:
attachToRoot가true이면, 레이아웃이 root 뷰에 추가되고 그 root 뷰를 반환합니다.attachToRoot가false이면, 레이아웃은 root 뷰에 추가되지 않고, 단순히 XML 레이아웃이View객체로 변환된 결과만 반환합니다.
2. attachToRoot가 false일 때, root의 null 여부에 따른 차이점
root가 null 일 때 attachToRoot가 true이면, null인 뷰에 레이아웃을 붙일 수 없기 때문에 당연히 Exception이 발생합니다. 하지만 attachToRoot가 false 일 때는 root가 null 일수도 있고, 아닐수도 있습니다. 그렇다면 이 두 경우에 어떤 차이가 있을까요?
핵심은 root의 null 여부에 따라 반환되는 View의 LayoutParams가 달라진다는 것입니다.
LayoutParams가 달라진다는 것은 뷰의 배치 속성(width, heigth, margin, padding 등)이 달라진다는 뜻입니다.
root == null 인 경우:
inflate() 메소드가 XML 레이아웃을 View 객체로 변환할 때, 레이아웃의 파라미터를 그대로 사용합니다. 즉, XML 파일에 정의된 배치 속성을 기반으로 뷰가 객체화됩니다.
root != null 인 경우:
레이아웃의 View 객체가 실제로 root에 붙지 않더라도, root의 레이아웃 컨텍스트에 맞는 LayoutParams가 적용됩니다. 즉, root가 예를 들어 LinearLayout이면 LinearLayout.LayoutParams, ConstraintLayout이면 ConstraintLayout.LayoutParams와 같은 부모 뷰에 맞는 LayoutParams가 적용됩니다.
이 때는 레이아웃에 정의한 layout_width, layout_height 같은 값이 무시되거나, 부모 레이아웃에 맞게 재조정됩니다.
결론:
root가 있는 경우, 레이아웃이 View 객체로 변환될 때 LayoutParams는 root 뷰가 어떤 레이아웃인지에 따라 그 레이아웃의 규칙에 맞는 속성으로 바뀌며, 이 속성은 뷰의 크기와 위치에 영향을 미칩니다.
3. attachToRoot가 false 일 때,다른 ViewGroup의 자식 뷰로 추가해도 될까?
엉뚱한 생각일 수 있지만, 예를 들어 inflate() 메소드를 사용하여 View 객체를 생성 할 때 root 뷰로 ll_button_list_01을 사용하고, ll_button_list_02의 자식뷰로 추가할 수 있을까?라는 의문이 들었습니다.
결론부터 말하자면 Exception은 발생하지 않지만 자식뷰로 추가되지도 않습니다. 그 이유는 inflate() 메소드 호출 시 root를 ll_button_list_01로 전달했기 때문입니다. 그로 인하여 반환된 View 객체는 ll_button_list_01의 LayoutParams를 따르게 되며, 이 때문에 ll_button_list_02에 자식 뷰로 추가하려고 할 때 호환되지 않는 LayoutParams 때문에 추가되지 않는 것입니다.
만약 root가 null이었다면, View는 특정한 부모의 LayoutParams에 의존하지 않기 때문에 다른 ViewGroup에 자식 뷰로 문제없이 추가할 수 있었을 것입니다.