- 파이썬 실행해 볼 때는 터미널에서 python 이름.py 로 실행해보기
PyAutoGui 설치
pip install pyautiguiposition() = 마우스 커서 위치 확인
- 마우스 커서의 현재 위치를 (x,y) 튜퓰의 형태로 반환
print(pyautogui.position())

=> Point(x=1182, y=367)
size() = 모니터 위치 크기 확인
print(pyautogui.size())

=> Size(width=2560, height=1440)
moveTo() = 마우스 커서 이동
pyautogui.moveTo(405, 598)
pyautogui.click()
click() = 마우스 클릭, 더블클릭
pyautogui.click(405, 598)
pyautogui.doubleClick()
button 설정하기 (좌,우,휠 클릭)
pyautogui.click(405, 598, button = 'right')
pyautogui.click(405, 598, button = 'left')
pyautogui.click(405, 598, button = 'middle')
interval 설정하기 (클릭횟수,시간설정)
pyautogui.click(405, 598, click = 2, interval= 0.5)moveRel( ) = 마우스 현위치에서 이동
pyautogui.moveRel(0,100)dragTo( ) = 마우스 드래그
- 3번째 인수의 값을 넣어주면 드래그 시간 설정
- 현재 커서위치에서 x=400, y=400의 위치로 2초동안 왼쪽 버튼을 누른 채로 이동
- dragRel 은 상대적 이동.
현재위치에서 x=30,y=0만큼 2초동안 오른쪽버튼 누른채로 드래그
pyautogui.dragTo(300, 300, button='left')
pyautogui.dragTo(400, 400, 2, button='left')
pyautogui.dragRel(30, 0, 2, button='right')
typewrite() = 문자,리스트 입력
pyautogui.click(1046,312)
pyautogui.typewrite('Hello', interval=0.1)

pyautogui.click(1046,512)
pyautogui.typewrite(['a', 'b', 'c'], interval=0.1)
hotkey() = 단축키 입력하기
pyautogui.hotkey('ctrl', 'c')  # ctrl-c to copy
pyautogui.hotkey('ctrl', 'v')  # ctrl-v to paste
keyDown(), keyUp() = 키 누르기
pyautogui.keyDown('p')
pyautogui.keyUp('p')
press() = keydown + up
pyautogui.press('c')KEYBOARD_KEYS 모든 키리스트 확인하기
print(pyautogui.KEYBOARD_KEYS)screenshot() = 스크린샷찍기
im1 = pyautogui.screenshot()
im2 = pyautogui.screenshot('test.png')
im3 = pyautogui.screenshot('test3.png', region=(0, 0, 300, 300))
locateOnScreen() = 이미지 영역 찾기
test = pyautogui.locateOnScreen('test.png')
print(test)

=>
Box(left=490, top=1167, width=66, height=46)
center () = 이미지 영역 가운데 위치
test = pyautogui.locateOnScreen('test.PNG')
center = pyautogui.center(test)
print(center)

=>
Point(x=523, y=1190)
click () = 클릭하기
center = pyautogui.locateCenterOnScreen('test.PNG')
pyautogui.click(center)
alert() = 알림창띄우기
pyautogui.alert('테스트 메시지')

test = pyautogui.alert('테스트 메시지입니다')
print(test)

# 2개 연속사용시 위에꺼 눌러야 밑에꺼 뜬다.
confirm() = 확인창 띄우기
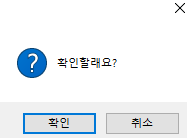
confirm = pyautogui.confirm('확인할래요?')
print(confirm)
# 확인 , 취소 버튼 2개가 나온다
# 확인 누를시 OK, 취소 누를시 Cancel 반환

a = pyautogui.confirm('Enter option', buttons=['A', 'B', 'C'])

if a == 'A':
    print('You selected A')
elif a == 'B':
    print('You selected B')
else:
    print('You selected C')

# 3개의 버튼이 뜨고 원하는걸 선택하면 그거에 대한게 반환된다.
=> You selected B
prompt() = 입력값 받기
id = pyautogui.prompt('What is your id?')
print(id)

=> corial
password() = 비밀번호 받기
pw = pyautogui.password('Enter password (hidden mode)')
print(pw)
안전장치
- 코드가 잘못 프로그램된 경우, 마우스,키보드 제어힘들시 사용
- 마우스 커서가 화면의 왼쪽 위 모서리(x=0,y=0)로 이동하면 종료
- 필요 없다면 밑에 처럼 설정
pyautogui.FAILSAFE = FalsePAUSE = 딜레이 추가하기
- PAUSE 의 디폴트 값은 0.1초
pyautogui.PAUSE = 2.5
pyautogui.moveTo(200, 200)
pyautogui.click()
Backend Delveloper