hash란?
브라우저에서 hash란 url의 #과 함께 있는 부분 식별자입니다.
예를들어 url이 https://www.naver.com/#example
이라면 #example이 이 url의 hash가 됩니다.
const url = new URL('https://www.naver.com/#exmaple');
console.log(url.hash); // #example
hashchange란?
브라우저에서 hash값이 바뀔때 발생하는 이벤트입니다.
브라우저 url 부분이 바뀌는 것이므로 이벤트 리스너는 window에 등록할 수 있습니다.
window.addEventListener('hashchange', () => console.log(location.hash)); 이런 형태로 EventListener를 등록하여 hash 값이 변하는 것을 감지하여 프로그램이 동작하도록 처리할 수 있습니다.
목표하는 라우터의 사용법
// 라우터 초기화 및 등록
const router = new Router();
router.add(hash, component);
// 라우터를 이용하여 다른 페이지로 이동하기
router.push('#home');
위와 같은 형태로 사용하고자 합니다.
라우터 설계
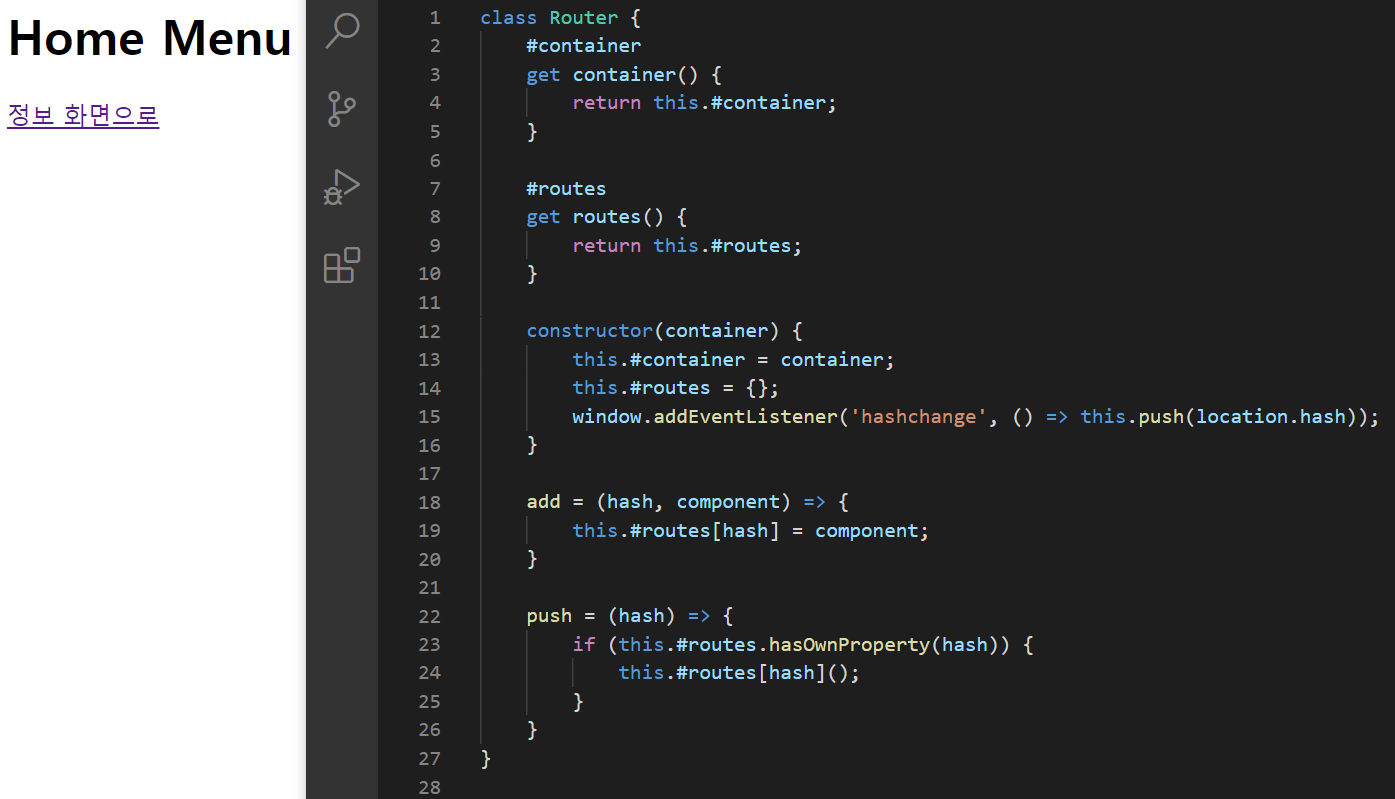
class Router {
    #routes // private 변수, 여러 hash 값과 그에 해당하는 컴포넌트를 매칭할 객체
    get routes() {
        return this.#routes;
    }

    constructor() {
        this.#routes = {};

        // hashchange 이벤트가 발생하면 해당 경로에 맞는 컴포넌트 실행하기
        window.addEventListener('hashchange', () => this.push(location.hash));
    }

    // hash와 컴포넌트 추가하기
    add = (hash, component) => {
        this.#routes[hash] = component;
    }

    // 컴포넌트 실행
    push = (hash) => {
        if (this.#routes.hasOwnProperty(hash)) {
            this.#routes[hash]();
        }
    }
}
이처럼 아주 간단한 수준의 라우터를 만들어봤습니다.
예시 컴포넌트 만들기
// #home 에 매칭될 간단한 화면 컴포넌트
class Home {
    constructor(container) {
        const template = `
            <div>
                <h1>Home Menu</h1>
            </div>
            <div>
                <a href="#info">정보 화면으로</a>
            </div>
        `;

        container.innerHTML = template;
    }
}

// #info 에 매칭될 간단한 화면 컴포넌트
class Info {
    constructor(container) {
        const template = `
            <div>
                <h1>Information</h1>
            </div>
            <div>
                <div>
                    반갑습니다!
                </div>
                <a href="#home">첫 화면으로</a>
            </div>
        `;

        container.innerHTML = template;
    }
}
라우터 생성 및 사용
const container = document.querySelector('#app');

// 라우터 생성
const router = new Router();
// 라우터 등록
router.add('#home', () => new Promise((resolve) => resolve(new Home(container))));
router.add('#info', () => new Promise((resolve) => resolve(new Info(container))));
// 라우터 페이지 이동 처리(시작할때 home으로 보내기)
router.push('#home');
전체 html 및 javascript 코드
index.html
<!DOCTYPE html>
<html>
<head>
    <meta charset="UTF-8">
    <meta http-equiv="X-UA-Compatible" content="IE=edge">
    <meta name="viewport" content="width=device-width, initial-scale=1.0 shrink-to-fit=no">
    <title>router 만들기</title>
</head>
<body>
    <div id="app">

    </div>
    <script src="app.js" type="module"></script>
</body>
</html>
app.js
class Router {
    #routes
    get routes() {
        return this.#routes;
    }

    constructor() {
        this.#routes = {};
        window.addEventListener('hashchange', () => this.push(location.hash));
    }

    add = (hash, component) => {
        this.#routes[hash] = component;
    }

    push = (hash) => {
        if (this.#routes.hasOwnProperty(hash)) {
            this.#routes[hash]();
        }
    }
}

class Home {
    constructor(container) {
        const template = `
            <div>
                <h1>Home Menu</h1>
            </div>
            <div>
                <a href="#info">정보 화면으로</a>
            </div>
        `;

        container.innerHTML = template;
    }
}

class Info {
    constructor(container) {
        const template = `
            <div>
                <h1>Information</h1>
            </div>
            <div>
                <div>
                    반갑습니다!
                </div>
                <a href="#home">첫 화면으로</a>
            </div>
        `;

        container.innerHTML = template;
    }
}

const container = document.querySelector('#app');
const router = new Router();
router.add('#home', () => new Promise((resolve) => resolve(new Home(container))));
router.add('#info', () => new Promise((resolve) => resolve(new Info(container))));
router.push('#home');
결론
이처럼 최대한 간단한 버전의 router를 만들어보았습니다. 많이 부족하지만 피드백을 통해 더 좋은 방법을 익히고 싶습니다!
.png)
풀스택 개발자 꿈나무

대단하네요! 저도 한 번 따라 해봐야겠어요! 저장해두겠습니다.