Admin 화면 마무리하자. 진짜 찐으로...
먼저 글 수정 & 삭제 화면에서 사용할 검색을 수행하는 컴포넌트, 검색 결과를 Table 형태로 노출하는 컴포넌트를 만들자.
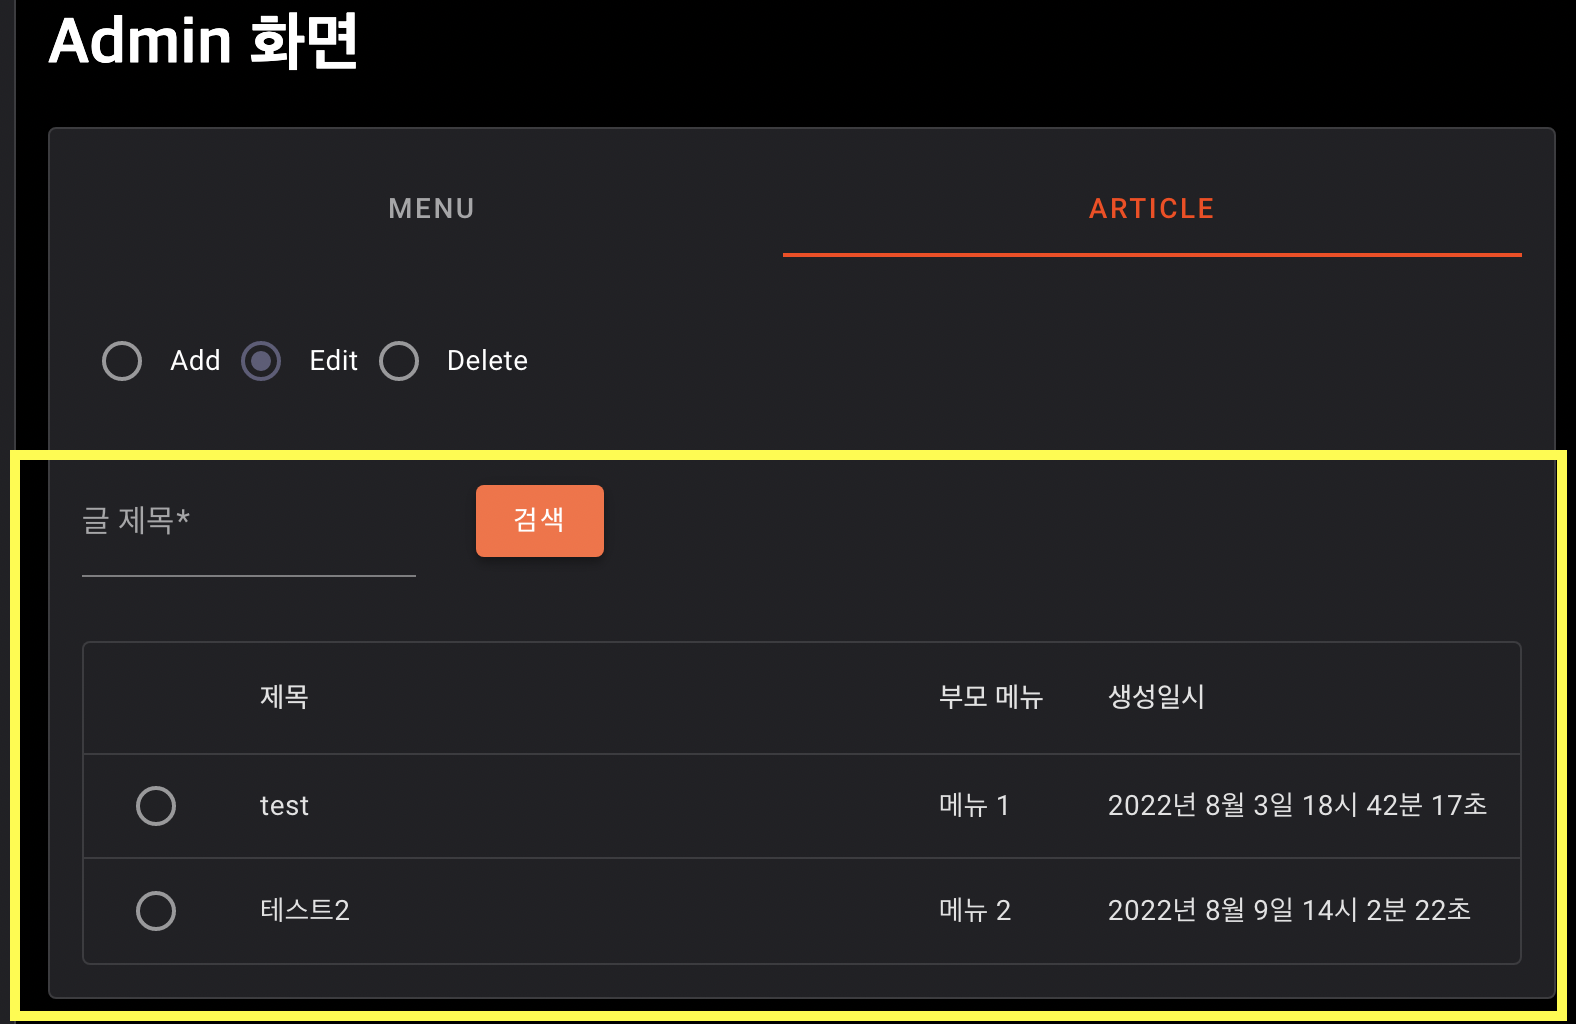
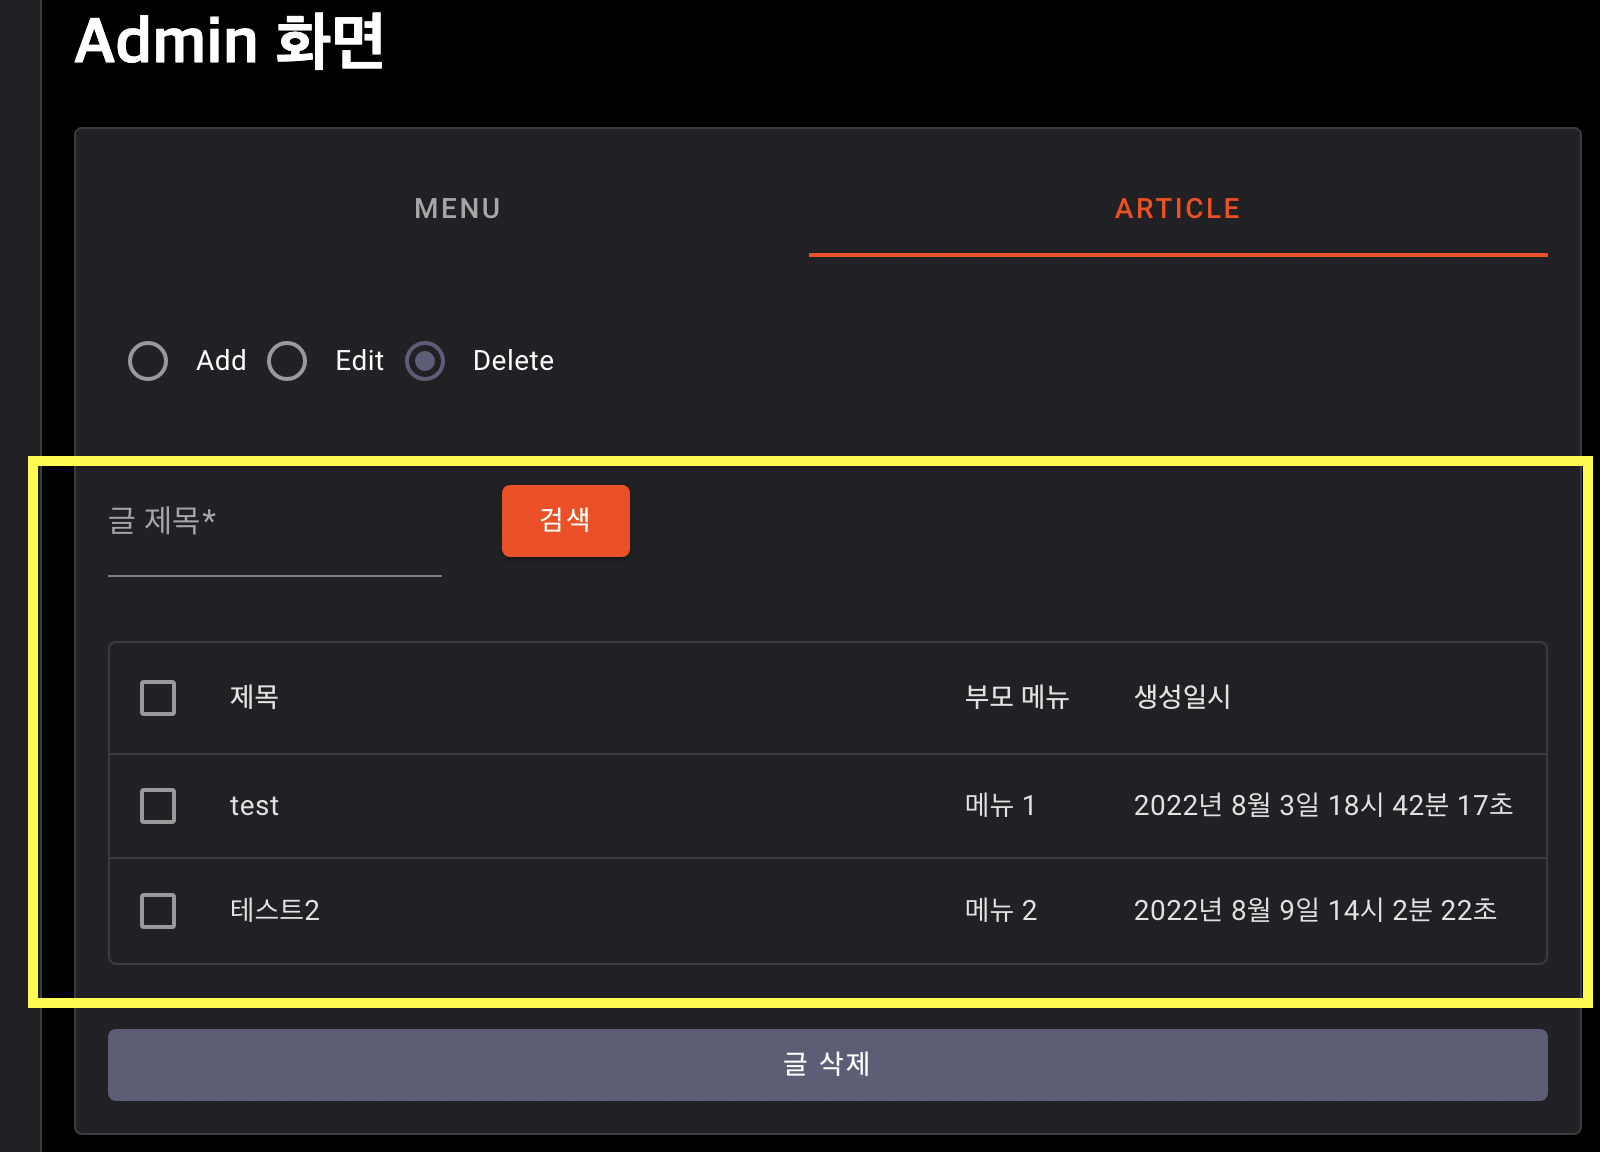
최종적으로는 아래와 같은 형태로 사용된다.
<SearchArticleContianer let:articles={articles} bind:this={searchArticleContianer}>
	<SearchArticleTableResult articles={articles} isRadio={true} on:select={select} bind:this={searchArticleTableResult}></SearchArticleTableResult>
</SearchArticleContianer>| 검색 결과 없을때 | 검색 결과 있을때 (Radio) | 검색 결과 있을때 (Checkbox) |
|---|---|---|
 |  |  |
SearchArticleContianer.svelte
input 으로 keyword 를 받아서 GET /article 를 호출한다.
<Content style="display: flex; align-items: center;">
	<Textfield bind:value={name} label="글 제목" required></Textfield>
	<Button style="margin-left: 30px;" on:click={ search } variant="raised"><Label>검색</Label></Button>
</Content>

<slot articles={articles}></slot>

<script>
	import Button, { Label } from '@smui/button';
	import { Content } from '@smui/card';
	import Textfield from '@smui/textfield';

	import { getArticle } from '../../api/article.js';


	let name = '';

	let articles = [];

	const search = async () => {
		const response = await getArticle({keyword: name});

		articles = response?.data || [];
	};

	export function reset() {
		search();
	}

</script>
<slot articles={articles}></slot> 에는 API 호출 결과를 전달한다. (svelte slot 에 대해선 https://svelte.dev/tutorial/slots 참조)
뭐 결국 <slot> 위치에 렌더링될 컴포넌트에 API 호출 결과가 전달되는 형태... Admin 화면에서는 <SearchArticleTableResult> 컴포넌트가 렌더링 되겠지용.
굳이 <slot> 을 쓴 이유는 혹시 Table 말고 다른 형태로 결과를 노출할 수도 있지 않을까 해서임.
SearchArticleTableResult.svelte
검색 결과를 Table 형태로 노출하는 컴포넌트로 Svelte Material UI 의 Data Table 컴포넌트를 사용했다. (https://sveltematerialui.com/demo/data-table/)
추가로 row 를 선택해야 하므로 CheckBox 혹은 Radio 를 colomn 에 추가하고 row 가 선택될때마다 상위 컴포넌트에 event 를 날리도록 구현했다.
그 외에 특이한 부분은 없는 듯.
{#if articles.length > 0}
<Content>
	<DataTable table$aria-label="User list" style="width: 100%;">
		<Head>
			<Row>
				{#if isRadio}
				<Cell></Cell>
				{:else}
				<Cell checkbox><Checkbox /></Cell>
				{/if}
				<Cell>제목</Cell>
				<Cell>부모 메뉴</Cell>
				<Cell>생성일시</Cell>
			</Row>
		</Head>
		<Body>
			{#each articles as article, i}
			<Row>
				{#if isRadio}
				<Cell><Radio bind:group={selected} value={article} /></Cell>
				{:else}
				<Cell checkbox><Checkbox bind:group={selected} value={article} valueKey={article._id}
					/></Cell>
				{/if}
				<Cell style="width: 100%;">{article.title}</Cell>
				<Cell>{getAllParentsNames(article.parent)}</Cell>
				<Cell>{getCreatedString(article.created)}</Cell>
			</Row>
			{/each}
		</Body>
	  </DataTable>
</Content>
{:else}
<Content>
	<em>검색 결과가 읍슴다~</em>
</Content>
{/if}

<script>
	import { Content } from '@smui/card';
	import DataTable, { Head, Body, Row, Cell } from '@smui/data-table';
  	import Checkbox from '@smui/checkbox';
	import Radio from '@smui/radio';
	import { createEventDispatcher } from 'svelte';

	import menu from '../../store/menu.js';

	const dispatch = createEventDispatcher();

	export let articles = [];
	export let isRadio = false;

	let selected = isRadio ? null : [];

	const menuMap = new Map();

	const makeMenuMap = () => {
		let arr = [...$menu];

 		while (arr.length > 0) {
			const current = arr.shift();

			menuMap.set(current._id, current);

			arr = [...arr, ...current.children];
		}
	};

	const getAllParentsNames = _id => {
		if (menuMap.size === 0) {
			makeMenuMap();
		}

		const target = menuMap.get(_id);

		if (!target) {
			return '';
		}

		let str = '';

		let temp = target;
		while (temp) {
			str = `${temp.name}${str.length > 0 ? ' > ' : ''}${str}`;
			temp = temp.parent;
		}

		return str;
	};

	const getCreatedString = created => {
		const date = new Date(created);

		return `${date.getFullYear()}년 ${date.getMonth() + 1}월 ${date.getDate()}일 ${date.getHours()}시 ${date.getMinutes()}분 ${date.getSeconds()}초`;
	};

	$: dispatch('select', { selected: selected });

	export function reset() {
		selected = isRadio ? null : [];
	}
</script>
위에서 만든 두 컴포넌트를, 실제로 DELETE /article 을 호출하는 글 삭제 화면 - AdminDeleteArticle.svelte 에 적용해보자.
-
AdminDeleteArticle.svelte<SearchArticleContianer let:articles={articles} bind:this={searchArticleContianer}> <SearchArticleTableResult articles={articles} on:select={select} bind:this={searchArticleTableResult}></SearchArticleTableResult> </SearchArticleContianer> <Content> <Group variant="unelevated" style="display: flex; justify-content: stretch;"> <Button color="secondary" on:click={ deleteTargets } variant="raised" style="flex-grow: 1;"><Label>글 삭제</Label></Button> </Group> </Content> <script> import Button, { Group, Label } from '@smui/button'; import { Content } from '@smui/card'; import { deleteArticle } from '../../api/article.js'; import SearchArticleContianer from './SearchArticleContianer.svelte'; import SearchArticleTableResult from './SearchArticleTableResult.svelte'; let searchArticleContianer; let searchArticleTableResult; let selected = []; const select = e => { selected = e.detail.selected; }; const deleteTargets = async () => { if (selected.length === 0) { alert('삭제할 글 선택하숑~'); return; } const response = await deleteArticle({ _id: selected.map(s => s._id) }); if (response?.success) { alert(`글 삭제에 성공하였습니다.`); searchArticleTableResult.reset(); searchArticleContianer.reset(); } else { alert(`글 삭제에 실패하였습니다.`); } }; </script>
글 수정 화면 - AdminEditArticle.svelte 도 마찬가지로 적용함 ㅎㅎ (https://github.com/crazydj2/blog-frontend/tree/master/src/view/child 참조)
두 화면 다 모두 잘 동작하는 것 확인했다.
몇몇 UI 중에 거슬리는 부분이 보이긴 하는데... 뭐 기능에는 문제 없으니까 넘어가자....
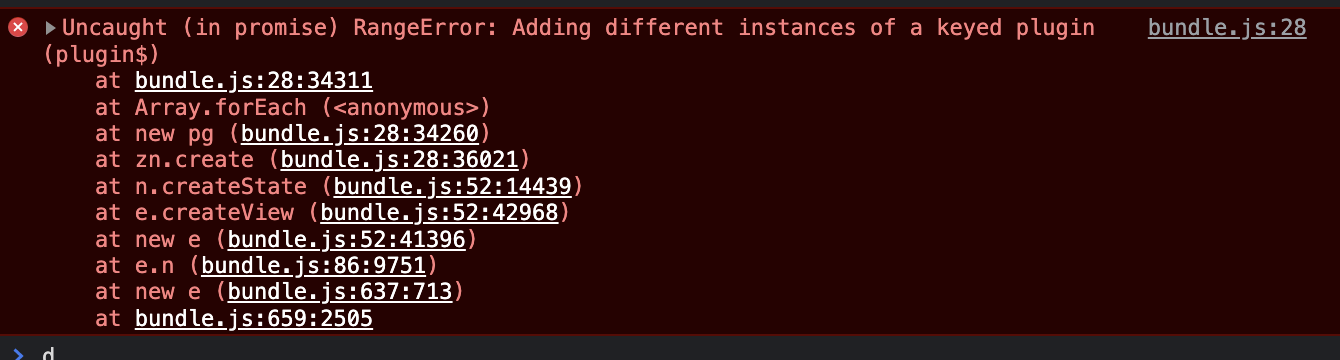
참고로 아래와 같은 에러가 나와서 애먹었는데, @toast-ui/editor 의 최신 버전을 쓰면 저 에러가 계속 발생하더라.
그래서 @toast-ui/editor 플러그인 버전을 3.1.7 로 고정해서 사용하고 있음.
이제는 메뉴 & 글 샘플 데이터를 좀 만들고 Article List 컴포넌트 마무리 좀 하고 Article Detail 화면만 만들면 됨...
