-Preview-
| Defaults Refreshable | Custom Refreshable |
|---|---|
 |  |
-View made today-
| Defaults Refreshable View | Custom Refreshable View |
|---|---|
 |  |
| .refreshable 사용 | CustomRefreshable 사용 |
-View Review-
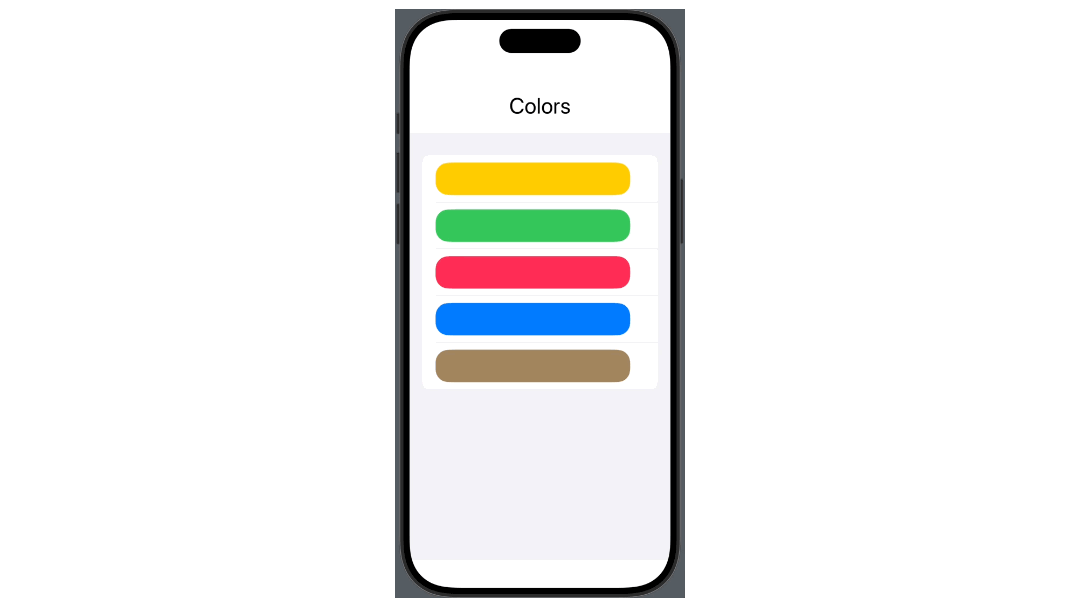
1. Defaults Refreshable View
앱을 사용하다가 새로고침이 필요할 때, 화면을 아래로 당기면 로딩과 함께 새로고침이 이루어진다. 이를
Pull to Refresh라고 하며, 이 기능을 사용하기 위해서.refreshable코드를 사용한다.List나ScrollView에서 사용할 수 있다.
.refreshable선언은 아래와 같다.func refreshable(action: @escaping () async -> Void) -> some View사용자가 새로고침을 요청할 때 발생하는 SwiftUI의 비동기 처리기이다.
핵심코드
.refreshable {
	await colors.append(contentsOf: addColors())
}
1) Color 배열 생성
이번에는 새로고침이 될 때마다 새로운 블록이 생성되는 뷰를 만드려고 한다.
List를 활용할 생각이기 때문에 이 때 활용할 배열 값을 먼저 생성해준다.
@State private var colors: [Color] = [.yellow, .green, .pink, .blue, .brown]2) List 생성하기
위에서 만든 배열을 활용하여 List를 만들어 준다.
// colors 배열의 멤버 수만큼 RoundedRectangle 반환
List(colors, id: \.self) { color in
	RoundedRectangle(cornerRadius: 20)
		.frame(width: 300, height: 50)
		.foregroundStyle(color)
}
3) Color값을 추가할 함수 선언
새로고침이 될 때마다 colors 배열에 Color값이 추가되도록 함수를 선언한다.
이 때, 함수에 async를 선언하여 비동기작업임을 설정해준다.
// 함수가 호출될 때마다 3가지 색을 배열에 추가
func addColors() async -> [Color] {
    return [.red, .orange, .gray]
}async는 비동기(Asynchronous) 작업을 처리하기 위해 도입된 키워드로, 비동기 작업을 보다 쉽게 작성하고 관리할 수 있도록 한다.
비동기 작업은 일반적으로 네트워킹, 파일 입출력(I/O), 타이머와 같은 시간이 오래 걸리는 작업을 처리할 때 사용된다.
async로 정의된 함수는 await와 함께 사용되는데, await는 비동기 작업이 완료될 때까지 기다렸다가 그 결과를 반환하는 동작을 수행하는 코드이다.
4) Refreshable 선언
마지막으로 List뷰에 Refreshable을 선언하여 새로고침을 구현한다.
List { ... }
.refreshable {
// addColors 함수가 async를 정의하는 비동기 작업이므로 await를 함께 사용한다.
await colors.append(contentsOf: addColors())
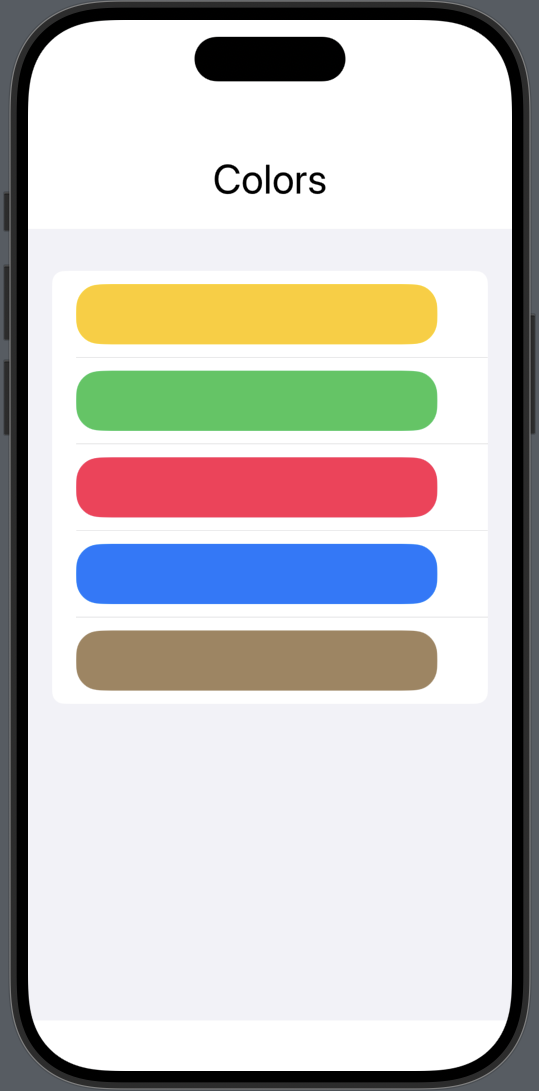
}5) 구현 결과물

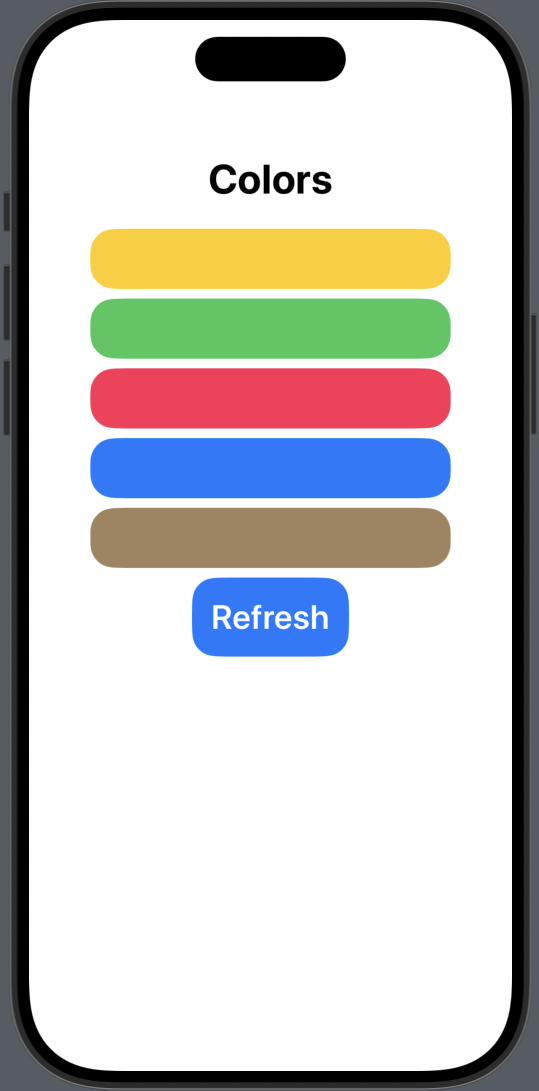
2. Custom Refreshable View
위에서 작성한
Refreshable의 경우 리스트나 스크롤 뷰에서만 쓸 수 있는Pull to Refreshable방식이다.
그러나 우리는 당기는 형식이 아닌 다른 방법으로도 뷰를 새로고침 할 수 있게끔 만들고 싶을 수 있다. 이를 위해 SwiftUI에서는Refreshable을 커스텀할 수 있도록RefreshAction을 제공한다.
RefreshAction은 구조체 타입이며 기본적으로refresh환견 값에 해당 인스턴스가 포함되어 있어 기본 뷰의Environment가 새로고침을 제공해준다.
이번에는Refreshable을 버튼 형식으로 커스텀 해보았다.핵심코드
struct CustomRefreshable: View {
    @Environment(\.refresh) private var refresh
    var body: some View {
        Button("Refresh") {
            Task {
                await refresh?()
            }
        }
        .disabled(refresh == nil)
    }
}
1) 배열 생성
먼저 위에서 Refreshable을 구현할 때와 마찬가지로 새로고침을 할 때마다 Color값을 가진 RoundedRectangle을 추가할 것이기 때문에 Color타입으로 배열을 생성해준다.
@State private var colors: [Color] = [.yellow, .green, .pink, .blue, .brown]2) ForEach로 기본값 세팅
이번에는 ForEach를 사용하여 뷰를 생성할 것이기 때문에 위에서 만든 배열을 사용하여 ForEach를 선언한다.
// colors 배열의 멤버 수만큼 RoundedRectangle 생성
ForEach(colors, id: \.self) { color in
	RoundedRectangle(cornerRadius: 20)
		.frame(width: 300, height: 50)
		.foregroundStyle(color)
}
3) Custom Refreshable 선언
Custom Refreshable을 만들기 위해서는 구조체를 선언하고 해당 구조체에 @Environment를 선언해야 한다.
그리고 뷰 내부에 버튼을 생성한 뒤 액션 값으로 Task를 사용한 비동기 작업으로 refresh를 선언해준다.
struct CustomRefreshable: View {
	// refreshable을 사용하기 위한 선언
    @Environment(\.refresh) private var refresh

    var body: some View {

        Button("Refresh") {
        	// 버튼 클릭시 Task를 통해 refresh를 비동기로 처리
            Task {
                await refresh?()
            }
        }
        .font(.title)
        .fontWeight(.semibold)
        .foregroundStyle(Color.white)
        .padding()
        .background(Color.blue)
        .cornerRadius(20)
        .disabled(refresh == nil)
    }
}
4) Custom Refreshable 사용
이제 위에서 만든 Custom Refreshable을 메인 뷰에 선언하여 Refreshable 메서드를 사용한다.
CustomRefreshable()
	.refreshable {
		await colors.append(contentsOf: addColors())
	}
5) 구현 결과물

-Today's lesson review-
오늘은 새로고침에 대해 학습하고 Refreshable과 RefreshAction을 활용한 새로고침을 구현해 보았다.
Custom Refreshable을 만들며 여러 에러가 나타나기도 하고, 비동기 작업이라던가 async, await 같은 생소한 코드들이 등장하여
공부하는데 시간을 더 많이 쓴 것 같다.
SwiftUI에 대해 꽤 공부했다고 생각했는데 여전히 내가 모르는 코드는 많고
공부해야할 코드들이 산더미처럼 있다.
제대로 더 공부해서 인터넷의 도움없이 코드를 다룰 줄 아는 사람이 되고싶다.