
-Preview-
| Selected Profile Image |
|---|
 |
-Project progress-
- SplashView 구현
- CustomTabView 구현
- SettingView 구현
- HomeView 구현
- AccountView 구현
- SwiftDataView 구현
- DailyQuizView 구현 / 퀴즈 DB, 랜덤 퀴즈 구현 필요
- RankSystem 구현
-View made today-
| ActionSheet | LazyGridView |
|---|---|
 |  |
| actionSheet를 사용한 선택지 | LazyGrid를 활용한 선택지 제공 |
-View Review-
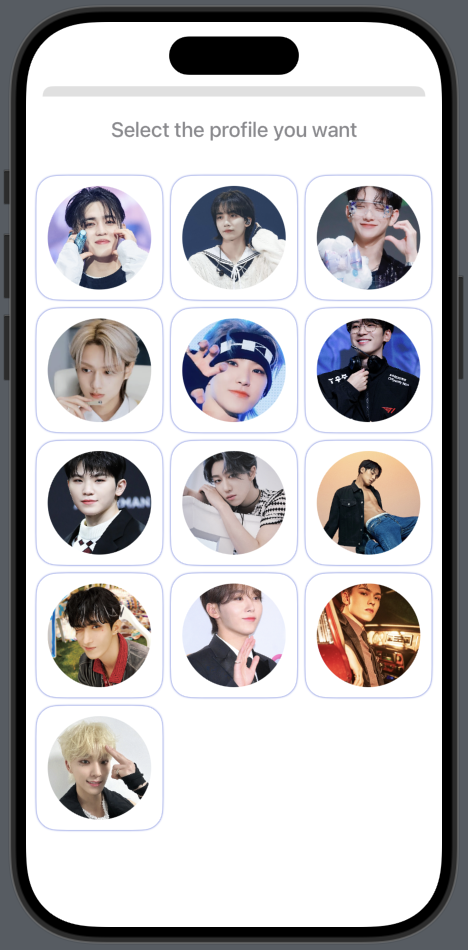
1. LazyGridView
사용자가 프로필 사진을 변경할 때, 사용자의 갤러리에서 사진을 선택하는 방법과 앱에서 기본으로 제공하는 이미지를 선택할 수 있는 선택지를 준다. 이 때 앱에서 기본 제공하는 이미지를 선택하면 보여질 화면을
LazyGrid를 사용하여 구현하였다.핵심코드
LazyVGrid(columns: self.columns) {
	ForEach(defaultsProfileImage, id: \.self) { item in
		Button(action: {
			let profileImage = UIImage(named: item)
			let imageData = profileImage?.pngData()
			self.selectedImageData = imageData
			UserDefaults.standard.set(imageData, forKey: "profileImage")
			showDefaultsImagePicker = false
}) { // label... }
1) Image 배열 생성
먼저 기본으로 제공할 이미지를 프로젝트 Asset에 넣고, 이미지의 이름을 [String]배열로 선언한다.
private let defaultsProfileImage: [String] = ["승철",
                                              "정한",
                                              "지수",
                                              "준휘",
                                              "순영",
                                              "원우",
                                              "지훈",
                                              "명호",
                                              "민규",
                                              "도겸",
                                              "승관",
                                              "한솔",
                                              "찬"]
2) LazyGrid column값 정의하기
LazyGrid를 생성하기 위해 [GridItem]값을 가진 column을 정의해준다. LazyGrid를 선언할 때 입력해도 되지만, 가독성과 편의를 위해 미리 선언해둔다.
// 이번에선 3xn 값으로 3열로 보여주고 싶었기 때문에 GridItem(.flexible())을 3번 넣어줬다.
private let columns: [GridItem] = [GridItem(.flexible()),GridItem(.flexible()),GridItem(.flexible())]
3) LazyGrid 선언하기
위에서 만든 columns와 defaultsProfileImage를 활용하여 LazyGrid를 선언하고 내부에서 ForEach를 통해 뷰를 구현한다.
LazyVGrid(columns: self.columns) {
ForEach(defaultsProfileImage, id: \.self) { item in
// 클릭 이벤트를 위해 뷰를 버튼으로 구현
Button(action: {
// 선택한 이미지를 Data로 변환한다.
// 변환한 Data를 Binding값(selectedImageData)으로 보낸다.
// 변환한 Data를 UserDefaults에 저장한다.
let profileImage = UIImage(named: item)
let imageData = profileImage?.pngData()
self.selectedImageData = imageData
UserDefaults.standard.set(imageData, forKey: "profileImage")
showDefaultsImagePicker = false
}) {
// 보여질 이미지 뷰 설정
RoundedRectangle(cornerRadius: 20)
.frame(height: 120)
.foregroundStyle(Color.white)
.shadow(color: Color.parsta, radius: 1)
.overlay {
Image(item)
.resizable()
.scaledToFill()
.frame(width: 100, height: 100)
.clipShape(Circle())
}
}
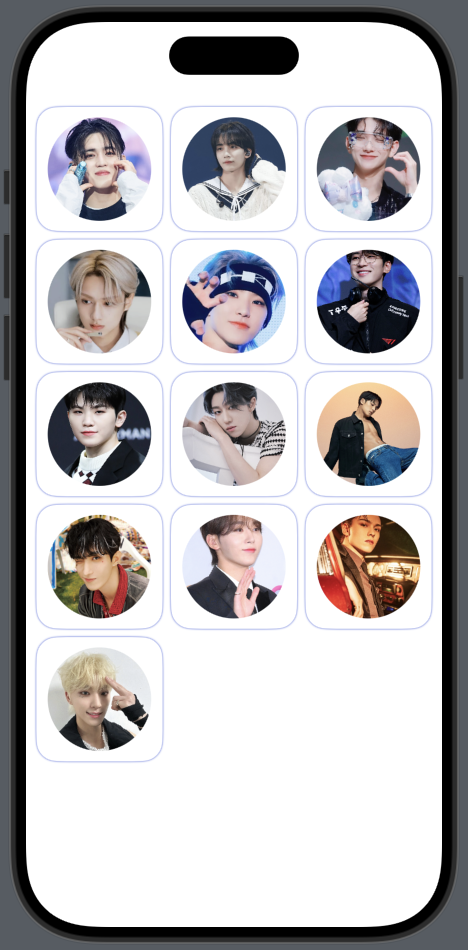
}4) 구현 결과물
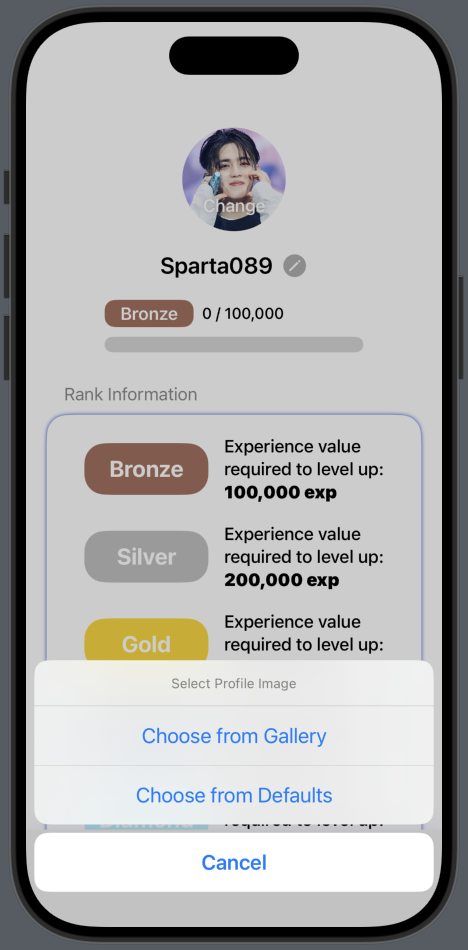
2. ActionSheet
사용자가 프로필 사진을 선택할 때, 사용자의 갤러리에서 사진을 선택할 것인지 앱에서 기본적으로 제공하는 이미지를 선택할 수 있는지 선택지를 주기 위해
actionSheet와sheet를 활용하여 해당 기능을 구현한다.핵심코드
.actionSheet(isPresented: $actionSheetShowing) {
	ActionSheet(title: Text("Select Profile Image"), message: nil, buttons: [
		.default(Text("Choose from Gallery")) {
			self.showPhotosPicker = true
		},
		.default(Text("Choose from Defaults")) {
			self.showDefaultsImagePicker = true
		},
		.cancel()
	])
}
1) 초기 상태 설정
actionSheet는 특정 값의 상태 변화에 따라 이벤트가 발생하기 때문에 @State 혹은 @Binding값을 통해 변수를 지정해 주어야 한다.
@State private var actionSheetShowing: Bool = false // 액션시트를 open 시킬 변수
@State private var showDefaultsImagePicker: Bool = false // sheet에 사용할 변수
@State private var showPhotosPicker: Bool = false // sheet에 사용할 변수
2) 트리거 생성
actionSheet를 작동시키기 위해 Button을 사용하여 트리거를 만들어준다.
Button(action: {
	// 버튼을 클릭하면 액션시트가 활성화
	self.actionSheetShowing = true
}) {
	Text("Change")
		.font(.headline)
		.fontWeight(.medium)
		.foregroundStyle(Color.white)
		.shadow(radius: 3)
}
3) actionSheet 선언
트리거를 작동시켰을 때 액션시트에 나타날 항목을 지정해준다.
.actionSheet(isPresented: $actionSheetShowing) {
	ActionSheet(title: Text("Select Profile Image"), message: nil, buttons: [
    	// 버튼의 수는 사용자가 지정한 만큼 만들 수 있다.
        // 1. 사용자의 갤러리에서 이미지 선택
		.default(Text("Choose from Gallery")) {
			self.showPhotosPicker = true
		},
        // 2. 앱에서 기본 제공하는 이미지 선택
		.default(Text("Choose from Defaults")) {
			self.showDefaultsImagePicker = true
		},
        // 취소 버튼
		.cancel()
	])
}
4) sheet로 액션 설정
액션시트에서 선택지를 선택했을 때 나타날 액션을 sheet를 통해 나타낸다.
// 사용자의 갤러리에서 사진을 선택할 경우
.sheet(isPresented: $showPhotosPicker) {
	ZStack {
    	// 시트 위에 포토픽커 라벨이 표시되며 해당 라벨을 통해 갤러리에 접근 가능
		PhotosPicker(selection: $selectedImage, matching: .images) {
			Text("Select a photo")
		}
        // photosPickerItem의 타입을 Data타입으로 변환 후 유저 정보에 저장
		.onChange(of: selectedImage) { _, image in
			Task {
				if let data = try? await image?.loadTransferable(type: Data.self) {
					selectedImageData = data
					UserDefaults.standard.set(data, forKey: "profileImage")
				}
			}
		}
	}
}
// 앱에서 기본 제공하는 이미지를 선택하는 경우
.sheet(isPresented: $showDefaultsImagePicker) {
	VStack {
		Text("Select the profile you want")
			.font(.title3)
			.fontWeight(.medium)
			.foregroundStyle(Color.secondary)
			.padding(.top, 20)

        // LazyGrid로 만든 뷰
		ParstaDefaultsProfileImage(showDefaultsImagePicker: $showDefaultsImagePicker, selectedImageData: $selectedImageData)
	}
}
5) 구현 결과물
| 기본 제공하는 이미지 선택 | 갤러리에서 이미지 선택 |
|---|---|
 |  |
| 사진 편집기능 구현 중 |
-Today's lesson review-
오늘은 사용자가 프로필사진을 선택할 때 선택지를 부여하고, 선택한 값에 따라 다른 결과를 보여주도록 actionSheet를 구현해보았다.
actionSheet의 사용법 자체는 별로 어렵지 않았지만, 구현 결과를 만드는데 시간이 오래 걸렸다.
갤러리에서 사진을 선택할 때 사진의 회전이나 크롭 등의 기능도 구현해보려고 했으나 잘 되지 않아 미완성 상태이다.
다음번에 편집 기능에 대해 재도전 해보려고 한다.
이유있는 코드를 쓰자!!