Kubeflow 1.4 설치
kubeflow를 설치하는데는 몇가지 어려움이 있어서 공유합니다.
- 삭제가 제대로 적용안되서 발생한 에러
- 대부분 문서가 1.2이하 버전의 내용위주와 하위버전이라는점..
문서에 대한 정확한 내용이 없는것도 있지만, 기존의 사용한 kfctl에서 새로운 kustomize툴을 이용하여 적용된점이 변경사항
환경
EKS kubernetes 1.21버전 사용 (가장 최신 1.22 로컬 minikube)
kubeflow 1.4.1설치 목표 - 최신 istio설치 목표
kustomize 3.2.0 설치
Install Tool
기존 kubeflow 1.2이하 버전까지는 kfctl이라는 툴을 이용하여 설치하였습니다.
kfctl툴은 삭제해도 되며, 사용하지 맙시다.
위의툴은 설치하는 서비스들이 2020년버전으로 특히 istio가 낮은 버전으로 설치되다보니 최신것을 사용하기 힘든 Dependency로 문제가 있습니다.
kubeflow 1.4가 있습니다.
https://github.com/kubeflow/manifests
https://github.com/kubeflow/manifests/releases
위의 release버전을 보시면 현재 1.4.1이 가장 최신입니다.
1.3부터는 설치를 kustomize을 이용하여 설치하게 되어있습니다. 꼭 참고바랍니다.
https://github.com/kubeflow/manifests#change-default-user-password
위의 문서를 참고하고 따라가기만 하면 됩니다.
아래 링크에서 중요한 부분
Kubernetes(tested with version1.19) with a default StorageClasskustomize(version3.2.0) (download link)- ⚠️ Kubeflow 1.4.0 is not compatible with the latest versions of of kustomize 4.x. This is due to changes in the order resources are sorted and printed. Please see kubernetes-sigs/kustomize#3794 and kubeflow/manifests#1797. We know this is not ideal and are working with the upstream kustomize team to add support for the latest versions of kustomize as soon as we can.
kustomize설치 참고
위의 문구에서도 Kubeflow 1.4는 kustomize 4.x가 안됩니다. 꼭 kustomize는 3.2대이하로 해주세요.
저같은경우 kustomize소스를 가지고 golang 컴파일을 통해서 내부에서 적용했습니다. 적절한 방법으로 하위 버전으로 설치하세요.
네임스페이스 삭제(중요)
위의 설명되로 설치하면 문제가 없을수도 있지만, 기존의 설치하면서 이력서 남는경우,
깔끔하게 삭제가 안되는경우가 있습니다. 아래와 같이 꼭 모든 네임스페이스를 삭제해야합니다.
# 설치하고자 하는 서비스가 이미 설치가 됐다면 깔끔하게 삭제처리하자 중요....
kubectl delete ns 네임스페이스이름

# 정확히 삭제가 아닌 terminated라고 나온다면 아래와 같이 finalize를 해줘야 설치가 정상적으로 가능하다.
kubectl get ns 네임스페이스이름 -o json | \
jq '.spec.finalizers=[]' | \
curl -X PUT [http://localhost:8001/api/v1/namespaces/네임스페이스이름/finalize](http://localhost:8001/api/v1/namespaces/kourier-system/finalize) -H "Content-Type: application/json" --data @-

# 설치된 validatingwebhookconfigurations가 있는지 확인
kubectl get validatingwebhookconfigurations

# 위의 검색된 설정을 깔끔히 삭제한다. (중요)
kubectl delete validatingwebhookconfigurations istiod-istio-system
실행
다 설치가 됐는지 확인해봅니다.
kubectl get pods -n cert-manager
kubectl get pods -n istio-system
kubectl get pods -n auth
kubectl get pods -n knative-eventing
kubectl get pods -n knative-serving
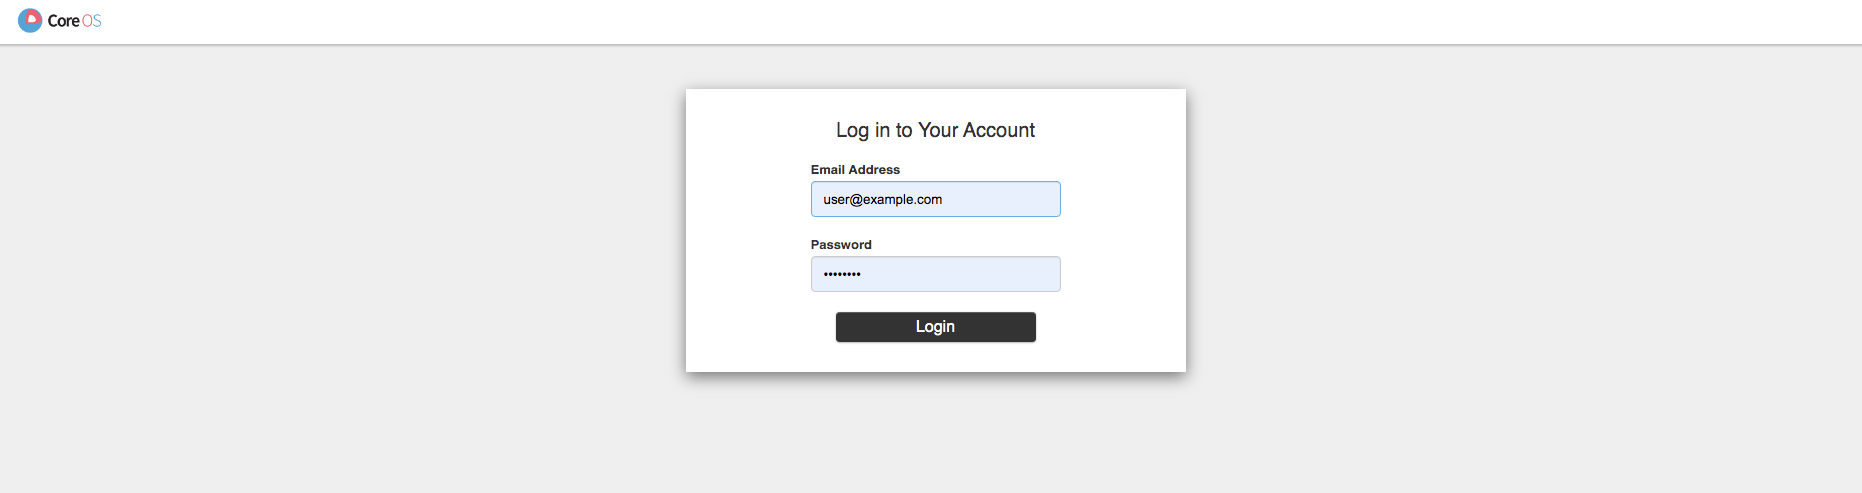
kubectl get pods -n kubeflow서비스 접근
kubectl port-forward svc/istio-ingressgateway -n istio-system 8080:80위의 서비스를 접근시 dex를 통해서 인증하게 됩니다.
auth 네임서비스의 configmap을 보시면 dex인증 기존 auth를 확인할수 있습니다.
아래 인증정보 입력해서 들어가면 끝입니다.
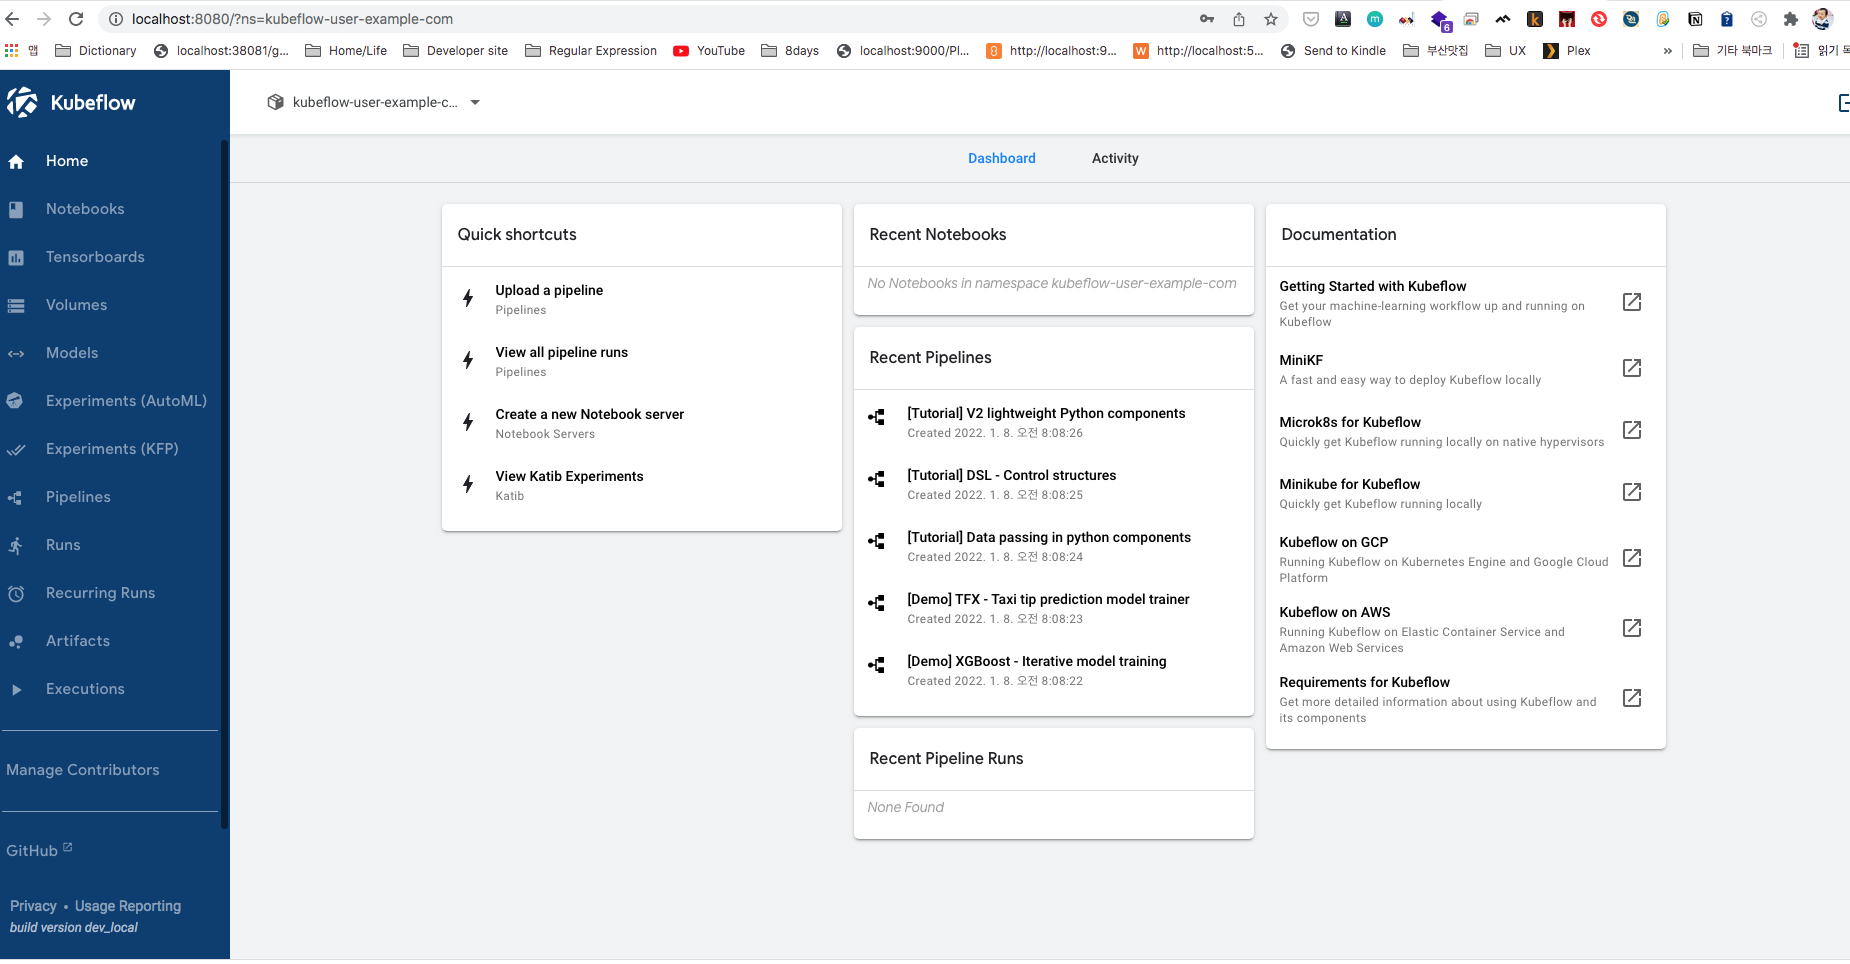
user@example.com / 12341234
참고
https://coffeewhale.com/kubernetes/admission-control/2021/04/28/opa1/