
전 포스팅에 이어서 workspace를 생성하고 배포하는 방법을 알아보겠습니다.
1. git push
전에 연동시킨 gitlab에 tarraform을 위한 네트워크 프로젝트를 push해야 합니다. 해당 코드를 하나의 폴더에 넣고 push 해줍니다.
# alb.tf
#######################
# alb 생성
#######################

resource "aws_lb" "test-velog-ecs-cluster-alb" {
  name               = "test-velog-ecs-cluster-alb"
  internal           = false
  load_balancer_type = "application"
  security_groups    = [aws_security_group.test_velog_ecs_cluster_alb_sg.id]
  subnets            = [aws_subnet.test_velog_public_a_subnet.id,aws_subnet.test_velog_public_c_subnet.id]
}
#######################
# security group 생성
#######################

# security group 생성
resource "aws_security_group" "test_velog_ecs_cluster_alb_sg" {
  name        = "test_velog_ecs_alb_sg"
  description = "allow to access alb from internet"
  vpc_id      = aws_vpc.test_velog_seoul_vpc.id

  egress {
    from_port        = 0
    to_port          = 0
    protocol         = "-1"
    cidr_blocks      = ["0.0.0.0/0"]
    }
}

# security group rule 생성
resource "aws_security_group_rule" "ecs_backend_sg_ingress_rule" {
  type              = "ingress"
  from_port         = 8080
  to_port           = 8080
  protocol          = "tcp"
  cidr_blocks       = ["0.0.0.0/0"]
  security_group_id = aws_security_group.test_velog_ecs_cluster_alb_sg.id
}
# security group rule 생성
resource "aws_security_group_rule" "ecs_front_sg_ingress_rule" {
  type              = "ingress"
  from_port         = 80
  to_port           = 80
  protocol          = "tcp"
  cidr_blocks       = ["0.0.0.0/0"]
  security_group_id = aws_security_group.test_velog_ecs_cluster_alb_sg.id
}
# main.tf
# terraform {
# required_providers {
# aws = {
# source = "hashicorp/aws"
# version = "~> 4.0"
# }
# }
# }
# #######################
# # Provider 설정
# #######################
# provider "aws" {
# region = "ap-northeast-2"
# }
#######################
# VPC 생성
#######################
resource "aws_vpc" "test_velog_seoul_vpc" {
cidr_block = "10.30.0.0/16"
tags = {
Name = "test_velog_seoul_vpc"
}
}
#######################
# 서브넷 생성
#######################
# 퍼블릭 서브넷 (가용영역 a)
resource "aws_subnet" "test_velog_public_a_subnet" {
vpc_id = aws_vpc.test_velog_seoul_vpc.id
cidr_block = "10.30.0.0/24"
availability_zone = "ap-northeast-2a"
tags = {
Name = "test_velog_public_a_subnet"
}
}
# 퍼블릭 서브넷 (가용영역 c)
resource "aws_subnet" "test_velog_public_c_subnet" {
vpc_id = aws_vpc.test_velog_seoul_vpc.id
cidr_block = "10.30.10.0/24"
availability_zone = "ap-northeast-2c"
tags = {
Name = "test_velog_public_c_subnet"
}
}
# 프라이빗 서브넷 (가용영역 a)
resource "aws_subnet" "test_velog_private_a_subnet" {
vpc_id = aws_vpc.test_velog_seoul_vpc.id
cidr_block = "10.30.20.0/24"
availability_zone = "ap-northeast-2a"
tags = {
Name = "test_velog_private_a_subnet"
}
}
# 프라이빗 서브넷 (가용영역 c)
resource "aws_subnet" "test_velog_private_c_subnet" {
vpc_id = aws_vpc.test_velog_seoul_vpc.id
cidr_block = "10.30.30.0/24"
availability_zone = "ap-northeast-2c"
tags = {
Name = "test_velog_private_c_subnet"
}
}
#######################
# 인터넷 게이트웨이 생성
#######################
resource "aws_internet_gateway" "test_velog_seoul_vpc_igw" {
vpc_id = aws_vpc.test_velog_seoul_vpc.id
tags = {
Name = "test_velog_seoul_vpc_igw"
}
}
#######################
# Nat 게이트웨이 생성
#######################
# 퍼블릭 서브넷 (가용영역 a)에 NAT 게이트웨이 생성
resource "aws_nat_gateway" "test_velog_seoul_public_a_nat" {
allocation_id = aws_eip.test_velog_seoul_public_a_nat_eip.id
subnet_id = aws_subnet.test_velog_public_a_subnet.id
tags = {
Name = "test_velog_seoul_public_a_nat"
}
}
# NAT 게이트웨이에 할당할 EIP 생성
resource "aws_eip" "test_velog_seoul_public_a_nat_eip" {
vpc = true
}
#######################
# 라우팅 테이블 생성
#######################
# 퍼블릭 라우팅 테이블
resource "aws_route_table" "test_velog_seoul_vpc_public_rt" {
vpc_id = aws_vpc.test_velog_seoul_vpc.id
route {
cidr_block = "0.0.0.0/0"
gateway_id = aws_internet_gateway.test_velog_seoul_vpc_igw.id
}
tags = {
Name = "test_velog_seoul_vpc_public_rt"
}
}
# 프라이빗 라우팅 테이블
resource "aws_route_table" "test_velog_seoul_vpc_private_rt" {
vpc_id = aws_vpc.test_velog_seoul_vpc.id
route {
cidr_block = "0.0.0.0/0"
nat_gateway_id = aws_nat_gateway.test_velog_seoul_public_a_nat.id
}
tags = {
Name = "test_velog_seoul_vpc_private_rt"
}
}
# 라우팅 테이블과 서브넷 연결
resource "aws_route_table_association" "public_a_subnet_rt_association" {
subnet_id = aws_subnet.test_velog_public_a_subnet.id
route_table_id = aws_route_table.test_velog_seoul_vpc_public_rt.id
}
resource "aws_route_table_association" "public_c_subnet_rt_association" {
subnet_id = aws_subnet.test_velog_public_c_subnet.id
route_table_id = aws_route_table.test_velog_seoul_vpc_public_rt.id
}
resource "aws_route_table_association" "private_a_subnet_rt_association" {
subnet_id = aws_subnet.test_velog_private_a_subnet.id
route_table_id = aws_route_table.test_velog_seoul_vpc_private_rt.id
}
resource "aws_route_table_association" "private_c_subnet_rt_association" {
subnet_id = aws_subnet.test_velog_private_c_subnet.id
route_table_id = aws_route_table.test_velog_seoul_vpc_private_rt.id
}# outpus.tf
# test_velog_seoul_vpc id 추출
output "test_velog_seoul_vpc_id" {
description = "test_velog_seoul_vpc_id"
value = aws_vpc.test_velog_seoul_vpc.id
}
# test_velog_seoul_private/public subnet 추출
output "test_velog_public_a_subnet_id" {
description = "test_velog_public_a_subnet_id"
value = aws_subnet.test_velog_public_a_subnet.id
}
output "test_velog_public_c_subnet_id" {
description = "test_velog_public_c_subnet_id"
value = aws_subnet.test_velog_public_c_subnet.id
}
output "test_velog_private_a_subnet_id" {
description = "test_velog_private_a_subnet_id"
value = aws_subnet.test_velog_private_a_subnet.id
}
output "test_velog_private_c_subnet_id" {
description = "test_velog_private_c_subnet_id"
value = aws_subnet.test_velog_private_c_subnet.id
}
# test_velog ecs alb 추출
output "test_velog_ecs_cluster_alb_arn" {
description = "test_velog_ecs_cluster_alb_arn"
value = aws_lb.test-velog-ecs-cluster-alb.arn
}
output "test_velog_ecs_cluster_alb_sg" {
description = "test_velog_ecs_cluster_alb_sg"
value = aws_security_group.test_velog_ecs_cluster_alb_sg.id
}코드의 내용은 대략 VPC내부에 들어갈 라우팅 테이블, 보안 그룹 등을 정의하고 로드밸런서를 생성한다는 내용입니다.
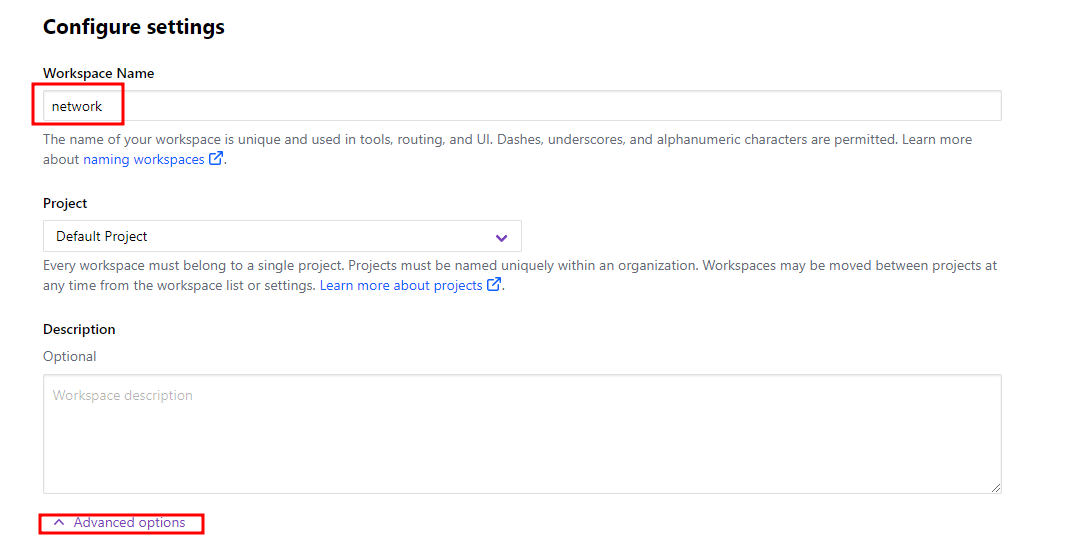
2. 워크스페이스 생성
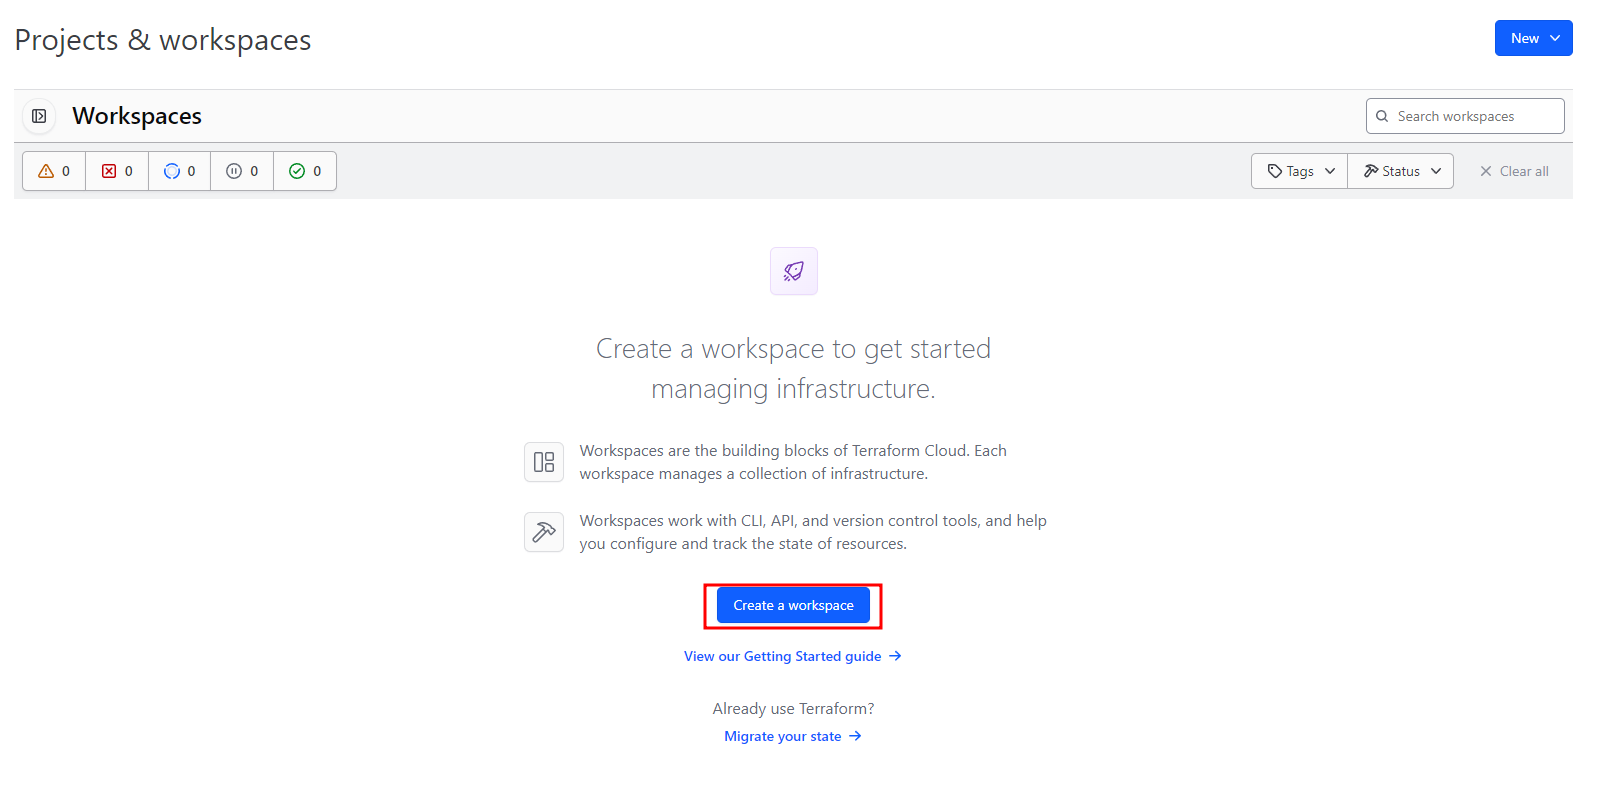
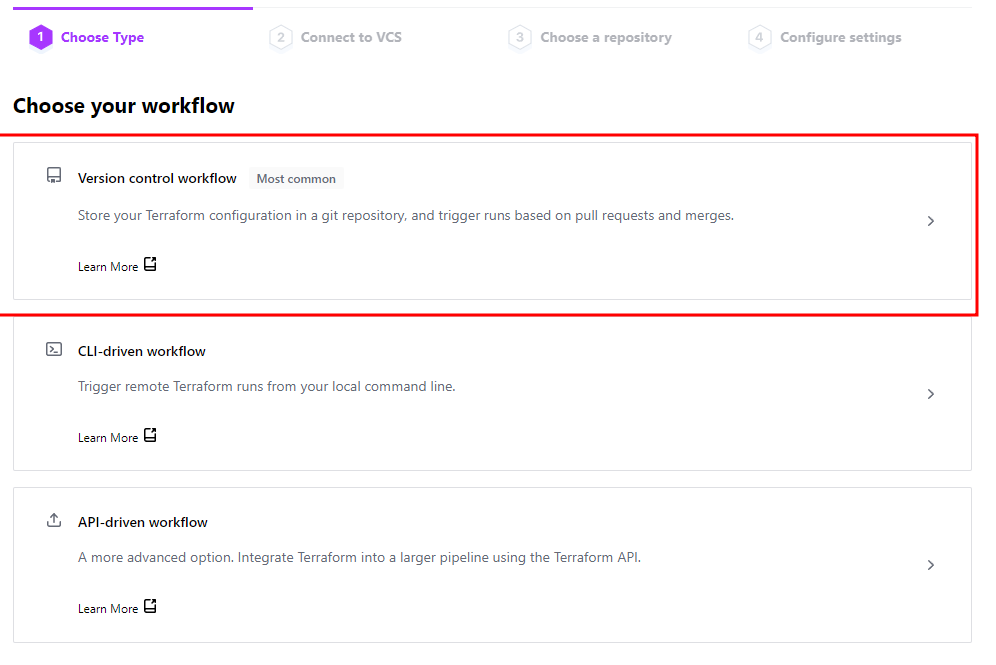
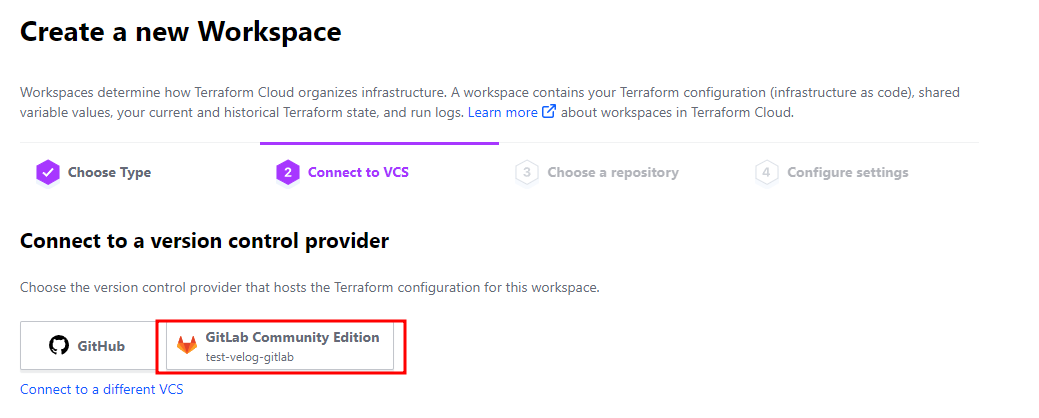
전에 만든 Organization을 클릭하면 Organizaion을 처음 만들었던 화면과 연동시킨 Gitlab Community Edition 버튼을 볼 수있습니다.
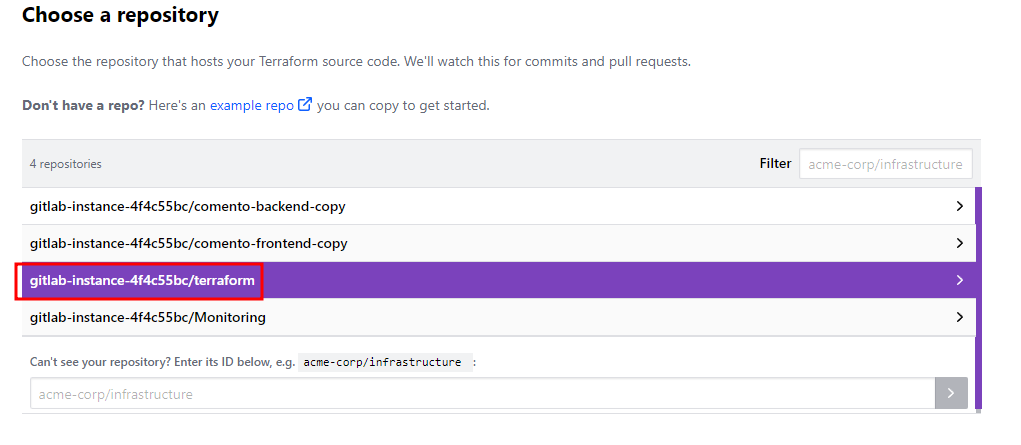
여기서 내가 push한 저장소를 선택해줍니다.
2. 워크스페이스 설정
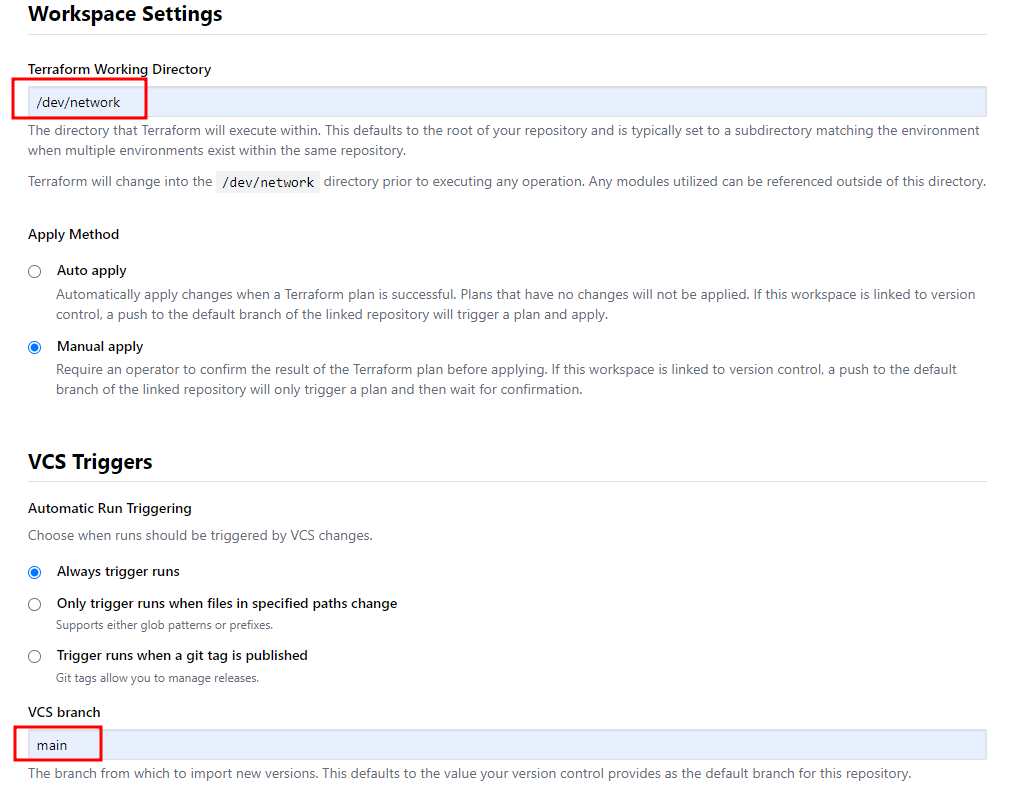
Terraform Working Directory는 1번의 코드들이 들어있는 경로를 설정하고 VCS branch는 가져올 리포지토리의 브랜치를 적어줍니다.
3. 환경변수 설정
이제 AWS에 접근하기 위한 액세스 키를 지정할 환경변수를 설정해야 합니다.

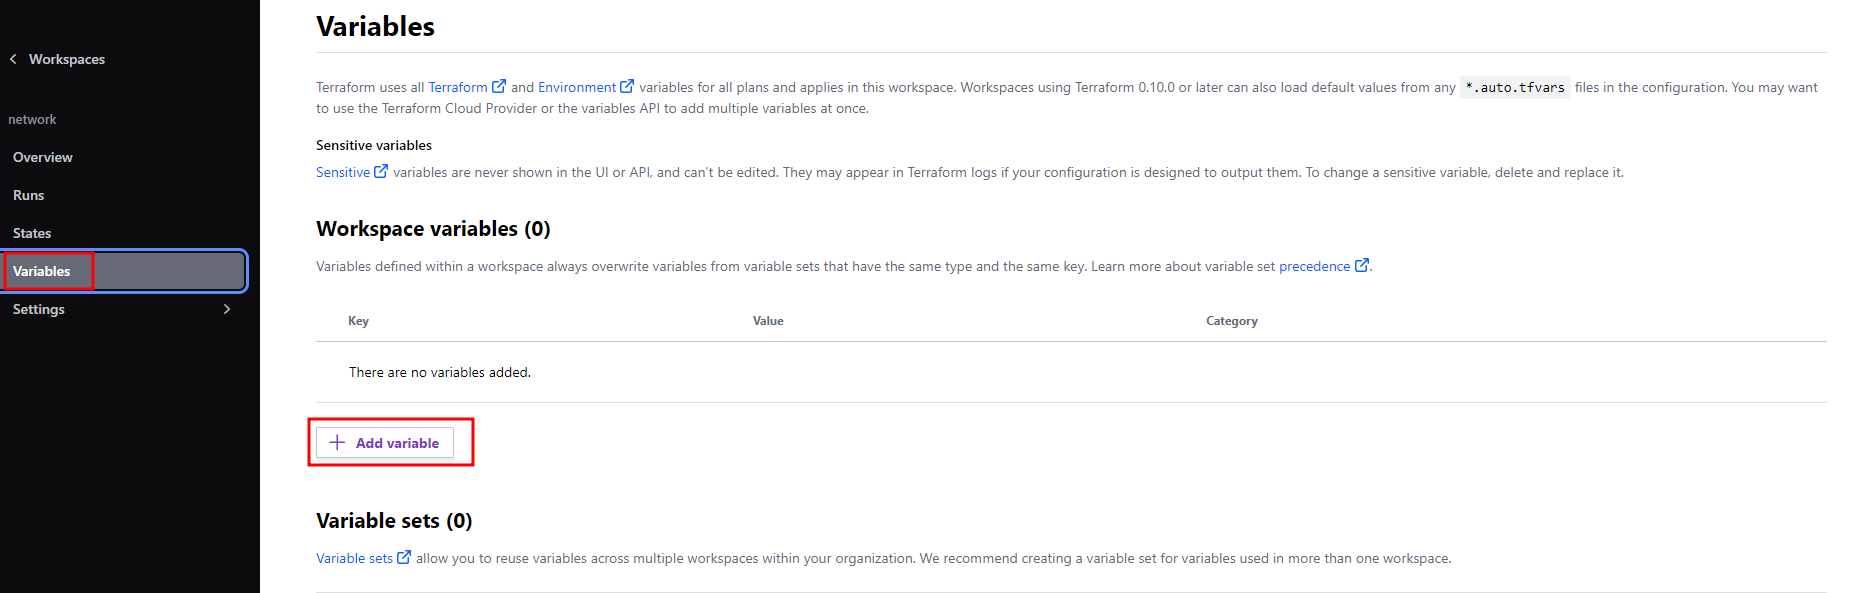

적어야 하는 환경변수는 다음과 같습니다.
- AWS_ACCESS_KEY_ID
- AWS_SECRET_ACCESS_KEY
- AWS_DEFAULT_REGION
AWS_DEFAULT_REGION은 한국이라면 ap-northeast-2를 적어주고 AWS_ACCESS_KEY_ID, AWS_SECRET_ACCESS_KEY는 설정시 Sensitive를 체크하여 안보이도록 해줍시다.
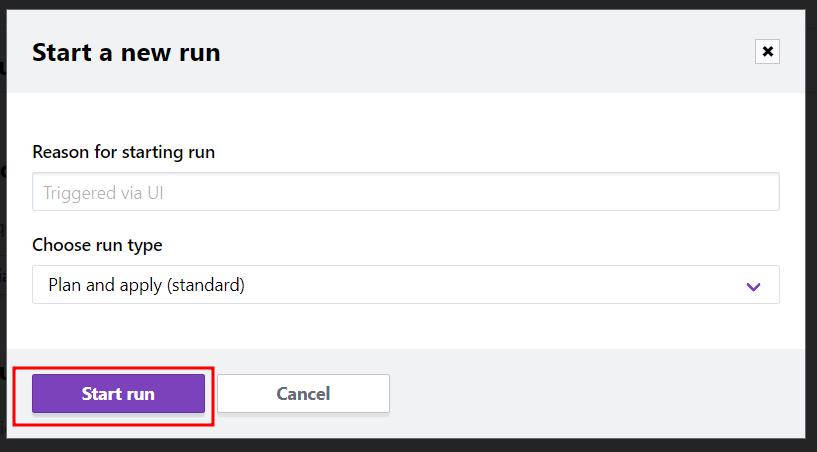
4. plan 및 apply
이제 만들어진 워크스페이스에 들어가 실행시켜 봅시다.
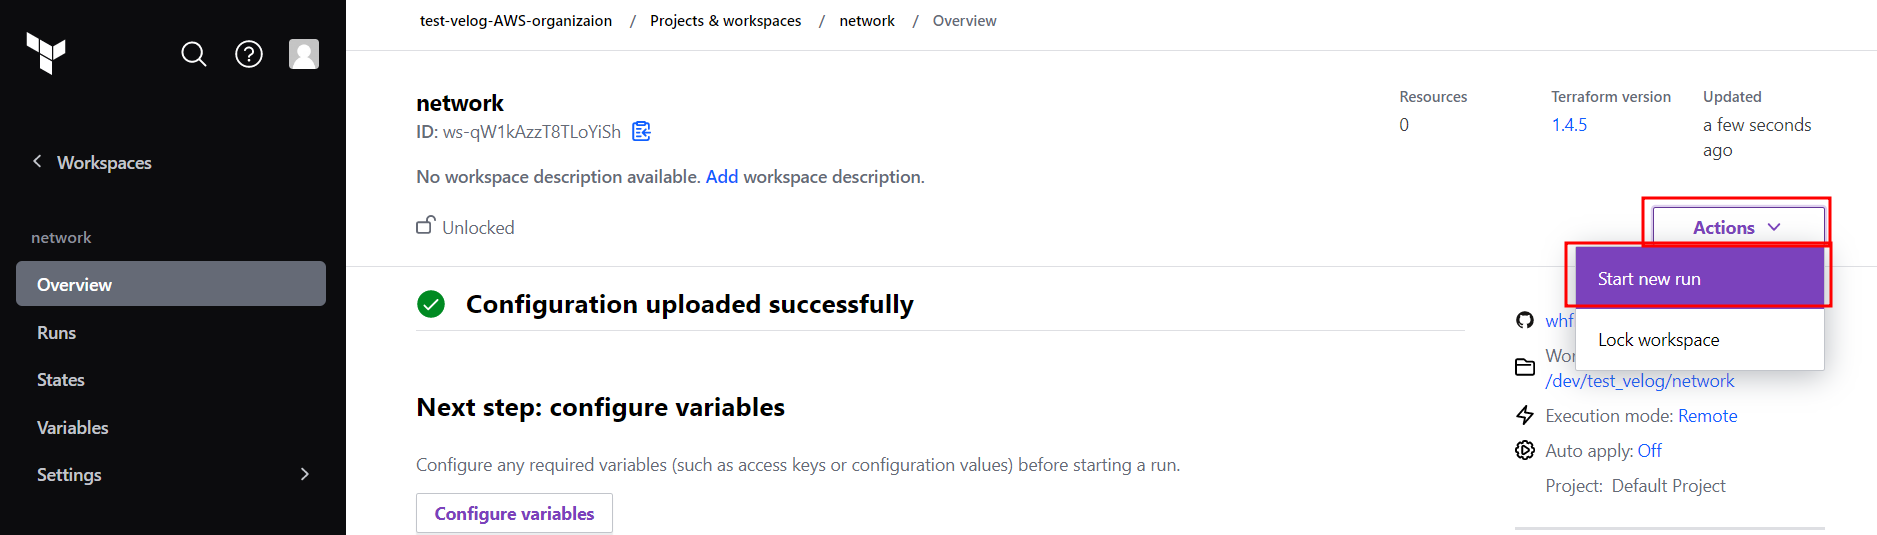
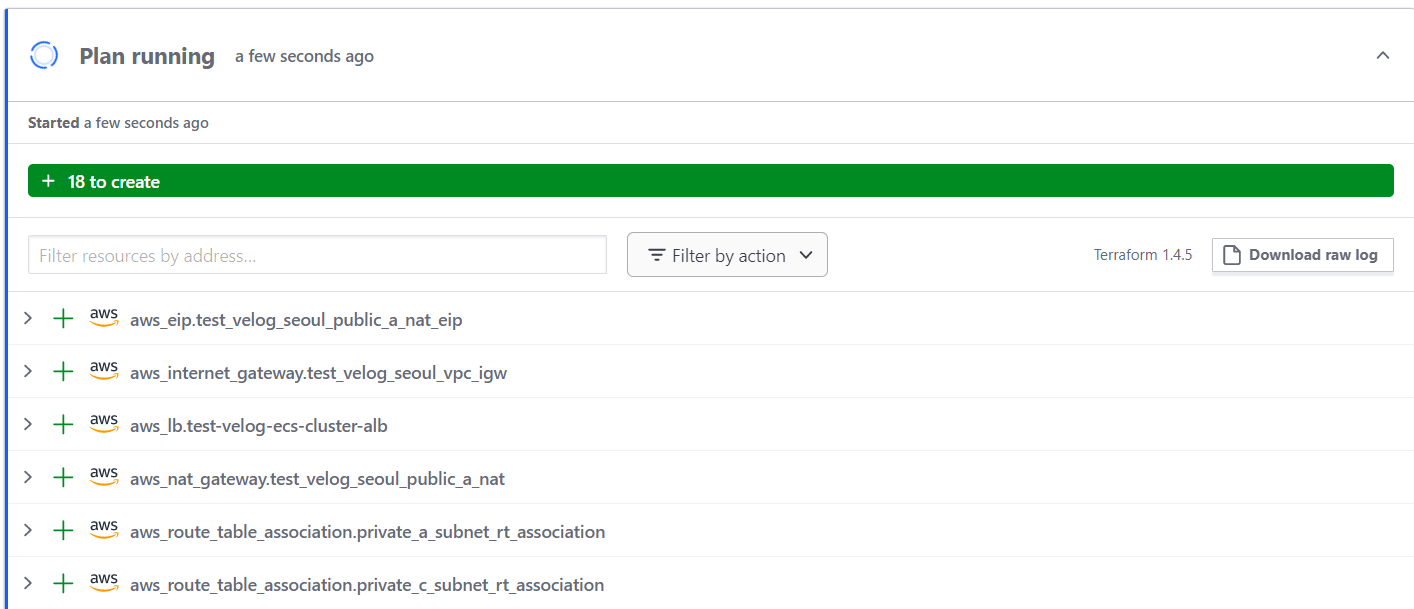
처음엔 코드에 에러가 있는지 확인하는 과정을 거칩니다. 에러가 없다면 위와 같은 화면이 뜹니다.
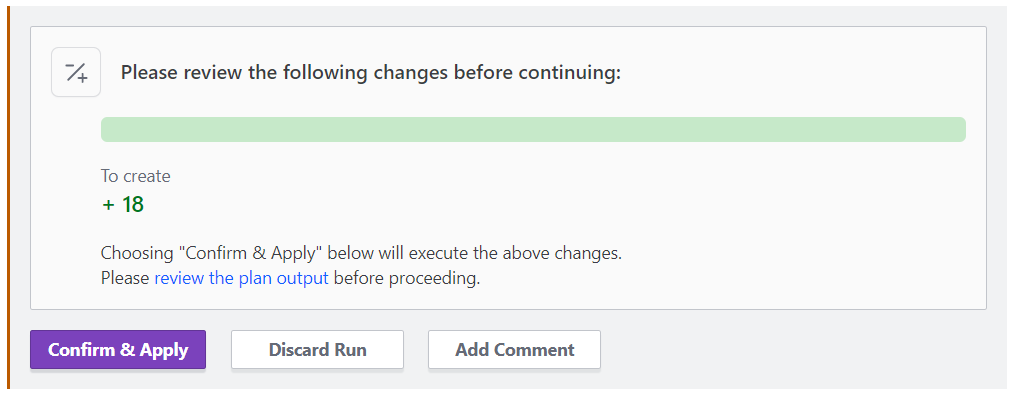
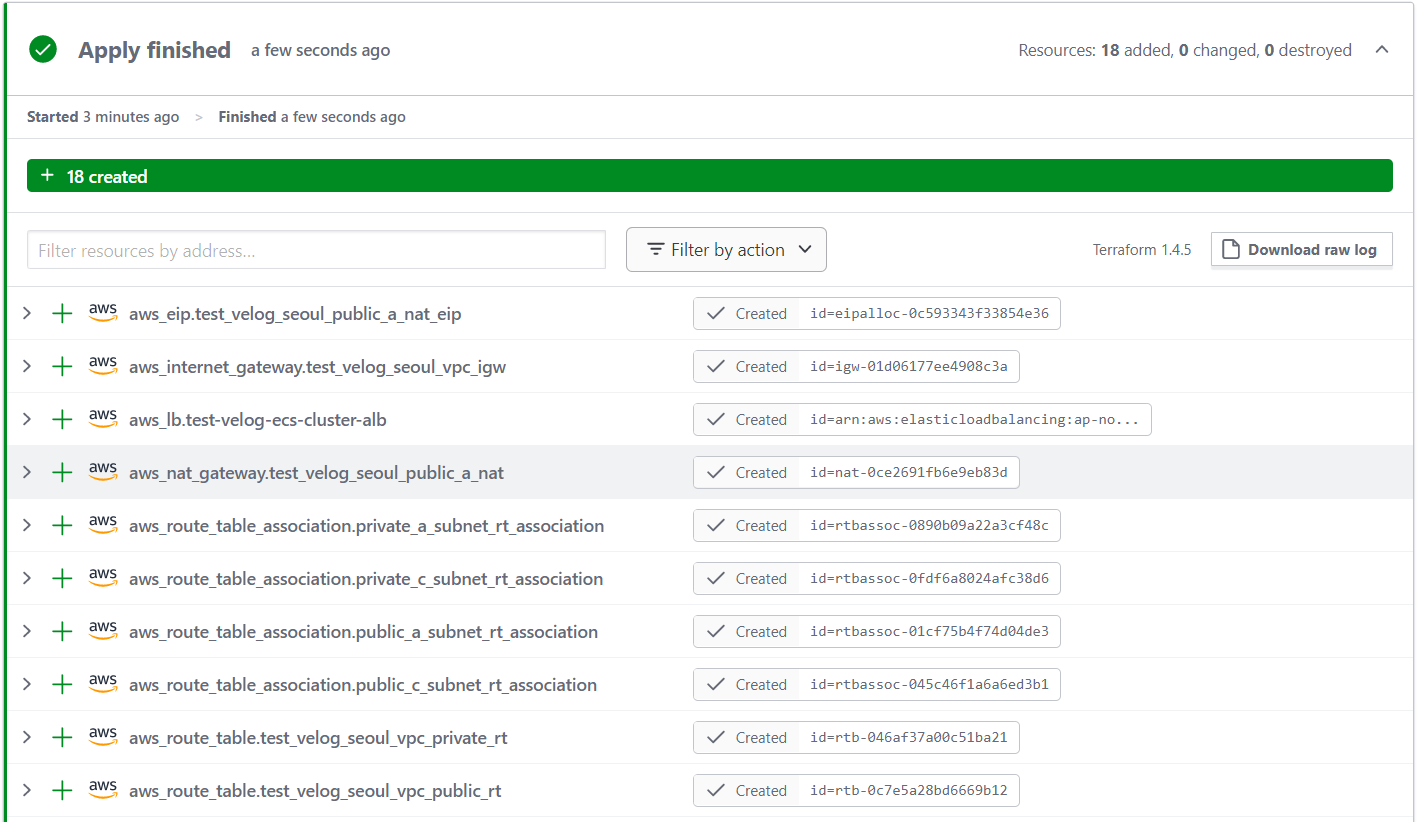
Confirm & Applpy 버튼을 클릭하면 작성한 코드 내용대로 VPC 및 기타설정한 서비스를 자동으로 생성해줍니다. 에러가 없다면 AWS에 접속해 코드 내용대로 생성되었는지 확인합니다.