
01. 401 unauthorized 해결을 위한 Security 설정
1. config 패키지 생성
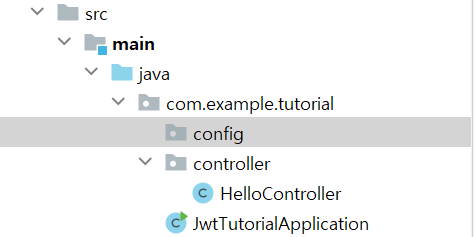
2. SecurityConfig 클래스 생성
src > main > java > com.example.tutorial > config > SecurityConfig.java
import org.springframework.security.config.annotation.web.builders.HttpSecurity;
import org.springframework.security.config.annotation.web.configuration.EnableWebSecurity;
import org.springframework.security.config.annotation.web.configuration.WebSecurityConfigurerAdapter;

@EnableWebSecurity
public class SecurityConfig extends WebSecurityConfigurerAdapter {

    @Override
    protected  void configure(HttpSecurity http) throws Exception{
        http
                .authorizeRequests()
                .antMatchers("/api/hello").permitAll()
                .anyRequest().authenticated();
    }
}
- @EnableWebSecurity
기본적인 웹 보안을 활성화
- extends WebSecurityConfigurerAdapter
추가적인 웹 보안 설정을 위해 ① WebSecurityConfigurer를 implements 하거나
② WebSecurityConfigurerAdapter를 extends 하는 방법이 있는데, 여기서는 ②를 이용했다.
- configure(HttpSecurity http)
WebSecurityConfigurerAdapter의 configure 메소드 오버라이딩
- .authorizeRequests()
HttpServletRequest를 사용하는 요청들에 대한 접근제한 설정
- .antMatchers("/api/hello").permitAll()
/api/hello에 대한 요청은 인증없이 접근 허용
- .anyRequest().authenticated()
나머지 요청들은 모두 인증되어야 함
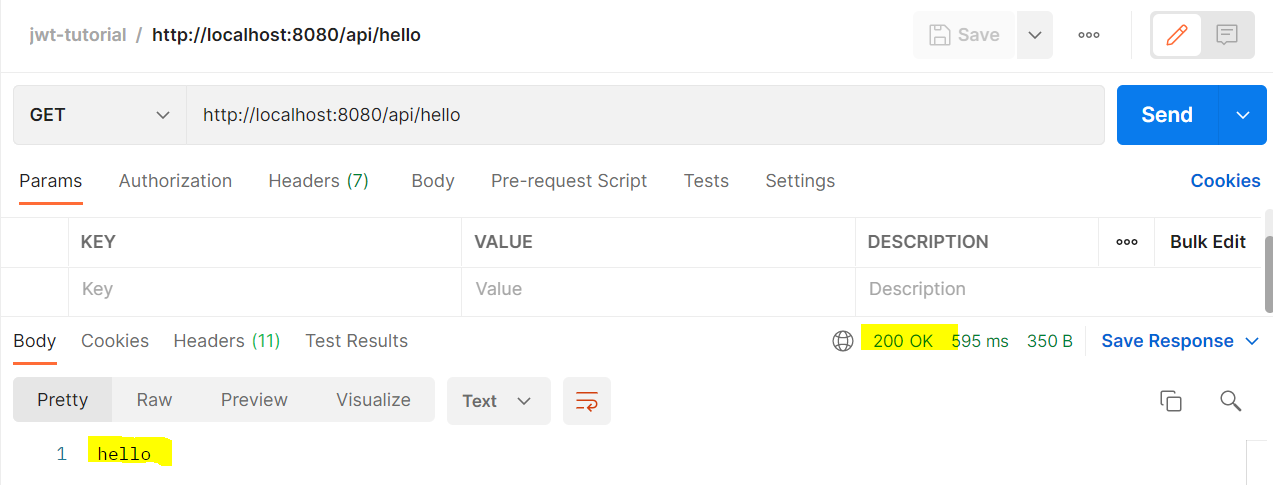
3. 포스트맨으로 테스트
다시 /api/hello로 GET 요청을 보내면 성공적으로 hello를 리턴해준다.
02. Datasource, JPA 설정
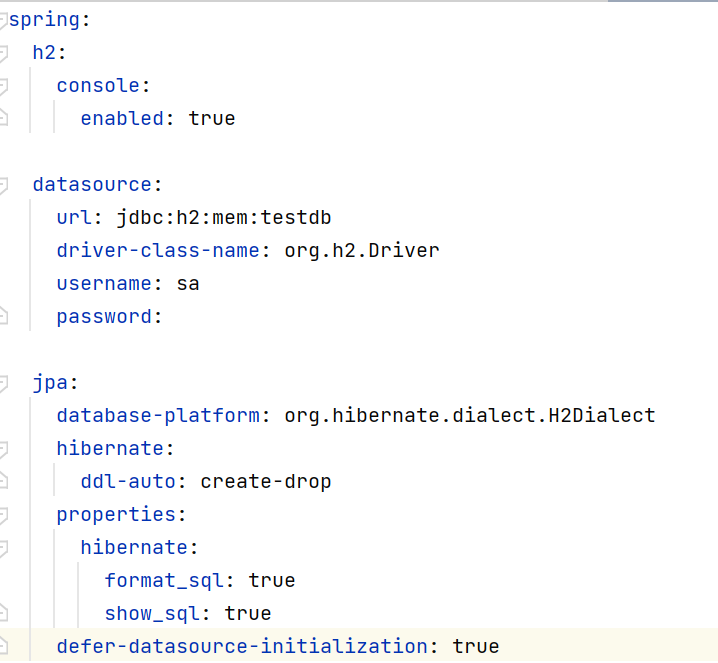
application.properties를 application.yml로 변경
resources > application.properties
yml파일이 보기가 편해서 그냥 변경
spring:
  h2:
    console:
      enabled: true

  datasource:
    url: jdbc:h2:mem:testdb
    driver-class-name: org.h2.Driver
    username: sa
    password:

  jpa:
    database-platform: org.hibernate.dialect.H2Dialect
    hibernate:
      ddl-auto: create-drop
    properties:
      hibernate:
        format_sql: true
        show_sql: true

logging:
  level:
    com.example: DEBUG
- create-drop
SessionFactory가 시작될 때는 Drop, Create, Alter, 종료될 때는 Drop을 진행한다는 의미
- hibernate: format_sql: true show_sql: true
콘솔창에서 실행되는 sql들을 보기좋게 보여주는 설정
- logging: level: com.example: DEBUG
로깅 레벨을 디버그로 설정함
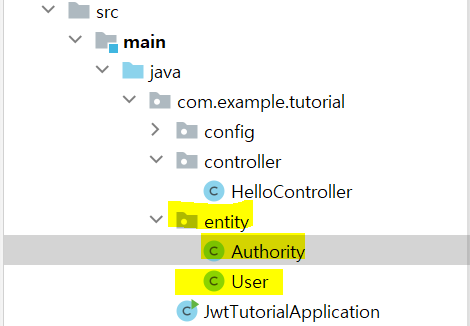
03. Entity 생성
1. entity 패키지 생성 > User, Authority 클래스 생성
2. User 클래스 작성
import com.fasterxml.jackson.annotation.JsonIgnore;
import lombok.*;
import javax.persistence.*;
import javax.validation.constraints.NotNull;
import javax.validation.constraints.Size;
import java.util.HashSet;
import java.util.Set;
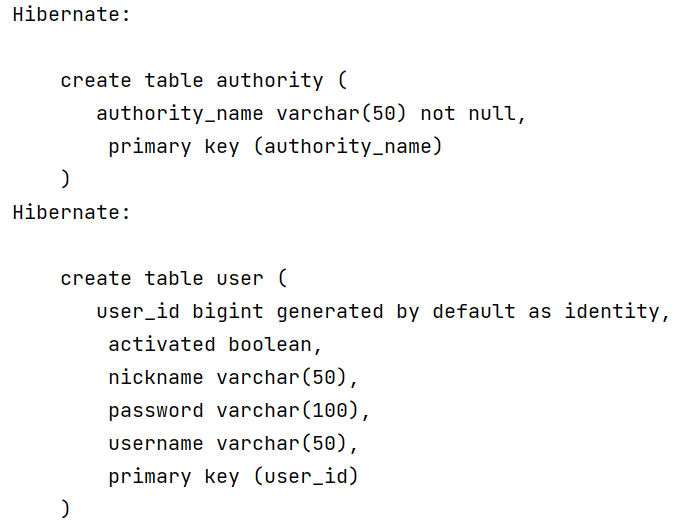
@Entity // DB의 테이블과 1:1 매핑되는 객체
@Table(name = "user") // 테이블명 user로 지정
@Getter
@Setter
@Builder
@AllArgsConstructor
@NoArgsConstructor
public class User {
@JsonIgnore
@Id // PK
@Column(name = "user_id")
@GeneratedValue(strategy = GenerationType.IDENTITY)
private Long userId;
@Column(name = "username", length = 50, unique = true)
private String username;
@Column(name = "password", length = 100)
private String password;
@Column(name = "nickname", length = 50)
private String nickname;
@Column(name = "activated")
private boolean activated;
@ManyToMany
@JoinTable(
name = "user_authority",
joinColumns = {@JoinColumn(name = "user_id", referencedColumnName = "user_id")},
inverseJoinColumns = {@JoinColumn(name = "authority_name", referencedColumnName = "authority_name")})
private Set<Authority> authorities;
}
- @Table(name = "user")
테이블명을 user로 지정
- @ManyToMany @JoinTable
User 객체와 Authority 객체의 다대다 관계를 일대다, 다대일 관계의 조인 테이블로 정의
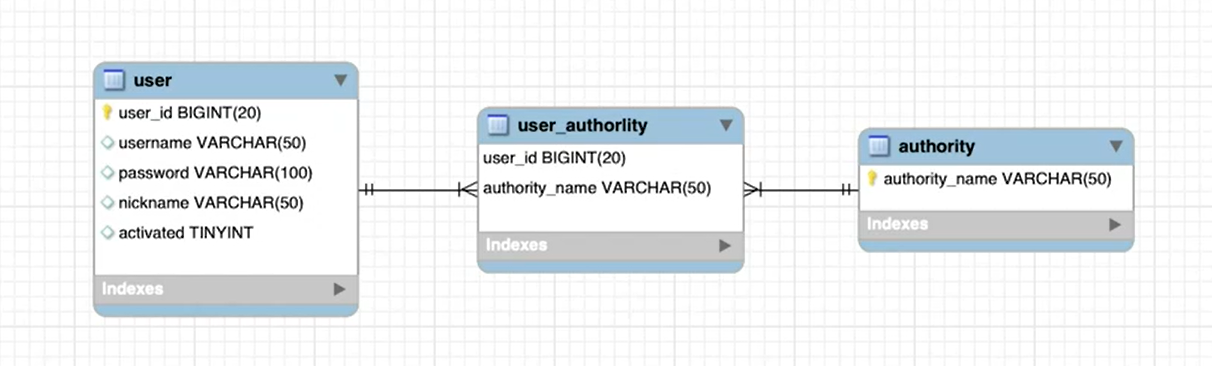
3. Authority 작성
import lombok.*;

import javax.persistence.Column;
import javax.persistence.Entity;
import javax.persistence.Id;
import javax.persistence.Table;
import javax.validation.constraints.NotNull;

@Entity
@Table(name = "authority")
@Getter
@Setter
@Builder
@AllArgsConstructor
@NoArgsConstructor
public class Authority {

    @Id
    @Column(name = "authority_name", length = 50)
    private String authorityName;
}
04. H2 콘솔 결과 확인
application.yml 파일의 create-drop은 스프링부트 서버가 시작될 때마다 테이블들을 새로 만들기 때문에 편의를 위해 서버를 시작할 때마다 데이터를 자동으로 DB에 넣어주는 기능을 활용할 것이다.
1. resources 디렉토리 밑에 data.sql 파일 생성
서버가 시작될 때마다 자동 실행할 쿼리문을 작성한다.
INSERT INTO USER (USER_ID, USERNAME, PASSWORD, NICKNAME, ACTIVATED) VALUES (1, 'admin', '$2a$08$lDnHPz7eUkSi6ao14Twuau08mzhWrL4kyZGGU5xfiGALO/Vxd5DOi', 'admin', 1);
INSERT INTO USER (USER_ID, USERNAME, PASSWORD, NICKNAME, ACTIVATED) VALUES (2, 'user', '$2a$08$UkVvwpULis18S19S5pZFn.YHPZt3oaqHZnDwqbCW9pft6uFtkXKDC', 'user', 1);

INSERT INTO AUTHORITY (AUTHORITY_NAME) values ('ROLE_USER');
INSERT INTO AUTHORITY (AUTHORITY_NAME) values ('ROLE_ADMIN');

INSERT INTO USER_AUTHORITY (USER_ID, AUTHORITY_NAME) values (1, 'ROLE_USER');
INSERT INTO USER_AUTHORITY (USER_ID, AUTHORITY_NAME) values (1, 'ROLE_ADMIN');
INSERT INTO USER_AUTHORITY (USER_ID, AUTHORITY_NAME) values (2, 'ROLE_USER');
2. h2-console에 접근하기 위한 시큐리티 설정
config > SecurityConfig.java
import org.springframework.security.config.annotation.web.builders.HttpSecurity;
import org.springframework.security.config.annotation.web.builders.WebSecurity;
import org.springframework.security.config.annotation.web.configuration.EnableWebSecurity;
import org.springframework.security.config.annotation.web.configuration.WebSecurityConfigurerAdapter;

@EnableWebSecurity // 기본적인 웹 보안을 활성화
public class SecurityConfig extends WebSecurityConfigurerAdapter {

    @Override
    public void configure(WebSecurity web){
        web
                .ignoring()
                .antMatchers(
                        "/h2-console/**",
                        "/favicon.ico"
                );
    }

    @Override
    //WebSecurityConfigurerAdapter의 configure 메소드 오버라이딩
    protected  void configure(HttpSecurity http) throws Exception{
        http
                .authorizeRequests() //HttpServletRequest를 사용하는 요청들에 대한 접근제한 설정
                .antMatchers("/api/hello").permitAll() //'/api/hello'에 대한 요청은 인증없이 접근 허용
                .anyRequest().authenticated(); //나머지 요청들은 모두 인증되어야 함
    }
}
- configure(WebSecurity web)
h2-console 하위 모든 요청들과 파비콘 관련 요청은 스프링 시큐리티 로직을 수행하지 않고 접근할 수 있게 configure 메소드를 오버라이딩한다.
3. 서버 시작해서 테스트
콘솔을 확인하면 아래 사진처럼 우리가 만들었던 엔티티 내용들을 기반으로 쿼리가 잘 수행된 것을 확인할 수 있다.
🔫 Table "USER" not found 에러
- 강의(2.4)에서와 내가 사용하는 스프링부트 버전(2.6)이 달라 생긴 문제이다. 스프링부트 2.5버전부터 data.sql은 hibernate가 초기화되기 전에 실행된다고 한다. 따라서 hibernate가 초기화된 후 data.sql을 실행시키기 위해서는 application.yml에 추가 설정을 해줘야 한다.
spring:
	jpa:
    	  defer-datasource-initialization: true
이런 식으로 추가해주면 된다.
- application.properties 경우는 아래와 같이 추가해주면 된다.
spring.jpa.defer-datasource-initialization=true
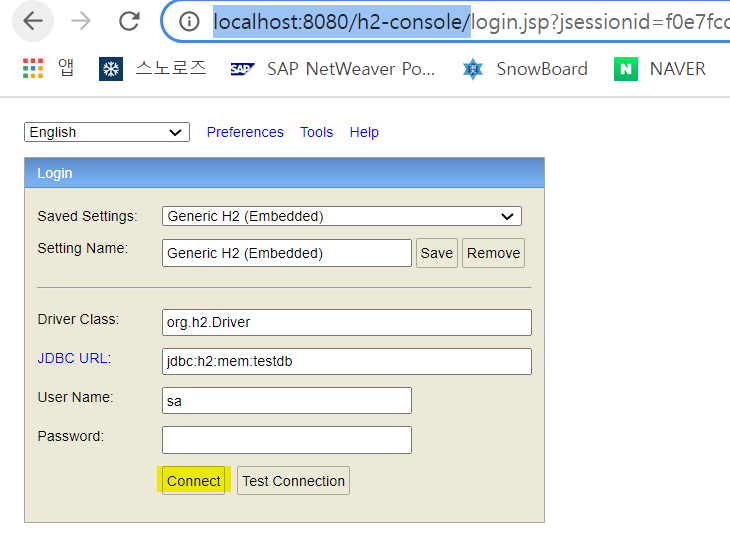
4. 브라우저에서 실제 DB 확인하기
-
http://localhost:8080/h2-console에 접속한 뒤 Connect 버튼을 누른다.
-
좌측을 보면 우리가 만들었던 엔티티 정보가 잘 들어와 있는 것을 확인할 수 있다. 여기서 user 테이블을 조회해보자.
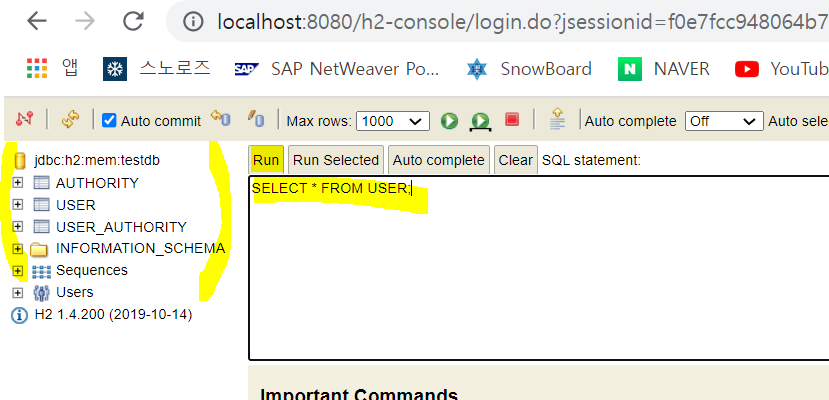
-
다음과 같이 쿼리문을 작성한 뒤 Run 버튼을 누르면, 우리가 작성했던 쿼리가 잘 수행됨을 확인할 수 있다.

