React 프로젝트에서 react-calendar 사용하기
이번 포스트에서는 React 프로젝트에서 react-calendar 라이브러리를 사용하여 캘린더 기능을 구현하는 방법을 다룰 것이다. react-calendar는 손쉽게 캘린더 컴포넌트를 구현할 수 있도록 도와주는 라이브러리다.
1. 프로젝트 설정
1.1 프로젝트 생성
먼저 React 프로젝트를 생성합니다. 아래 명령어를 사용하여 새로운 React 프로젝트를 생성합니다.
npx create-react-app my-calendar-app --template typescript
cd my-calendar-app
1.2 react-calendar 설치
react-calendar를 설치
npm install react-calendar2. 캘린더 컴포넌트 구현
프로젝트 구조
src/
|-- components/
|   |-- Calendar/
|       |-- index.tsx
|       |-- style.ts
2.1 index.tsx 파일 작성
캘린더 컴포넌트를 구현하는 index.tsx 파일을 작성
import { useState } from "react";
import * as S from "./style";
import { CalendarProps } from "react-calendar";

const MyCalendar = () => {
  // useState 훅의 초기값으로 현재 날짜를 넣어줌
  const [today, setToday] = useState<Date>(new Date());

  // onChange 이벤트에 넣어줘서 날짜가 지날 때마다 today값이 업데이트 되도록 구현
  const onChangeToday = (): void => {
    setToday(today);
  };

  // 요일 이름 길게 만들기(ex. mon, tue, ... -> Monday, Tuesday, ...)
  const formatDay: CalendarProps["formatShortWeekday"] = (locale, date) => {
    return date.toLocaleDateString(locale, { weekday: "long" });
  };

  // 태그 삽입 날짜 리스트
  const dayList = [
    "2024-07-02",
    "2024-07-05",
    "2024-07-08",
    "2024-07-11",
    "2024-07-14",
    "2024-07-17",
    "2024-07-20",
  ];

  // 날짜를 비교하는 함수
  const isSameDay = (date1: Date, date2: Date) => {
    return date1.toISOString().split('T')[0] === date2.toISOString().split('T')[0];
  };

  // 요일 이름 길게 만들기 및 태그 추가 기능 결합
  const tileContent = ({ date, view }: { date: Date; view: string }) => {
    const contents: any[] = [];

    if (view === "month") {
      if (isSameDay(date, new Date())) {
        contents.push(<span className="today-label">오늘</span>);
      }

      if (dayList.find((day) => isSameDay(date, new Date(day)))) {
        contents.push(<span className="tag">태그</span>);
      }
    }

    return <div>{contents}</div>;
  };

  return (
    <S.CalendarBox>
      <S.StyleCalendar
        locale="ko" // 한국어 로케일 설정
        calendarType="gregory"
        onChange={onChangeToday}
        value={today}
        formatShortWeekday={formatDay}
        nextLabel=">"
        prevLabel="<"
        showNeighboringMonth={false}
        tileContent={tileContent}
      />
    </S.CalendarBox>
  );
};

export default MyCalendar;
2.2 style.ts 파일 작성
스타일을 정의하는 style.ts 파일을 작성
import styled from 'styled-components';
import Calendar from 'react-calendar';
import 'react-calendar/dist/Calendar.css';

export const CalendarBox = styled.div`
  display: flex;
  align-items: center;
  justify-content: center;
`;

export const StyleCalendar = styled(Calendar)`
  width: 100%;
  height: 100%;
  border: none;
  margin-bottom: 15px;
  padding: 20px;

  .react-calendar__navigation {
    display: flex;
    height: 24px;
    margin-bottom: 1em;
  }

  .react-calendar__navigation button {
    min-width: 24px;
    background: none;
  }

  .react-calendar__navigation button:disabled {
    background-color: #e8e8e8;
  }

  .react-calendar__navigation button:enabled:hover,
  .react-calendar__navigation button:enabled:focus {
    background-color: #e8e8e8;
  }

  .react-calendar__month-view__weekdays {
    text-align: center;
    text-transform: uppercase;
    font-weight: bold;
    font-size: 1em;
    color: #42850D;
  }

  .react-calendar__month-view__weekdays__weekday {
    text-decoration: none; /* 밑줄 제거 */
  }

  .react-calendar__month-view__weekdays__weekday abbr {
    text-decoration: none; /* abbr 태그의 밑줄 제거 */
  }

  .react-calendar__month-view__days__day--weekend {
    color: #42850D;
  }

  .react-calendar__tile {
    padding: 1em;
    font-size: 1.2em;
    text-align: center;
    position: relative;
  }

  .react-calendar__tile:enabled:hover,
  .react-calendar__tile:enabled:focus {
    background-color: #DCF8A3;
    border-radius: 5px;
  }

  .react-calendar__tile--now {
    background: #DCF8A3;
    color: transparent;
    border-radius: 5px;
    position: relative;
  }

  .react-calendar__tile--now:enabled:hover,
  .react-calendar__tile--now:enabled:focus {
    background: #DCF8A3;
  }

  .react-calendar__tile--now .today-label {
    color: #42850D;
    position: absolute;
    top: 50%;
    left: 50%;
    transform: translate(-50%, -50%);
    font-weight: bold;
    font-size: 1.2em;
  }

  .react-calendar__tile .tag {
    display: block;
    margin-top: 0.5em;
    background: #42850D;
    color: white;
    border-radius: 3px;
    padding: 0.2em 0.5em;
    font-size: 0.8em;
  }

  .react-calendar__tile--active {
    background: #42850D;
    color: #ffffff;
    border-radius: 5px;
  }

  .react-calendar__tile--active:enabled:hover,
  .react-calendar__tile--active:enabled:focus {
    background: #42850D;
  }

  .react-calendar__tile--hasActive {
    background: #42850D;
    color: #ffffff;
    border-radius: 5px;
  }

  .react-calendar__tile--hasActive:enabled:hover,
  .react-calendar__tile--hasActive:enabled:focus {
    background: #42850D;
  }
`;
3. 사용 방법
이제 MyCalendar 컴포넌트를 필요한 곳에 import하여 사용한다.
import React from 'react';
import MyCalendar from './components/Calendar';

const App = () => {
  return (
    <div>
      <h1>My Calendar</h1>
      <MyCalendar />
    </div>
  );
};

export default App;
추가
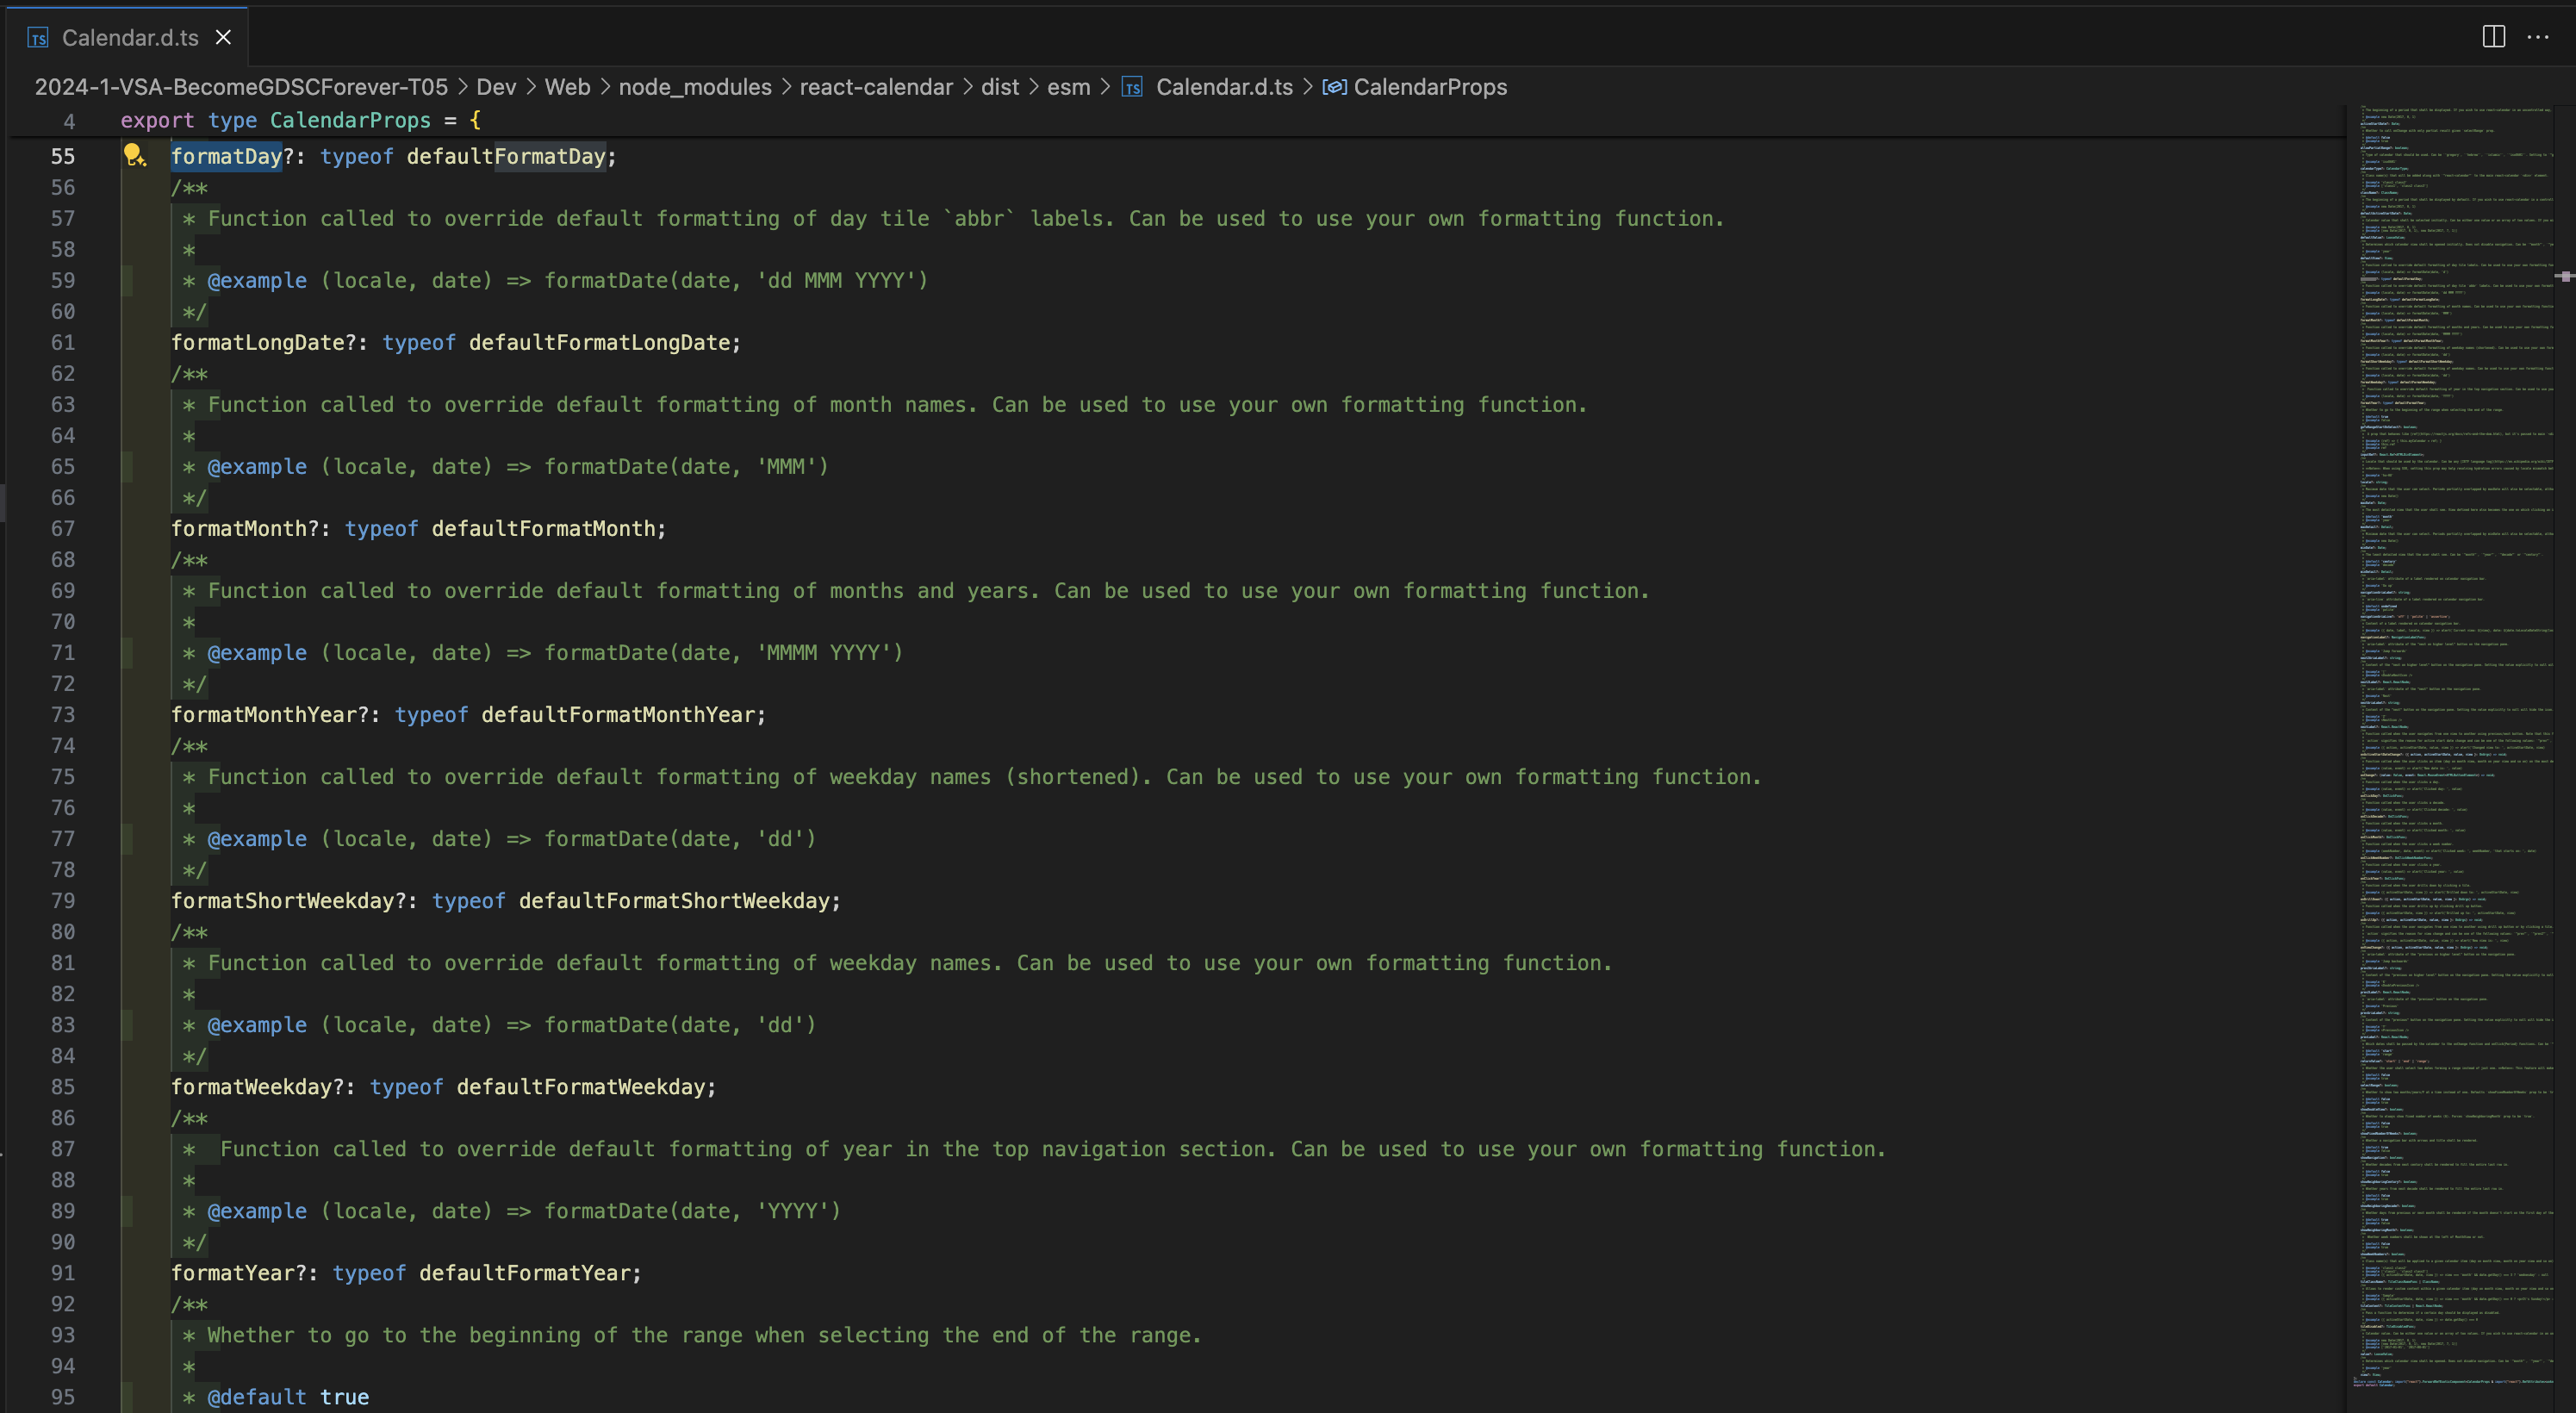
원하는 동작이나 옵션들은 CalendarProps 안에서 찾아서 컴포넌트 안에 집어넣어 원하는 기능을 유도할 수 있으며,
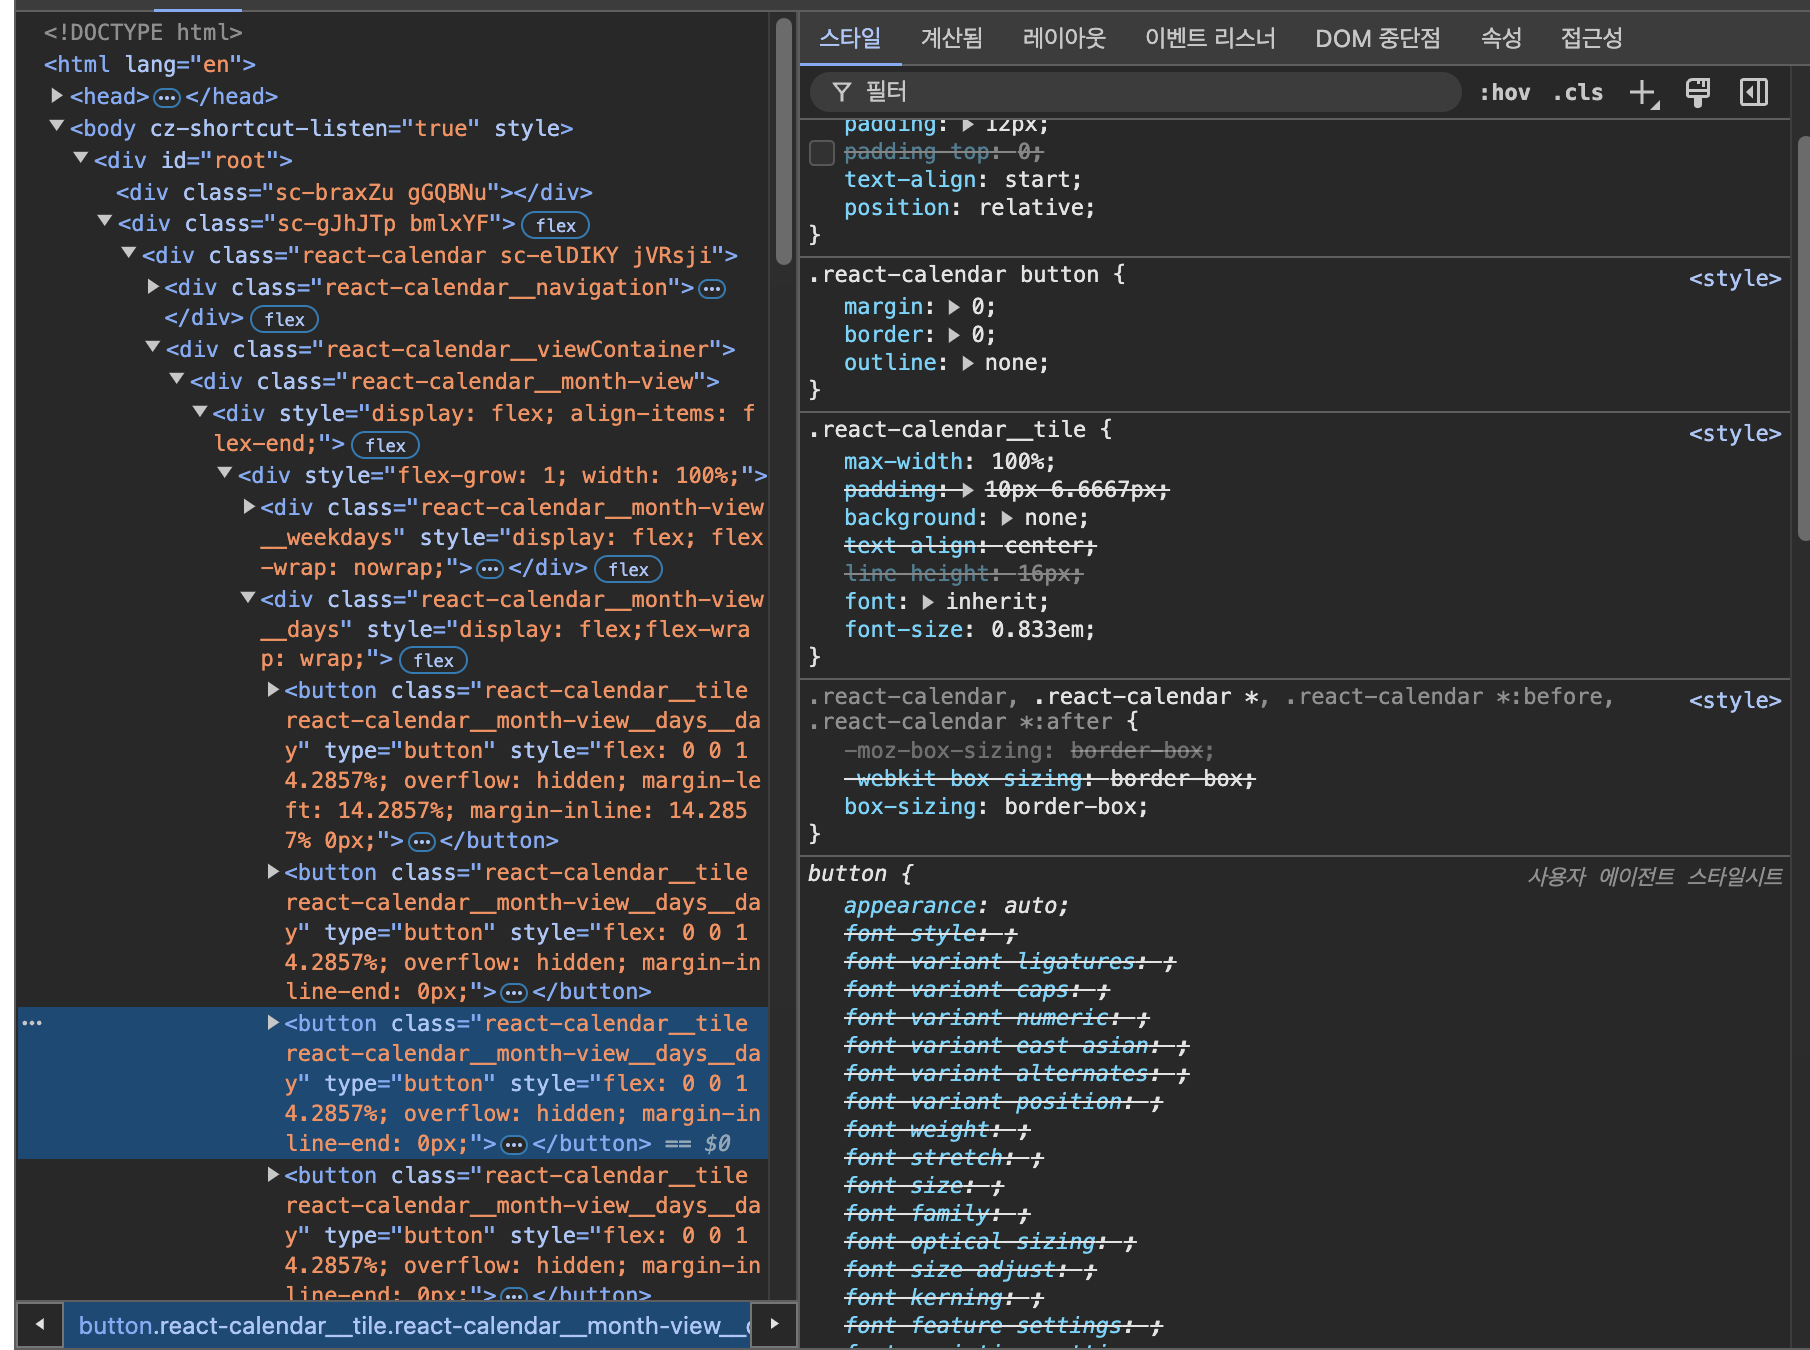
특정 스타일을 바꾸고 싶다면 (F12)개발자 도구 안에서 className을 확인할 수 있으니 이를 통해 css내용을 수정하면 된다.

개발자가 되고싶은 먼지입니다.