

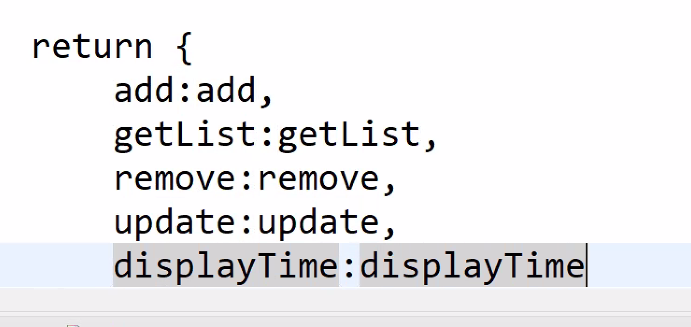
JSON 타입으로만 제공을 하겠다는 뜻이다.
댓글에 대한 댓글 즉, 대댓글의 DB구조는 많이 다르다.
DB 설계
tbl_reply 테이블
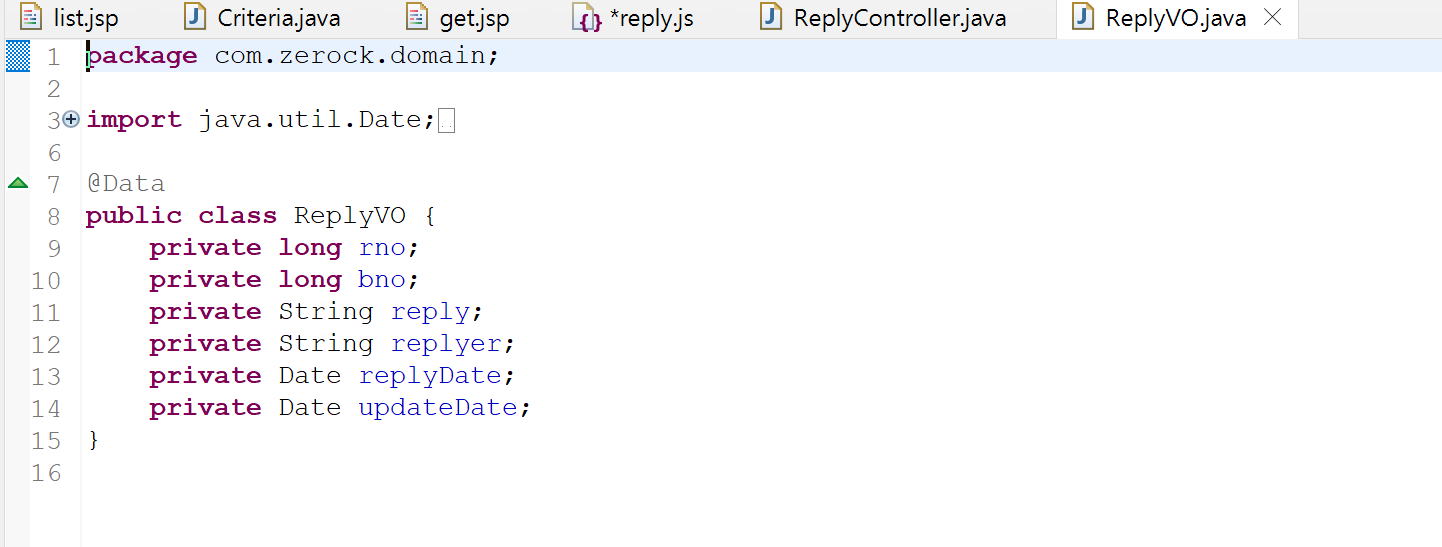
replyVO
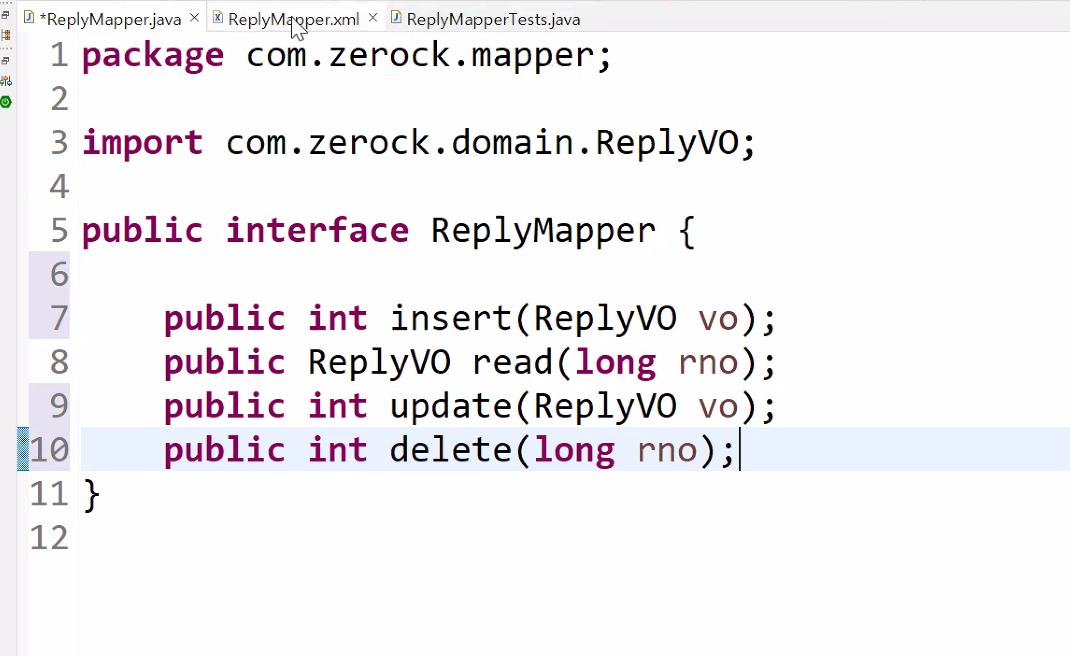
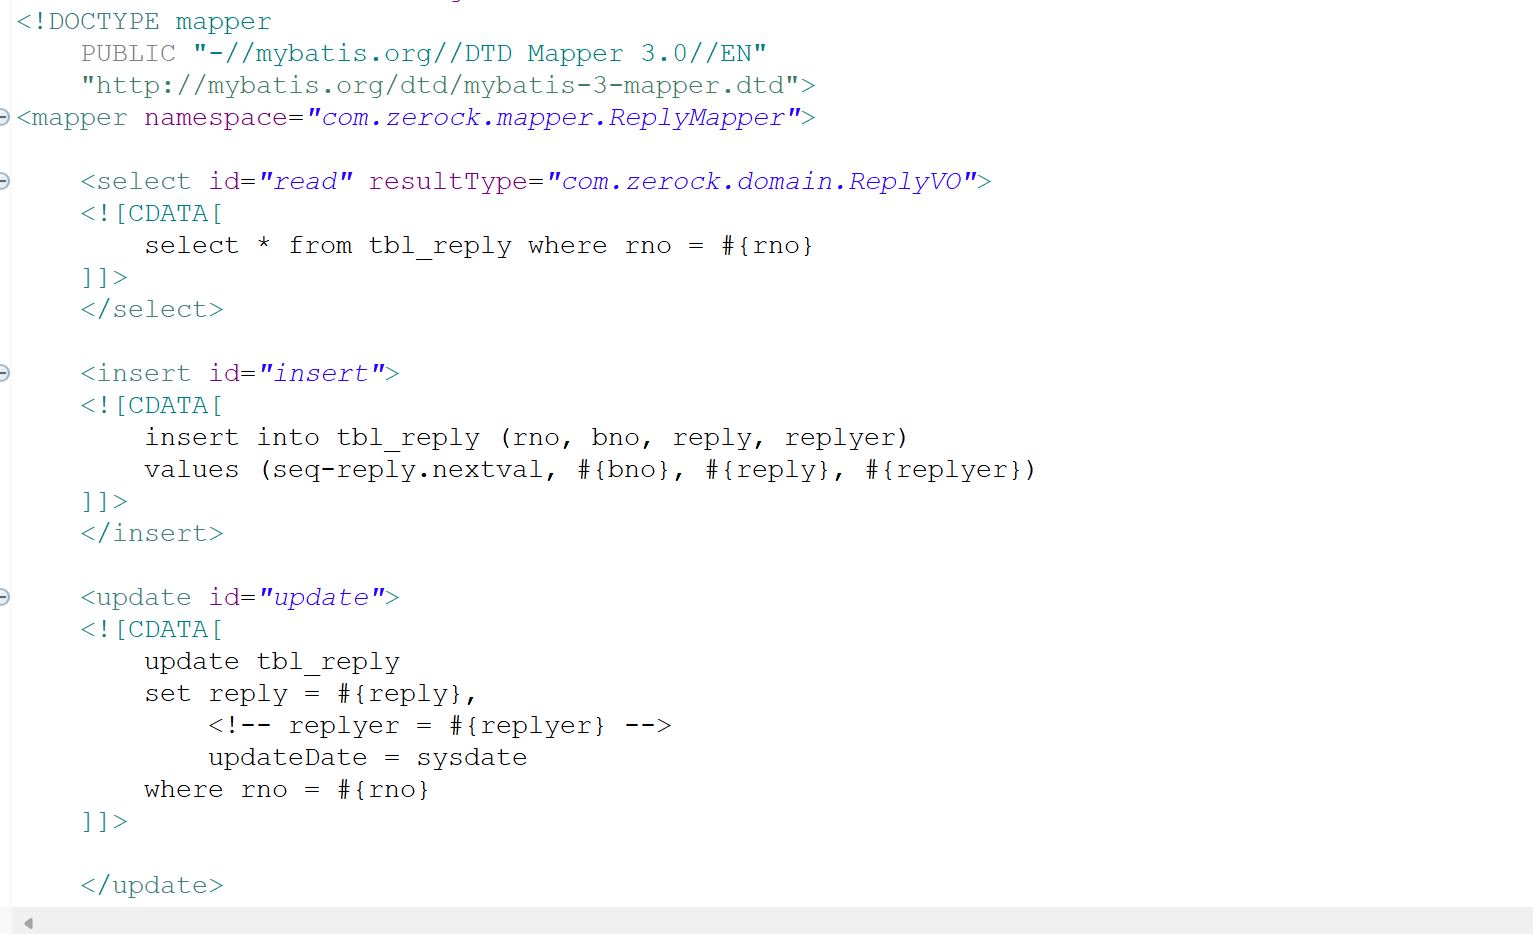
replyMapper
log4jdbc.log4j2.properties 파일 추가
log4j.xml에 다음 부분 추가
<logger name="jdbc.resultsettable">
<level value="info" />
</logger>
<logger name="jdbc.sqlonly">
<level value="info" />
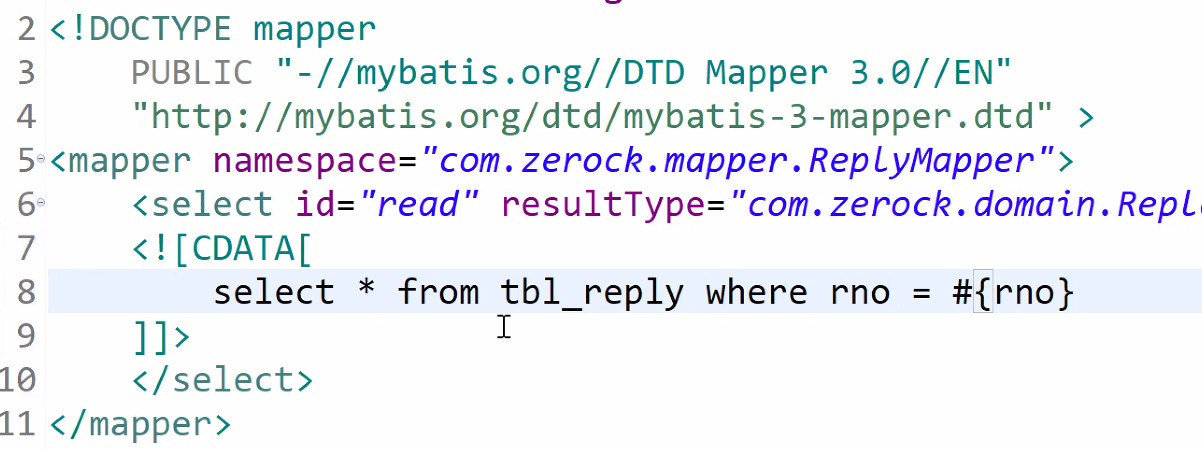
</logger>ReplyMapper.xml 추가
ex02에서 백앤드 부분과 프론트 부분의 파일들 복사
servlet-context.xml 수정할 필요 없고
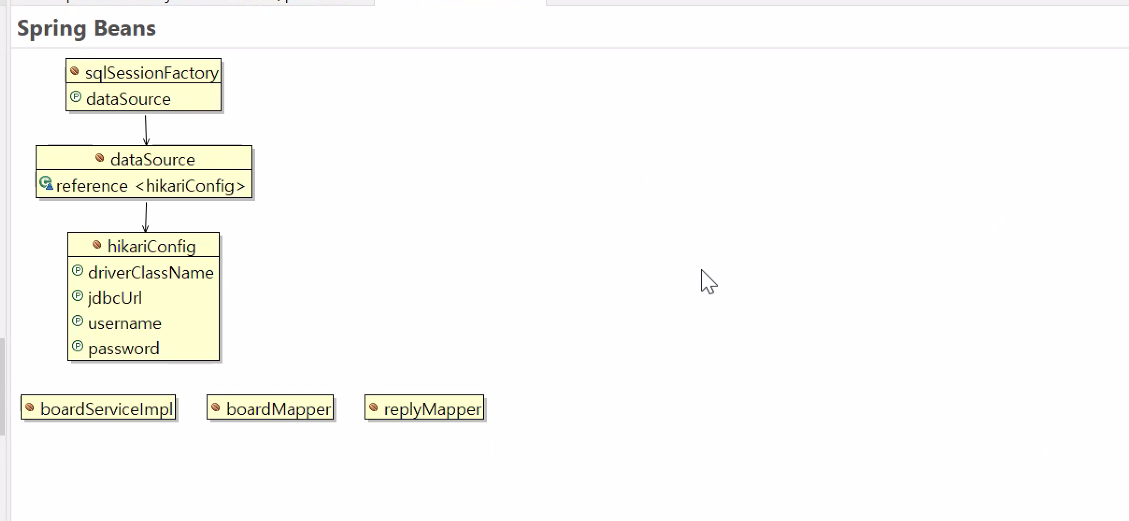
root-context.xml 수정

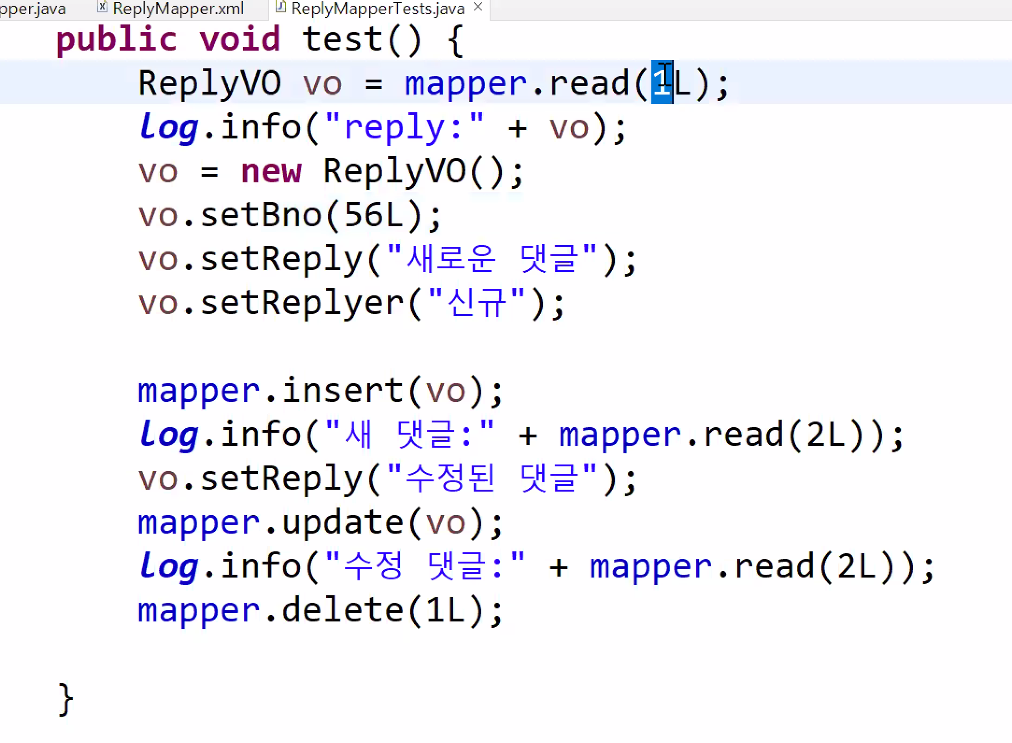
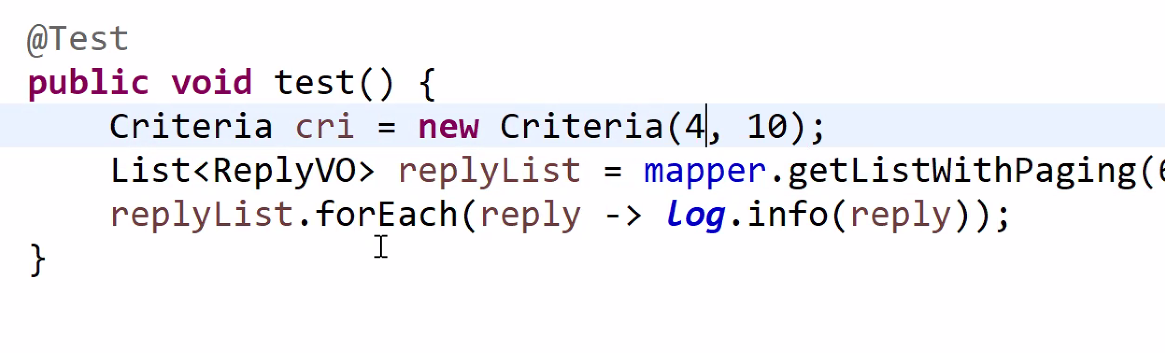
mappertests 테스트 해보기
mapper.xml에서 crud작성
원글을 삭제할때 댓글 역시 삭제하거나 원글을 삭제 하지 못하게해야한다. 참조 무결성 유지. cascading delete를 넣거나 해야한다.
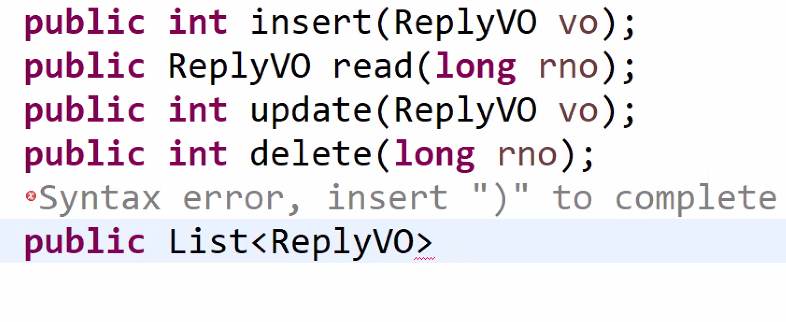
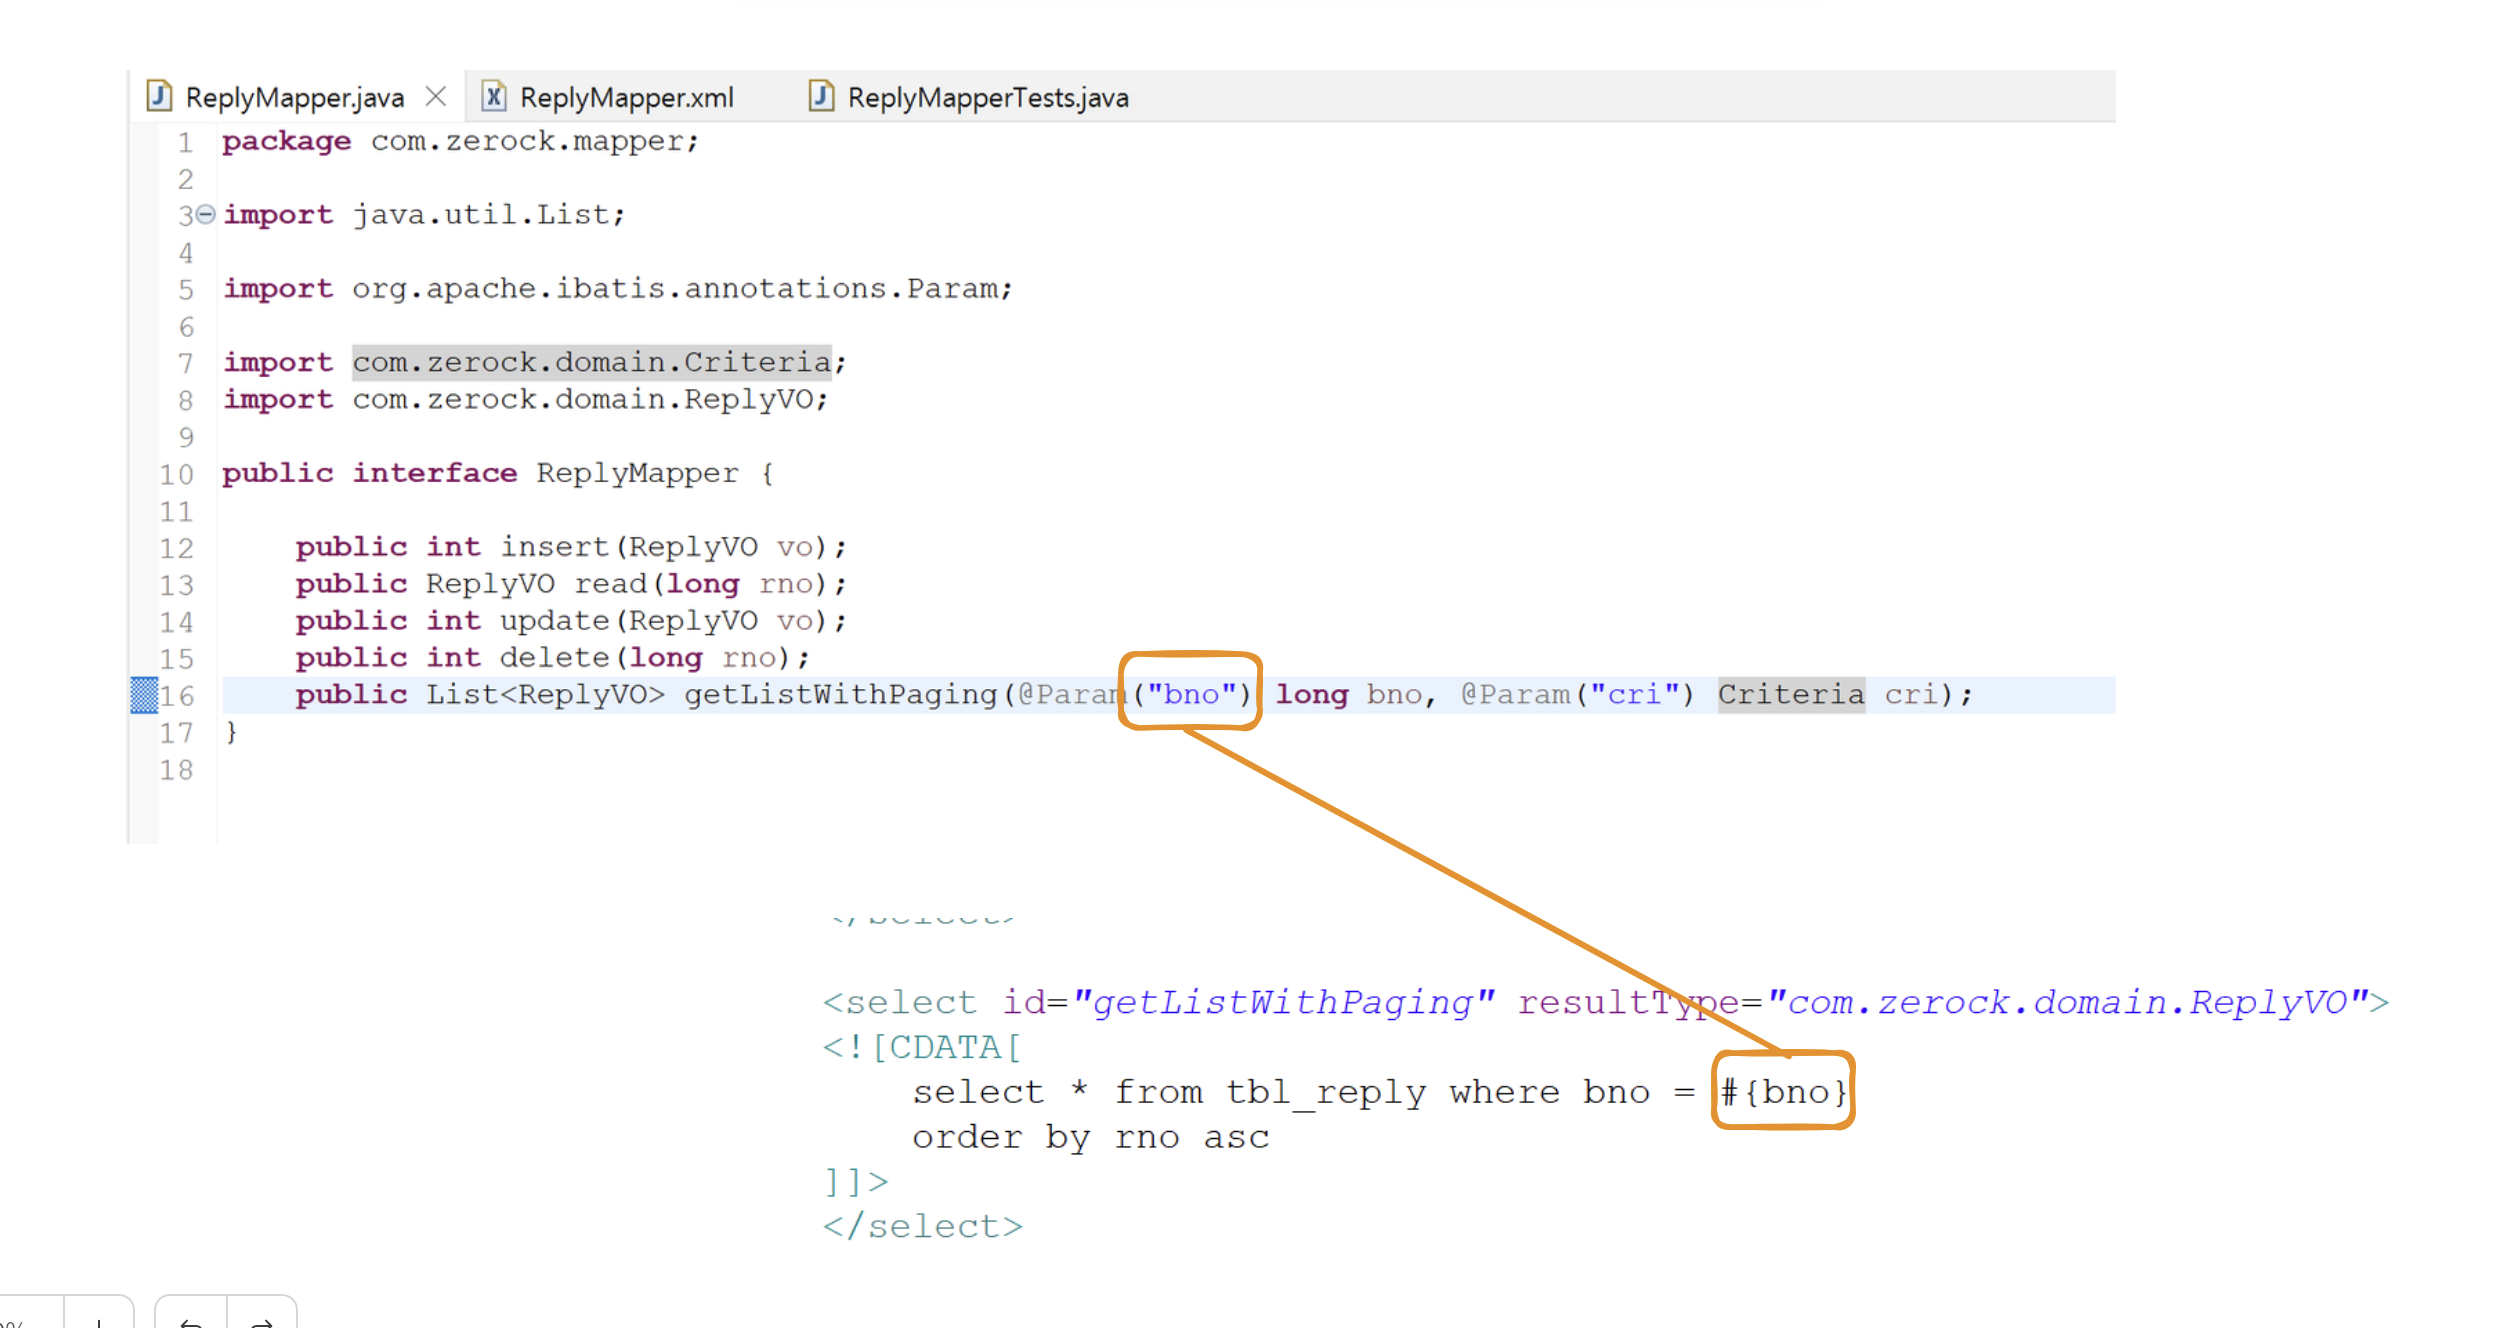
리스트 형태로 댓글전체를 가져오기
댓글을 가져오는것은 bno만 가져오면 됨
위에서 페이지와 같은 부분도 고려할수있도록 cri객체를 같이 인자로 받을수 있도록한다.


위에서 실제로 작업하는 것은 rno이므로 - 이따 확인
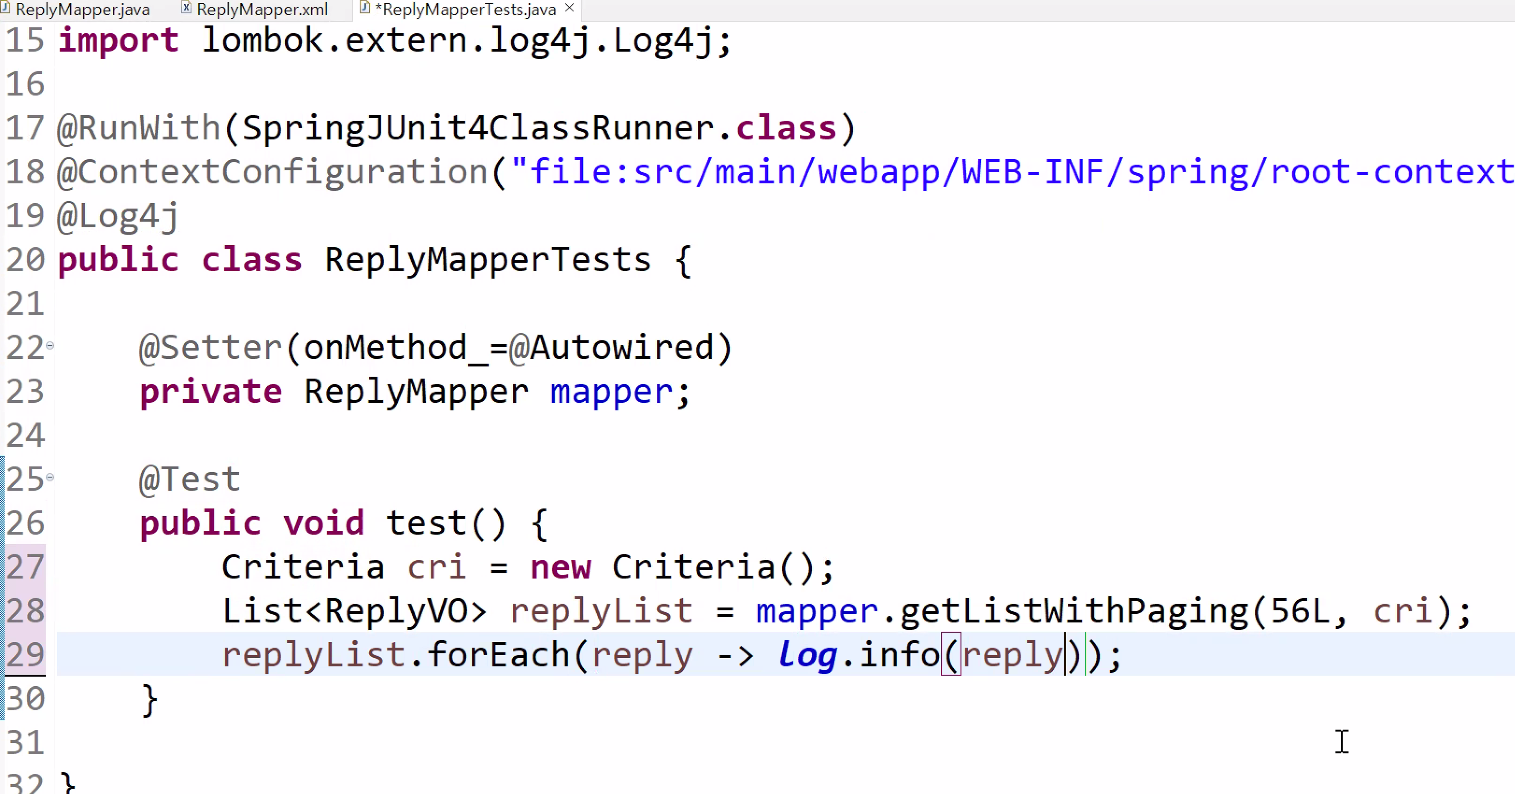

파라미터가 1개일 경우에는 매핑에 대한 정보를 지정하지 않아도된다.
2개 이상일 경우에는 @Param 어노테이션을 이용해서 매핑에 대한 정보를 지정해야 한다. 어떤 인자에 어떤값이 들어가는지 작성을 해줘야한다.
어노테이션을 붙이지 않아도 값을 전달할 수 있을까?
두개의 인자를 하나의 클래스로 만들거나(wrapping object)
혹은 맵을 이용할 수 있다. map.put 이런식으로 넣어서 map전체를 인자로 넘기는 방법이다.
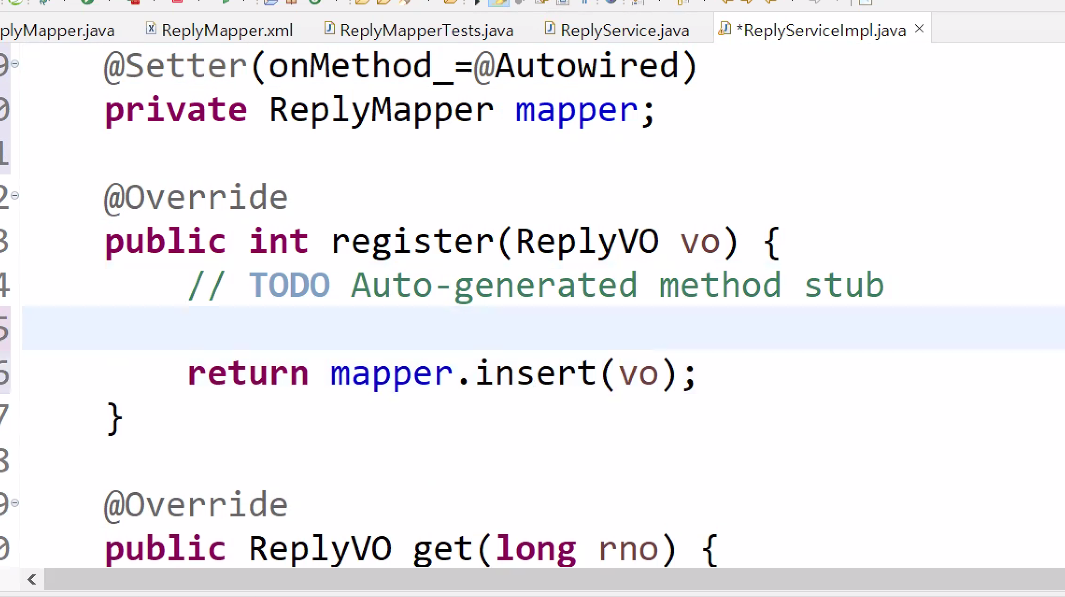
service
서비스 테스트
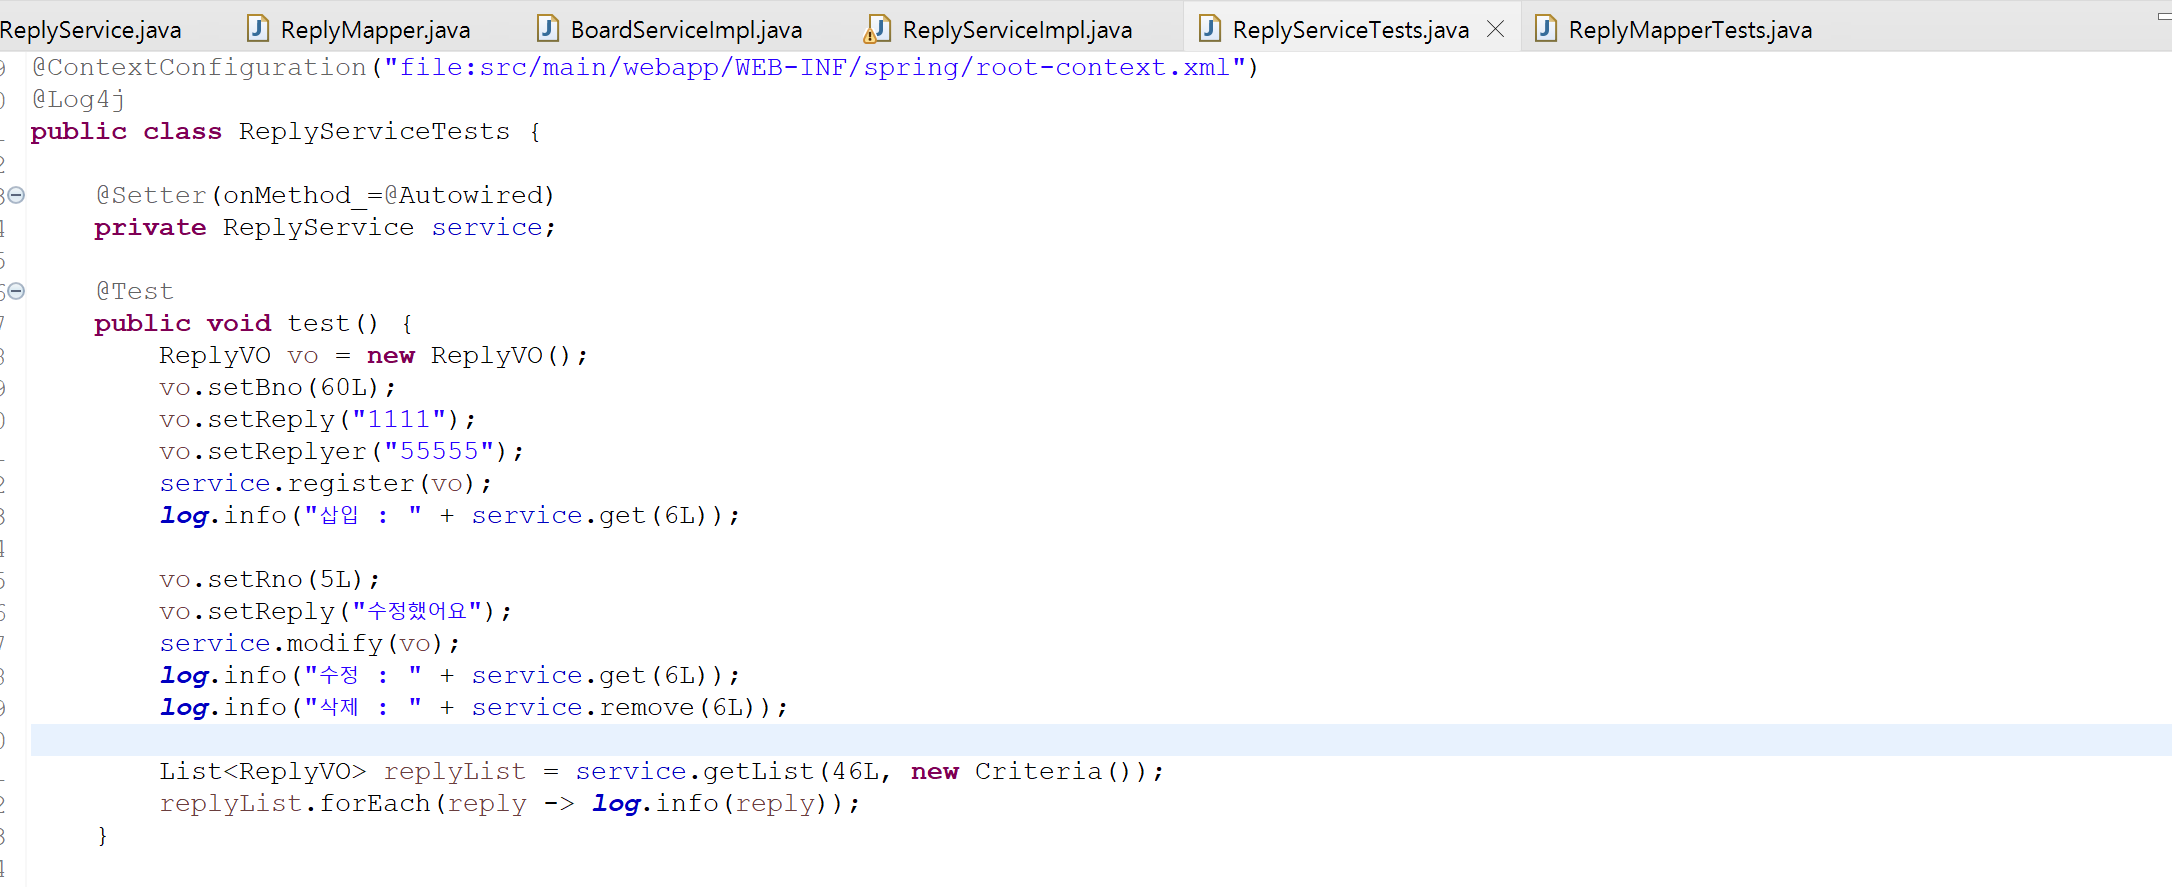
서비스 계층에 비즈니스 로직이 들어가면 의미를 가지게 된다.
restcontroller ajax
ReplyController의 설계
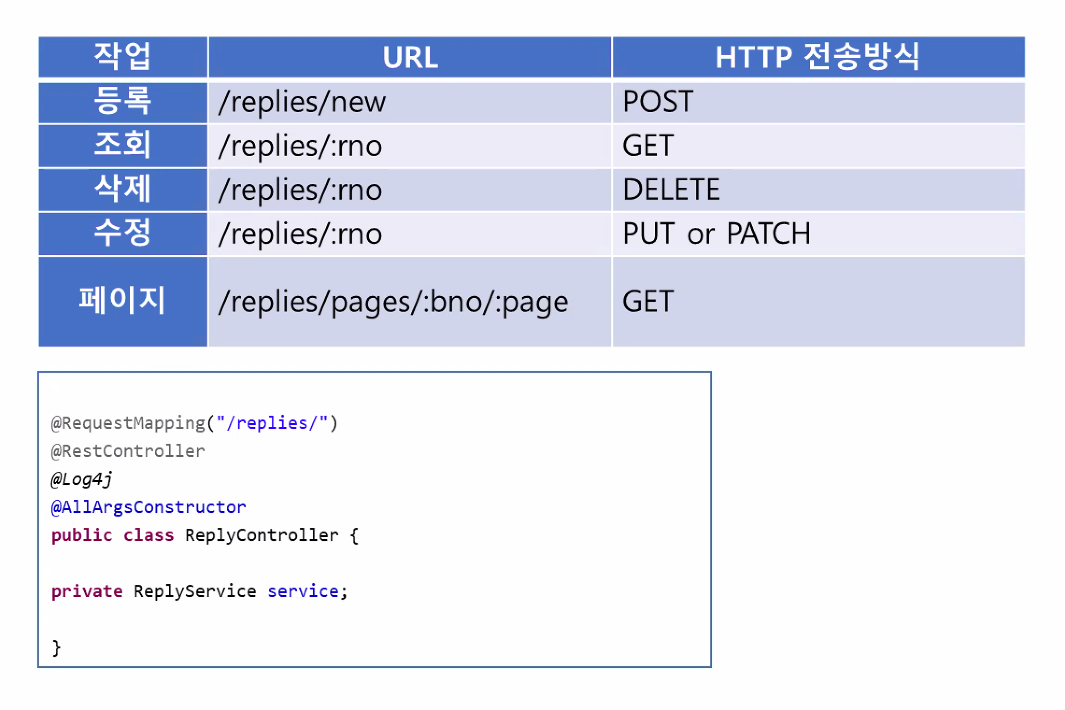
URL로 구분되는것이 아니라 http의 전송방식에 따라 동작이 달라지는 형태이다.
RestController 작성

다음과 같이 형태 작성
@RestController
@Log4j
@RequestMapping("/replies")
public class ReplyController {

	@Setter(onMethod_=@Autowired)
	private ReplyService service;

}
등록 : 정상적으로 성공했는지 실패했는지의 결과에 따라 차등을 주려면
ResponseEntity를 쓴다.
	public ResponseEntity<String> create(){
		return null;
	}
ReplyVO 가 인자로 들어온다. 들어오는 데이터 지정하는 속성은 consunms : 입력으로 받는 데이터
produces : 출력으로 내보내는 데이터
@RequestBody : 인자로 받을떄 필요함
MediaType.TEXT_PLAIN_VALUE : 출력값으로 순수한 텍스트를 보내겠다. 문자열로 mime타입을 줄수있다. 상수화?
insertCount가 1이나 0이냐에 따라 동작이 바뀌게 설정할 수 있다.
삼항 연산자 처리를 하는 것이다.
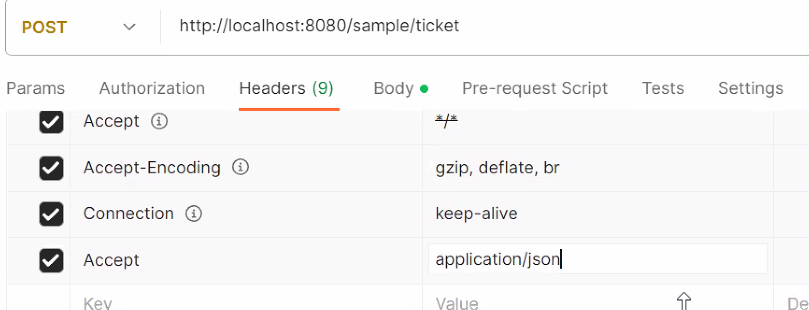
@PostMapping(value="/new", consumes="application/json",
		produces= { MediaType.TEXT_PLAIN_VALUE })
public ResponseEntity<String> create(@RequestBody ReplyVO vo){
	log.info("create : " + vo);
	int insertCount = service.register(vo);
	log.info("result : " + insertCount);
	return insertCount == 1 ? new ResponseEntity<>("success", HttpStatus.OK)
			: new ResponseEntity<>("fail", HttpStatus.INTERNAL_SERVER_ERROR);
}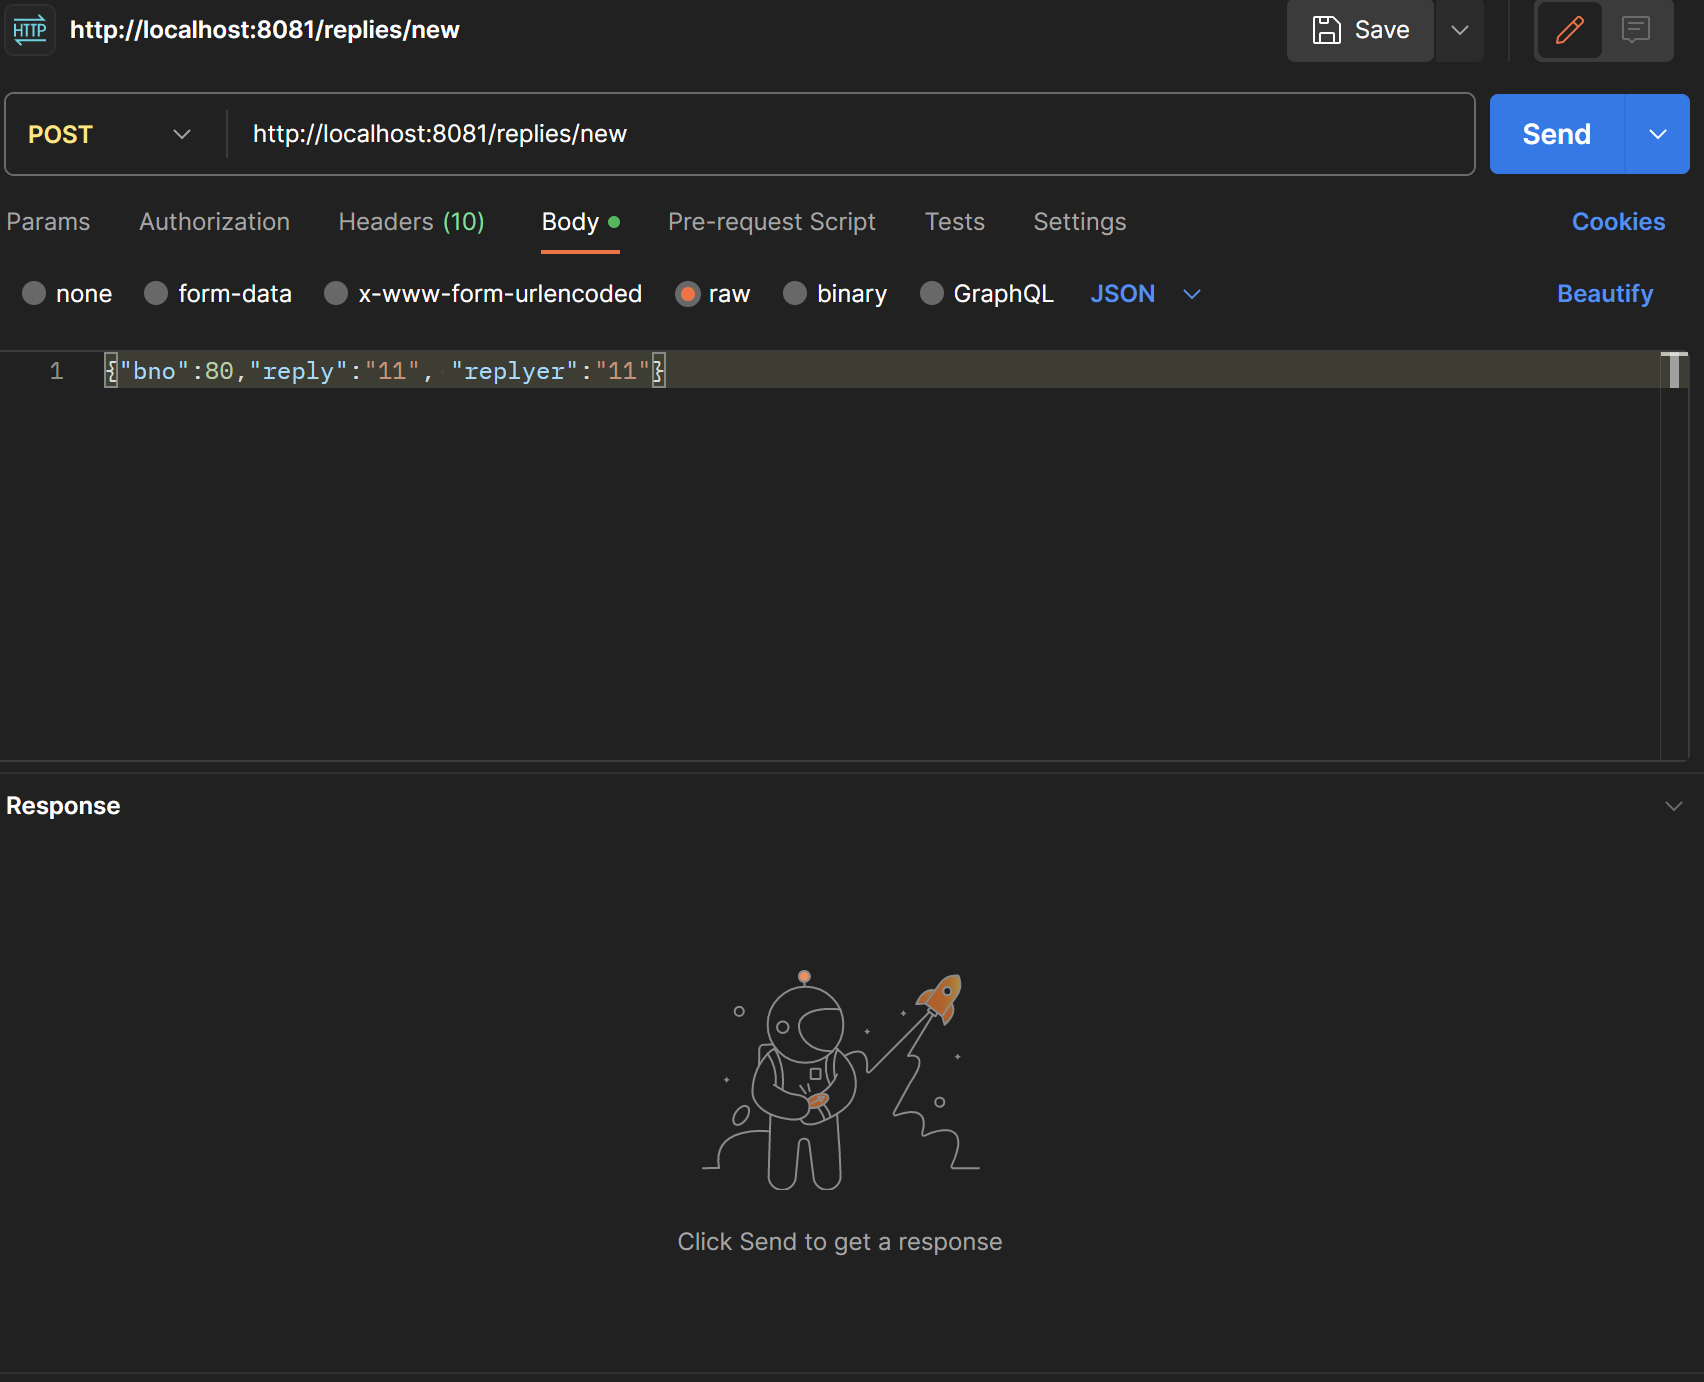
위와 같이 POSTMAN에서 JSON의 형태로 POST 방식으로 데이터를 보내서 정상적으로 응답을 받았으면 success가 뜬다.
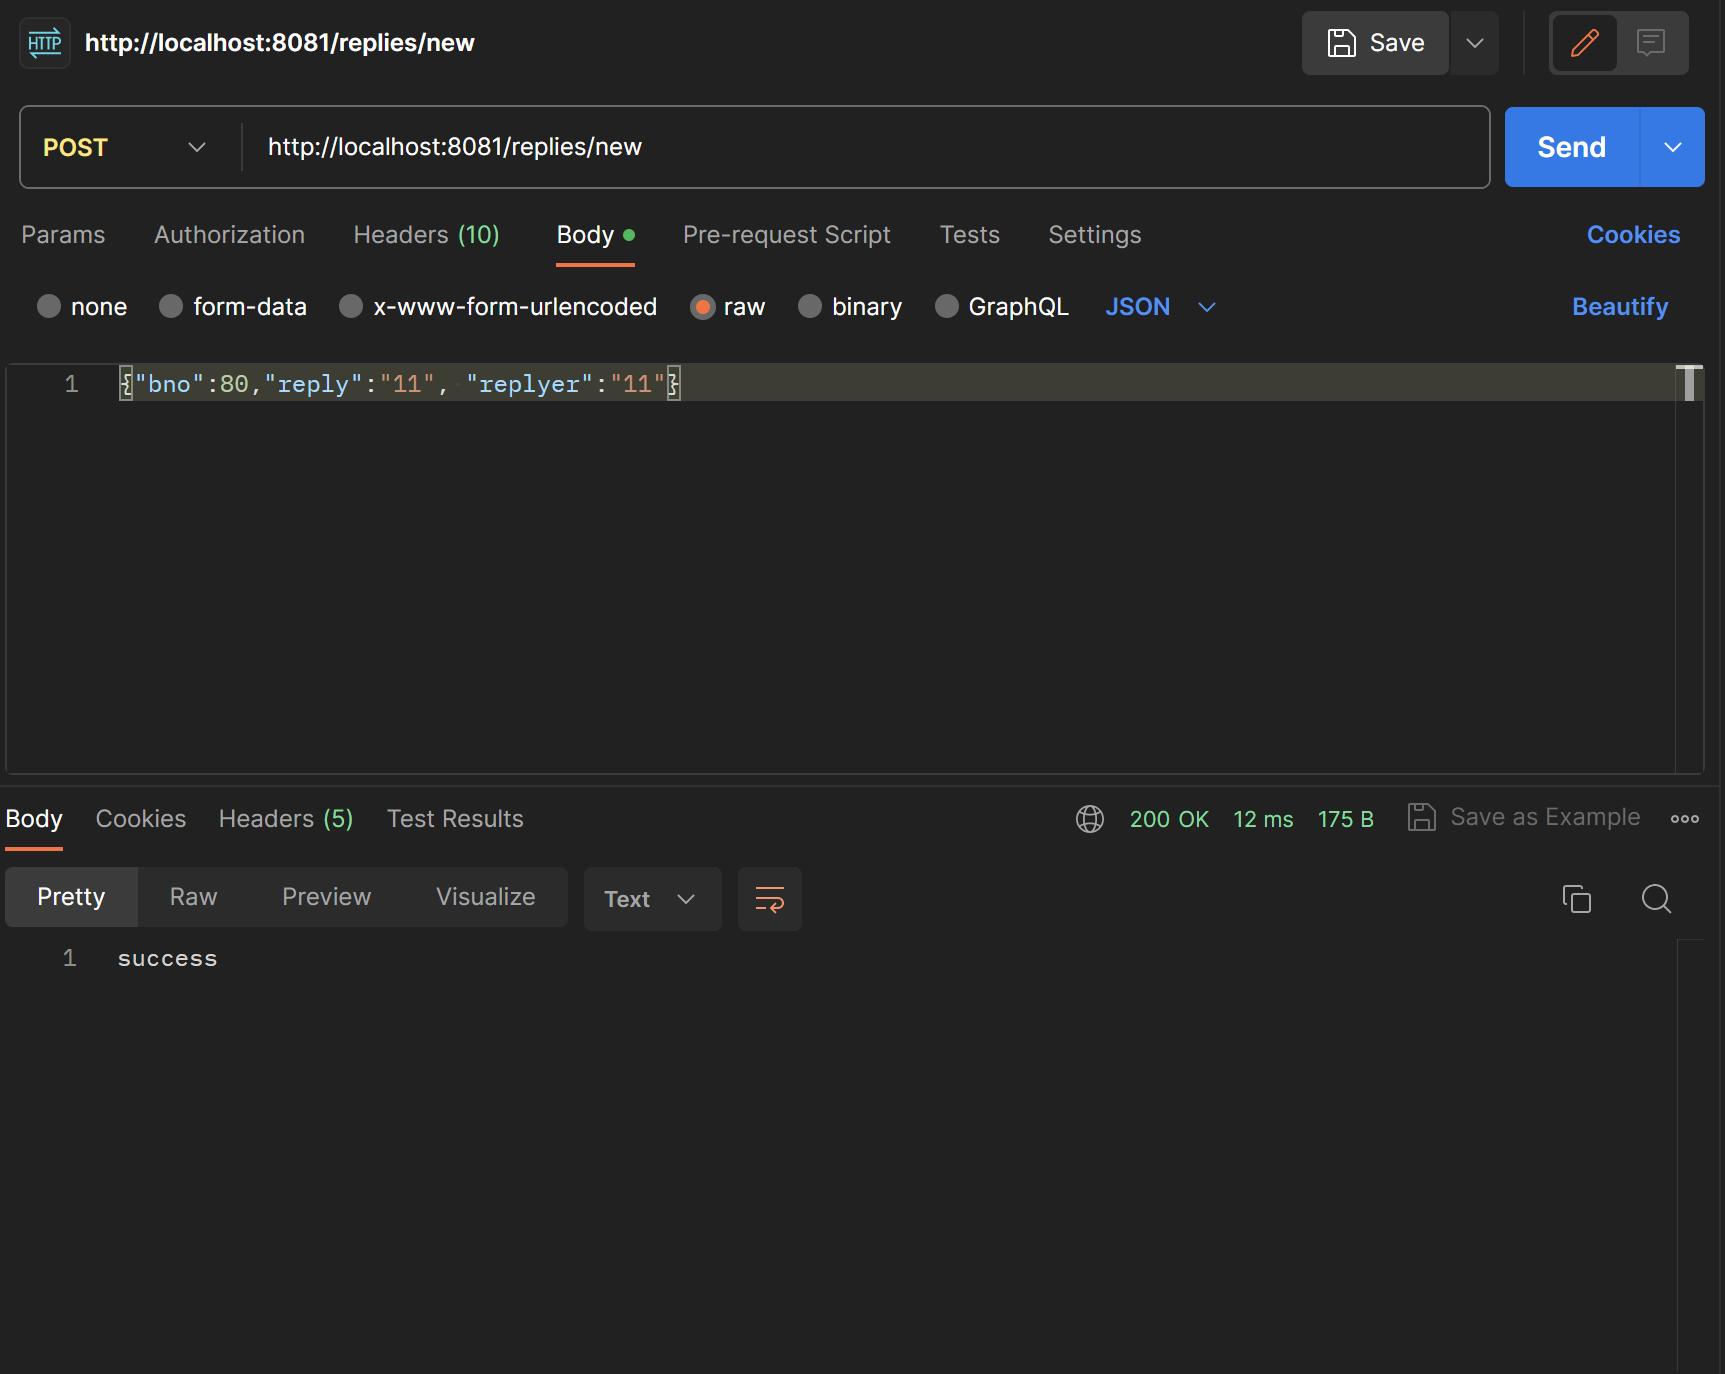
만약 bno에 없는 번호를 집어넣으면 fail이 뜬다 500번 오류가 뜬다.
댓글 목록확인
	@GetMapping(value="/pages/{bno}/{page}")
	public ResponseEntity<List<ReplyVO>> getList() {
		return null;
	}
기본 형태를 위와 같이 작성한다.
	@GetMapping(value="/pages/{bno}/{page}")
	public ResponseEntity<List<ReplyVO>> getList(@PathVariable("page") int page, @PathVariable("bno") Long bno) {
		log.info("getList page : " + page + ", bno : " + bno);
		Criteria cri = new Criteria(page,10);
		service.getList(bno, cri);
		return null;
	}
완성된 형태는 다음과 같다
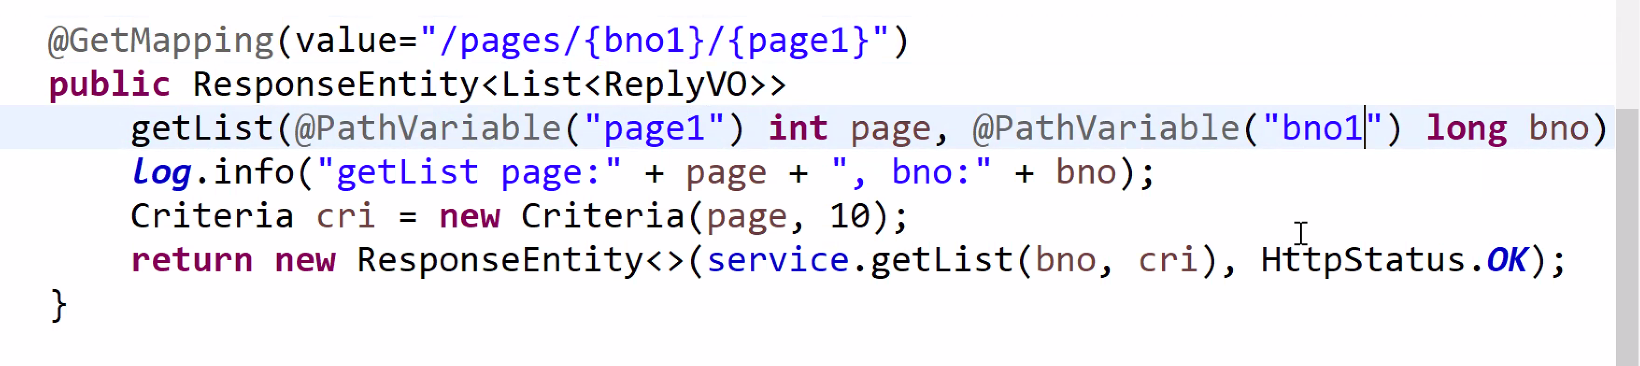
	@GetMapping(value="/pages/{bno}/{page}")
	public ResponseEntity<List<ReplyVO>> getList(@PathVariable("page") int page, @PathVariable("bno") Long bno) {
		log.info("getList page : " + page + ", bno : " + bno);
		Criteria cri = new Criteria(page,10);
		service.getList(bno, cri);
		return new ResponseEntity<>(service.getList(bno, cri), HttpStatus.OK);
	}
{bno}와 {page}가 path variable 이고 무엇과 매핑되는지 정확하게 구분할 수 있어야 한다.
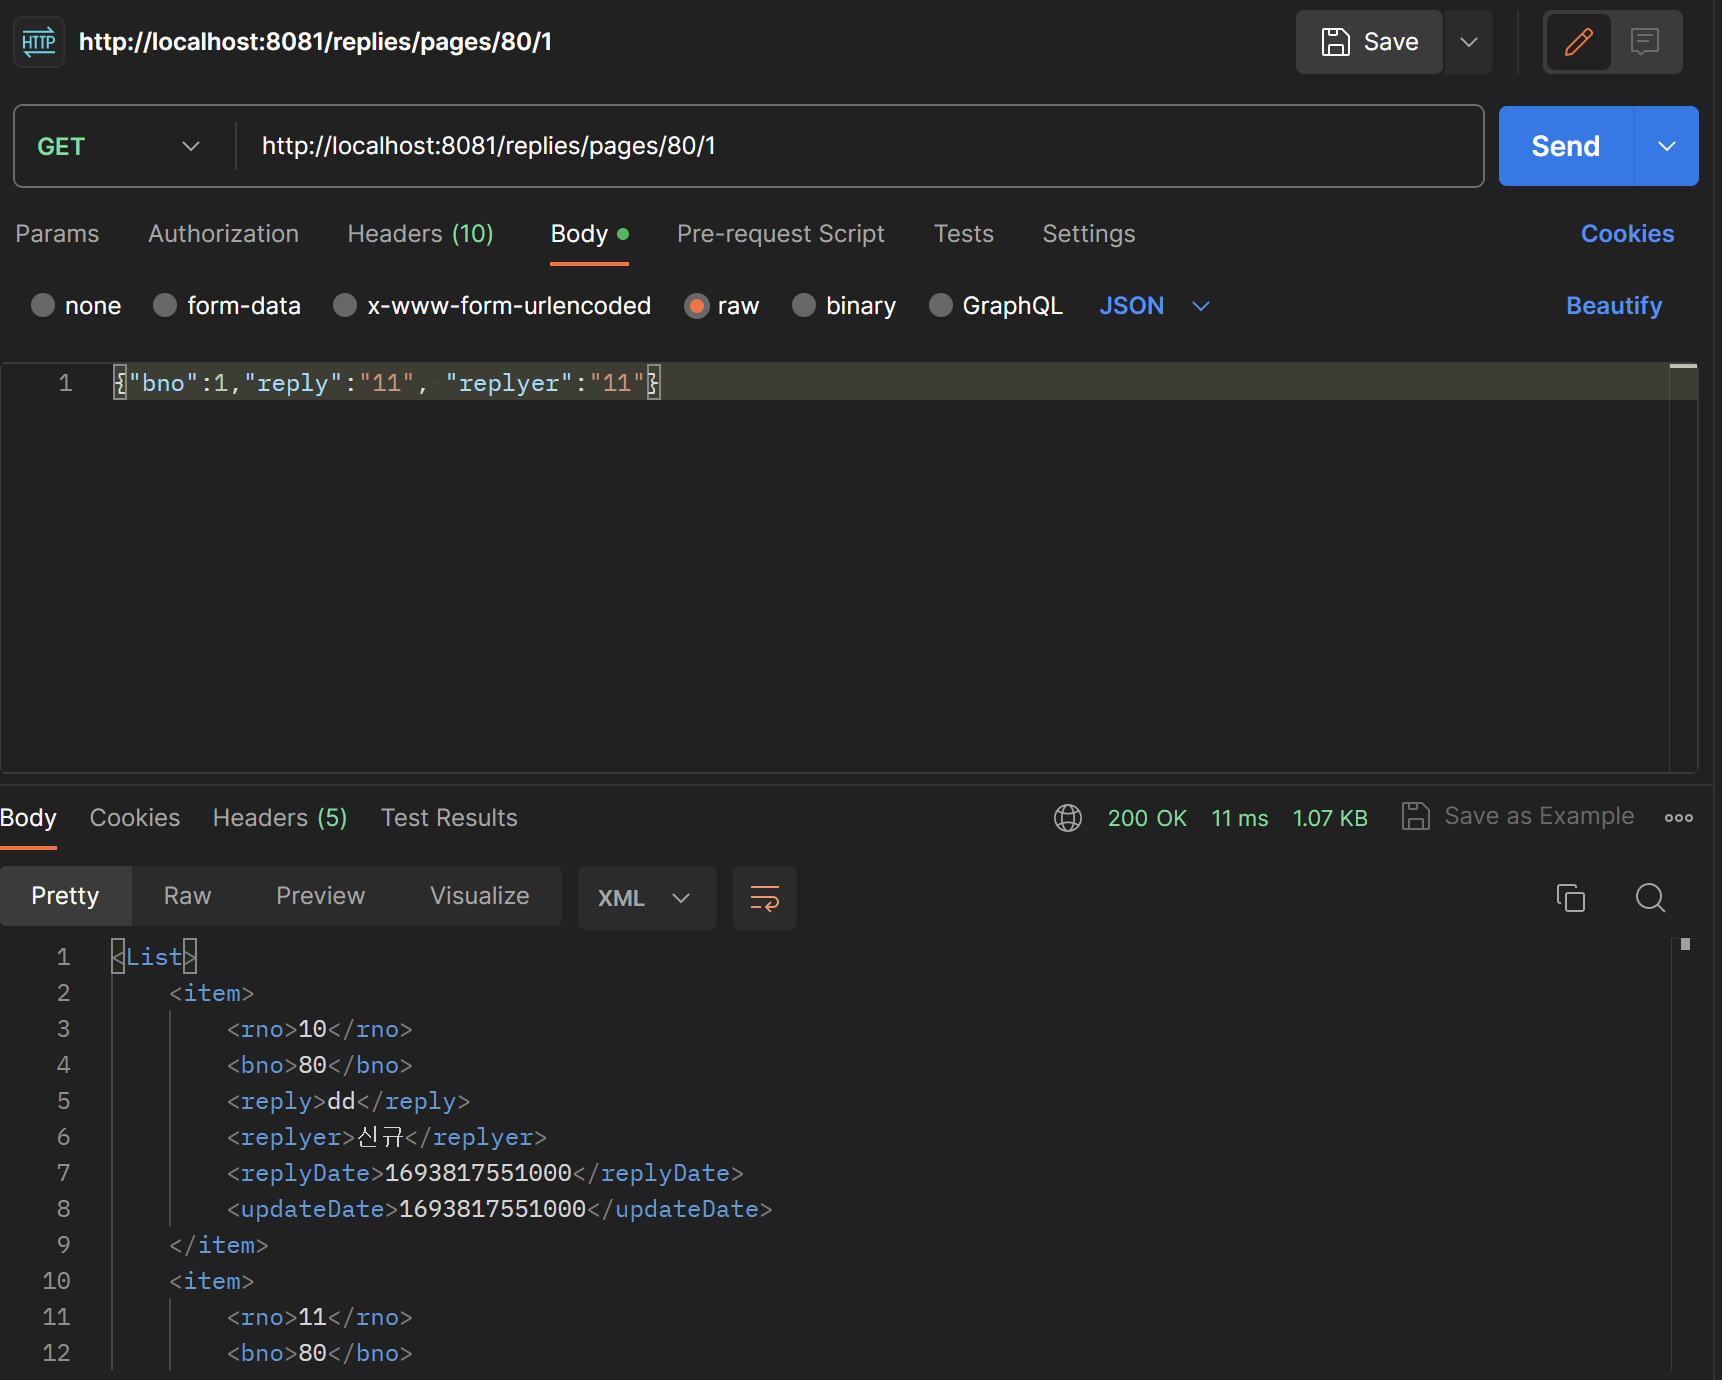
포스트맨으로 GET방식으로 요청을 보내면 디폴트값인 XML형식으로 응답을 받는다. .json을 붙이면 json형태로 응답을 받을수있다.
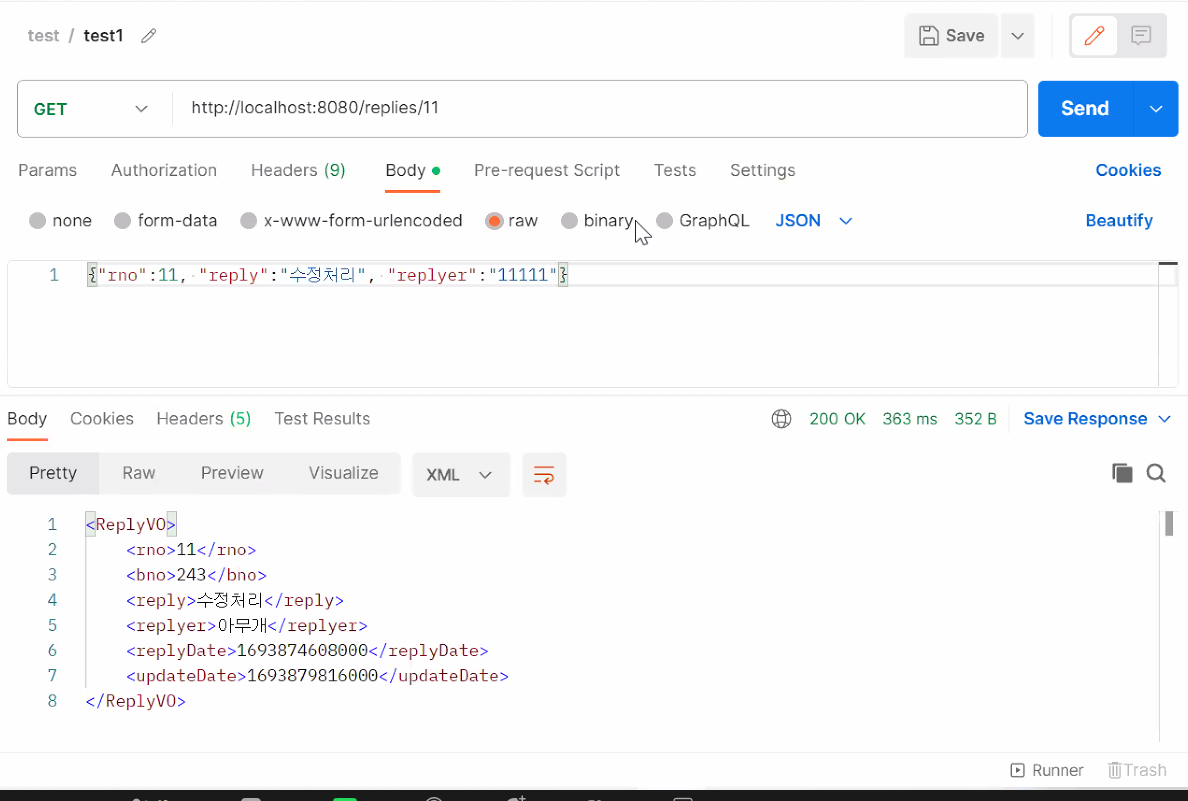
댓글 조회
	@GetMapping(value="/{rno}")
	public ResponseEntity<ReplyVO> get() {
		return null;
	}
기본틀 작성

인자 들어오고 아래와 같이 완성시킨다.
	@GetMapping(value="/{rno}")
	public ResponseEntity<ReplyVO> get(@PathVariable("rno") long rno) {
		log.info("get:" + rno);
		return new ResponseEntity<>(service.get(rno), HttpStatus.OK);
	}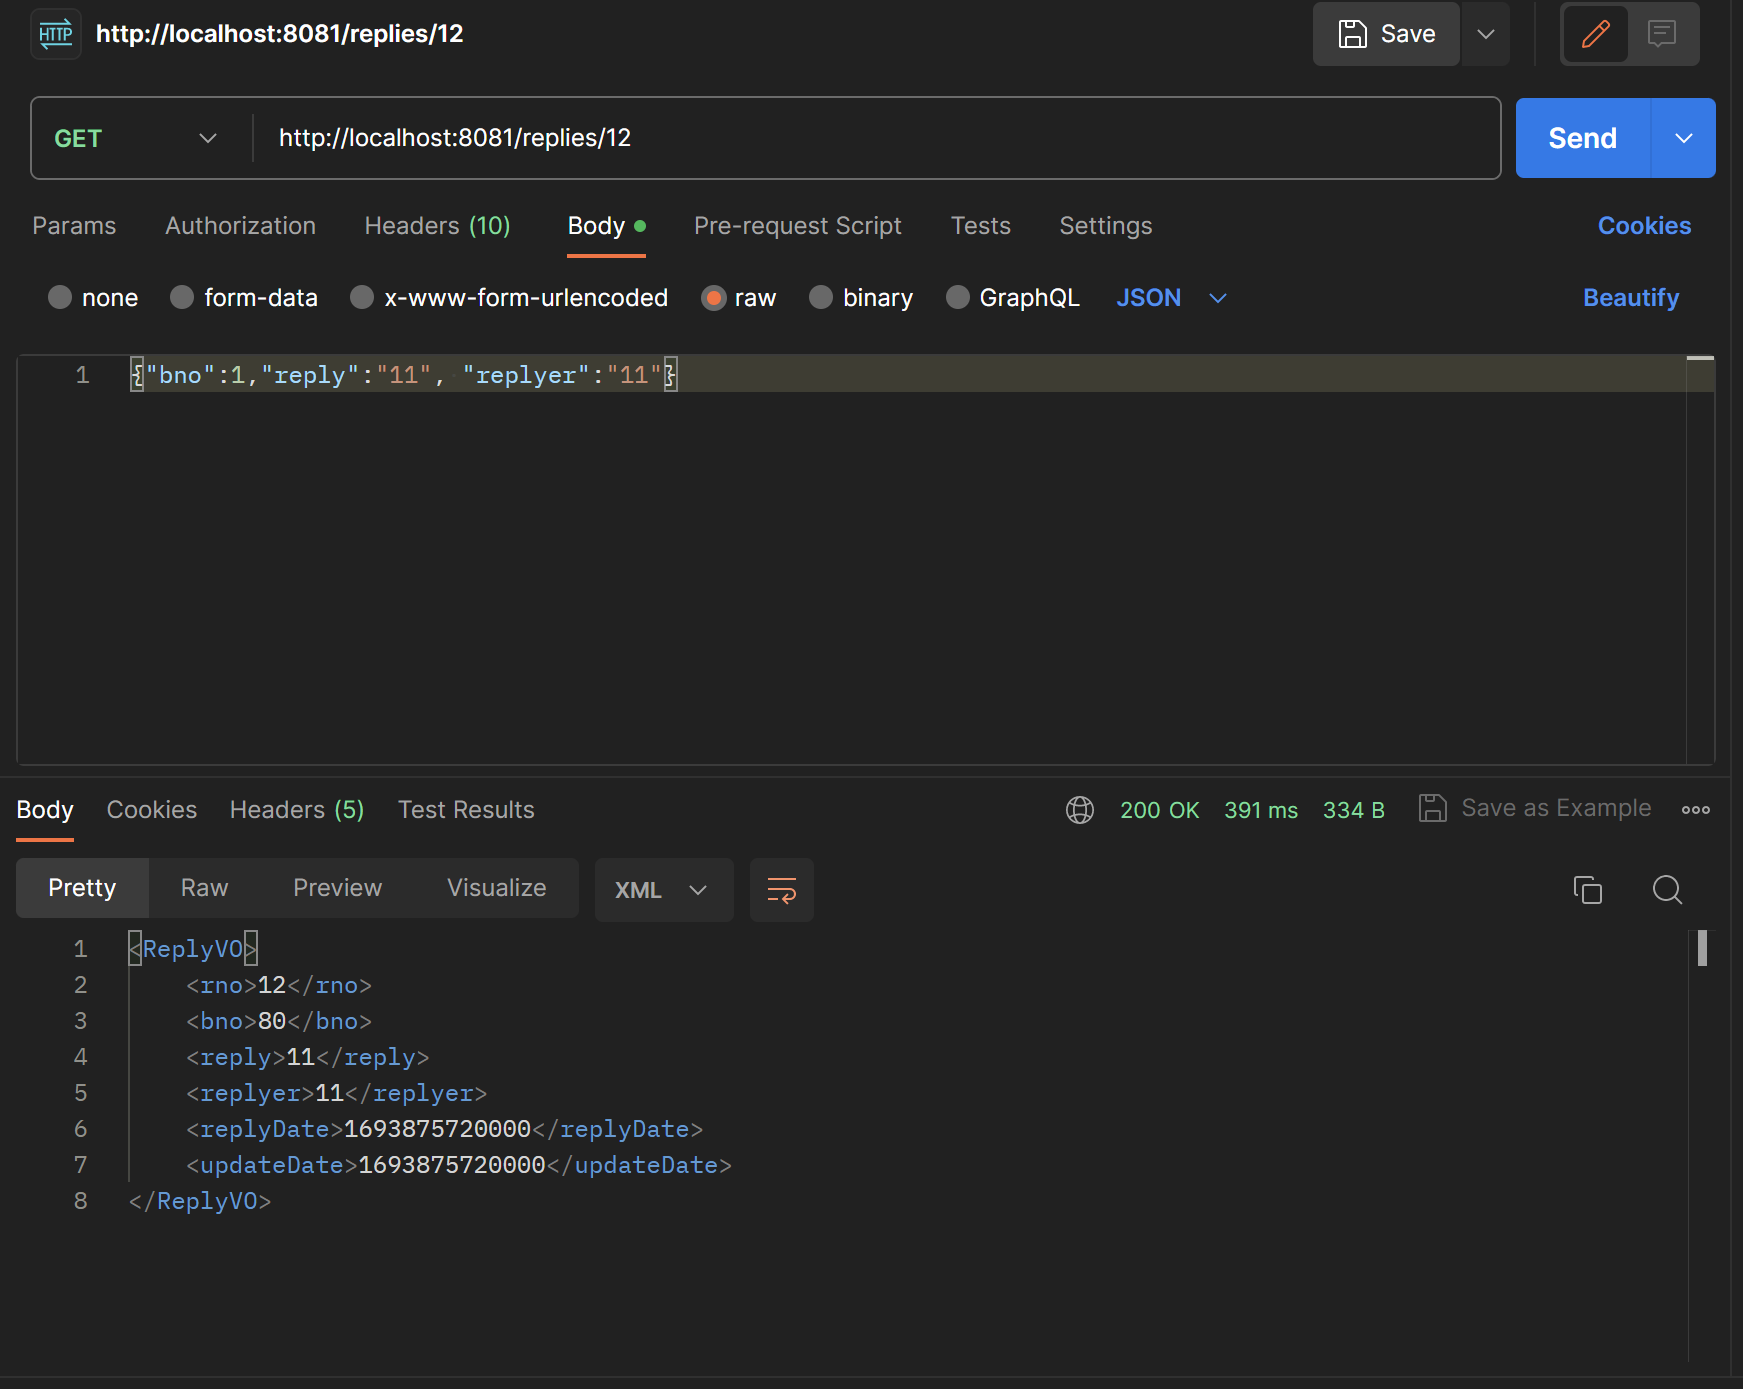
GET 방식으로 글번호만 썼을때 응답이 위와 같이 돌아오는 것을 확인 할 수 있다.
댓글 삭제
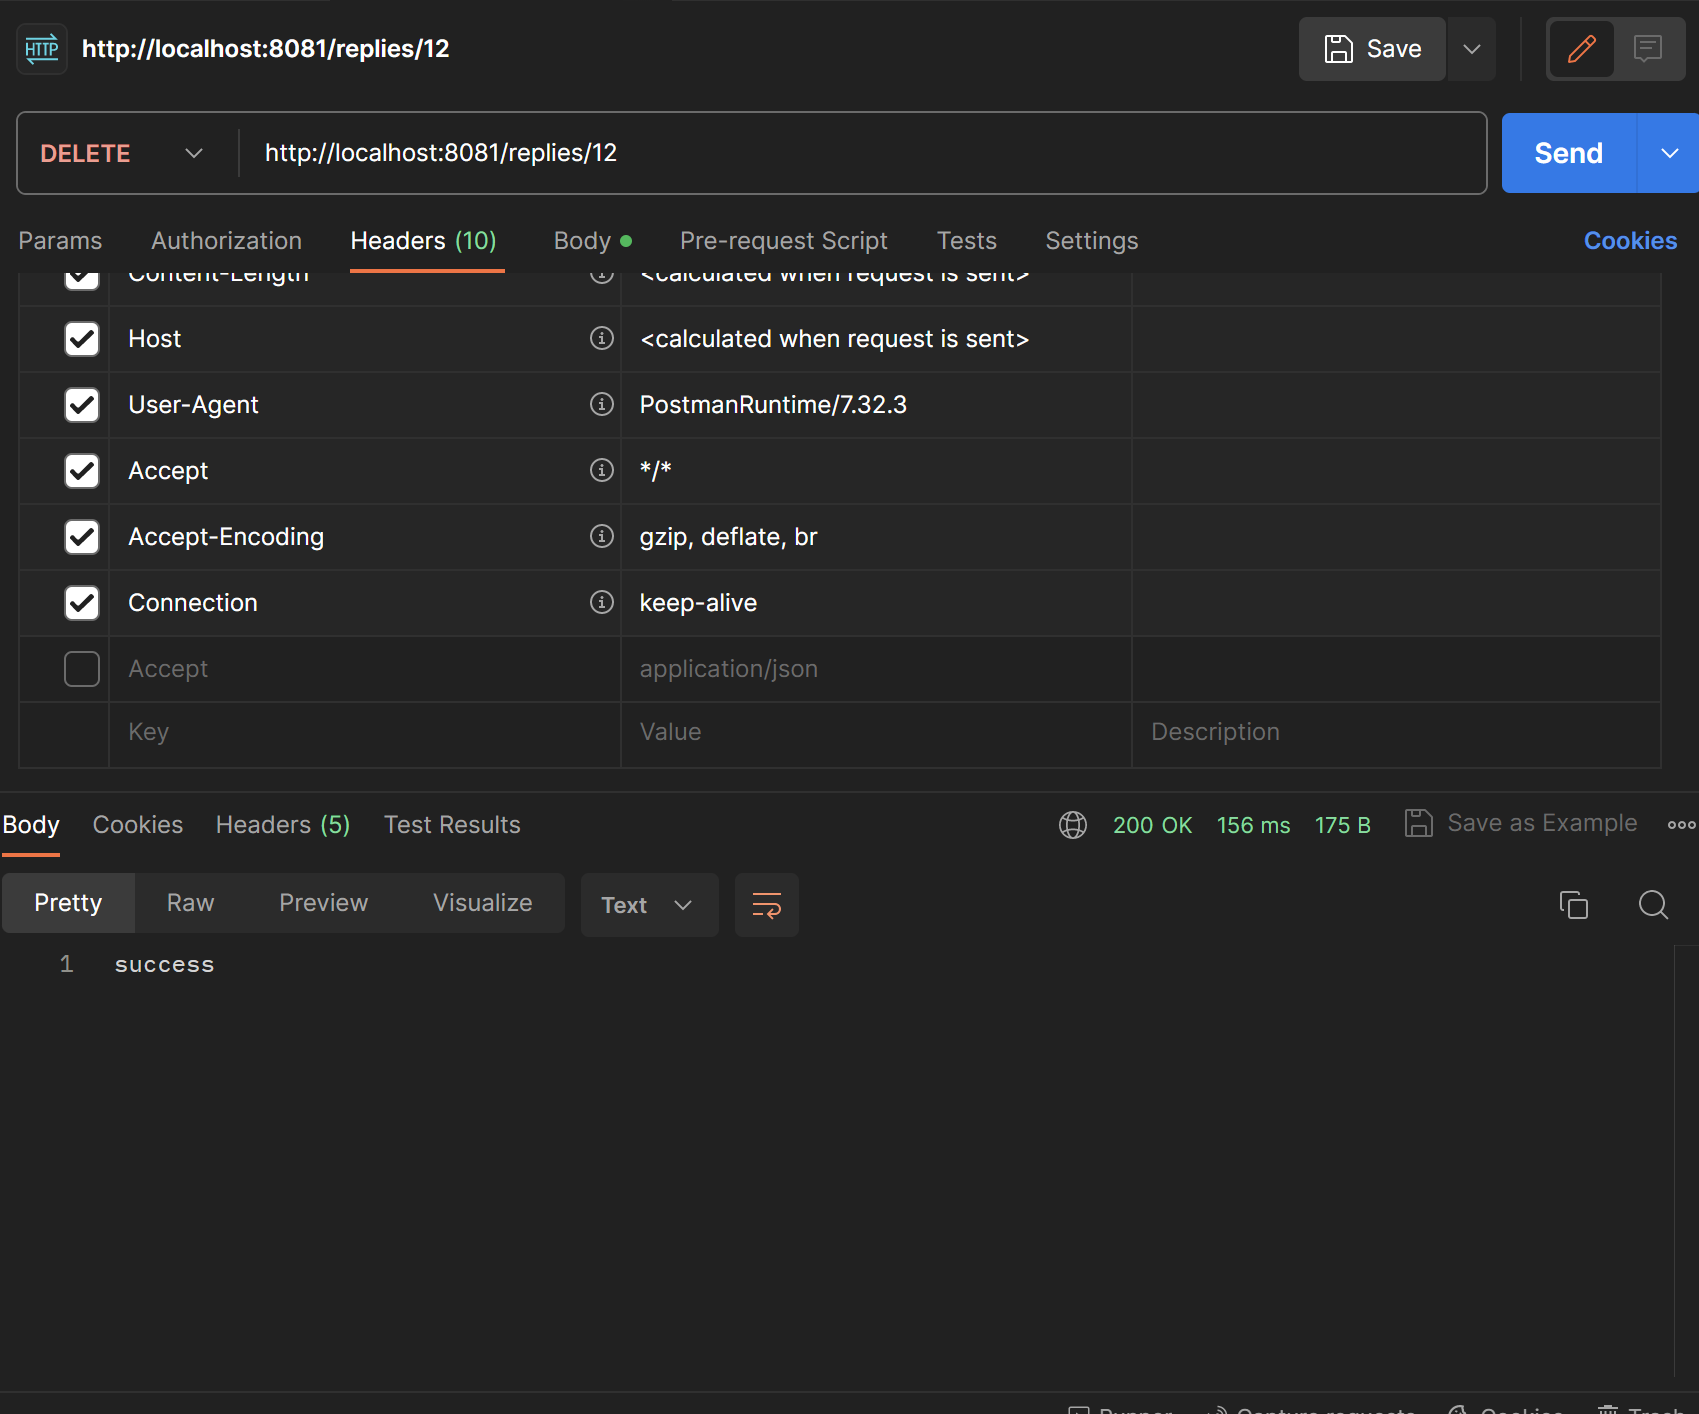
12번 글이 삭제 되었음을 알 수 있다.
댓글 수정
vo.setRno(rno); 안정성을 위해 추가해준다
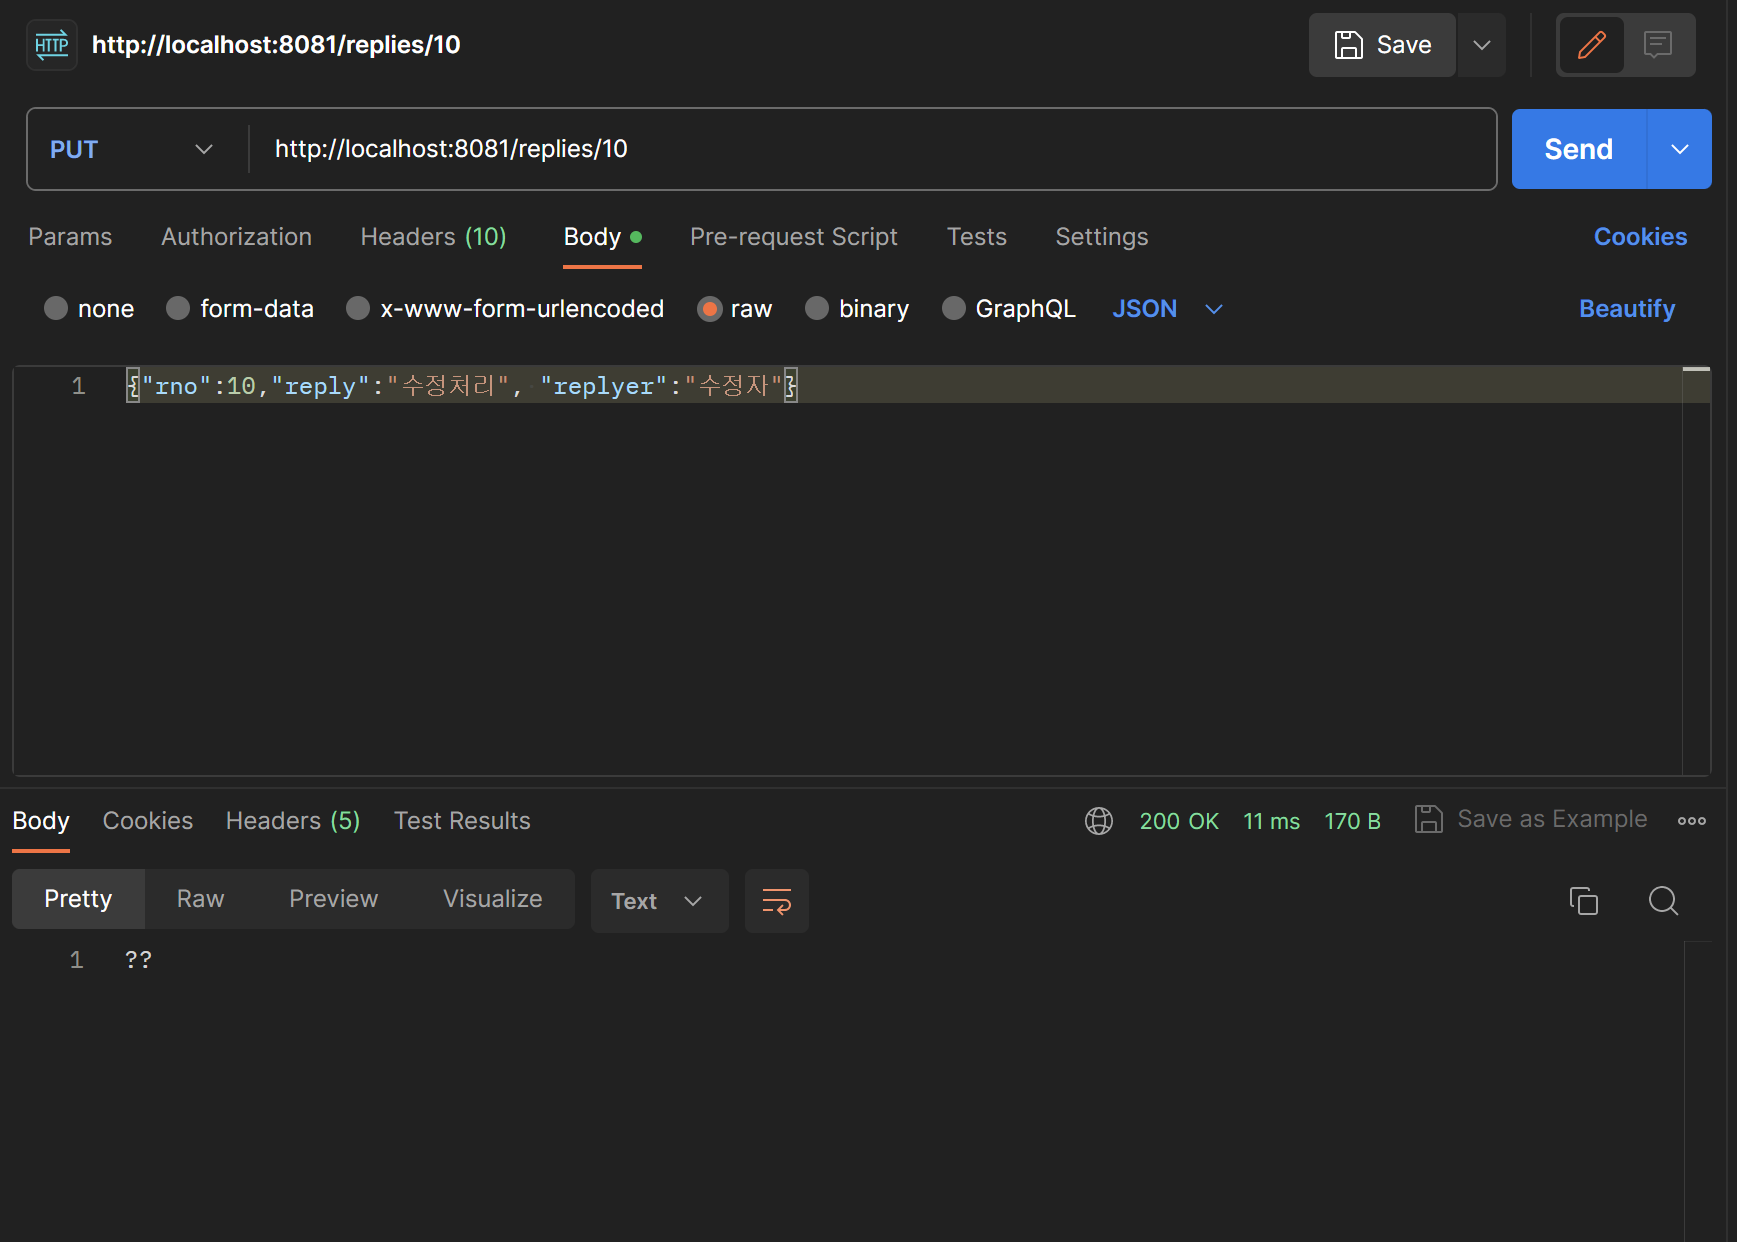
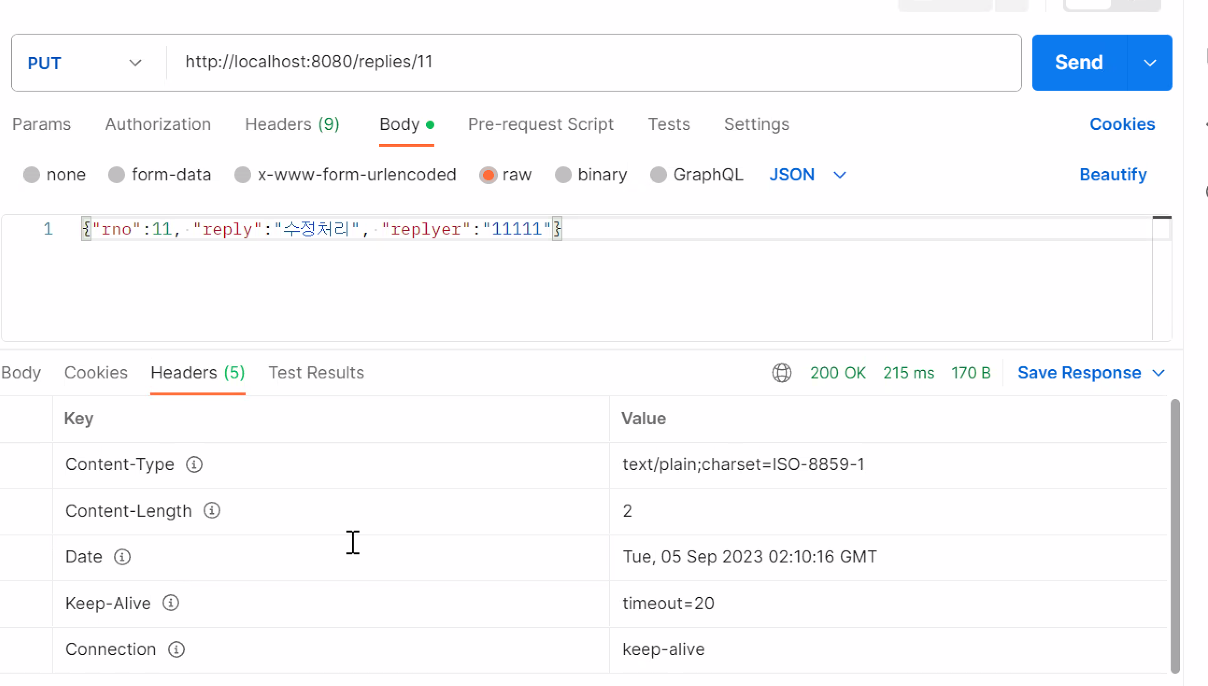
한글 인코딩처리
	@DeleteMapping(value="/{rno}", produces="text/plain;charset=UTF-8")
	public ResponseEntity<String> remove(@PathVariable("rno") long rno) {
		log.info("remove : " + rno);
		return service.remove(rno) == 1 ? new ResponseEntity<>("성공", HttpStatus.OK)
				: new ResponseEntity<>("fail", HttpStatus.INTERNAL_SERVER_ERROR);
	}
produces="text/plain;charset=UTF-8" 을 추가해서 한글이 깨지지 않게 한다.
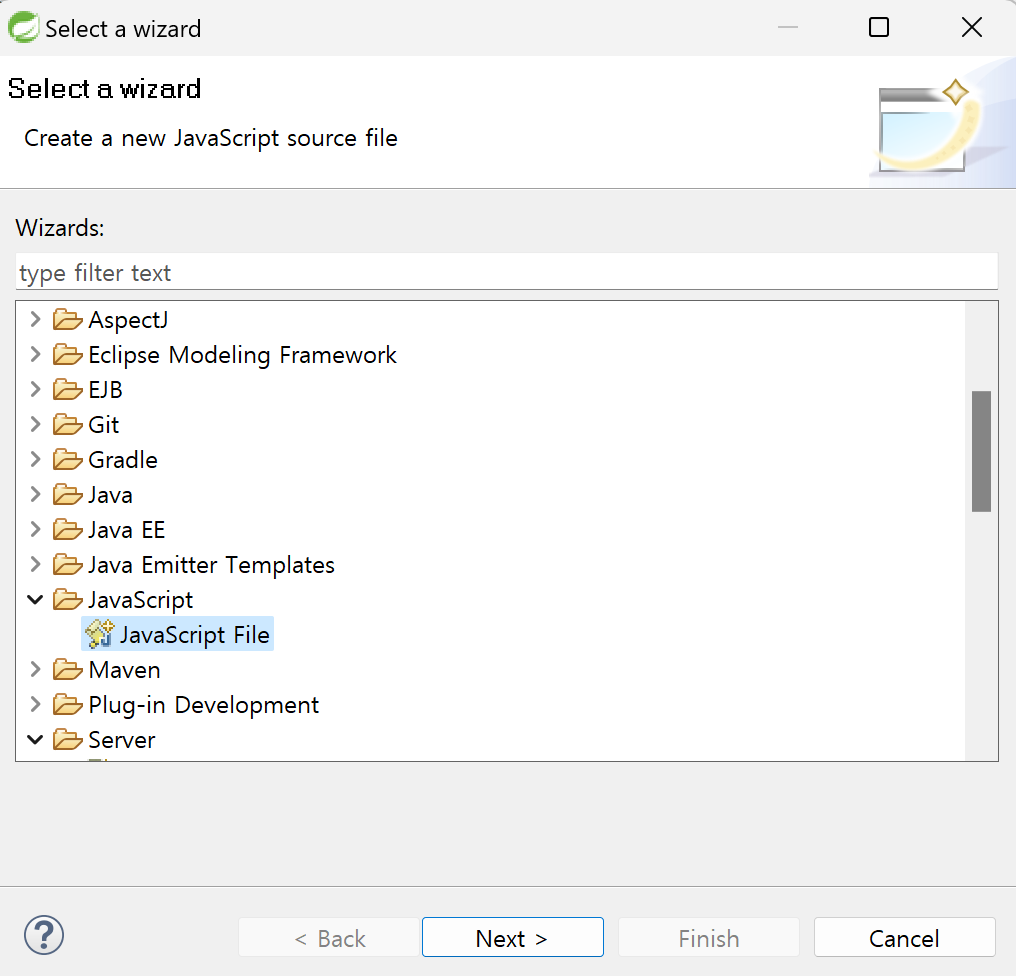
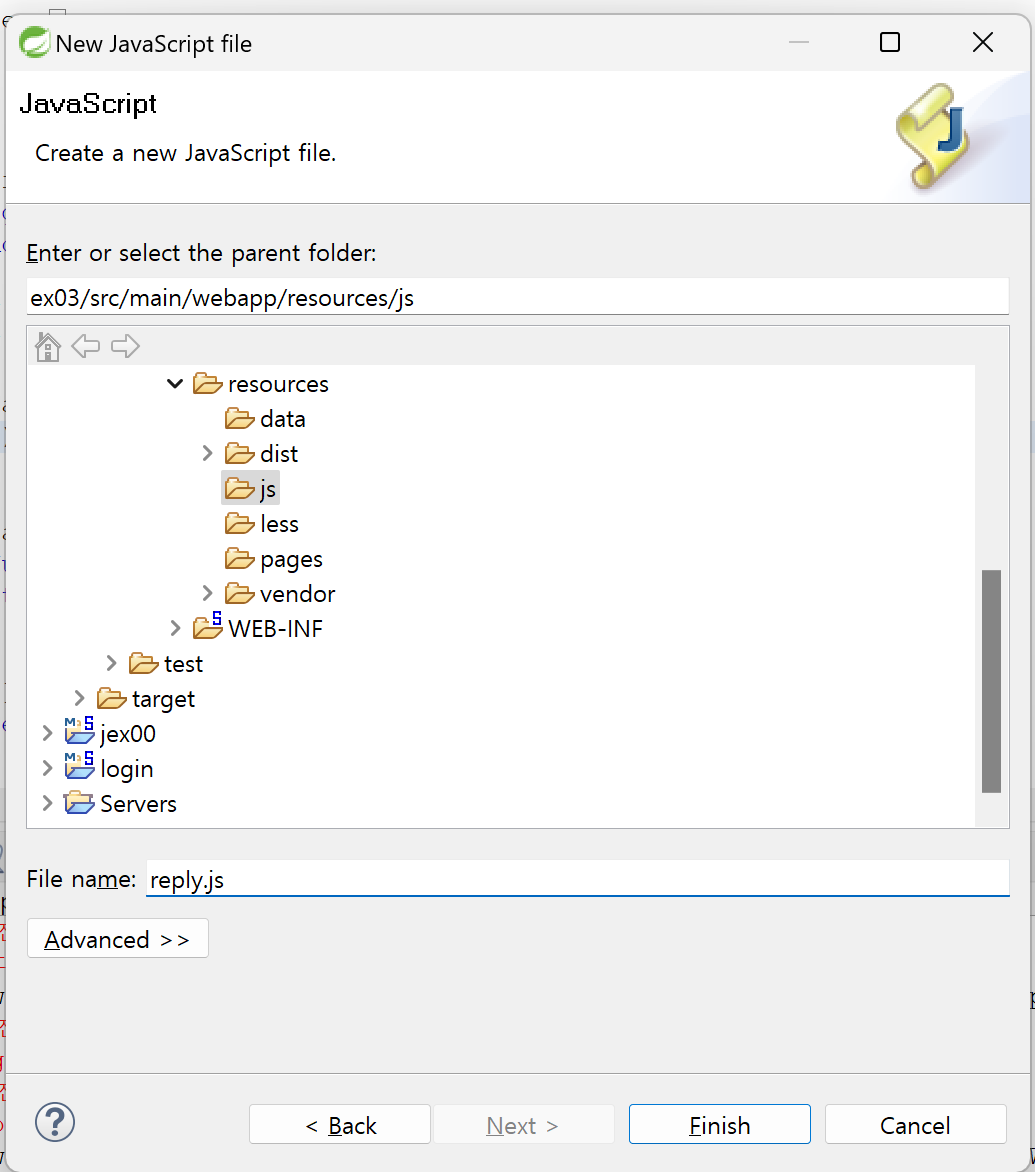
JavaScript 준비
테이블의 id 삭제
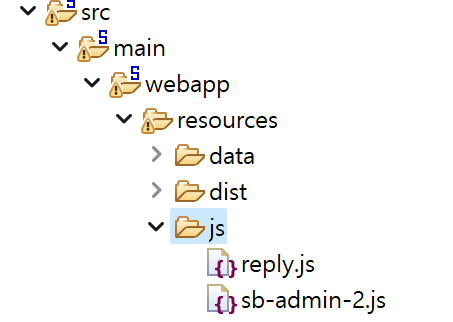
디렉토리의 경로에 잘 추가했다면 다음과 같이 페이지가 뜬다.
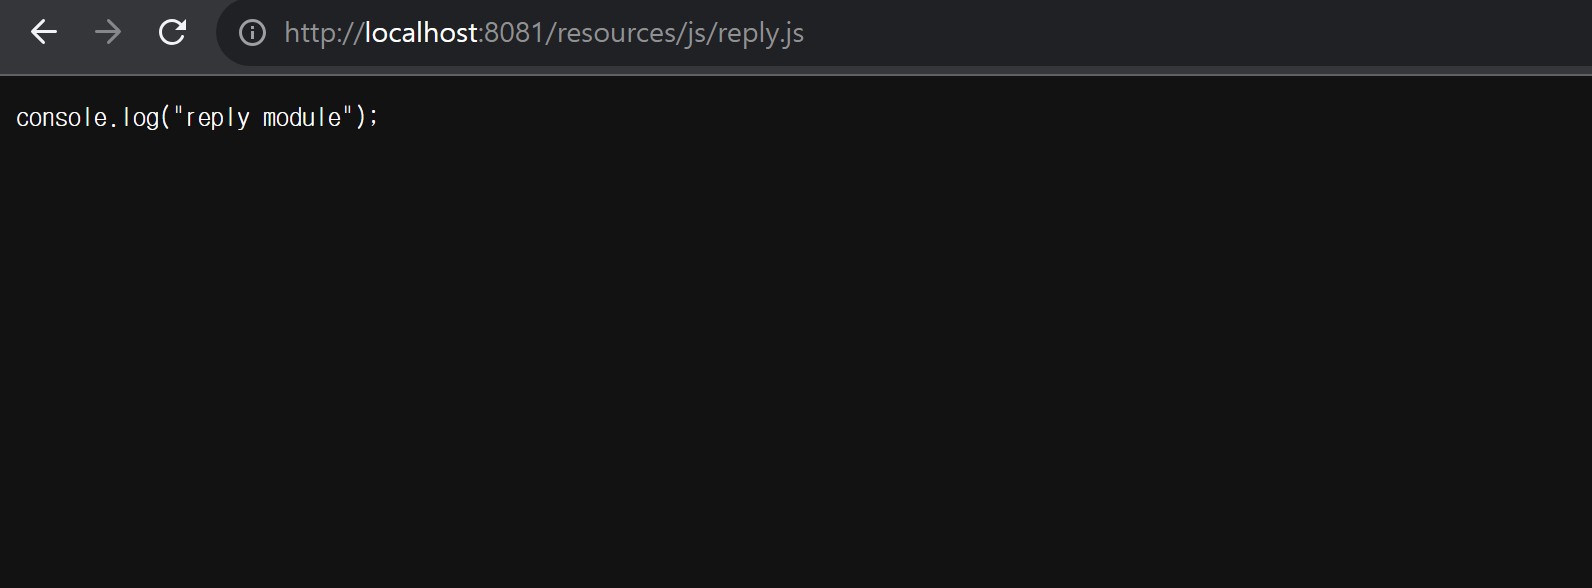
get.jsp

위에서만든 스크립트 추가

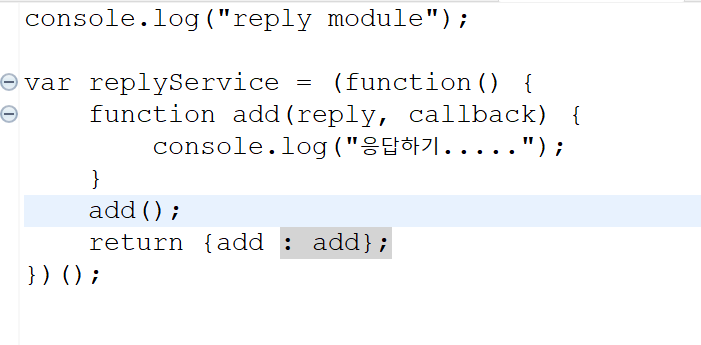
조회를 하면 reply module이 콘솔에 찍히는 것을 볼 수 있다.
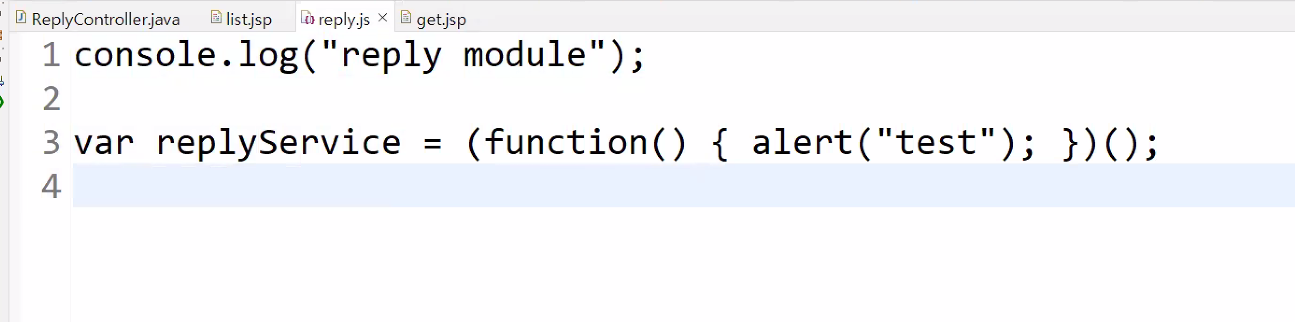
자바스크립트의 특징은 느슨한 타입이라는것. 변수에 함수를 짖정할수도 있다.
변수에 익명함수를 지정하면 그 변수를 함수의 이름이라고 이해하면된다.
변수에서 () 을 제거하고 실행하면 다음과 같은 결과가 콘솔에 찍힌다.
실행하지 않은 함수 자체가 찍힌다.
변수자체에 괄호가 붙던 ()는 실행을 의미함


reply.js 등록 처리

파라미터가 들어오지 않아도 실행이 된다.

ajax 추가를 위한 틀을 작성한다.
$.ajax({
	type:'post',
	url:'/replies/new',
	contentType:'application/json;charset=UTF-8',
	success:function {} ,
	error:function {}
})
function의 인자에는 헤더정보 result, status 들어올수있다.
인자에 아무것도 안써도 실행은 되지만 서버에서 보내는 인자정보를 받지 못할 뿐이다.
$.ajax({
type:'post',
url:'/replies/new',
contentType:'application/json;charset=UTF-8',
success:function(result, status, xhr) {} ,
error:function(xhr, status, er) {}
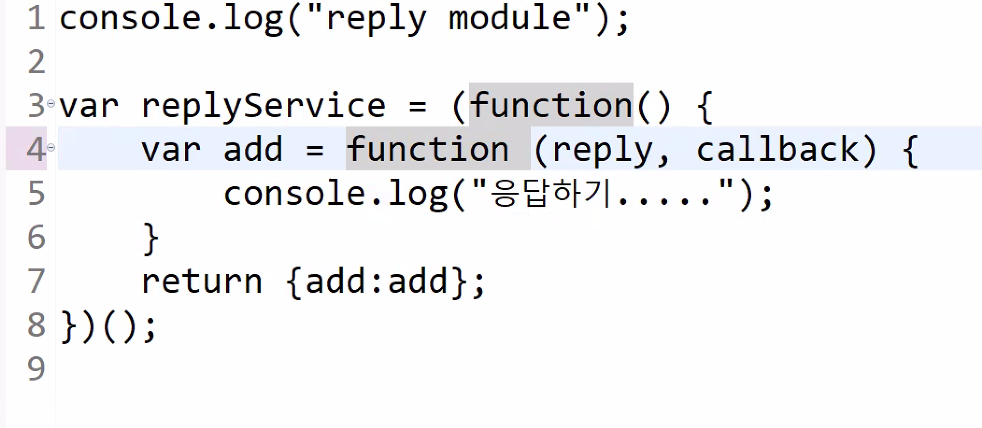
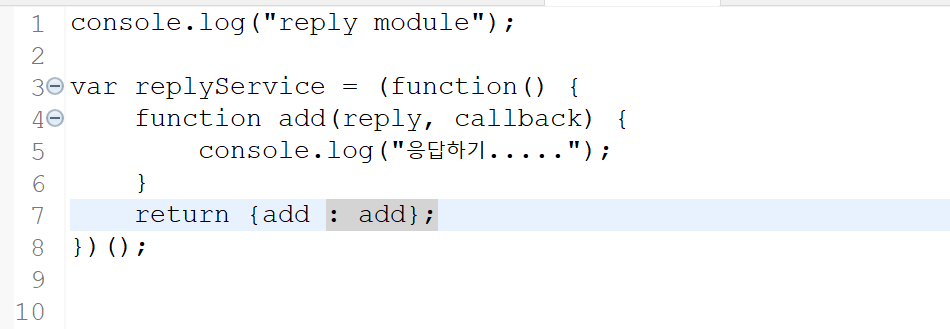
})replyService는 add라는 함수를 정의하는것을 실행하는것이다.
여기서 보내줄때 json으로 변환 시킨다.
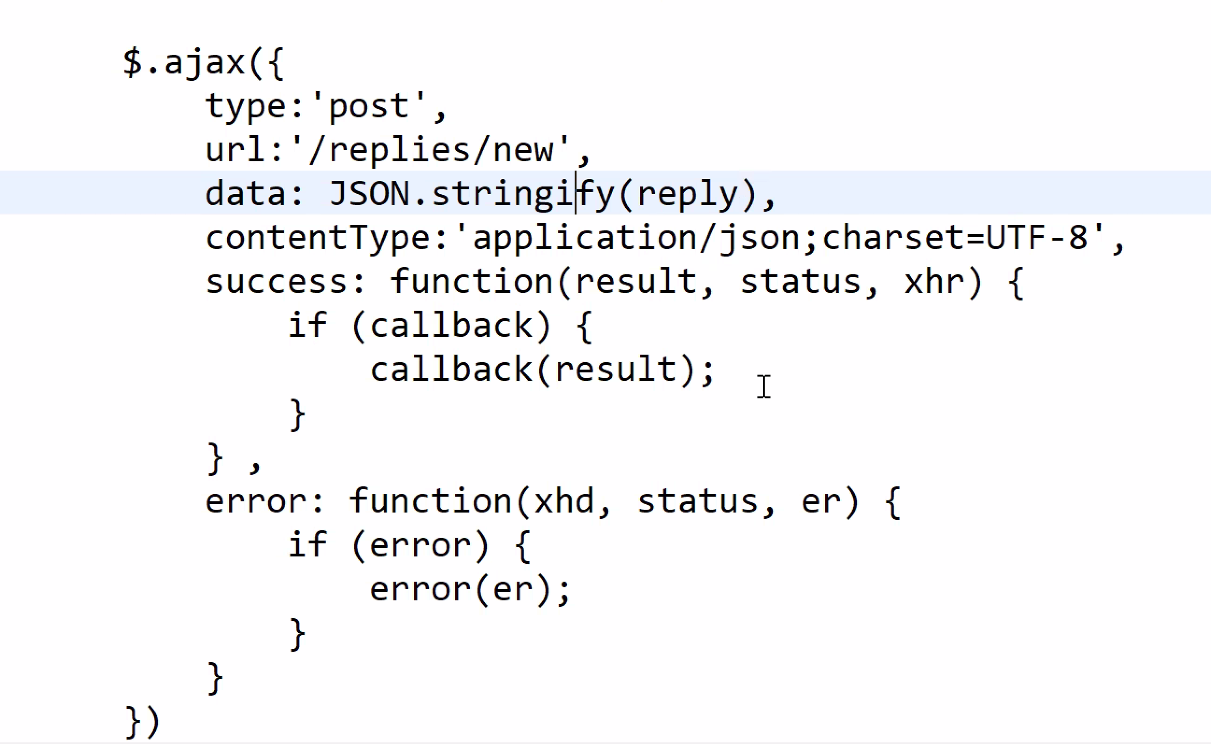
success 성공적으로 응답을 받았을때, 하고싶은 일을 적는다.
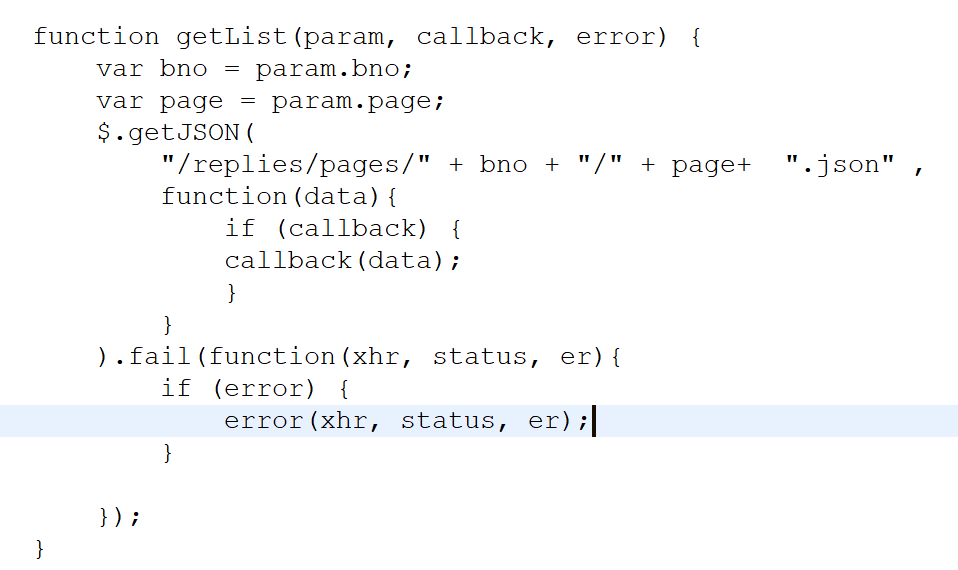
getList
param에도 데이터가 두개가 들어와야한다.
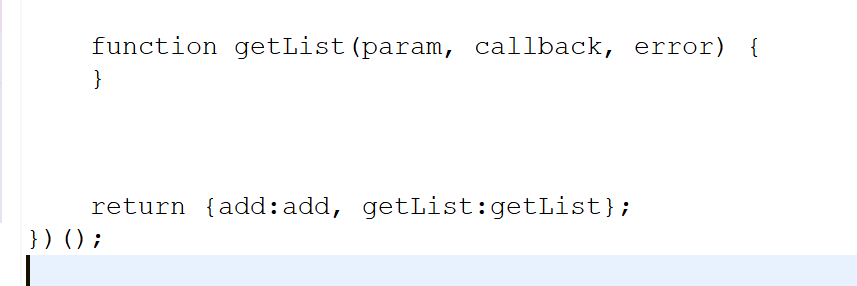
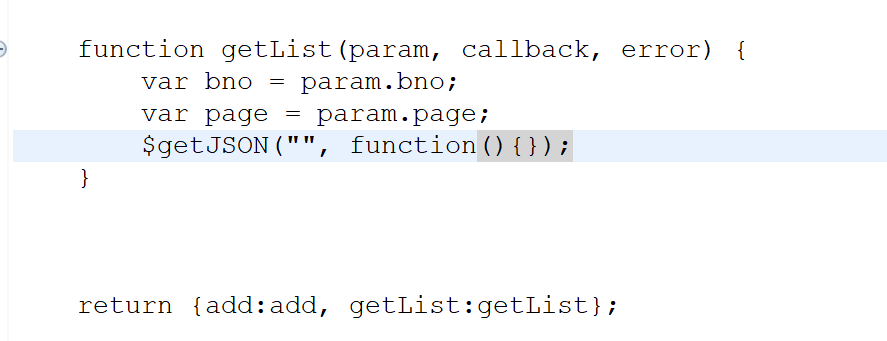
위와 같이 기본틀 작성
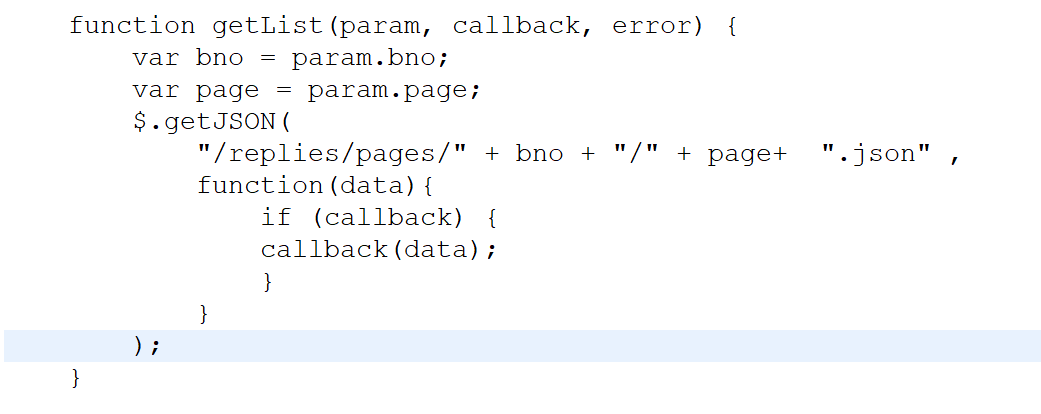
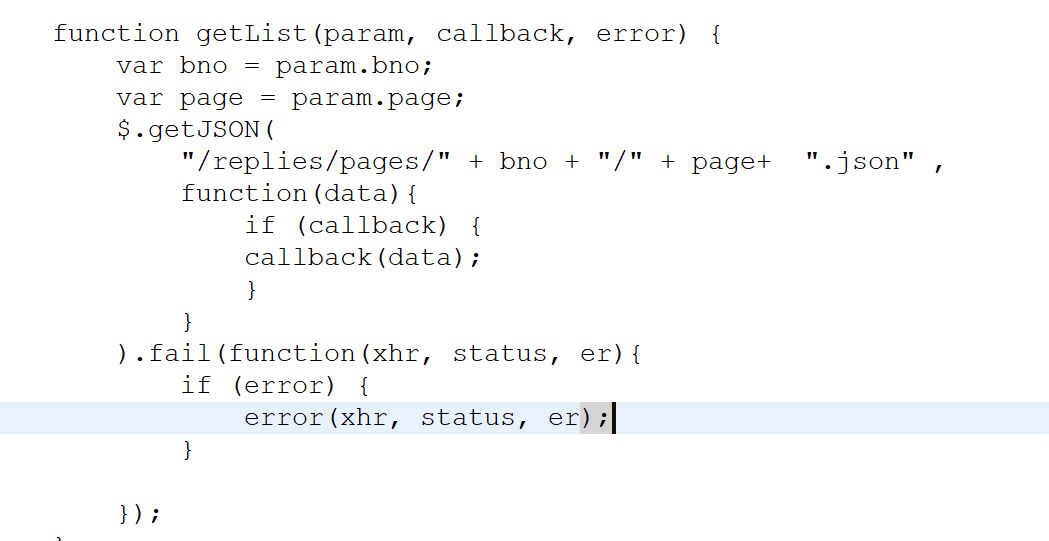
	function getList(param, callback, error) {
		var bno = param.bno;
		var page = param.page;
		$getJSON(
			"/replies/pages/" + bno + "/" + page+  ".json" ,
			function(data){
				if (callback) {
				callback(data);
				}
			}
		);
	}
get.jsp에 다음과 같이 작성
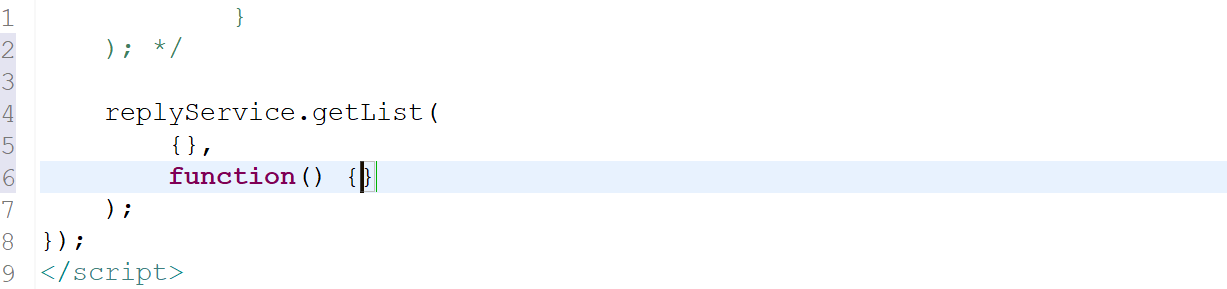
첫번째인자와 두번쨰 인자
function(1ist)인자로 설정
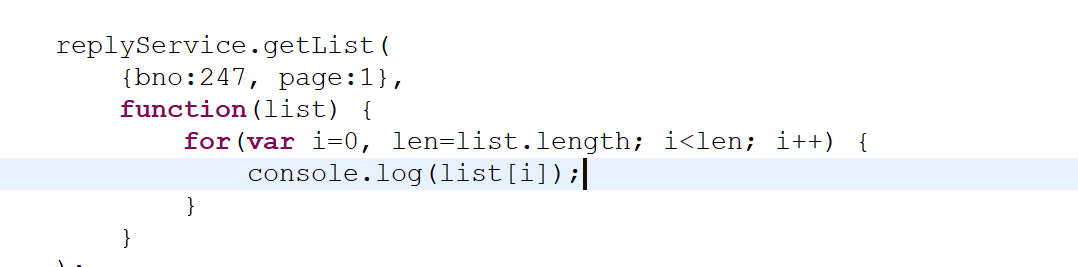
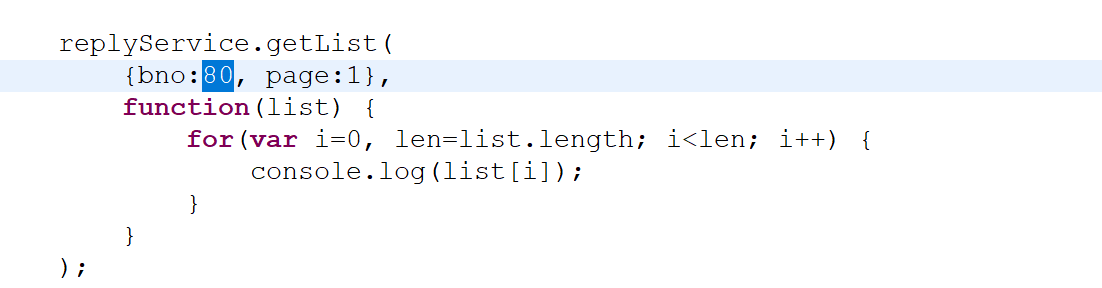
	replyService.getList(
		{bno:247, page:1},
		function(list) {}
	);
json어레이형태
get.jsp
.js
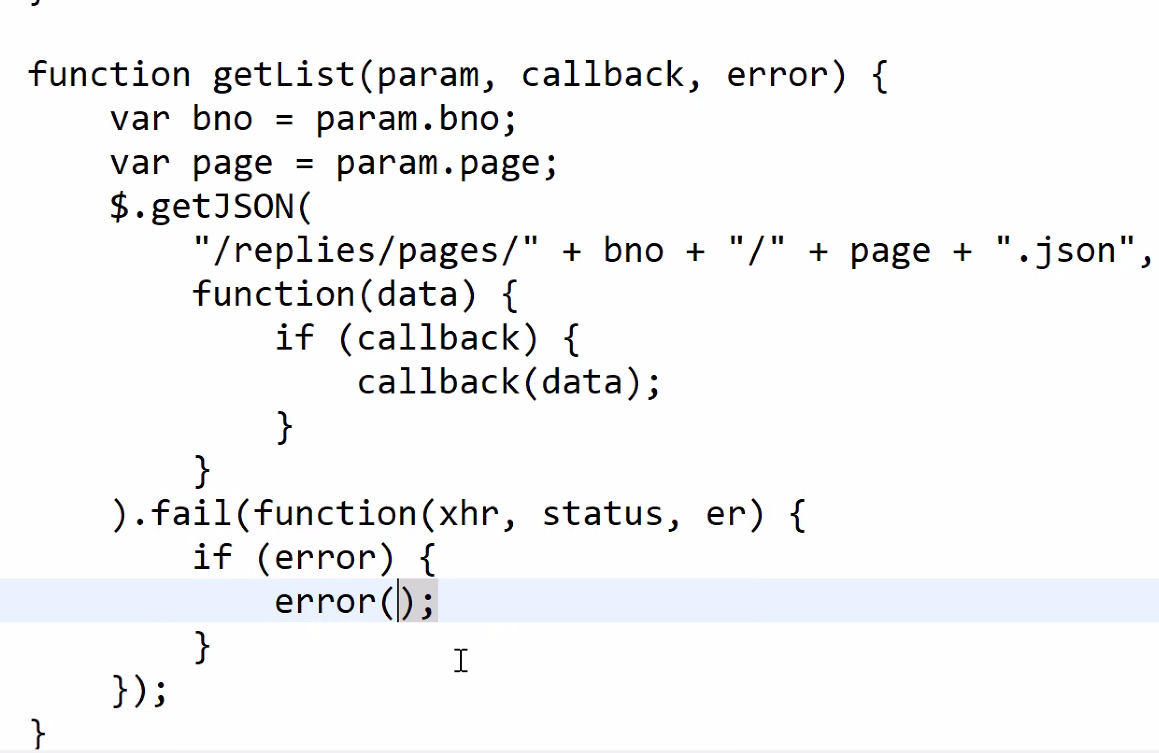
error쪽에 인자를 집어넣어도 안넣어도 상관없다.
콜백함수의 가장 중요한 요소는 이벤트 핸들링이다.

${board.bno} EL 1번글을 선택하면 이 부분이 1이 된다.
이걸 이용해서
의 부분을 아래와 같이 수정한다.
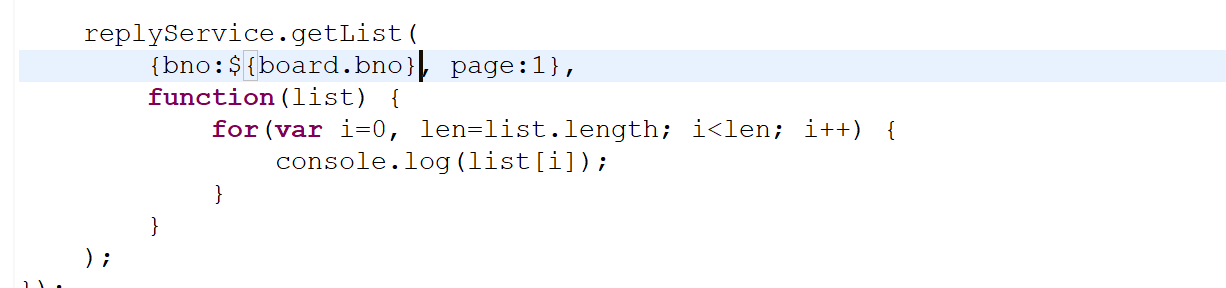
서버쪽에 스프링은 보드 번호를 알고있기때문에 스크립트를 다이나믹하게 스프링이 읽어서 선택된 번호를 html로 클라이언트에게 보내준다.
댓글 삭제
✍reply.js 추가 작성
	function remove(rno, callback, error) {
		$.ajax({
			type:'delete',
			url:'/replies/' + rno,
			success: function(result, status, xhr) {
				if (callback) {
					callback(result);
				}
			},
			error: function(xhr, status, er) {
				if (error) {
					error(er);
				}
			}
		});
	}
✍get.jsp 추가 작성
	replyService.remove(18, function(result) {
		console.log(result);
	});
위와 같이 콘솔에서 18이 삭제되면 성공이라는 result값을 확인할 수 있다.
댓글 수정
✍reply.js 추가 작성
	function update(reply, callback, error) {
		$.ajax({
			type : 'put',
			url : '/replies/' + reply.rno,
			data : JSON.stringify(reply),
			contentType : 'application/json; charset=UTF-8',
			success: function(result, status, xhr){
				if (callback) {
					callback(result);
				}
			},
			error : function(xhr, status, er) {
				if(error) {
					error(er);
				}
			}
		});
	}
✍get.jsp 추가 작성
	replyService.update({
		rno : 15,
		reply: 'ajax로 수정함12'
	}, function(result){
		console.log(result);
	});
한글이 깨져서 나오는 경우, 컨트롤러에 produces="text/plain;charset=UTF-8" 부분이 들어가 있는지 확인한다.
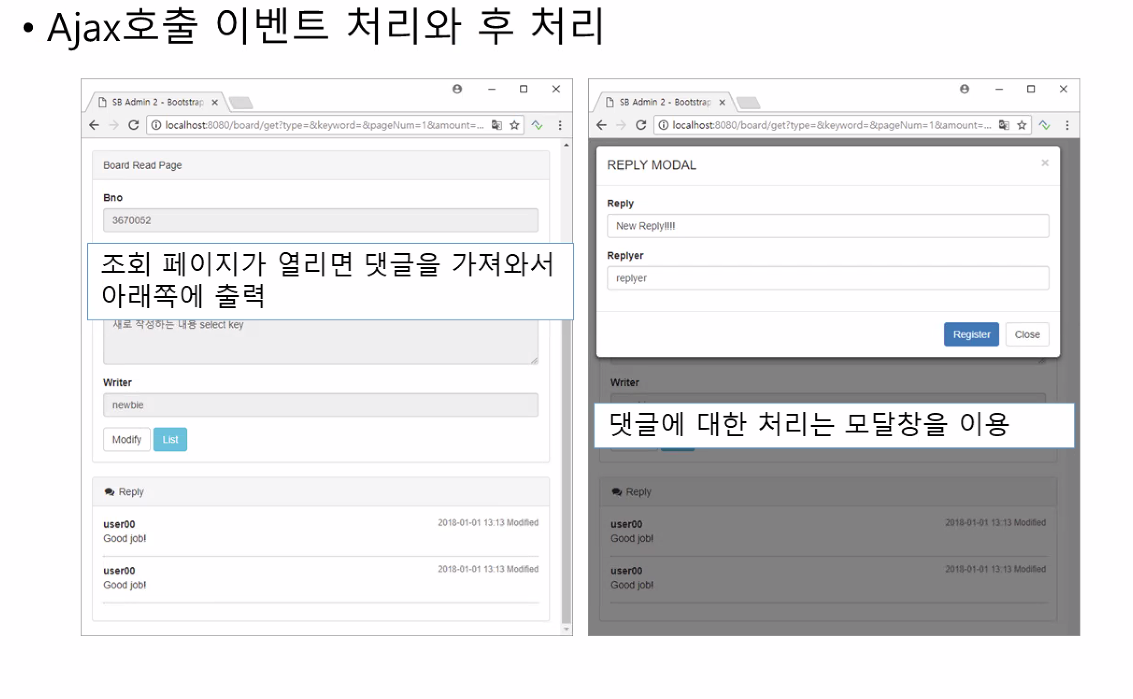
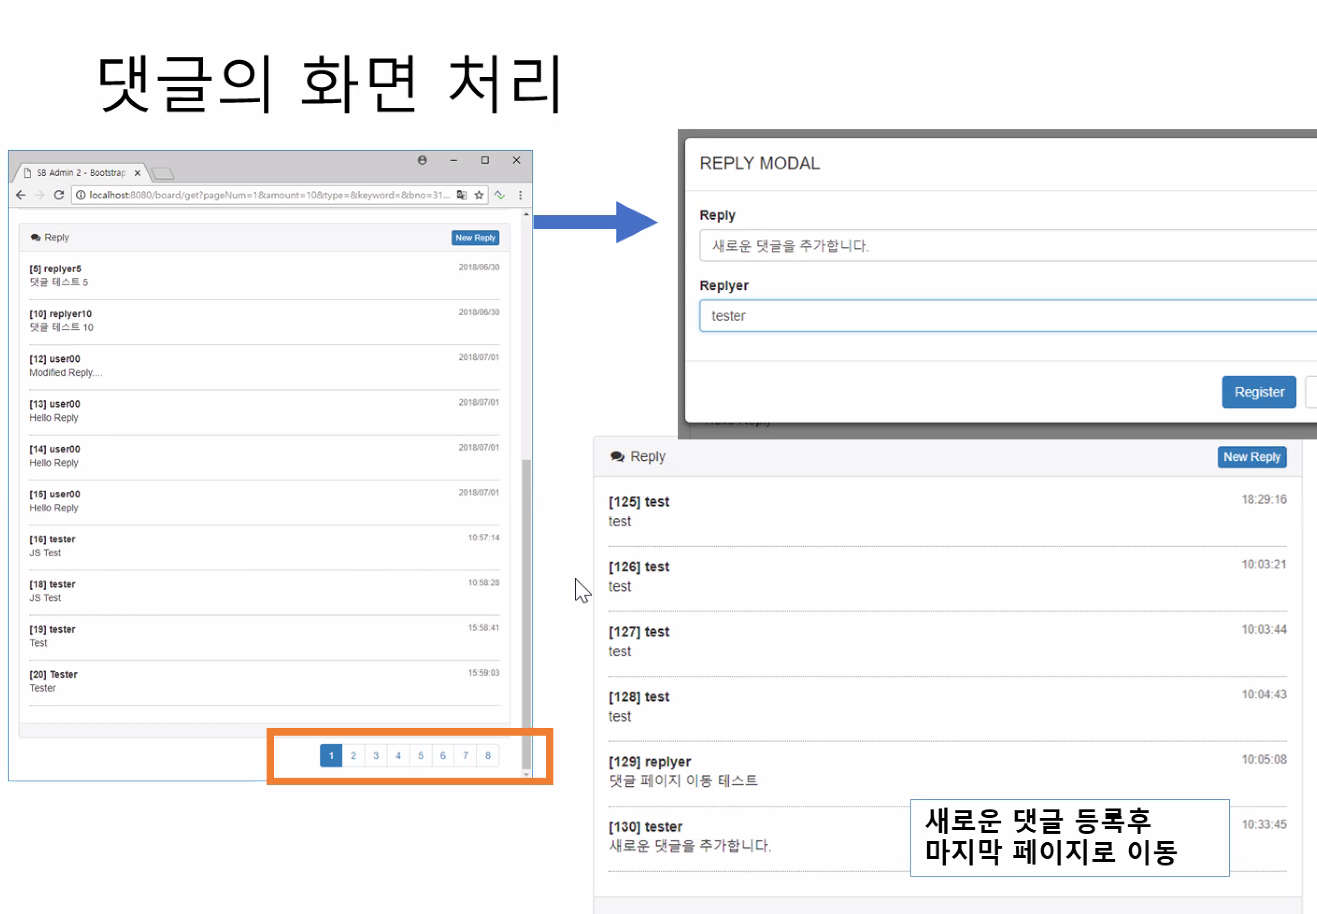
이벤트 처리와 HTML 처리
화면에서 버튼 등에서 발생하는 이벤트를 감지하고, Ajax 호출의 결과를 화면에 반영한다.

댓글 목록처리
이벤트 처리 ✍get.jsp
리스트가 없거나 댓글의 갯수가 하나도 없으면
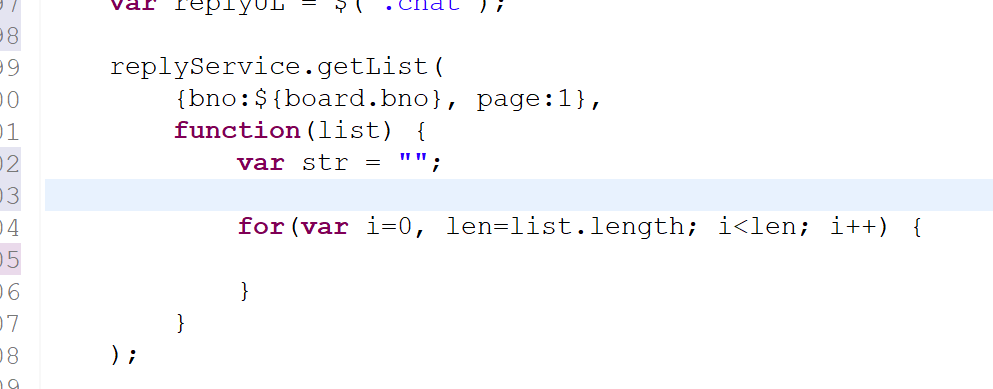
var replyUL = $(".chat");
replyService.getList(
{bno:${board.bno}, page:1},
function(list) {
var str = "";
if (list == null || list.length == 0) {
replyUL.html("");
return;
}
for(var i=0, len=list.length; i<len; i++) {
str += "";
}
}
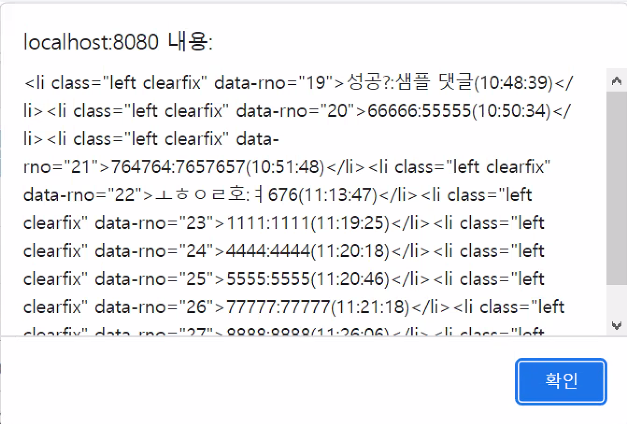
);list[i] : 댓글 객체
str += "<li class='left clearfix' data-rno='" + list[i].rno + "'>";
앞과 끝을 잘 맞춰서 작성하도록한다.
get.jsp
<%@ page language="java" contentType="text/html; charset=UTF-8"
pageEncoding="UTF-8"%>
<%@ taglib uri="http://java.sun.com/jsp/jstl/core" prefix="c" %>
<%@ taglib uri="http://java.sun.com/jsp/jstl/fmt" prefix="fmt" %>
<%@include file="../include/header.jsp" %>
<!-- /.row -->
<div class="row">
<div class="col-lg-12">
<h1 class="page-header">Board</h1>
</div>
<!-- /.col-lg-12 -->
</div>
<div class="row">
<div class="col-lg-12">
<div class="panel panel-default">
<div class="panel-heading">
Board Content
</div>
<!-- /.panel-heading -->
<div class="panel-body">
<div class="form-group">
<label>글번호</label>
<input class="form-control" name="bno" value="${board.bno}" readonly="readonly">
</div>
<div class="form-group">
<label>글제목</label>
<input class="form-control" name="title" value="${board.title}" readonly="readonly">
</div>
<div class="form-group">
<label>글내용</label>
<textarea class="form-control" name="content" rows="3" readonly="readonly">${board.content}</textarea>
</div>
<div class="form-group">
<label>글작성자</label>
<input class="form-control" name="writer" value="${board.writer}" readonly="readonly">
</div>
<button class="btn btn-default" data-oper='modify'>수정</button>
<button class="btn btn-info" data-oper='list'>목록</button>
<form id="operForm" method="get" action="/board/modify">
<input id="bno" type="hidden" name="bno" value="${board.bno}">
<input type="hidden" name="pageNum" value="${cri.pageNum}">
<input type="hidden" name="amount" value="${cri.amount}">
<input type="hidden" name="type" value="${cri.type}">
<input type="hidden" name="keyword" value="${cri.keyword}">
</form>
</div>
<!-- /.panel-body -->
</div>
<!-- /.panel -->
</div>
<!-- /.col-lg-12 -->
</div>
<!-- /.row -->
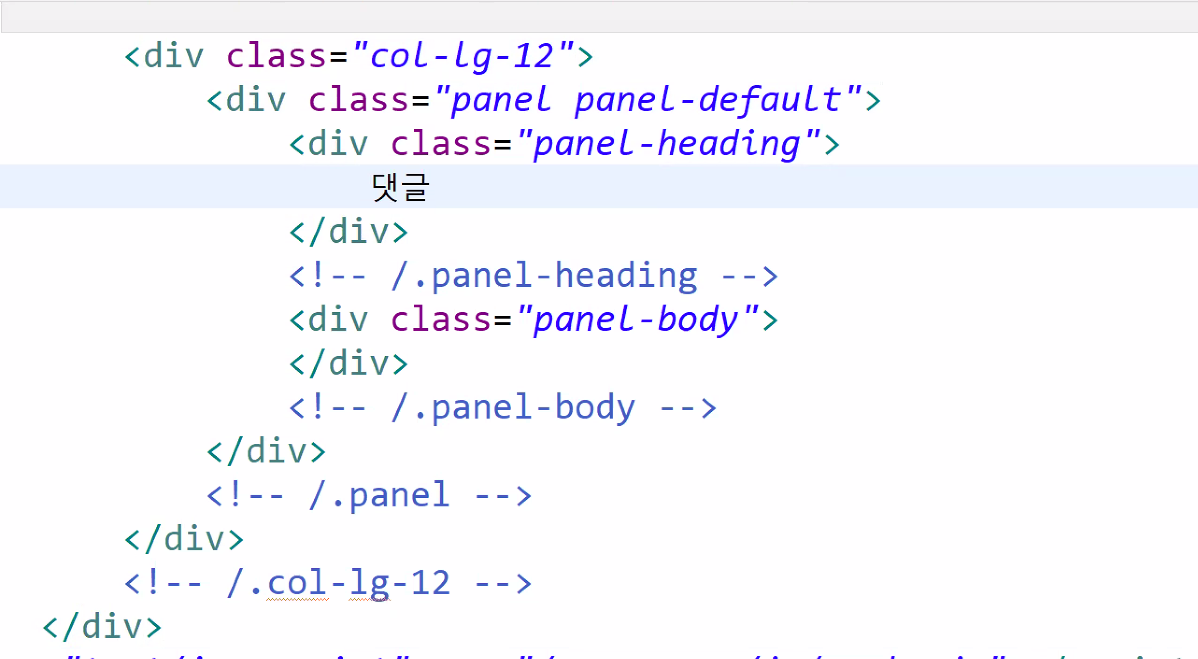
<div class="row">
<div class="col-lg-12">
<!-- /.panel -->
<div class="panel panel-default">
<div class="panel-heading">
<i class="fa fa-comments fa-fw"></i> Reply
</div>
<!-- /.panel-heading -->
<div class="panel-body">
<ul class= "chat">
<li>1</li>
<li>2</li>
</ul>
</div>
<!-- /.panel-body -->
</div>
<!-- /.panel -->
</div>
<!-- /.col-lg-12 -->
</div>
<!-- /.row -->
<%@include file="../include/footer.jsp" %>
<script type="text/javascript" src="/resources/js/reply.js"></script>
<script type="text/javascript">
$(document).ready(function() {
$("button[data-oper='modify']").on("click", function(){
$("#operForm").submit();
});
$("button[data-oper='list']").on("click", function(){
//location.href="/board/list"
$("#operForm").find("#bno").remove();
$("#operForm").attr("action", "/board/list").submit();
});
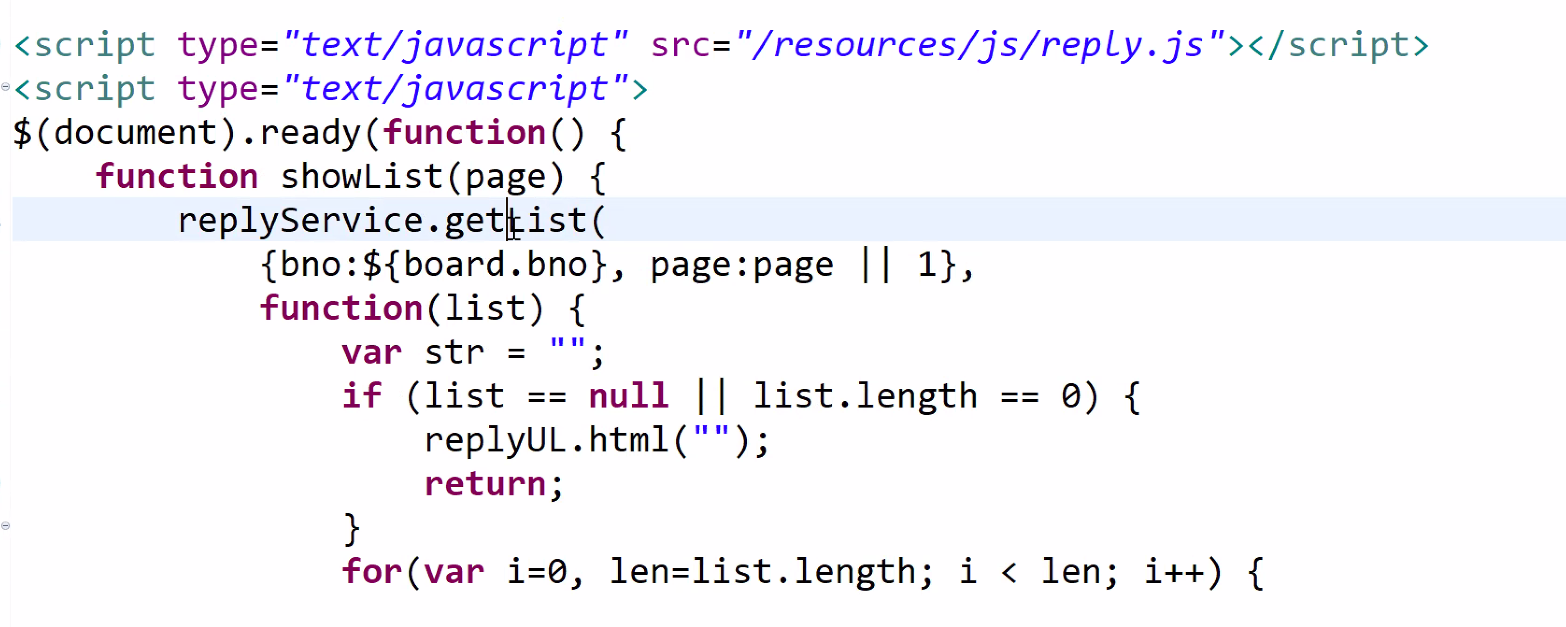
var replyUL = $(".chat");
replyService.getList(
{bno:${board.bno}, page:1},
function(list) {
var str = "";
if (list == null || list.length == 0) {
replyUL.html("");
return;
}
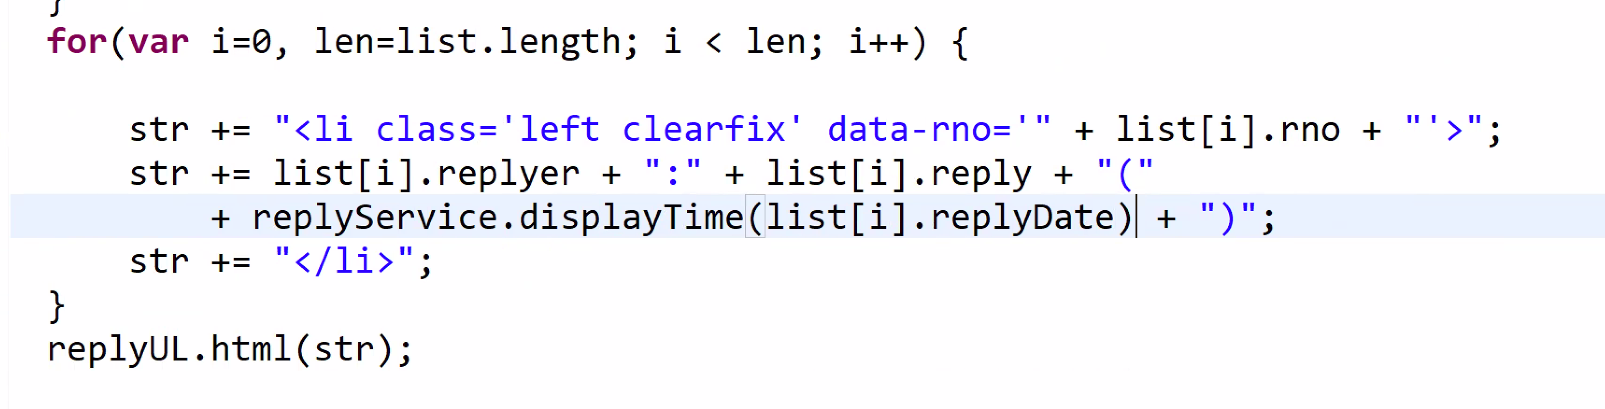
for(var i=0, len=list.length; i<len; i++) {
str += "<li class='left clearfix' data-rno='" + list[i].rno + "'>";
str += list[i].replyer + ":" + list[i].reply + "(" + list[i].replyDate + ")";
str += "</li>";
}
replyUL.html(str);
}
);
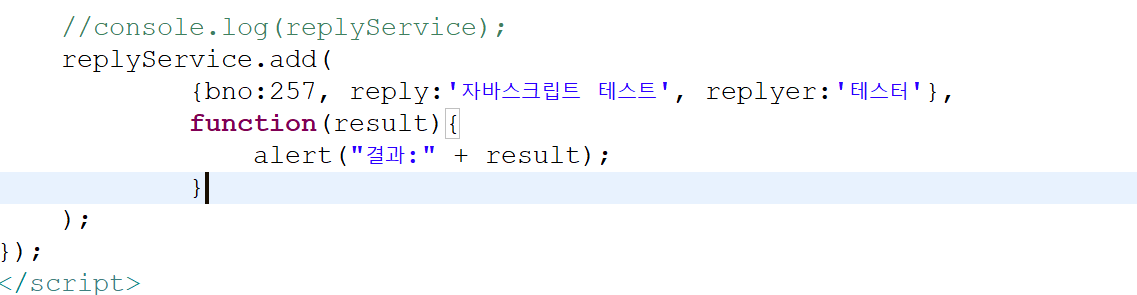
//console.log(replyService);
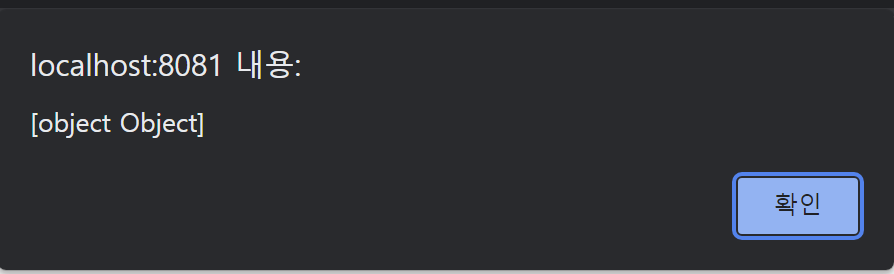
/* replyService.add(
{bno:80, reply:'자바스크립트 테스트', replyer:'테스터'},
function(result){
alert("결과:" + result);
}
);
replyService.remove(18, function(result) {
console.log(result);
});
replyService.update({
rno : 15,
reply: 'ajax로 수정함12'
}, function(result){
console.log(result);
});*/
});
</script>
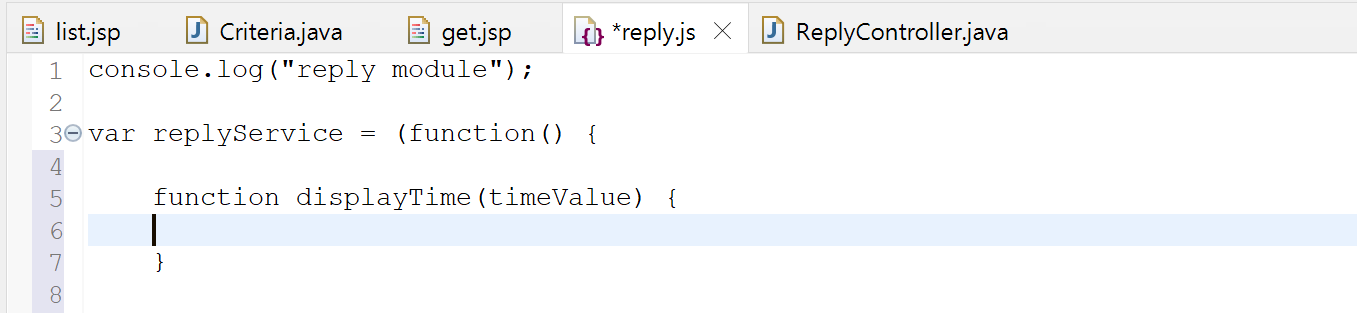
시간 함수 추가
✍reply.js
✍ReplyVO.java
date 타입은 밀리 세컨드로 내부적으로 설정되어있다. 년월일시분초로 바꾸는 작업을 해야한다.
gap의 값이 하루가 넘어가면 년월일
	function displayTime(timeValue) {
		var today = new Date();
		var gap = today.getTime() - timeValue;
		var dateObj = new Date(timeValue);

		if ( gap < (1000 * 60 * 60 * 24)) {
			var hh = dateObj.getHours();
			var mi = dateObj.getMinutes();
			var ss = dateObj.getSeconds();

			return [(hh > 9 ? '' : '0') + hh, ':' ,
				(mi > 9 ? '' : '0') + mi, ':' ,
				(ss > 9 ? '' : '0') + ss].join('');
			]
		}
	}
하루가 안넘어가면
join() 합치라는 뜻
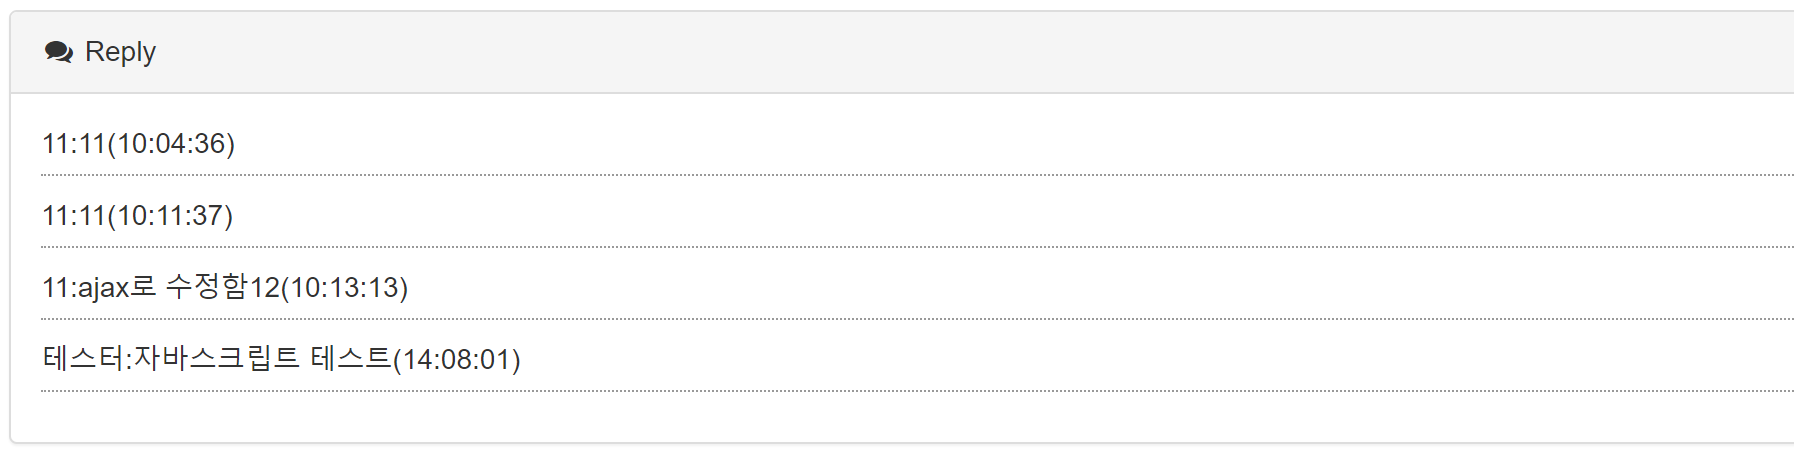
위와 같이 수정하면 시간이 변경되서 다음과 같이 출력된다.
이벤트 처리와 HTML 처리
새로운 댓글 처리
버튼 만들기, 페이지를 <include> 할 경우 id의 유일성이 중복되지 않도록 id를 작성한다.
✍get.jsp
get.jsp에 댓글 작성을 위한 버튼을 만든다.
<button id='addReplyBtn' class='btn btn-primary btn-xs pull-right'>
New Reply</button>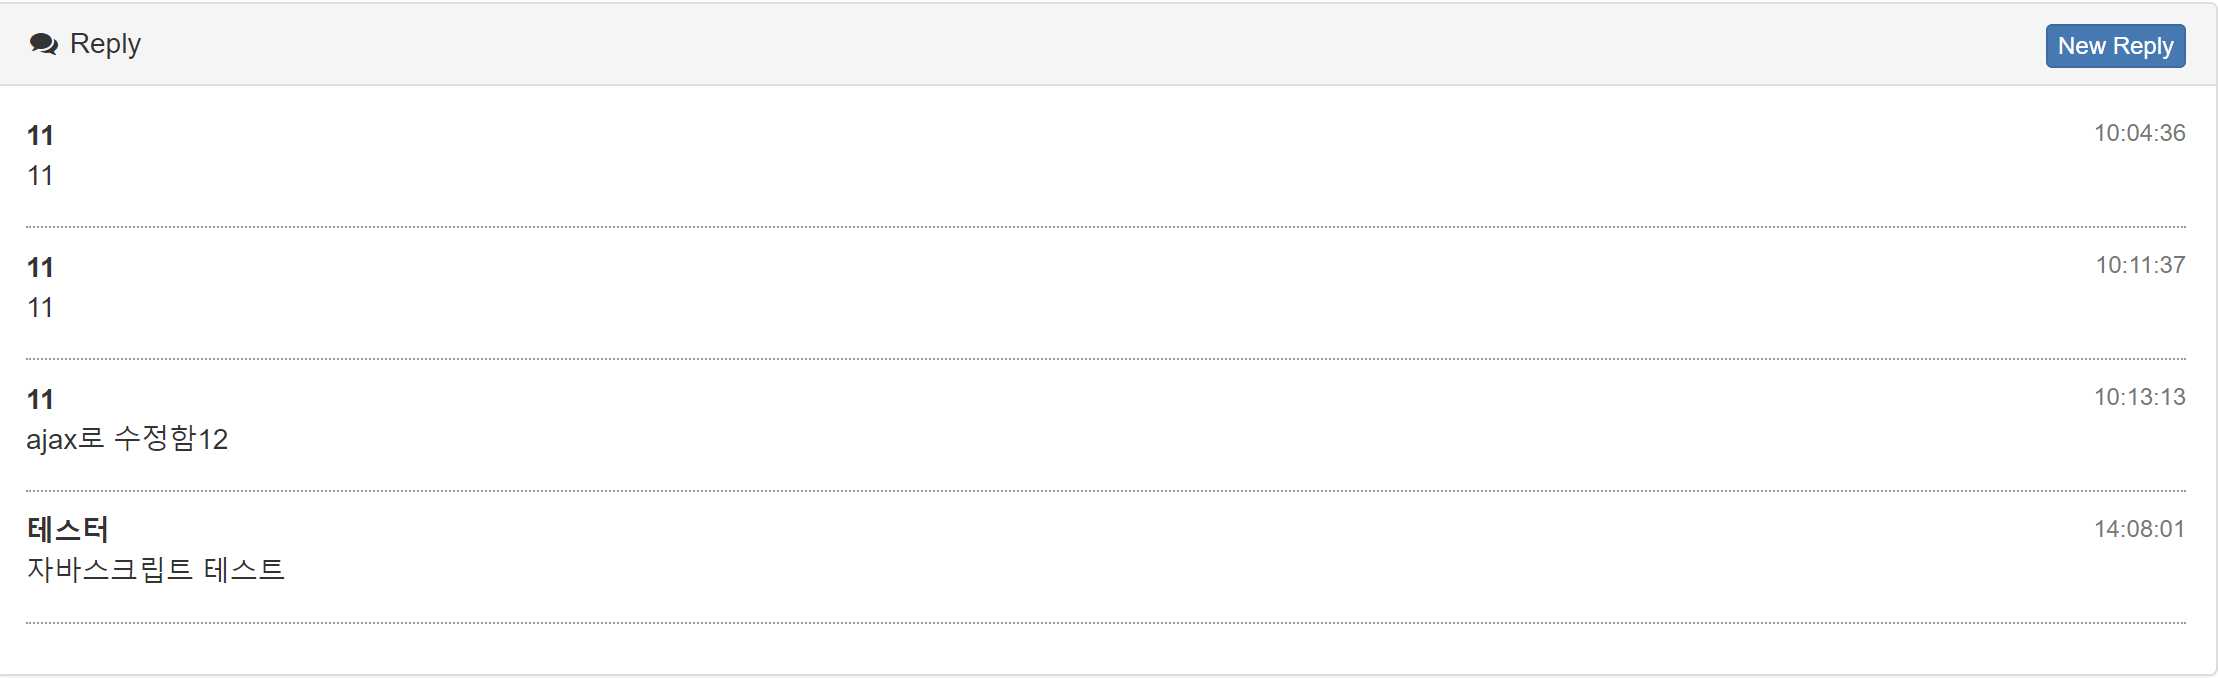
애드리벤트 리스너와 온클릭의 차이
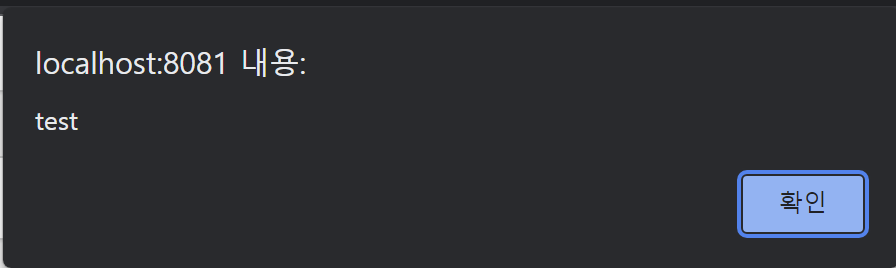
	alert($("#addReplyBtn"));
	$("#addReplyBtn").on('click', function(e){
		alert('test');
	});
객체를 잘 잡아왔으면 다음과 같은 알림이 발생한다.
버튼을 클릭하면 test 알림이 발생한다.
테스트가 끝났으면 모두 지운다.
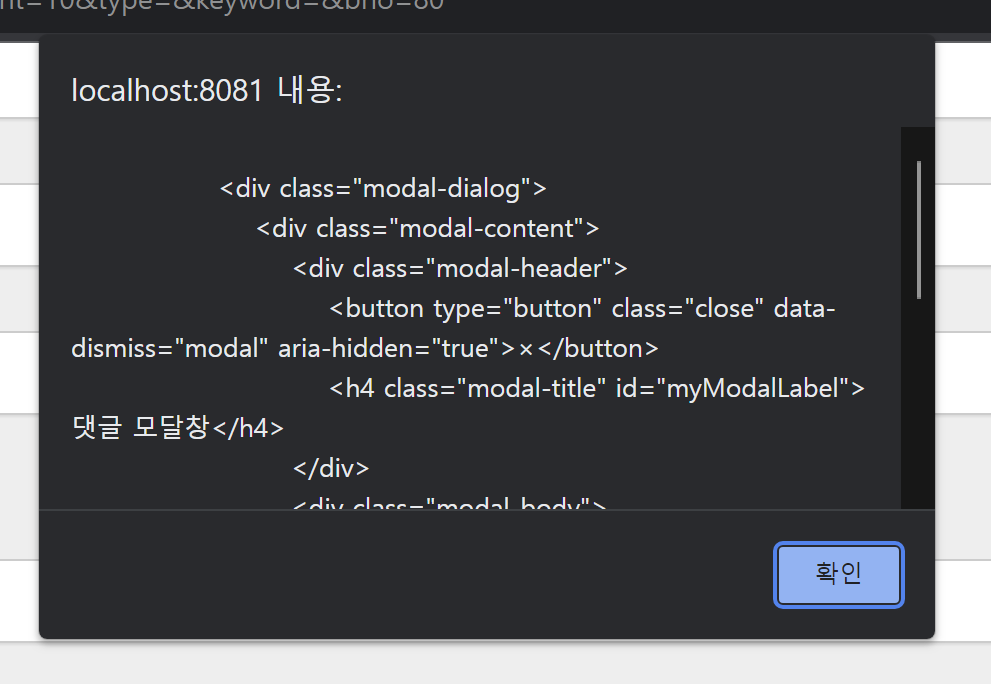
모달 코드 추가

객체를 제대로 찾는지 검사한다.

.html()을 추가하면 내부의 html이 출력된다.
	$("#addReplyBtn").on('click', function(e){
		$("#myModal").modal("show");
});<input>을 작성할때
                        	<div class = "form-group">
                        		<label>댓글</label>
                        		<input type = "text" class="form-control" name='reply' value='New Reply!!!'></input>
                        	</div>
name속성에 주의한다. 서버로 보낼때 서버에서 받는 인자와 매핑에 되게 설정한다.
새로운 댓글 처리
모달창 등록버튼 이벤트 추가

객체 찾아서 적용되나 확인한다.

버튼 수정
<div class="modal-footer">
	<button type="button" class="btn btn-warning" id="modalModBtn">수정</button>
	<button type="button" class="btn btn-danger" id="modalRemoveBtn">삭제</button>
	<button type="button" class="btn btn-primary" id="modalRegisterBtn">등록</button>
	<button type="button" class="btn btn-default" data-dismiss="modal">취소</button>
</div>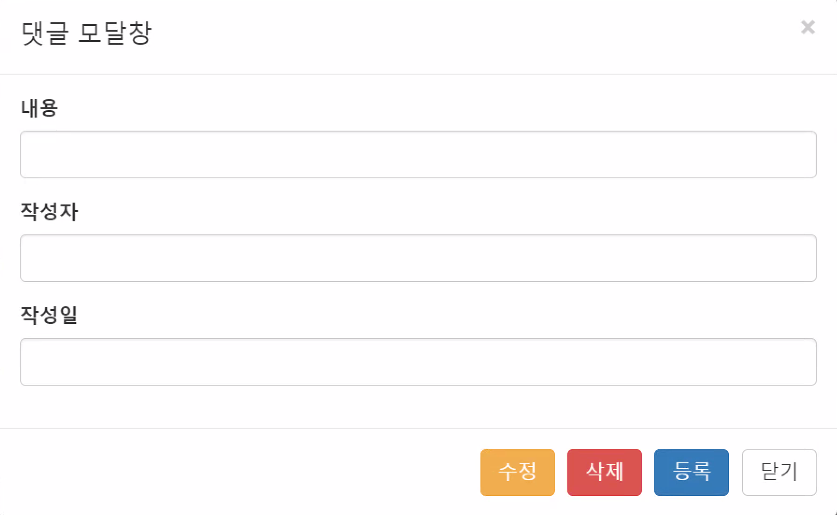
새 글 등록시에는 작성일, 수정, 삭제 항목은 필요가 없다.
이 때 각 항목에 대한 객체를 미리 변수로 잡아서 재활용하는 것이 편할 것 같다.
get.jsp js
var modalDiv = $("#myModal");
var modalInputReply = modalDiv.find("input[name='reply']");
var modalInputReplyer = modalDiv.find("input[name='replyer]");
var modalInputReplyDate = modalDiv.find("input[name='replyDate']");
var modalModBtn = $("modalModBtn");
var moaalRemoveBtn = $("#modalRemoveBtn");
var modalRegisterBtn = $("#modalRegisterBtn");
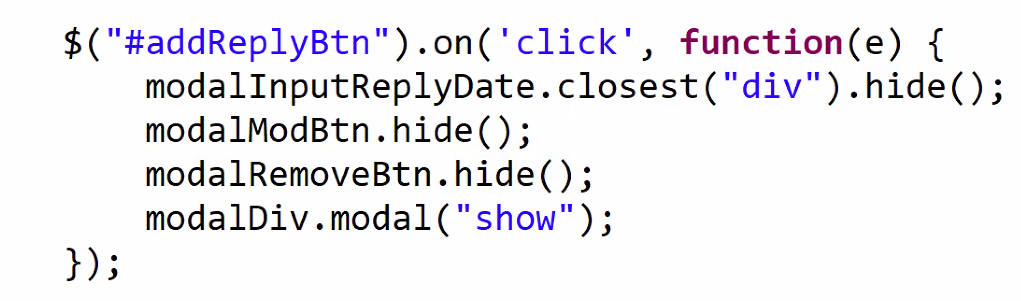
$("#addReplyBtn").on('click', function(e){
modalInputReplyDate.closest("div").hide();
modalDiv.modal("show");
});위와 같이 변수로 잡아준다. modalInputReplyDate.closest("div").hide(); 가장 가까운 Div를 숨기라는 의미이다.
위에서 replyer뒤에 ' 안붙인거 보이지? 이거 때문에 오류가 발생했음.
$("#modalRegisterBtn").on('click', function(e){
var reply = {
reply : modalInputReply.val(),
replyer : modalInputReplyer.val(),
bno : ${board.bno}
};
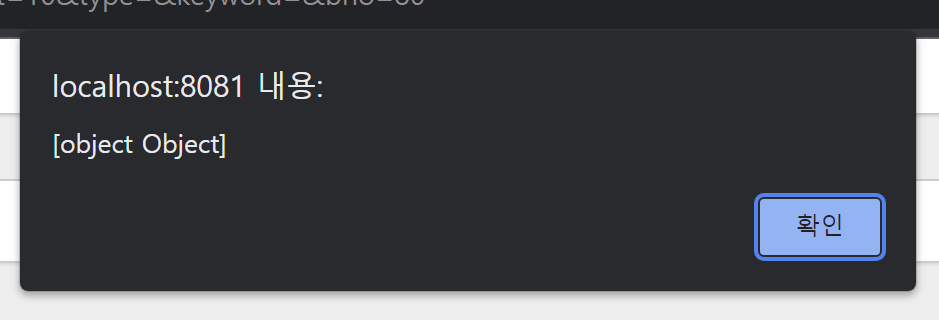
console.log(reply);
replyService.add(reply, function(result) {
alert(result);
modalInputReply.val("");
modalInputReplyer.val("");
modalDiv.modal("hide");
});
});
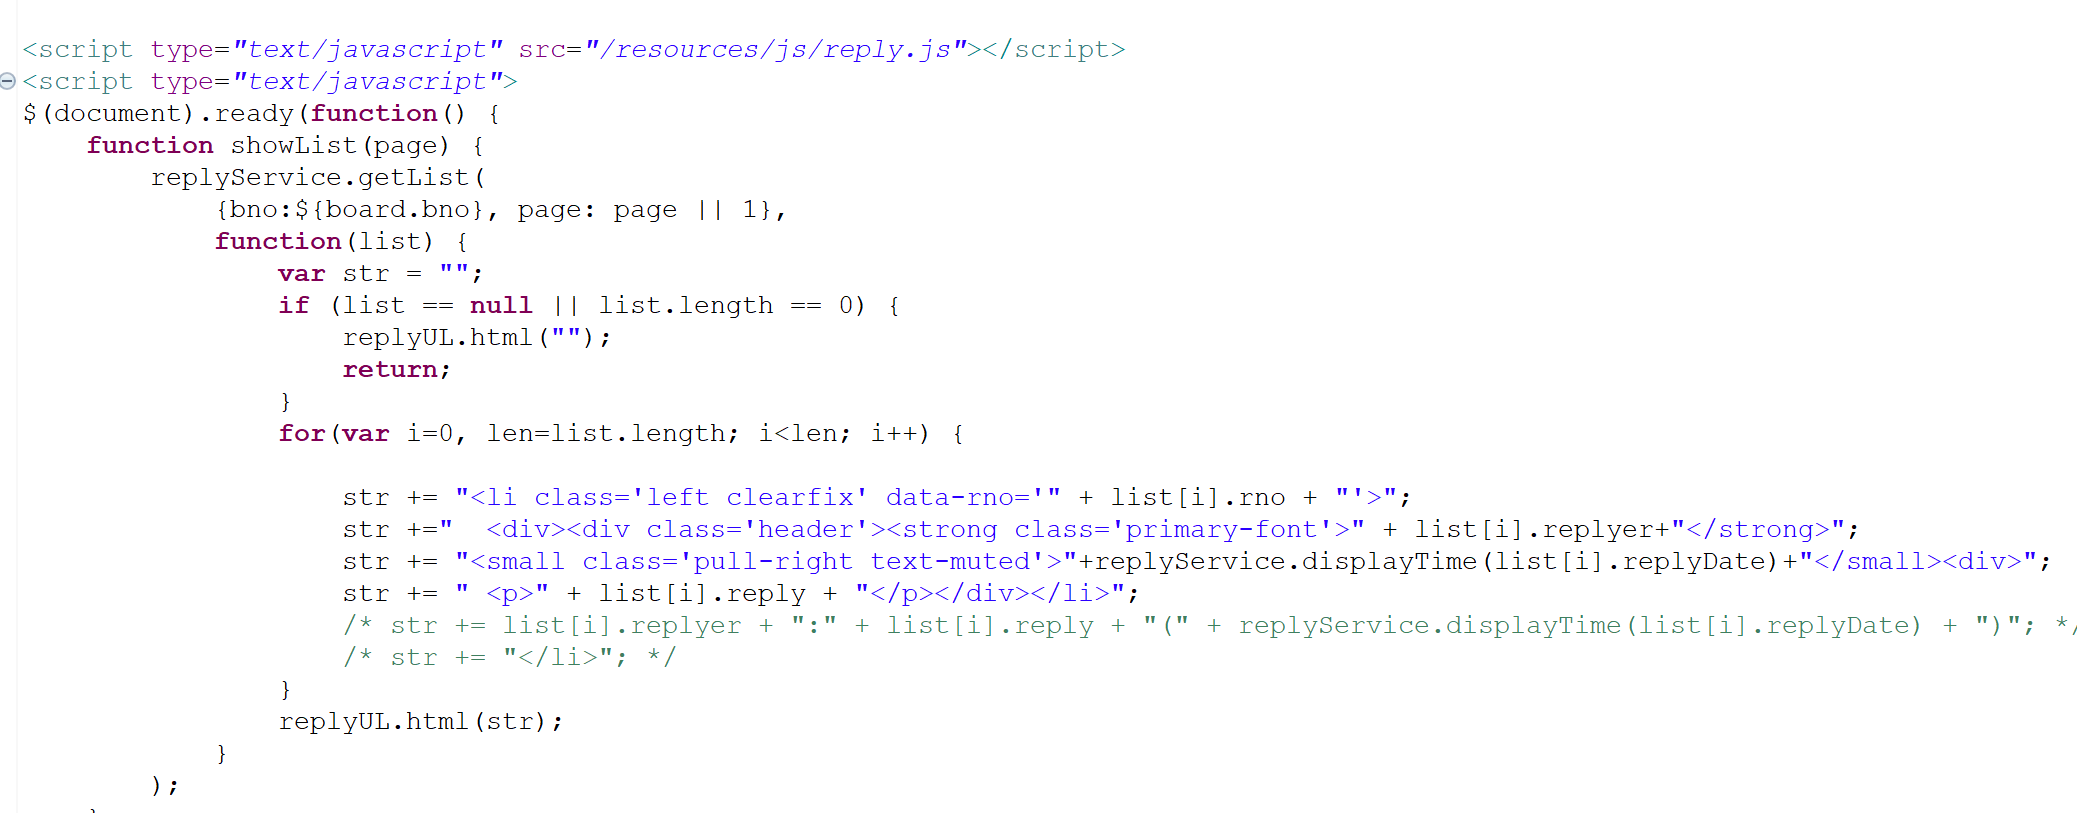
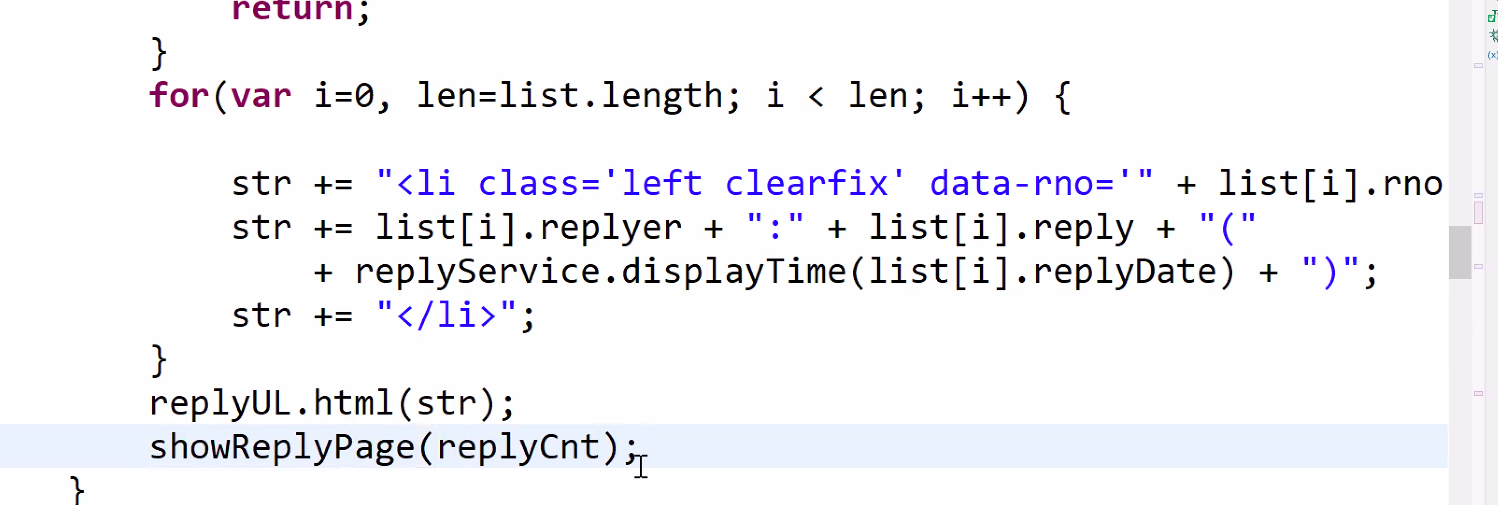
showList 함수 생성
	function showList() {
		replyService.getList(
			{bno:${board.bno}, page:1},
			function(list) {
				var str = "";
				if (list == null || list.length == 0) {
					replyUL.html("");
					return;
				}
				for(var i=0, len=list.length; i<len; i++) {

					str += "<li class='left clearfix' data-rno='" + list[i].rno + "'>";
					str +="  <div><div class='header'><strong class='primary-font'>" + list[i].replyer+"</strong>";
					str += "<small class='pull-right text-muted'>"+replyService.displayTime(list[i].replyDate)+"</small><div>";
					str += " <p>" + list[i].reply + "</p></div></li>";
					/* str += list[i].replyer + ":" + list[i].reply + "(" + replyService.displayTime(list[i].replyDate) + ")"; */
					/* str += "</li>"; */
				}
				replyUL.html(str);
			}
		);
	}
댓글을 작성한 후 작성한 댓글이 보이게 하기 위해서 showList 함수를 만들었음. 재활용을 해서
	$("#modalRegisterBtn").on('click', function(e){

		var reply = {
			reply : modalInputReply.val(),
			replyer : modalInputReplyer.val(),
			bno : ${board.bno}
		};
		console.log(reply);
		replyService.add(reply, function(result) {
			alert(result);
			modalDiv.modal("hide");
			showList();
		});
	});
이 부분에서 showList()를 쓸수 있게 !
그런데 위에서 page:1 로 설정되어 있음
1페이지만 보인다는것을 의미함

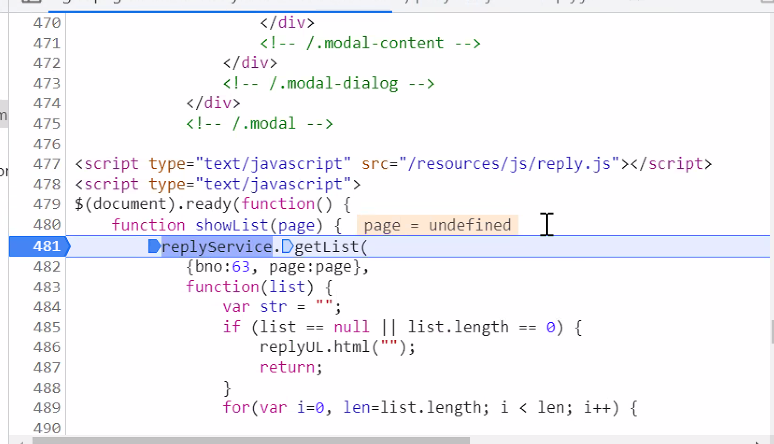
파라미터가 있게 설정을 해도 실행은된다.
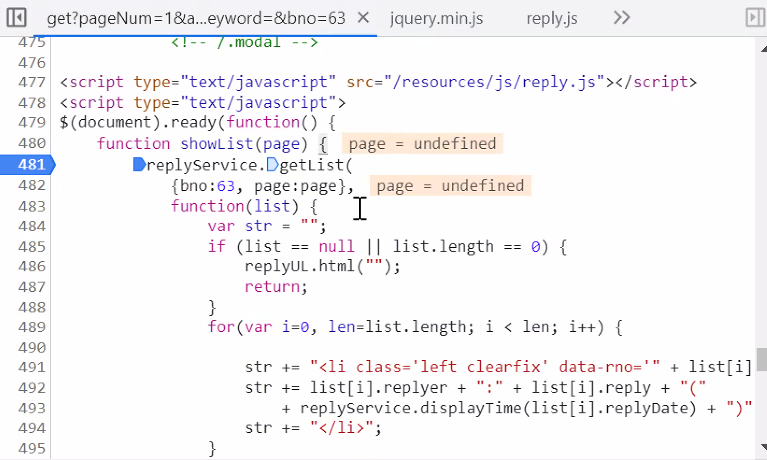
페이지 번호가 빠져있으니까 문제가 발생된다.
oring형태?
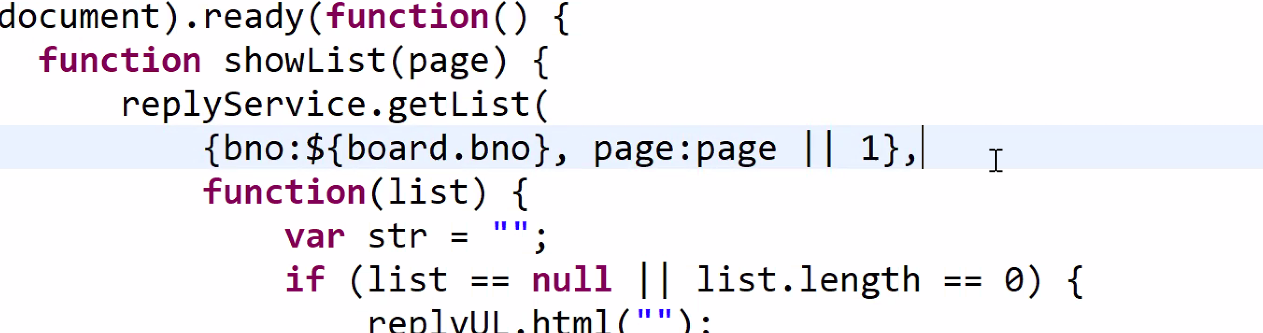
page=undefined일 경우 1로 대체한다.
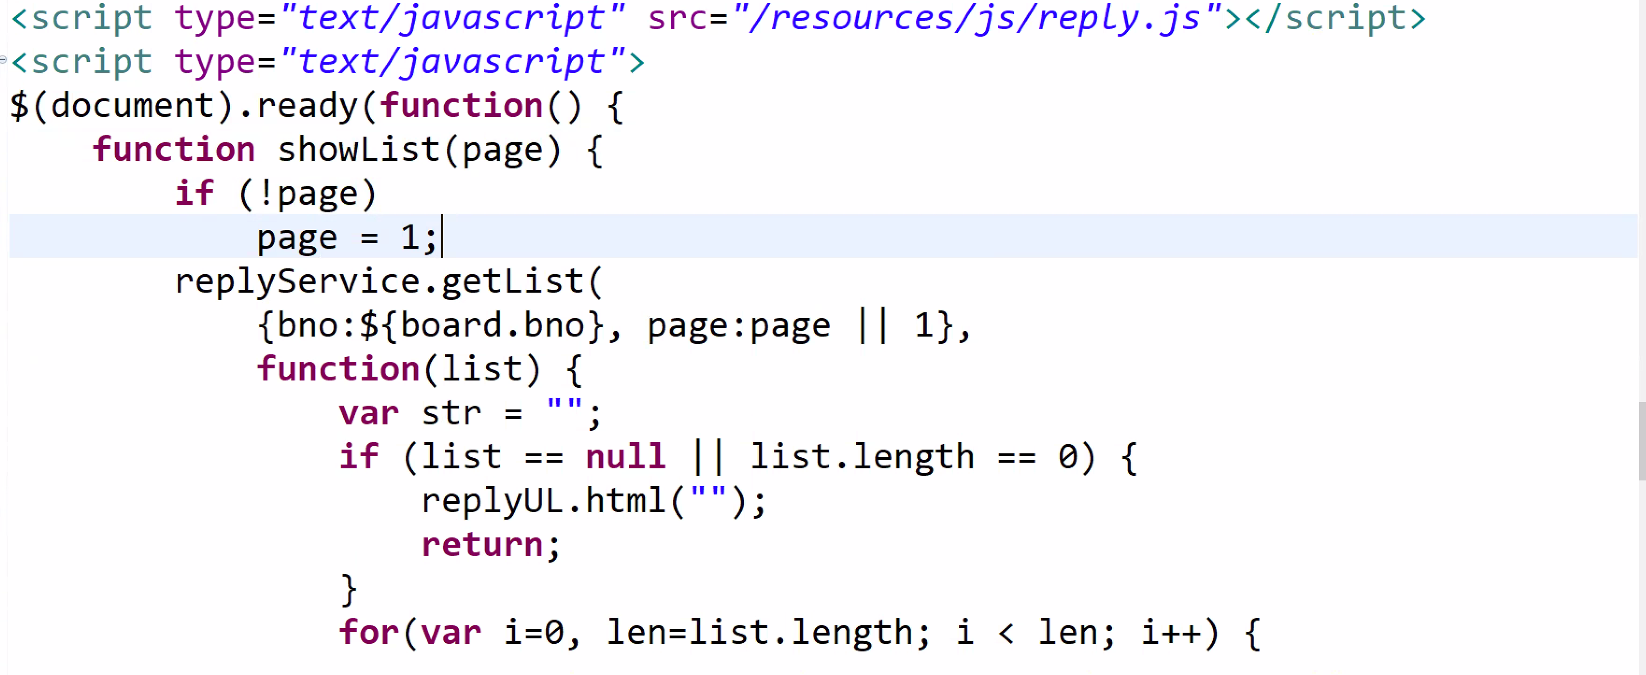
혹은 다음과 같이 if를 쓰기도 한다.
<li> 태그에 이벤트 걸기
.html()을 출력으로 찍으면
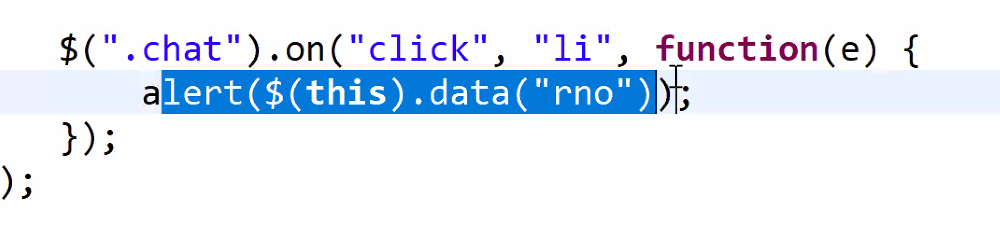
	$(".chat").on("click", "li", function(e){
		alert($(this).html());
	})
각각의 li의 내용이 등장을 한다.

ul 객체에 맞긴 것이 아니라 li에 펑션을 위임한것이다. 따라서 this의 대상이 li으로 바뀌었다.
댓글의 글번호도 alert창으로 확인할수있다.
reply.js
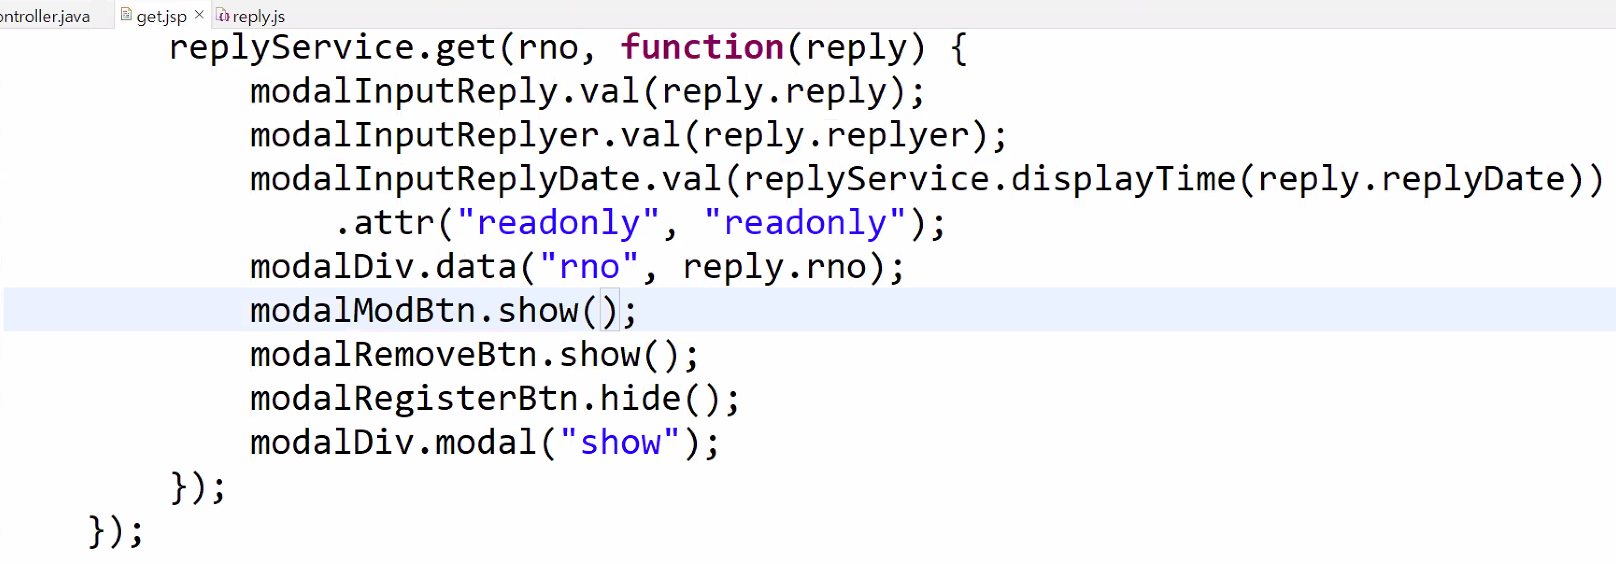
get 함수 추가
수정버튼 클릭이벤트처리


data-rno에 값이 들어감
modalDiv.data("rno", reply.rno);
댓글을 클릭하는 순갆게 모달에 데이터를 넣도록 동적으로 설정한다.
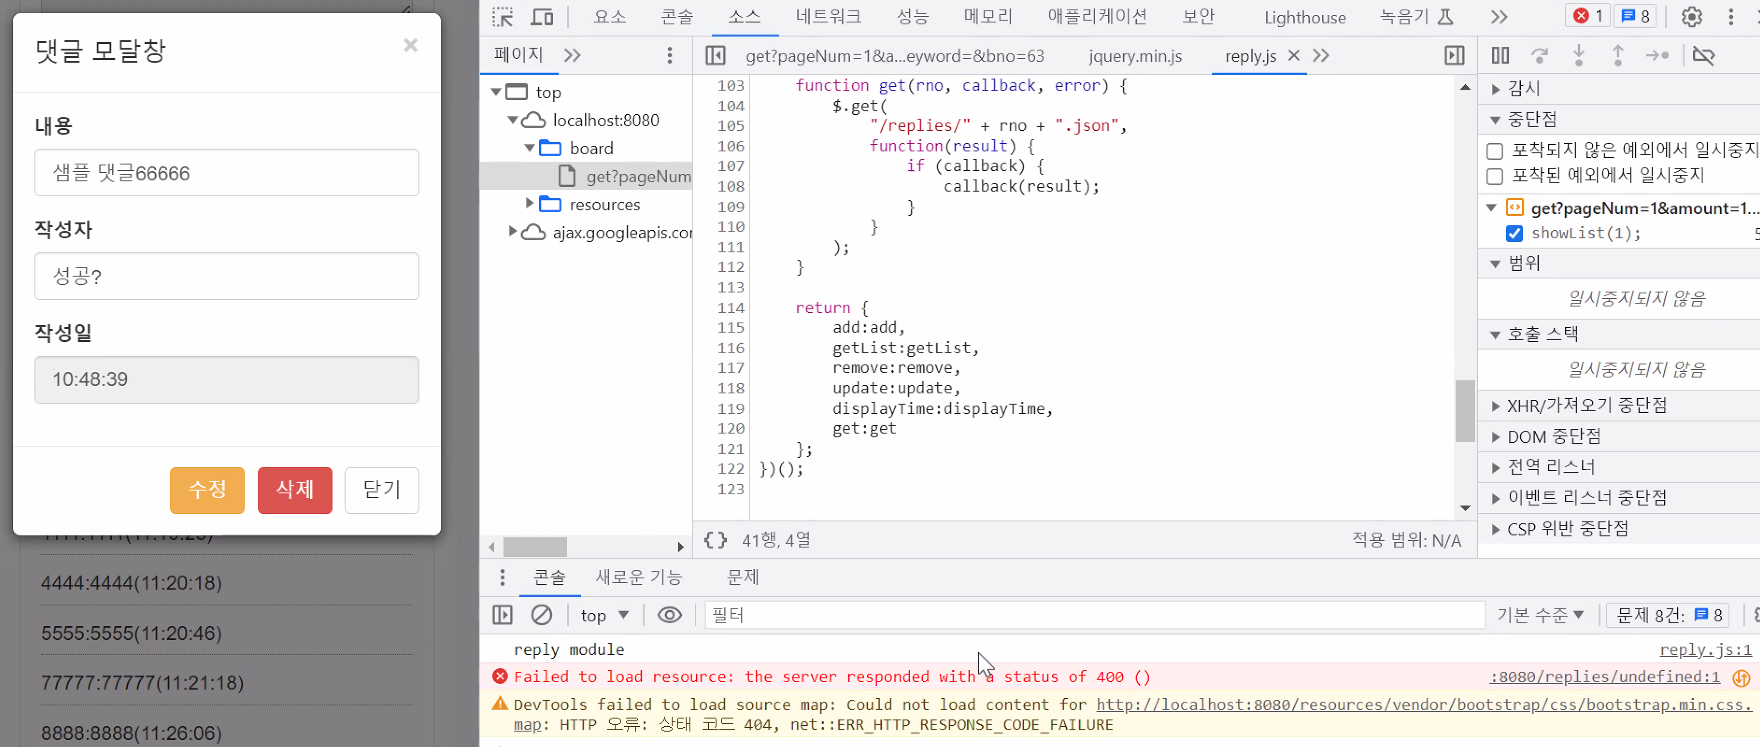
모달창 버튼 문제 해결
var modalDiv = $("#myModal");
var modalInputReply = modalDiv.find("input[name='reply']");
var modalInputReplyer = modalDiv.find("input[name='replyer']");
var modalInputReplyDate = modalDiv.find("input[name='replyDate']");
var modalModBtn = $("#modalModBtn");
var modalRemoveBtn = $("#modalRemoveBtn");
var modalRegisterBtn = $("#modalRegisterBtn");
$("#addReplyBtn").on('click', function(e){
modalInputReplyDate.closest("div").hide();
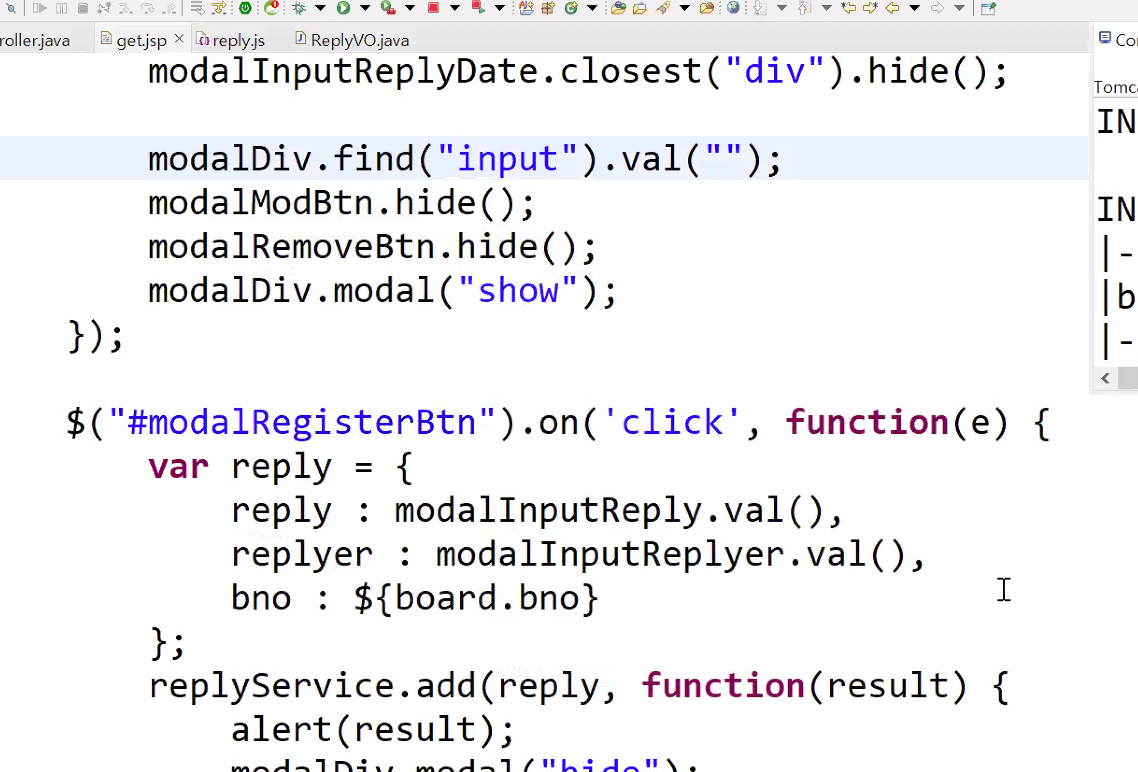
modalDiv.find('input').val("");
/* modalInputReply.val("");
modalInputReplyer.val(""); */
modalModBtn.hide();
modalRemoveBtn.hide();
modalDiv.modal("show");
});
$("#modalRegisterBtn").on('click', function(e){
var reply = {
reply : modalInputReply.val(),
replyer : modalInputReplyer.val(),
bno : ${board.bno}
};
console.log(reply);
replyService.add(reply, function(result) {
alert(result);
modalDiv.modal("hide");
showList(1);
});
});
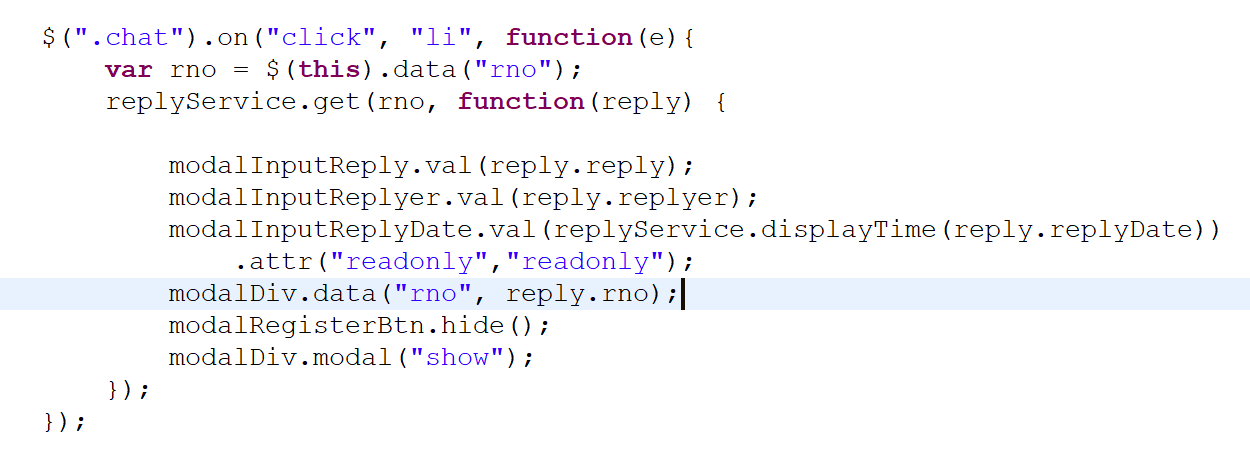
$(".chat").on("click", "li", function(e){
var rno = $(this).data("rno");
replyService.get(rno, function(reply) {
modalInputReply.val(reply.reply);
modalInputReplyer.val(reply.replyer);
modalInputReplyDate.val(replyService.displayTime(reply.replyDate))
.attr("readonly","readonly");
modalDiv.data("rno", reply.rno);
modalRegisterBtn.hide();
modalDiv.modal("show");
});
});
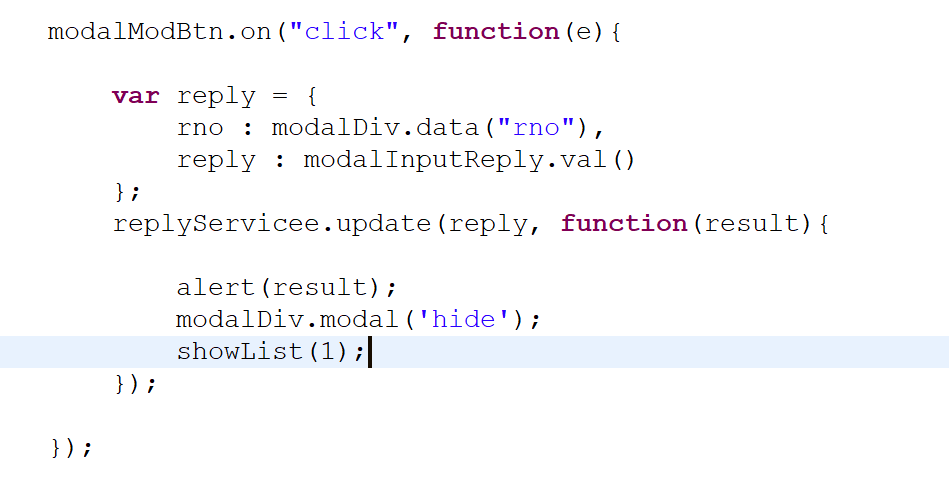
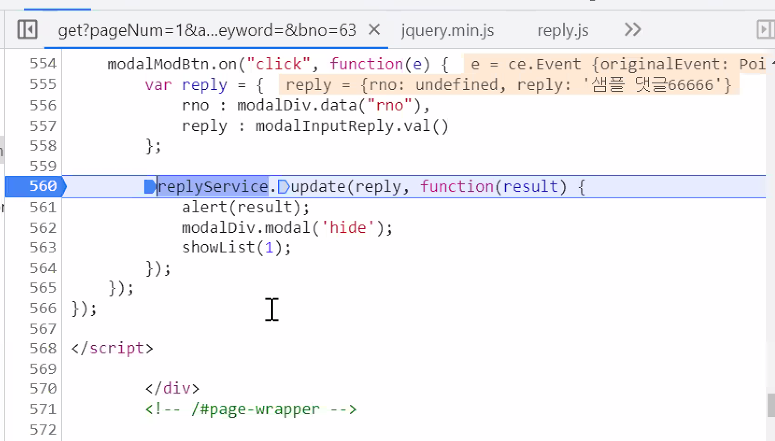
modalModBtn.on("click", function(e){
var reply = {
rno : modalDiv.data("rno"),
reply : modalInputReply.val()
};
replyService.update(reply, function(result){
alert(result);
modalDiv.modal('hide');
showList(1);
});
});
modalRemoveBtn.on("click", function(e){
replyService.remove(
modalDiv.data("rno"),
function(result){
alert(result);
modalDiv.modal('hide');
showList(1);
});
});
});
</script>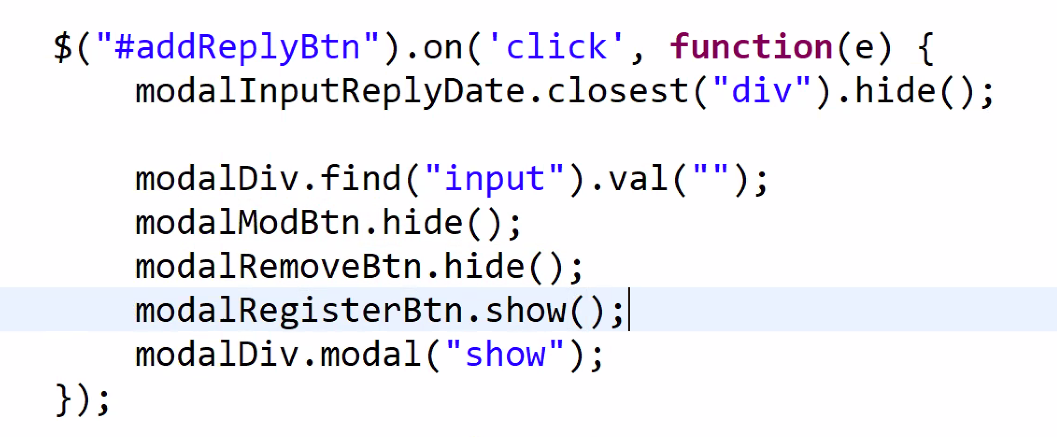
위와 같이 수정하면 버튼이 안보이는 문제가 해결된다.
댓글의 페이징 처리
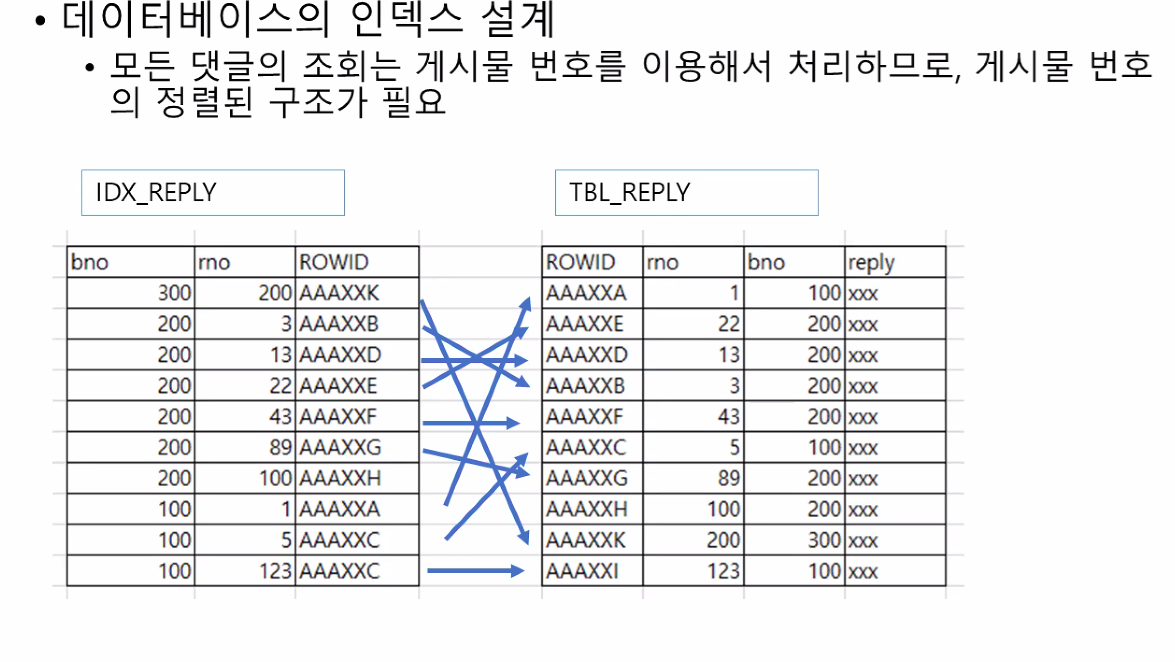
댓글의 테이블 크기가 커지는데 sorting 문제가 발생(속도 저하)
sql developer
select rownum rn, bno, rno, reply, replyer, replyDate, updateDate
from tbl_reply
where bno=46 and rno>0
인덴스 만들기
내림차순으로 bno 정령 rno에 대해 오름차순으로 2차정렬한다
select /+INDEX(tbl_reply idx_reply)/ rownum rn, bno, rno, reply, replyer, replyDate, updateDate
from tbl_reply
where bno=46 and rno>0;
create index idx_reply on tbl_reply(bno desc, rno asc);
위와 같은 페이징 처리를 위해 기본 쿼리를 다음과 같이 작성한다.
select  rno, bno, reply, replyer, replyDate, updateDate
from
(select rownum rn, bno, rno, reply, replyer, replyDate, updateDate
from tbl_reply
where bno=46 rownum <= 20)
where rn > 10
bno가 46에 대해 항목 가져오기
select  rno, bno, reply, replyer, replyDate, updateDate
from
(select rownum rn, bno, rno, reply, replyer, replyDate, updateDate
from tbl_reply
where bno=46 and rownum <= 10)
where rn > 0;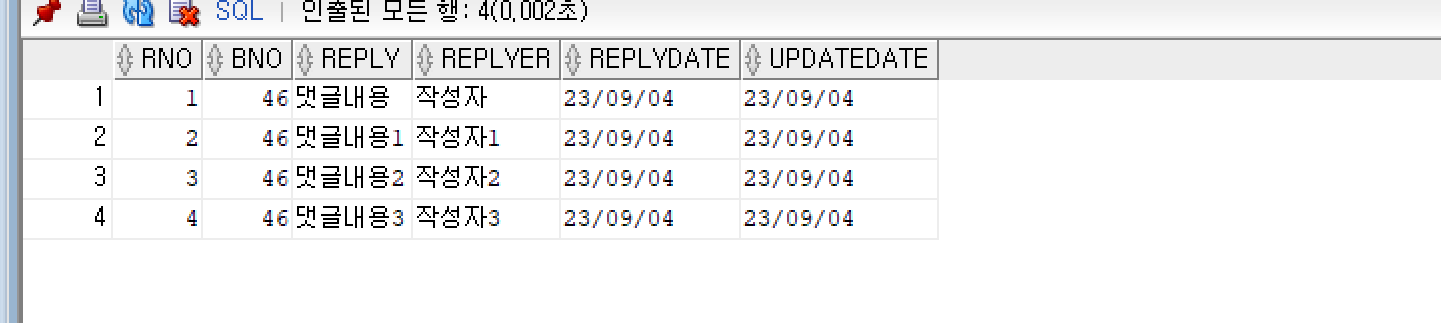
더미데이터 생성을 위한 다음과 같은 코드를 실행한다.
insert into tbl_reply (rno, bno, reply, replyer, replyDate, updateDate)
(select seq_reply.nextval ,bno, reply, replyer, replyDate, updateDate
from tbl_reply where bno=46);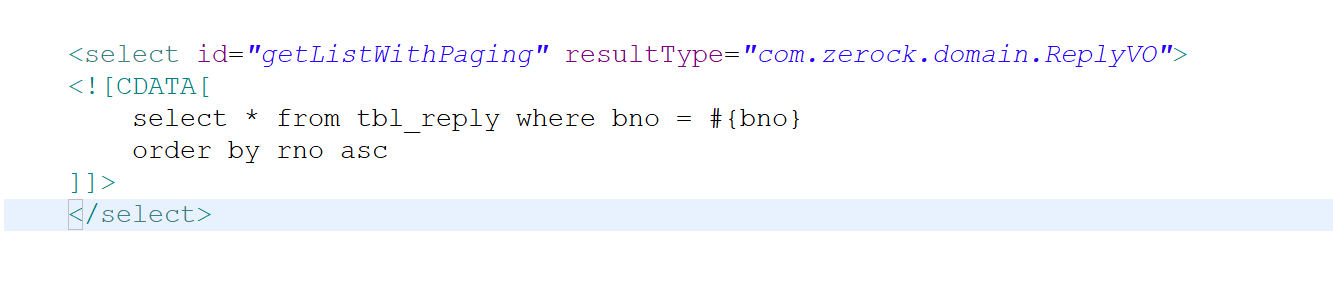
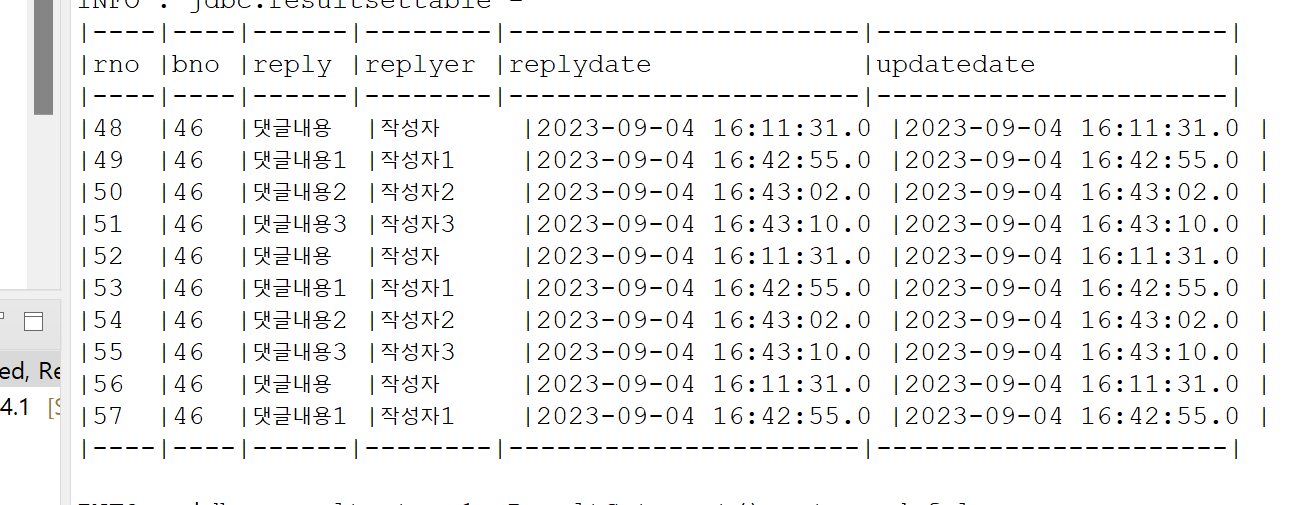
테스트
테스트를 하기 전에 commit을 sqldeveloper에서 했는지 확인한다.
위에서 어떻게 크리랑 다 넘어왓지
댓글의 숫자 파악
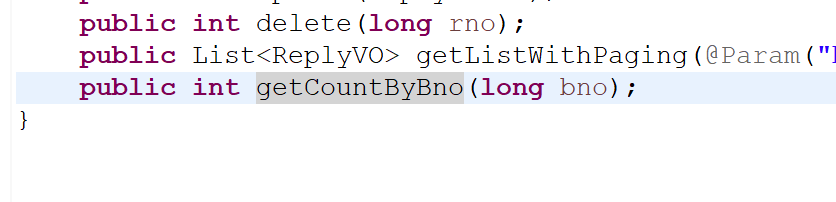
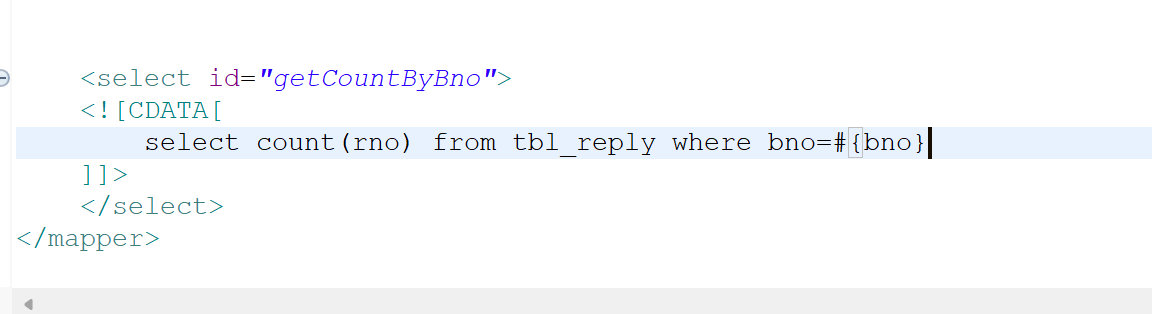
댓글들을 페이징 처리하기 위해서는 해당 게시물의 전체 댓글의 숫자를 파악해서 화면에 보여줄 필요가 있다. ReplyMapper 인터페이스에 getCountByBno()를 추가한다.

ReplyMapper.java
댓글과 댓글 수 처리
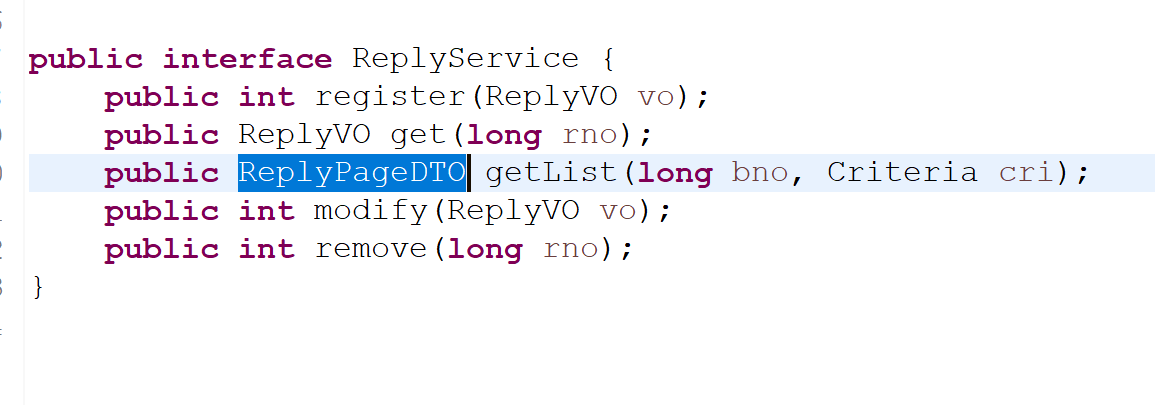
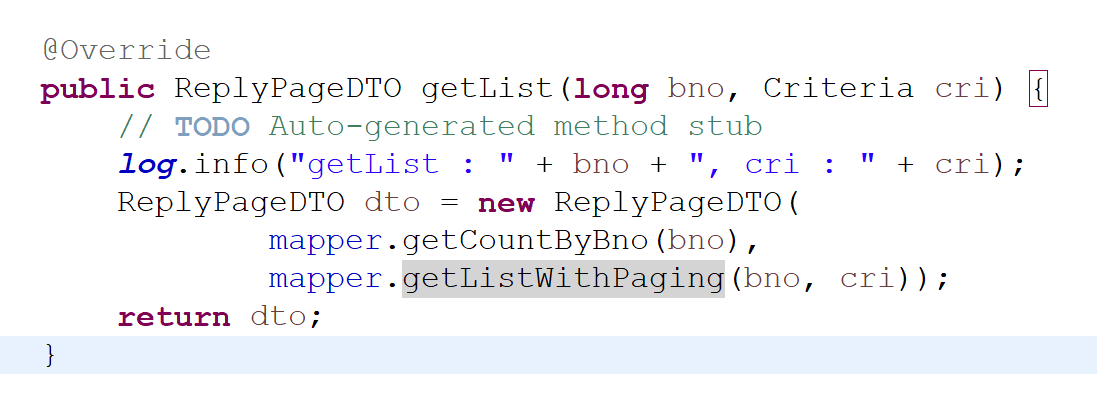
댓글 전체를 보여주는 방식과 달리 댓글의 페이징 처리가 필요한 경우에는 댓글 목록과 함께 전체 댓글의 수를 같이 전달해야 한다. 두가지 정보를 담을 수 있는 ReplyPageDTO 클래스를 정의한다.
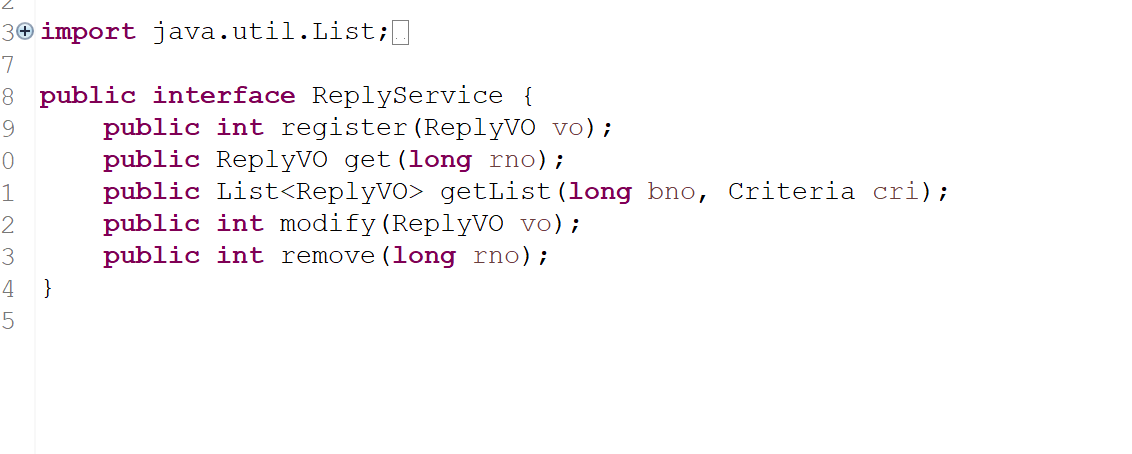
✍replyService.java
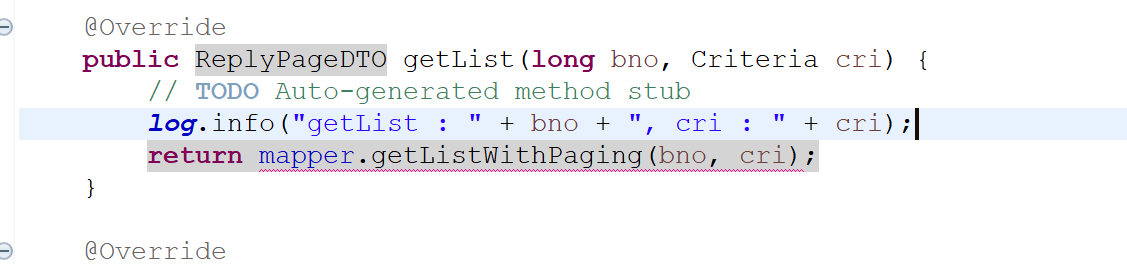
✍replyServiceImpl.java
다음과 같이 수정한다.
✍replyController
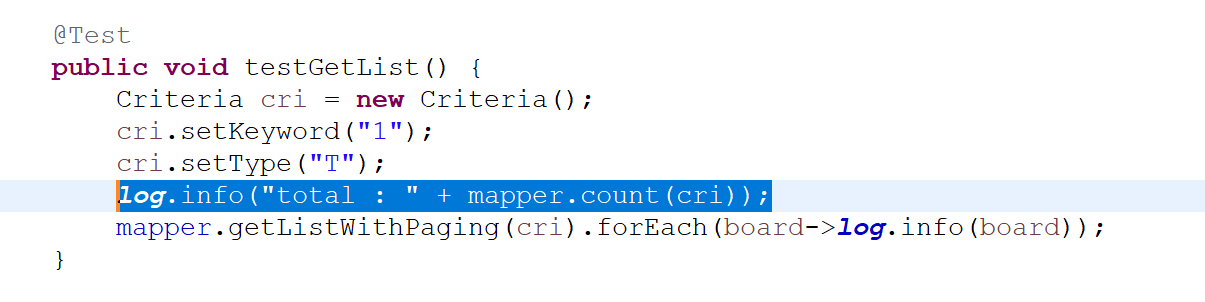
✍BoardMapperTest
리턴 타입이 pagedto로 바뀌었기때문에 화면상에서는 제대로 처리되지않음

이전에는 이 데이터가 리스트로 돌아왔음 그런데 지금은 pagedto로 돌아옴
댓글에대한 카운트도 추가한다
함수 부분도 수정한다
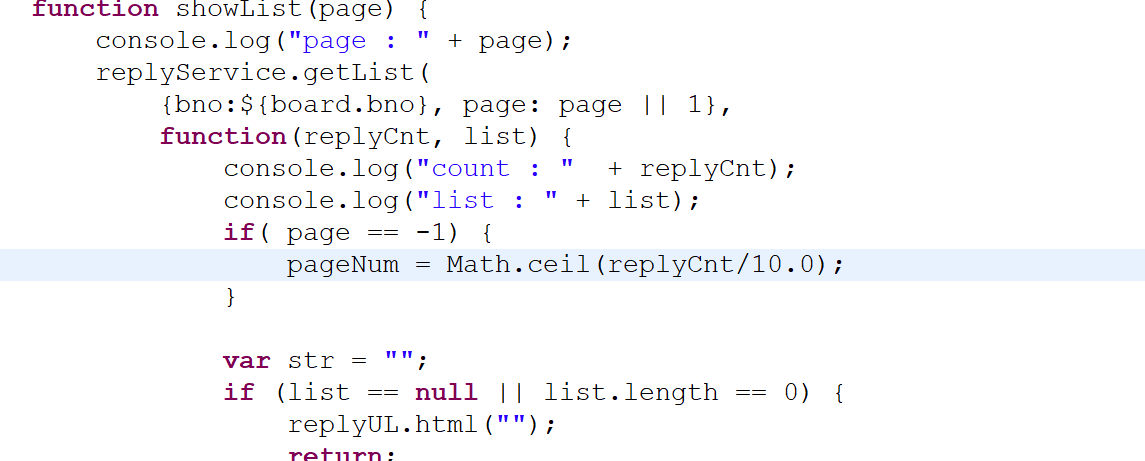
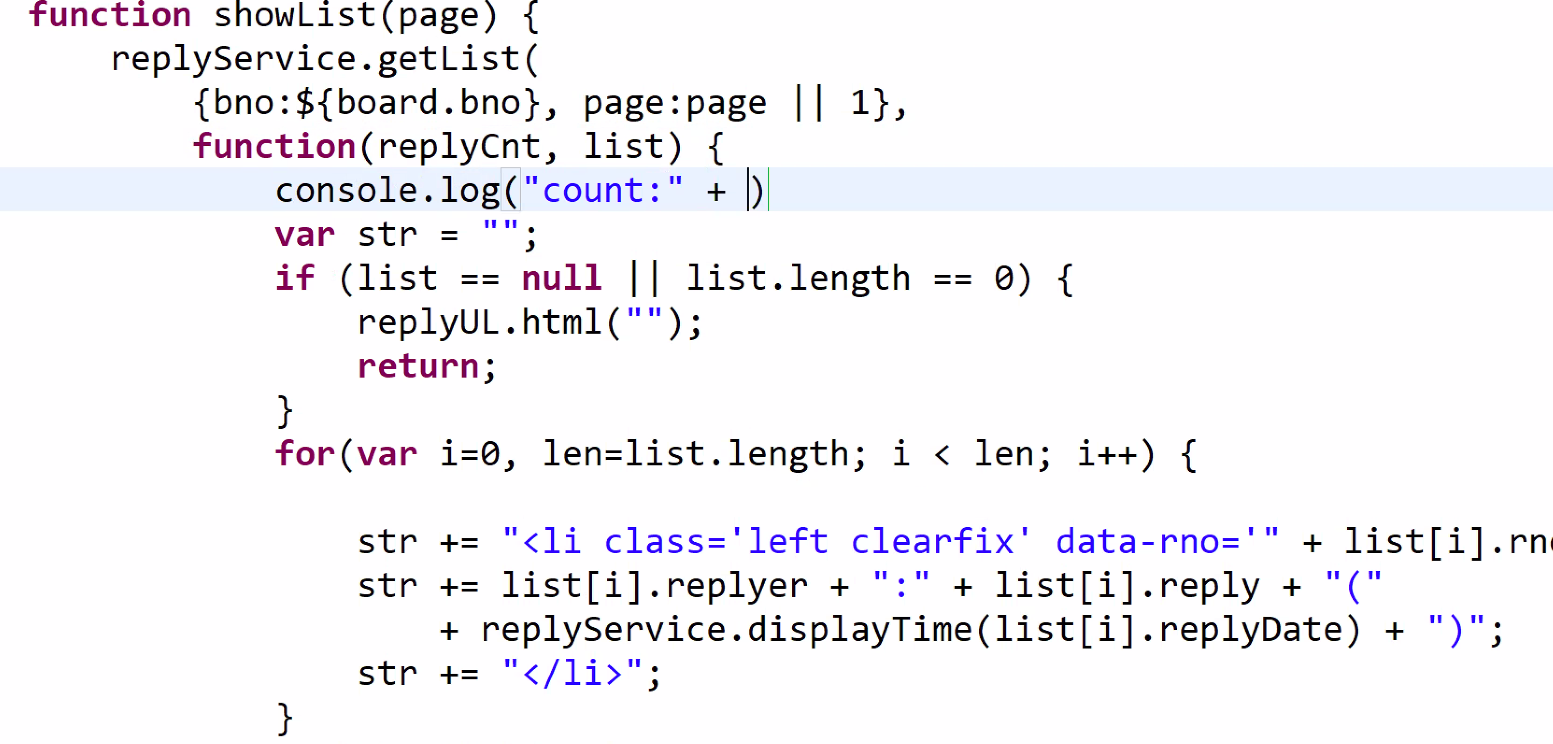
댓글의 끝페이지 계산
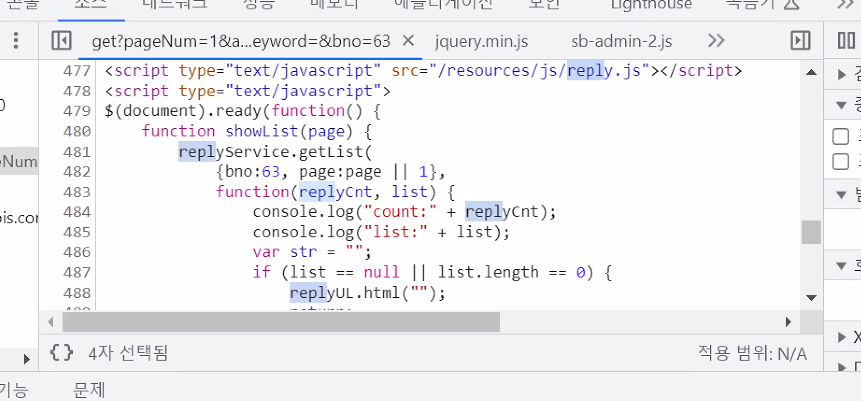
	function showList(page) {
		console.log("page : " + page);
		replyService.getList(
			{bno:${board.bno}, page: page || 1},
			function(replyCnt, list) {
				console.log("count : "  + replyCnt);
				console.log("list : " + list);
				if( page == -1) {
					pageNum = Math.ceil(replyCnt/10.0);
					showList(pageNum);
					return;
				}
위와 같은 형태의 함수를 재귀함수라 한다, 정상적으로 종료할수있다고 확실하게 확인작업을 해야한다.
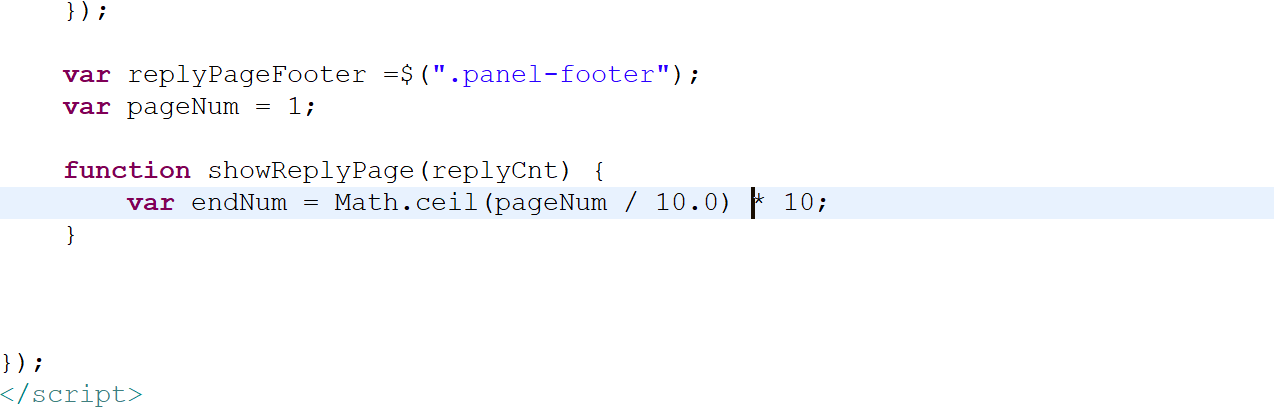
페이징 UI 만들기

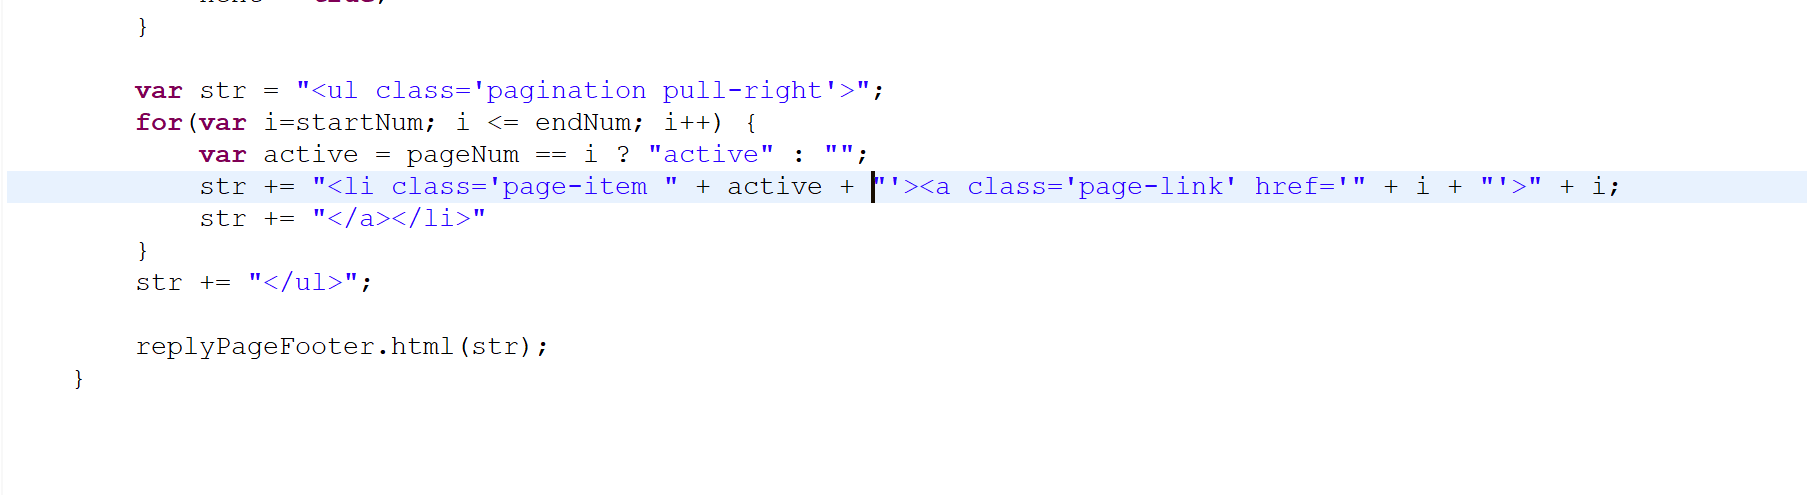
액티브 추가
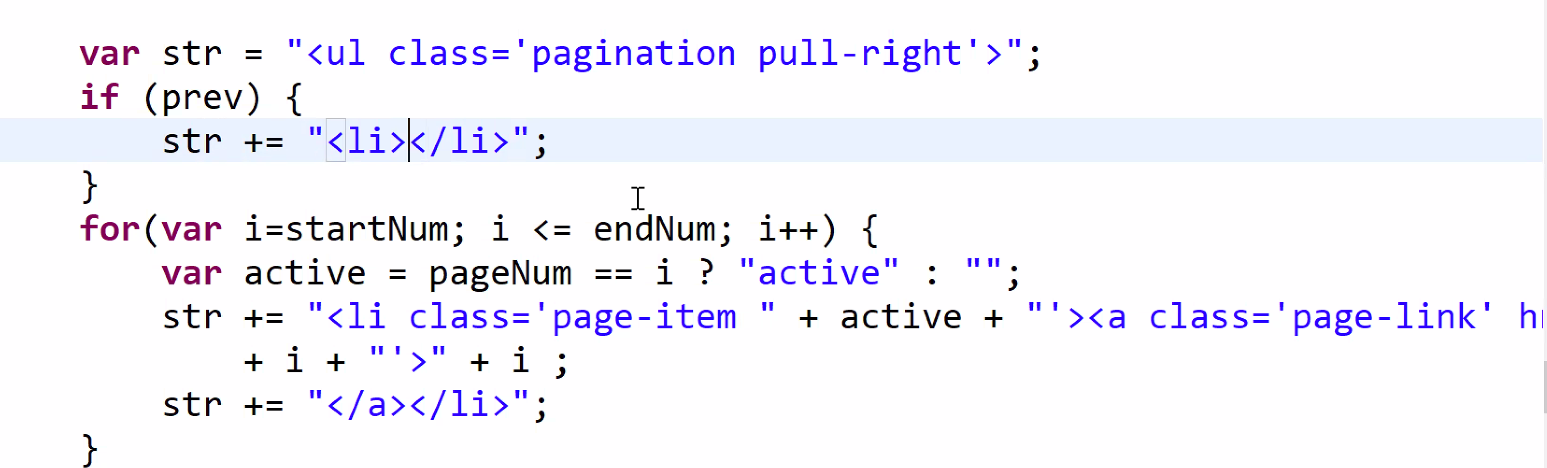
prev next 추가
다음과 같이
확인한다
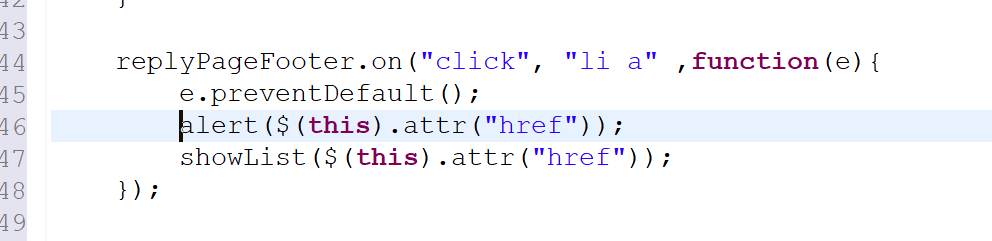
버튼 동작
	replyPageFooter.on("click", "li a" ,function(e){
		e.preventDefault();
		//alert($(this).attr("href"));
		pageNum = $(this).attr("href");
		showList(pageNum);
	});
attr 찾아보기