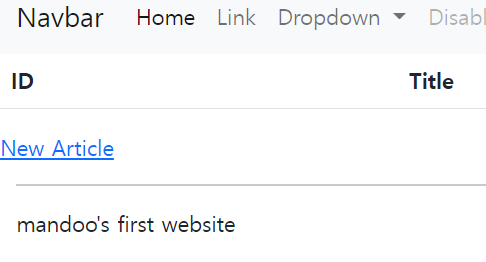
👾 페이지 연결
Rink
: 페이지를 다른 페이지로 연결해준다.
편리한 요청.
html 태그를 이용한다.
{{#article}}
<a href="/articles">Go To Article List</a>
<a href="/articles/new">New Article</a>
{{/article}}
.
.
.
<a href="/articles/{{article.id}}/edit" class="btn btn-primary">Edit</a>
<a href="/articles/{{article.id}}/delete" class="btn btn-danger">Delete</a>
#으로 묶어주고 안 묶어주고의 차이
Redirect
: 서버가 클라이언트에게 재요청.
편리한 응답
/articles/create 에서 유저가 글을 새로 작성하면 그 글의 show 페이지를 요청한다.
ArticleController _ show메소드의 return값에 해당 id로 redirect해준다.
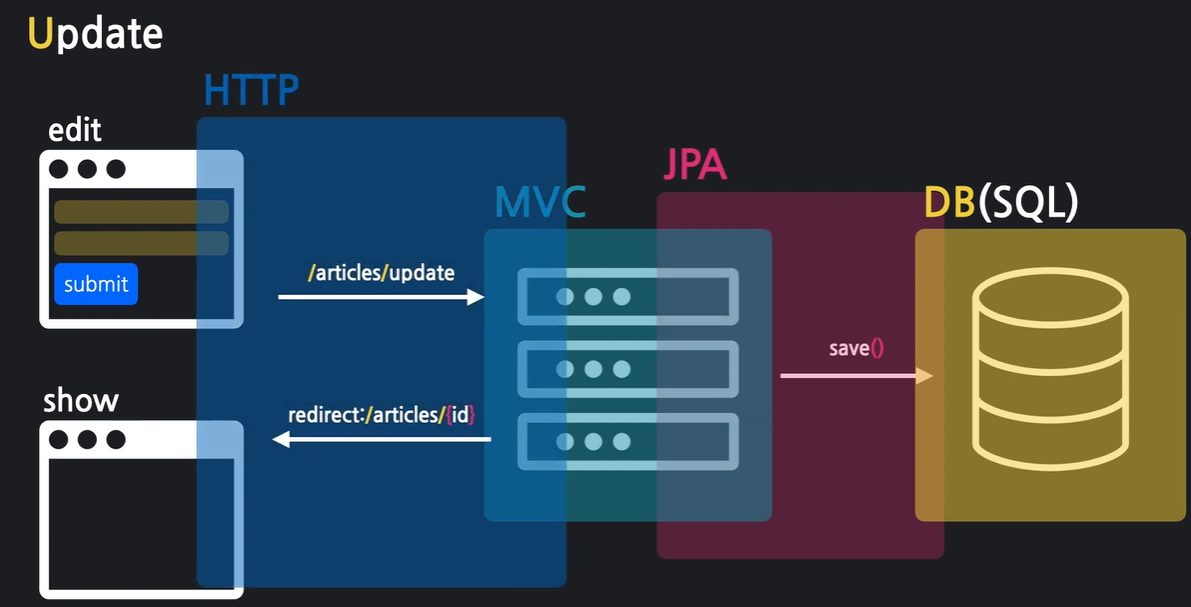
return "redirect:/articles/" + saved.getId() ;👾 데이터 수정하기
update
데이터 상세페이지 (show)에 edit 링크를 추가.
@PostMapping("/articles/update")
    public String update(ArticleForm form){

        //1. DTO를 엔티티에 저장
        Article articleEntity = form.toEntity();


        //2. 엔티티를 DB에 저장
        //2-1. 기존 DB를 가져온다.
        Article target =  articleRepository.findById(articleEntity.getId()).orElse(null);

        //2-2. 기존 데이터의 값을 수정, 갱신 한다.
        if(target != null){
             articleRepository.save(articleEntity);
        }


        //3. 수정 결과 페이지로 redirect
        return "redirect:/articles/" + articleEntity.getId();
    }
form 태그는 post, get만 지원한다. 일단 post 방식을 사용한다.
SQL UPDATE 문법
UPDATE article SET title='123' content='hello';모든 article 데이터를 title='123' content='hello'로 수정.
UPDATE article SET title='123' content='hello' WHERE id=2;id가 2인 article 데이터만 수정.
SELECT * FROM article;article의 모든 데이터를 확인.
data.sql
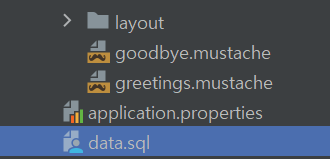
INSERT INTO article(id, title, content) VALUES (1,'Title','Content..');
INSERT INTO article(id, title, content) VALUES (2,'Milk','we make people happy.');
sql 파일로 저장해두면 서버를 재시작할때마다 DB에 해당 데이터가 저장된다.
👾 데이터 삭제
삭제할때는 delete요청을 보내줘야하는데 http에서 post, get만 제공해서. 임의로 get방식을 제공하는 a태그를 사용하겠다. 다음에는 js로 제대로 요청하겠다.
  @GetMapping("/articles/{id}/delete")
    public String delete(@PathVariable Long id, RedirectAttributes rttr){

        //1. 삭제 대상 가져오기
        Article target = articleRepository.findById(id).orElse(null);

        //2. 대상을 삭제
        if(target != null){
            articleRepository.delete(target);
            rttr.addFlashAttribute("msg","DELETE !!");
        }

        //3. 결과 페이지로 리다이렉트
        return  "redirect:/articles";
    }
addFlashAttribute(attributeName, attributeValue)
메소드의 파라미터로 RedirectAttribute 타입의 데이터를 받아온다.
addFlashAttribute메소드는 addAttribute와 달리 임시적, 일회성이다. 그래서 따라서 링크가 따로 없다.
header.mustache의 끝 부분에 attributeName(여기서는 msg)값이 들어오면 실행시키는 뷰 페이지를 설정해준다.
{{#msg}}
    <div class="alert alert-primary alert-dismissible">
        {{msg}}
    <button type="button" class="btn-close" data-bs-dismiss="alert" aria-label="Close"></button>
    </div>
{{/msg}}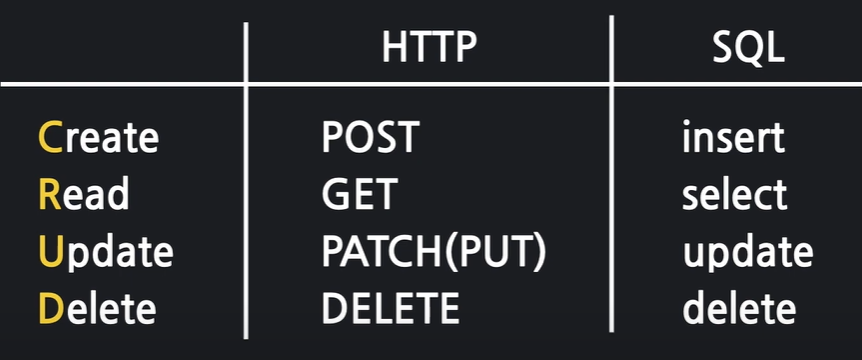
사진 출처 : https://youtu.be/2IuZs5I5KJg