SMTP Mail Service With Naver
1. 네이버 환경 설정
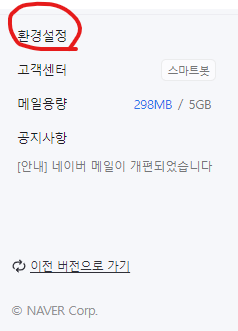
1.1네이버 메일 환경설정에 들어간다
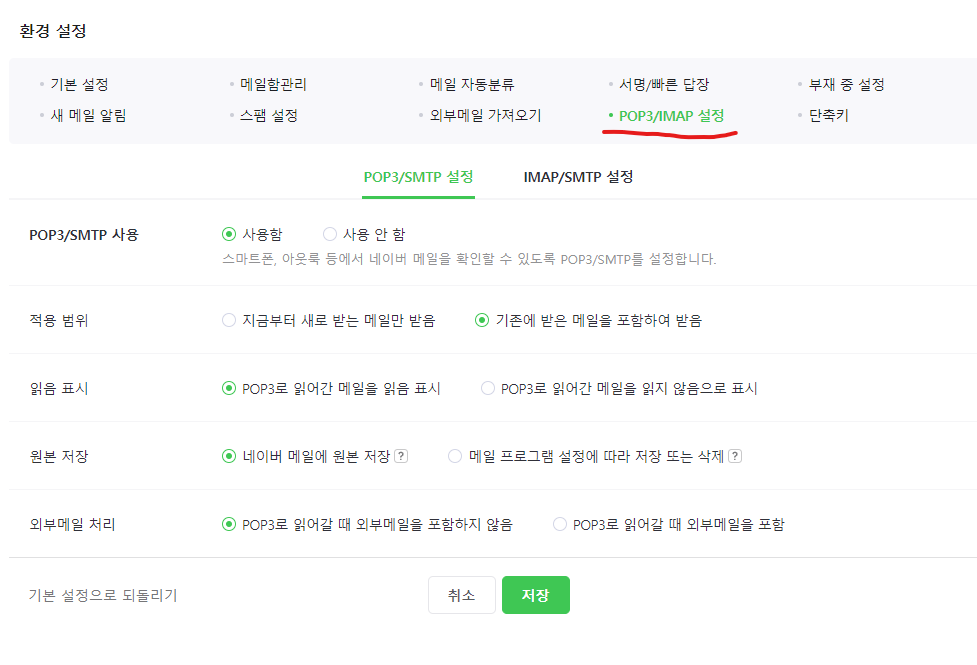
1.2pop3/imap 설정에 들어가고 아래와 같에 설정한다.
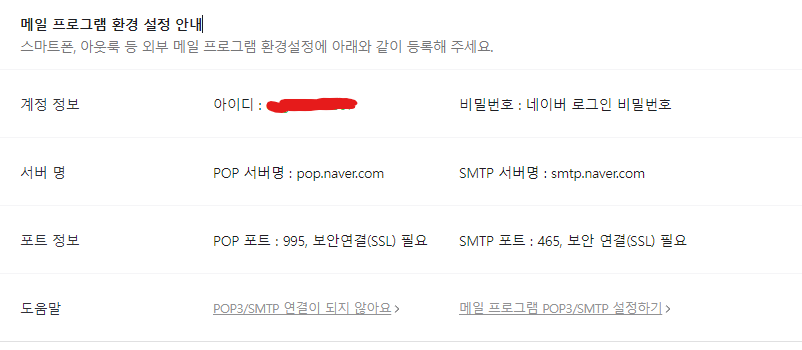
1.3그럼 아래 화면을 볼 수 있는데 그럼 네이버 환경설정은 끝이다.
2. SpringBoot 프로젝트 설정
2.1 dependency 추가
Gradle
implementation 'org.springframework.boot:spring-boot-starter-mail:2.7.1'
2.2 yml 파일 작성
spring:
  mail:
    username: <host>
    password: <host>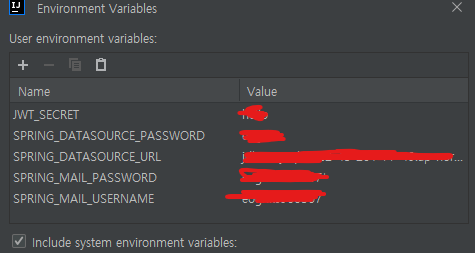
해당 username 값과 password 값은 네이버 아이디(@ 앞부분까지)와 비밀번호이다
나머지 yml 파일 설정은 뒤에 MailConfig에서 진행하는데 네이버 아이디와 비밀번호는 git에 올리면 큰일나기 때문에 환경변수로 바꿔서 yml에 직접 설정해 주었다.
3. SpringBoot 프로젝트 코드 작성
3.1 MailConfig
import org.springframework.beans.factory.annotation.Value;
import org.springframework.context.annotation.Bean;
import org.springframework.context.annotation.Configuration;
import org.springframework.context.annotation.PropertySource;
import org.springframework.mail.javamail.JavaMailSender;
import org.springframework.mail.javamail.JavaMailSenderImpl;

import java.util.Properties;

@Configuration
public class MailConfig {

    @Value("${spring.mail.username}")
    String id;
    @Value("${spring.mail.password}")
    String password;

    @Bean
    public JavaMailSender javaMailService() {
        JavaMailSenderImpl javaMailSender = new JavaMailSenderImpl();

        javaMailSender.setHost("smtp.naver.com");
        javaMailSender.setUsername(id);
        javaMailSender.setPassword(password);

        javaMailSender.setPort(465);

        javaMailSender.setJavaMailProperties(getMailProperties());

        return javaMailSender;
    }

    private Properties getMailProperties() {
        Properties properties = new Properties();
        properties.setProperty("mail.transport.protocol", "smtp");
        properties.setProperty("mail.smtp.auth", "true");
        properties.setProperty("mail.smtp.starttls.enable", "true");
        properties.setProperty("mail.debug", "true");
        properties.setProperty("mail.smtp.ssl.trust","smtp.naver.com");
        properties.setProperty("mail.smtp.ssl.enable","true");
        return properties;
    }
}
id 와 password를 환경변수에서 불러와서 사용하였다
javaMailService()의 내부는 대략 네이버 메일 서버에 본인의 아이디와 비밀번호를 이용해서 465 port로 연결하는 내용이다.
그리고 나머지 yml파일 셋팅을 해주었다.
3.2MailService
@Service
public class MailService   {
    @Autowired
    JavaMailSender emailsender; // Bean 등록해둔 MailConfig 를 emailsender 라는 이름으로 autowired

    public static final String ePw =createKey(); // 인증번호

    // 메일 내용 작성

    public MimeMessage createMessage(String to) throws MessagingException, UnsupportedEncodingException {
        MimeMessage message = emailsender.createMimeMessage();

        message.addRecipients(Message.RecipientType.TO, to);// 보내는 대상
        message.setSubject("운동메 회원가입 이메일 인증");// 제목

        String msgg = "";
        msgg += "<div style='margin:100px;'>";
        msgg += "<h1> 안녕하세요</h1>";
        msgg += "<h1> 운동메 입니다</h1>";
        msgg += "CODE : <strong>";
        msgg += ePw + "</strong><div><br/> ";
        msgg += "</div>";
        message.setText(msgg, "utf-8", "html");// 내용, charset 타입, subtype
        // 보내는 사람의 이메일 주소, 보내는 사람 이름
        message.setFrom(new InternetAddress("보낸는 주소", "보내는 사람 이름"));// 보내는 사람

        return message;
    }

    // 랜덤 인증 코드 생성
    public static String createKey() {
        StringBuffer key = new StringBuffer();
        Random rnd = new Random();

        for (int i = 0; i < 8; i++) { // 인증코드 8자리
            int index = rnd.nextInt(3); // 0~2 까지 랜덤, rnd 값에 따라서 아래 switch 문이 실행됨

            switch (index) {
                case 0:
                    key.append((char) ((int) (rnd.nextInt(26)) + 97));
                    // a~z (ex. 1+97=98 => (char)98 = 'b')
                    break;
                case 1:
                    key.append((char) ((int) (rnd.nextInt(26)) + 65));
                    // A~Z
                    break;
                case 2:
                    key.append((rnd.nextInt(10)));
                    // 0~9
                    break;
            }
        }

        return key.toString();
    }

    // 메일 발송
    // sendSimpleMessage 의 매개변수로 들어온 to 는 곧 이메일 주소가 되고,
    // MimeMessage 객체 안에 내가 전송할 메일의 내용을 담는다.
    // 그리고 bean 으로 등록해둔 javaMail 객체를 사용해서 이메일 send!!

    public UserMailResponse sendSimpleMessage(String to) throws Exception {
       // 랜덤 인증번호 생성
        MimeMessage message = createMessage(to); // 메일 발송
        try {// 예외처리
            emailsender.send(message);
        } catch (MailException es) {
            es.printStackTrace();
            throw new IllegalArgumentException();
        }

        return new UserMailResponse(ePw); // 메일로 보냈던 인증 코드를 서버로 반환
    }
}
createMessage(): 메일의 내용을 직접 작성한다.
createKey(): code를 생성하는 코드
sendSimpleMessage(): 메일을 발송한다.
3.3 Controller
    @PostMapping("/login/mailConfirm")
    @ResponseBody
    public Response mailConfirm(@RequestParam("email") String email) throws Exception {

        UserMailResponse userMailResponse = mailService.sendSimpleMessage(email);
        System.out.println("인증코드 : " + userMailResponse.getCode());
        return Response.success(userMailResponse);
    }
    @PostMapping("/login/verifyCode")
    @ResponseBody
    public int verifyCode(@RequestParam("code") String code) {
        int result = 0;
        System.out.println("code : "+code);
        System.out.println("code match : "+ mailService.ePw.equals(code));
        if(mailService.ePw.equals(code)) {
            result =1;
        }
        return result;
    }
메일을 전송하는 api 하나와 전송코드를 확인하는 api이다.
둘다 RequestParam으로 Email주소와 Code를 받고 이 값은 thymeleaf input태그에서 값을 가져온다.
4. Javascript
한동안 계속 Java를 비롯해 backEnd 관련 공부만 해왔어서 javascript를 많이 까먹었다. 그래서 기억을 더듬어 가며 구글링을 하면서 작성을 하였다. 분명 더 좋은 방식이 있을 테지만 나중에 공부를 더하고 리팩토링 해야 할 것 같다.
4.1 checkEmail
 async function checkEmail(){
        let params = document.getElementById("memail").value;
        let response = await fetch(`/login/mailConfirm/?email=${params}`, {
            method: "POST",
            headers: {
                "Content-Type": "application/json",
            }
        })
        let data = await response.json()
        console.log(data)
        console.log(data.result.code)

        if(response.ok){
            alert("메세지가 전송되었습니다 email을 확인하세요")
        }else
        {
            alert("오류가 발생하여 메세지가 전송되지 못하였습니다.")
        }

    }
4.2 checkCode
async function checkCode(){
        let params = document.getElementById("memailconfirm").value;
        let response = await fetch(`/login/verifyCode/?code=${params}`, {
            method: "POST",
            headers: {
                "Content-Type": "application/json",
            },body: JSON.stringify({

                code: document.getElementById("memailconfirm"),
            })
        })
        let data = await response.json()
        console.log(data)

        if(data==1){
           alert("확인되었습니다.")
            const btn = document.getElementById("last")
            btn.style.display='block'
        }else
        {
            alert("비밀번호가 일치하지 않습니다.")
        }
    }
이메일 인증이 완료되어야 회원가입을 진행하도록 로직을 구현하고 싶어서 회원가입 버튼을 display none을 주고 확인이 되면 display = block으로 바꾸는 방식으로 구현하였다. 백엔드 개발자도 javascript를 어느정도 알고있으면 도움이 될 것 같다.
5 느낀점
react가 아닌 thymeleaf를 사용하다보니까 개발할때 제약사항이 많이 있었다. 프론트부분을 잘 알고있었으면 쉽게 해결할 수 있었지만 그렇지 못해서 많은 시간을 허비했다.
EmailCode를 전송하면 json 에 code: 코드값 이렇게 전달이 되는데 이 오브젝트를
javascript 안에서 전역적으로 사용하고 싶었지만 잘되지 않았다.
그래서 찾은 대안이 java코드에서 public static final String ePw =createKey(); 이런식으로 선언을 해서 접근하였다. 하지만 이게 맞는 방식은 아닌거 같아서 공부가 더 필요하다고 느끼게 되었다.
동기,비동기 처리를 좀더 공부해야 할 것 같다.