
Sanity란?
공식 사이트
Sanity.io는 블로그, 쇼핑몰 등에서 사용하는 여러 컨텐츠를 다양한 bulit-in 기능등을 이용해 편리하게 관리할 수 있는 콘텐츠 관리 시스템이다.(이라고 이해했다.)
Sanity studio를 통해 굉장히 간편하게 콘텐츠를 관리할 수 있었는데.. 본 글에서는 간단한 sanity의 사용법을 적어놓도록 하겠다.
Sanity project 생성
- cli 툴 설치
$ npm i @sanity/cli -g- login하기
$ sanity login-> 브라우저가 열리면서 google, github 등으로 간편하게 로그인 할 수 있는 창이 열리게 된다.
- sanity 프로젝트 시작
$ mkdir {프로젝트 디렉토리 이름}
$ cd {프로젝트 디렉토리 이름}
$ sanity init
-> 여러가지 옵션을 선택해주면 초기 세팅을 마칠 수 있게 된다.
나는 Blog template를 선택했다.
- 프로젝트 시작 명령
$ sanity start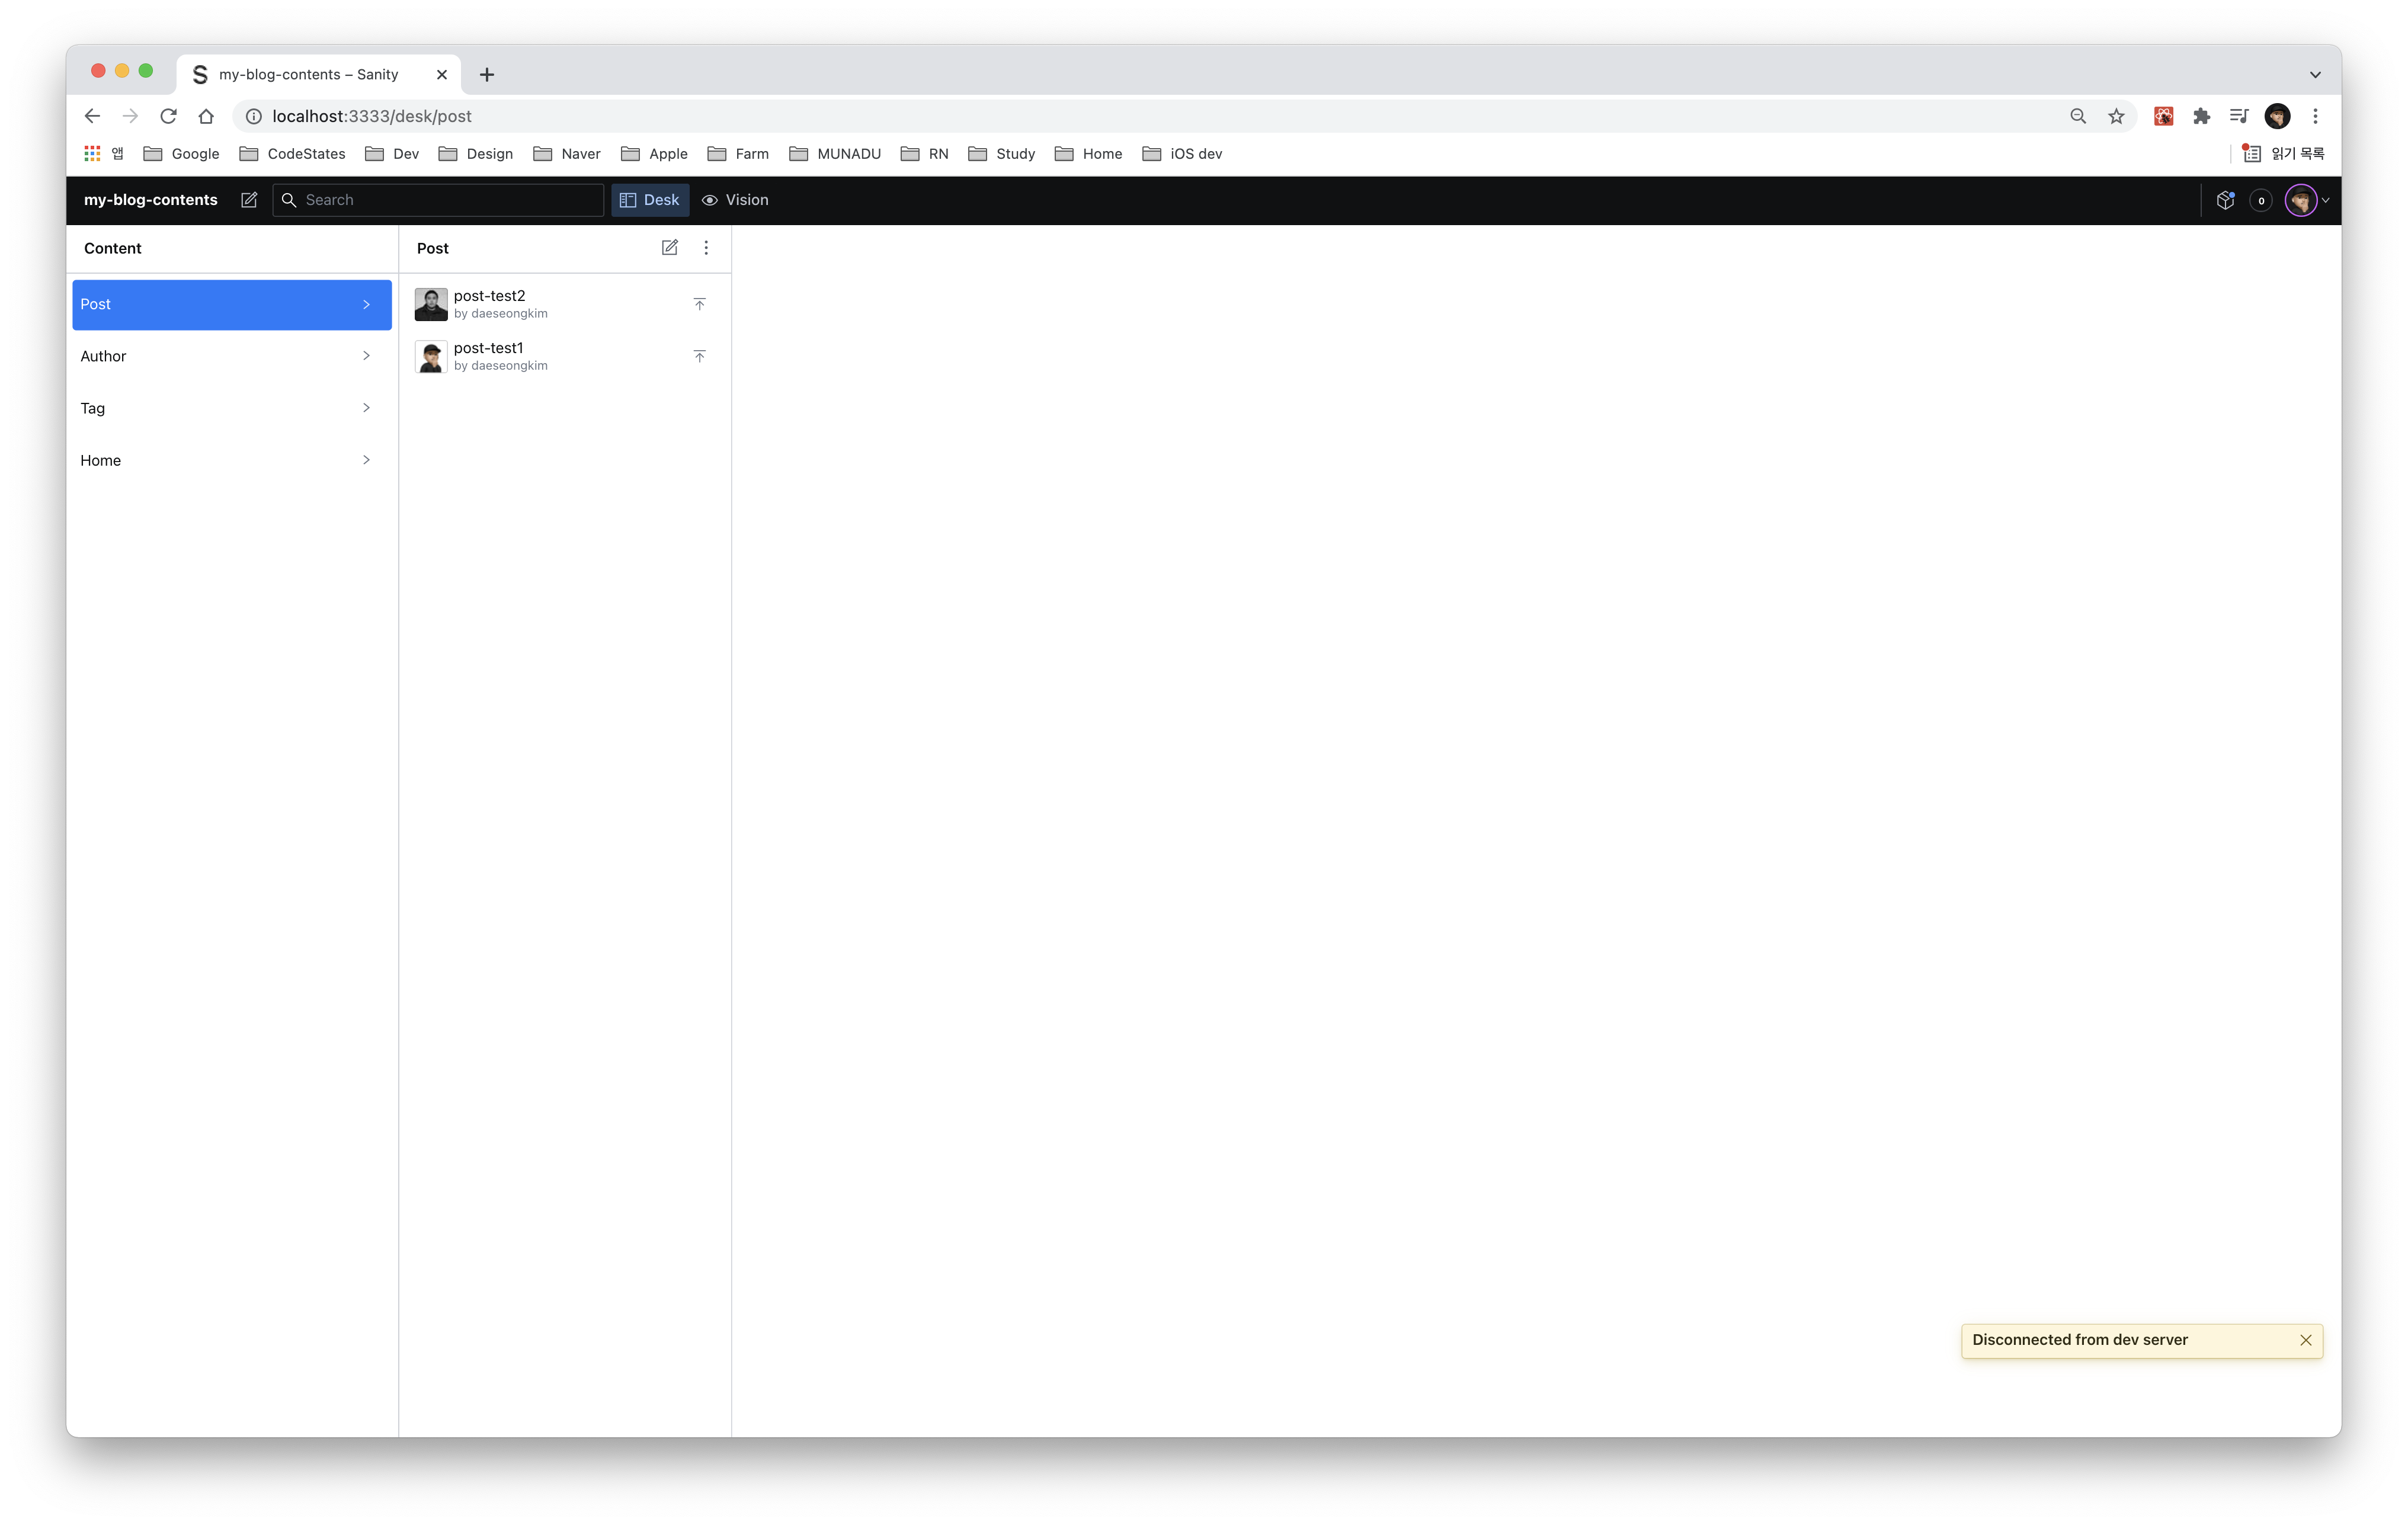
-> 브라우저에서 현재 프로젝트에 들어가 있는 스키마와 데이터를 확인 할 수 있다.
- 디렉토리 구조
├── README.md
├── components
│   └── CodeInput.jsx
├── config
│   └── @sanity
│       ├── data-aspects.json
│       ├── default-layout.json
│       ├── default-login.json
│       └── form-builder.json
├── dist
│   ├── index.html
│   └── static
│       ├── css
│       │   └── main.css
│       ├── favicon.ico
│       └── js
│           ├── app.bundle.js
│           └── vendor.bundle.js
├── package.json
├── plugins
├── sanity.json
├── schemas
│   ├── author.js
│   ├── blockContent.js
│   ├── code.js
│   ├── home.js
│   ├── imageGallery.js
│   ├── link.js
│   ├── post.js
│   ├── schema.js
│   ├── tag.js
│   └── video.js
├── static
│   └── favicon.ico
├── tsconfig.json
└── yarn.lock
Schema 만들기 및 편집
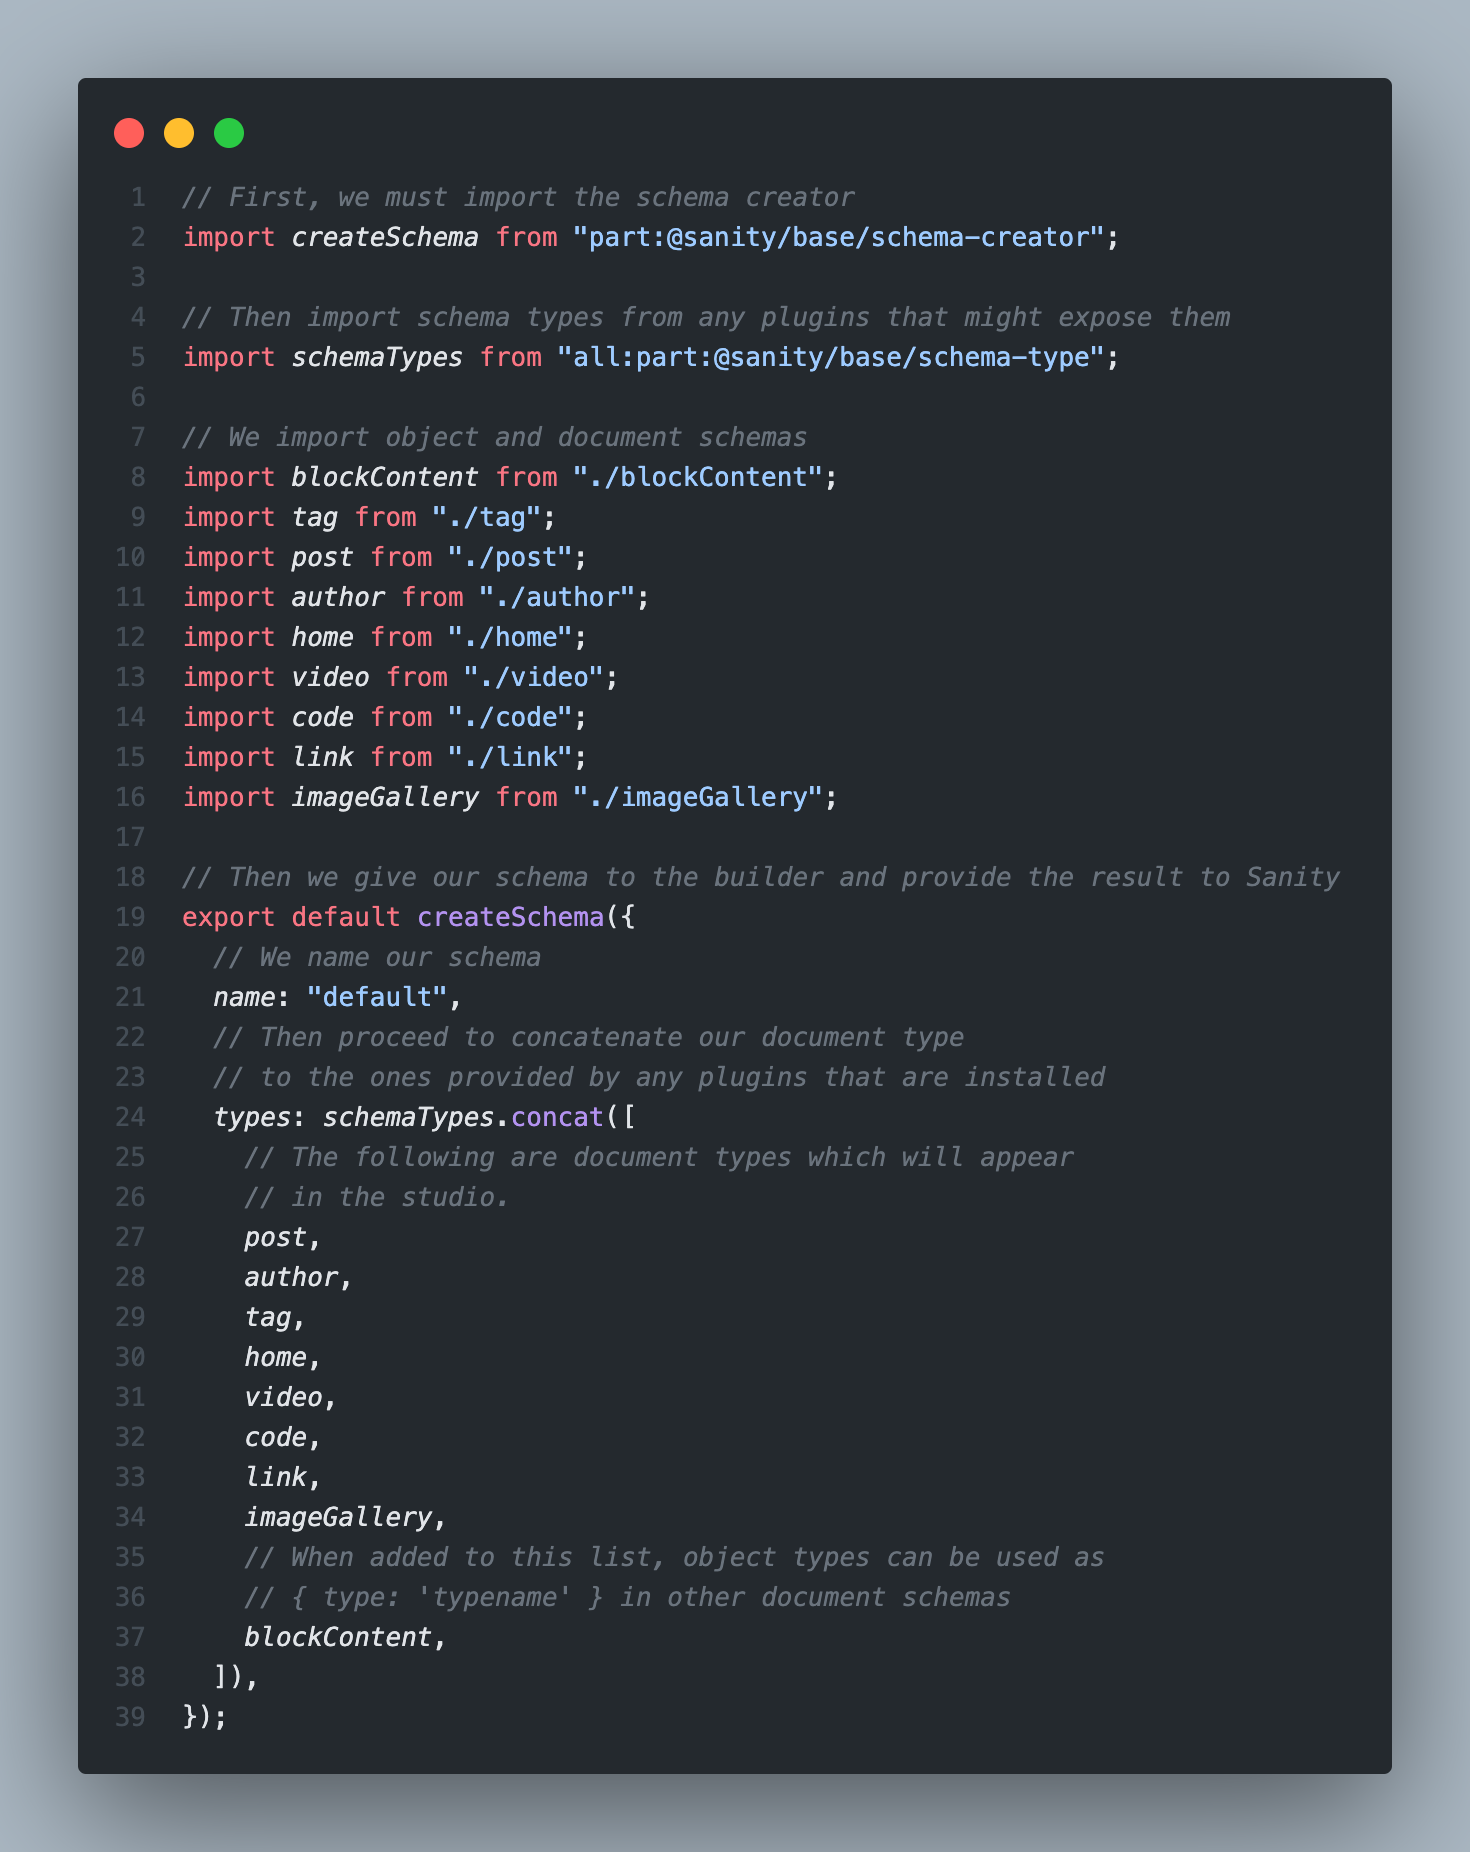
./schemas 디렉토리 내부에 있는 각각의 js파일들이 각각의 스키마를 뜻한다.
- ./schemas/schema.js
- ./schemas/author.js
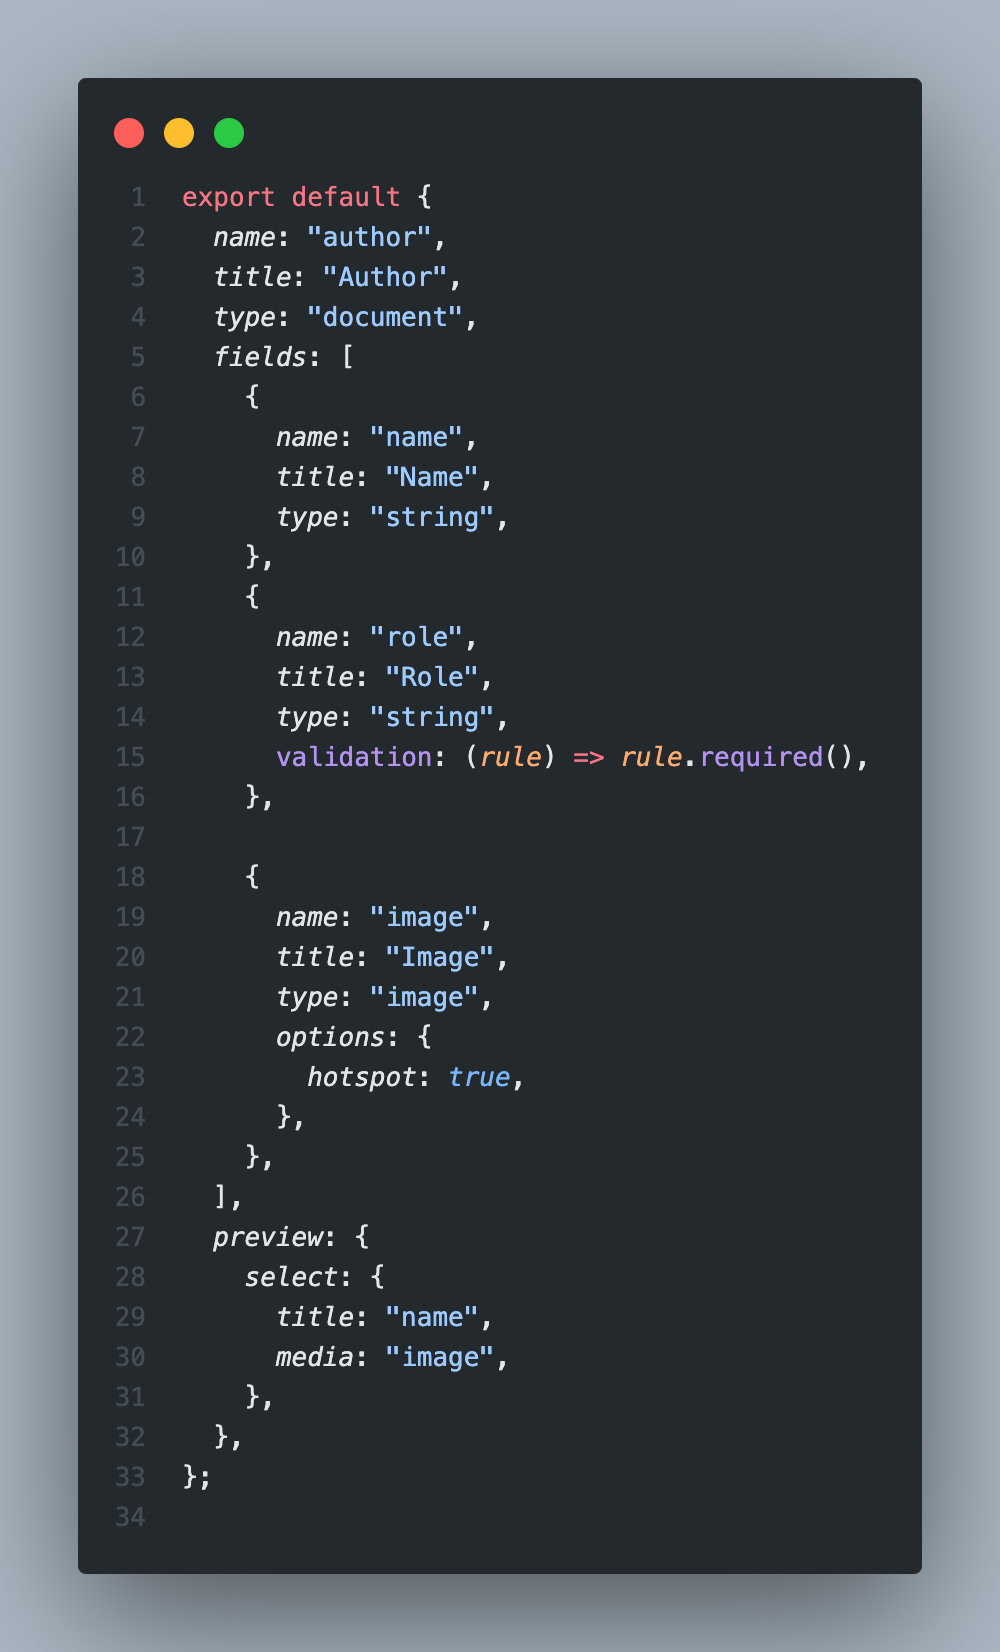
각종 설정들은 공식 문서를 통해 참고하면서 하나하나 적어가면 될 것 같다. 다 적긴 빡세다..
공식 문서 - 스키마 타입
- ./components/CodeInput.jsx
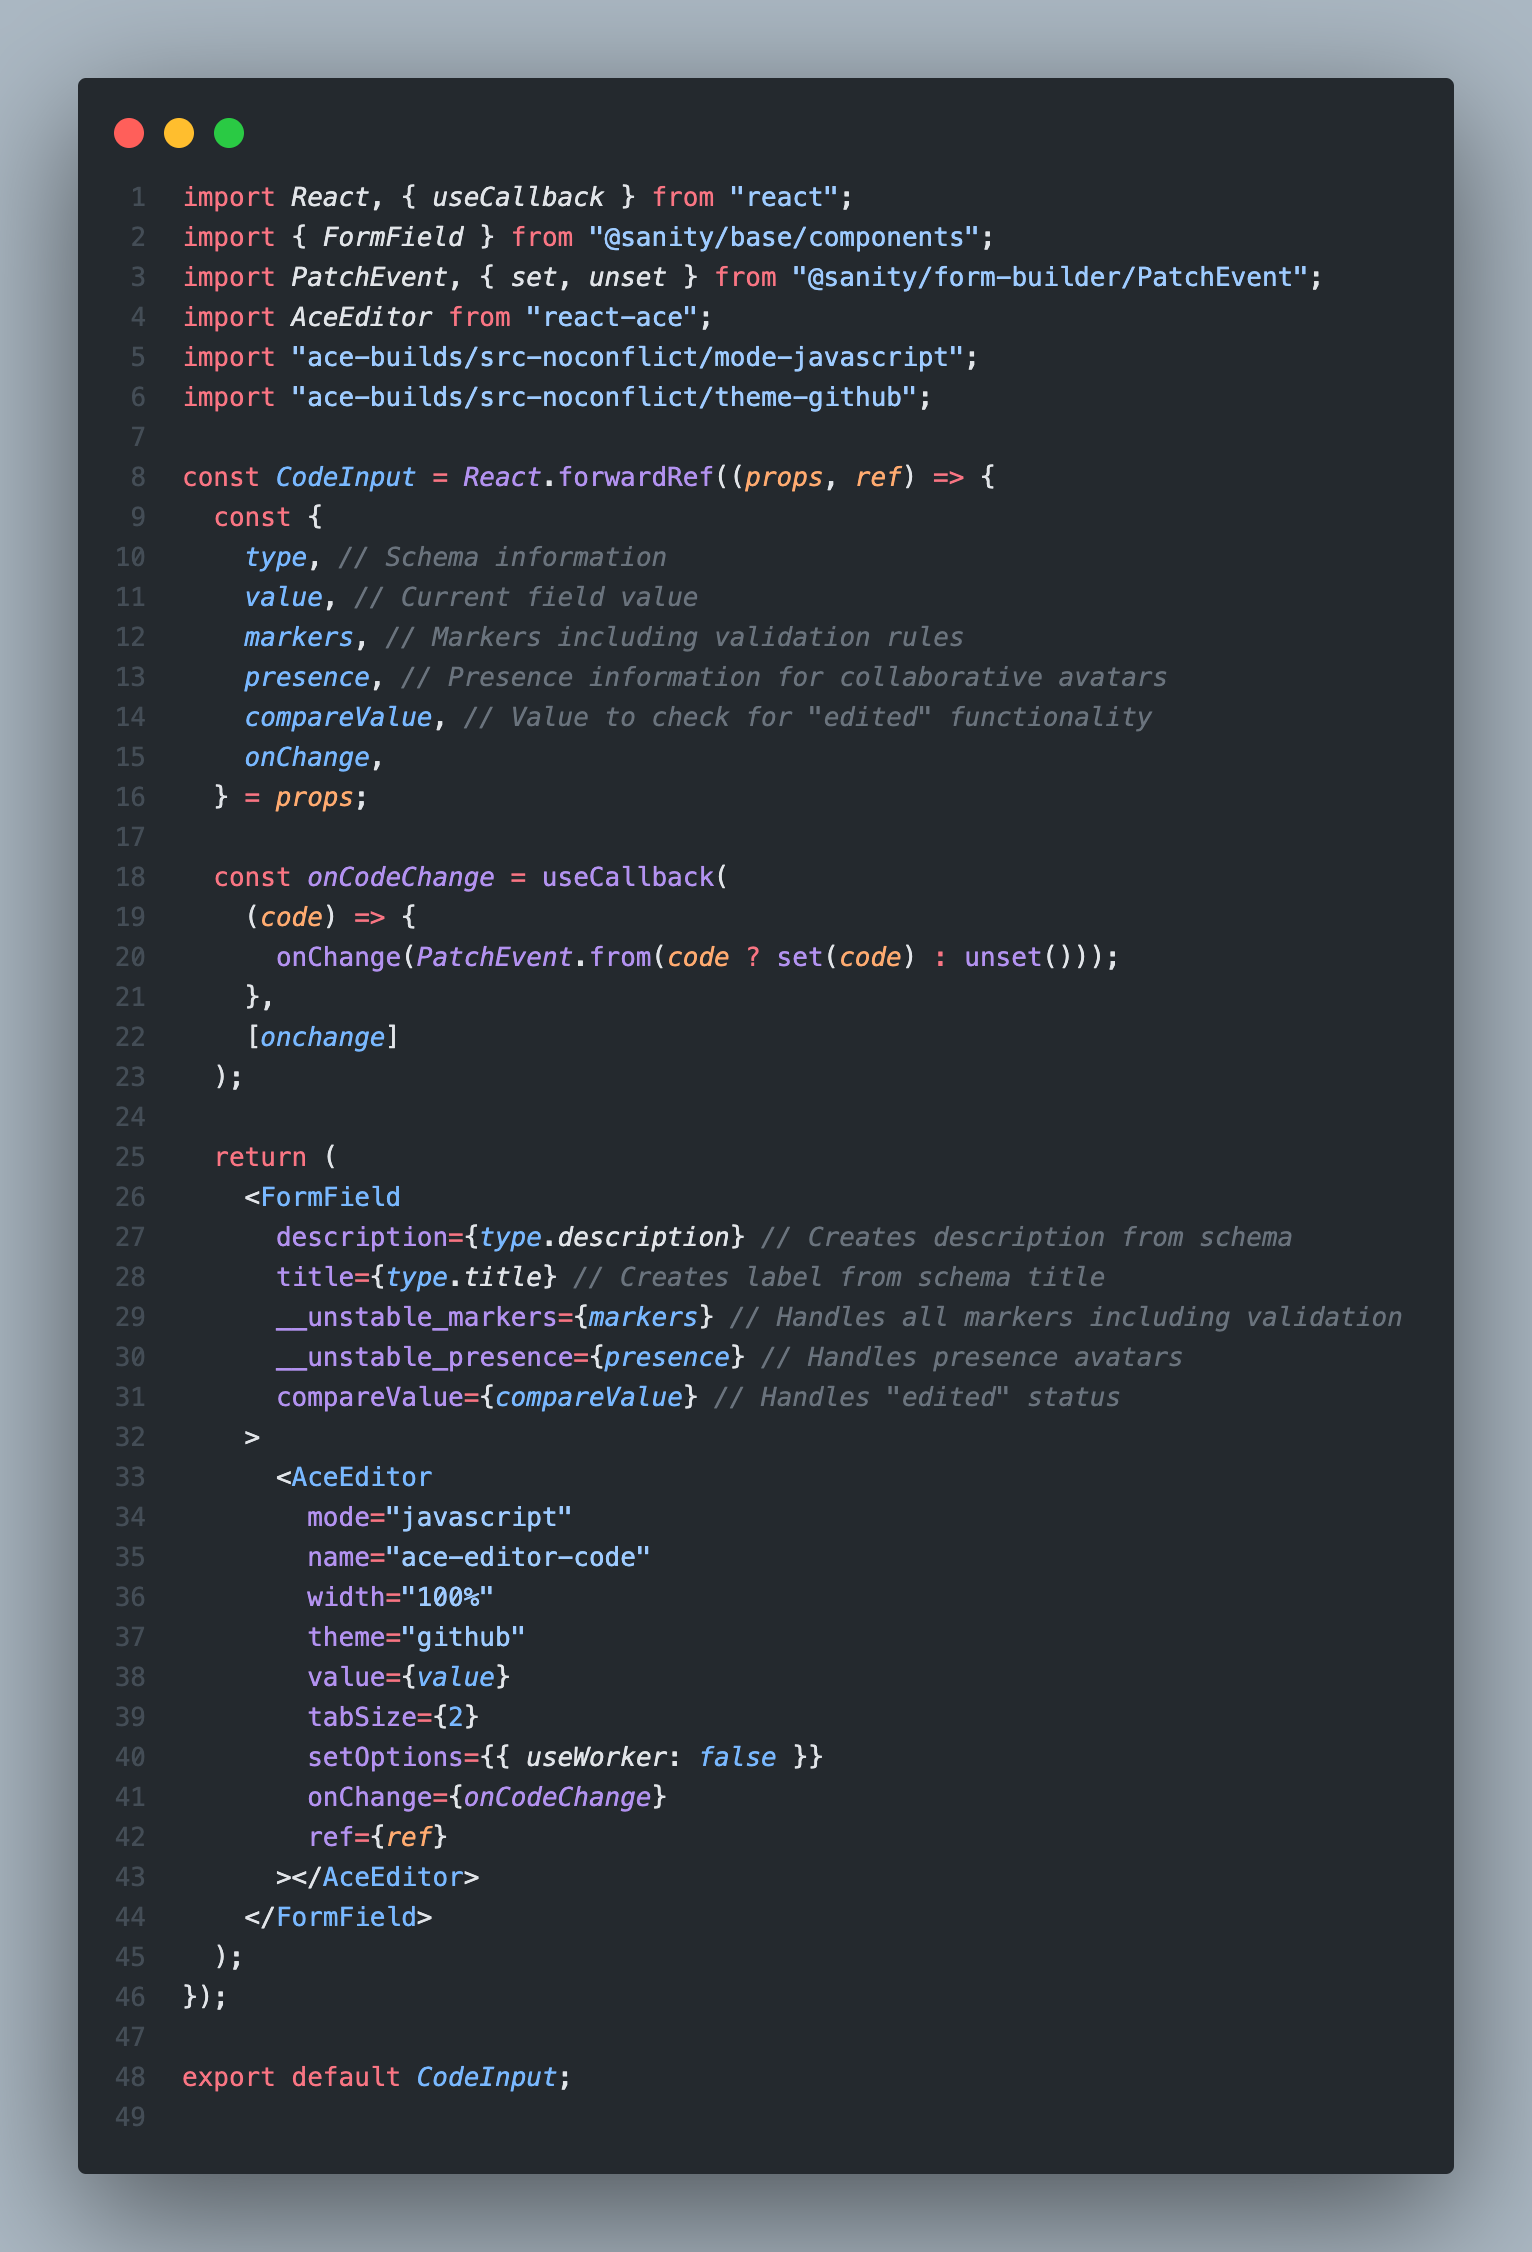
-> react component도 삽입 가능하다! 블로그에 code를 삽입하기 위해 위 기능과react-ace라이브러리를 사용하였다.
공식 문서 - 커스텀 인풋
Sanity Query
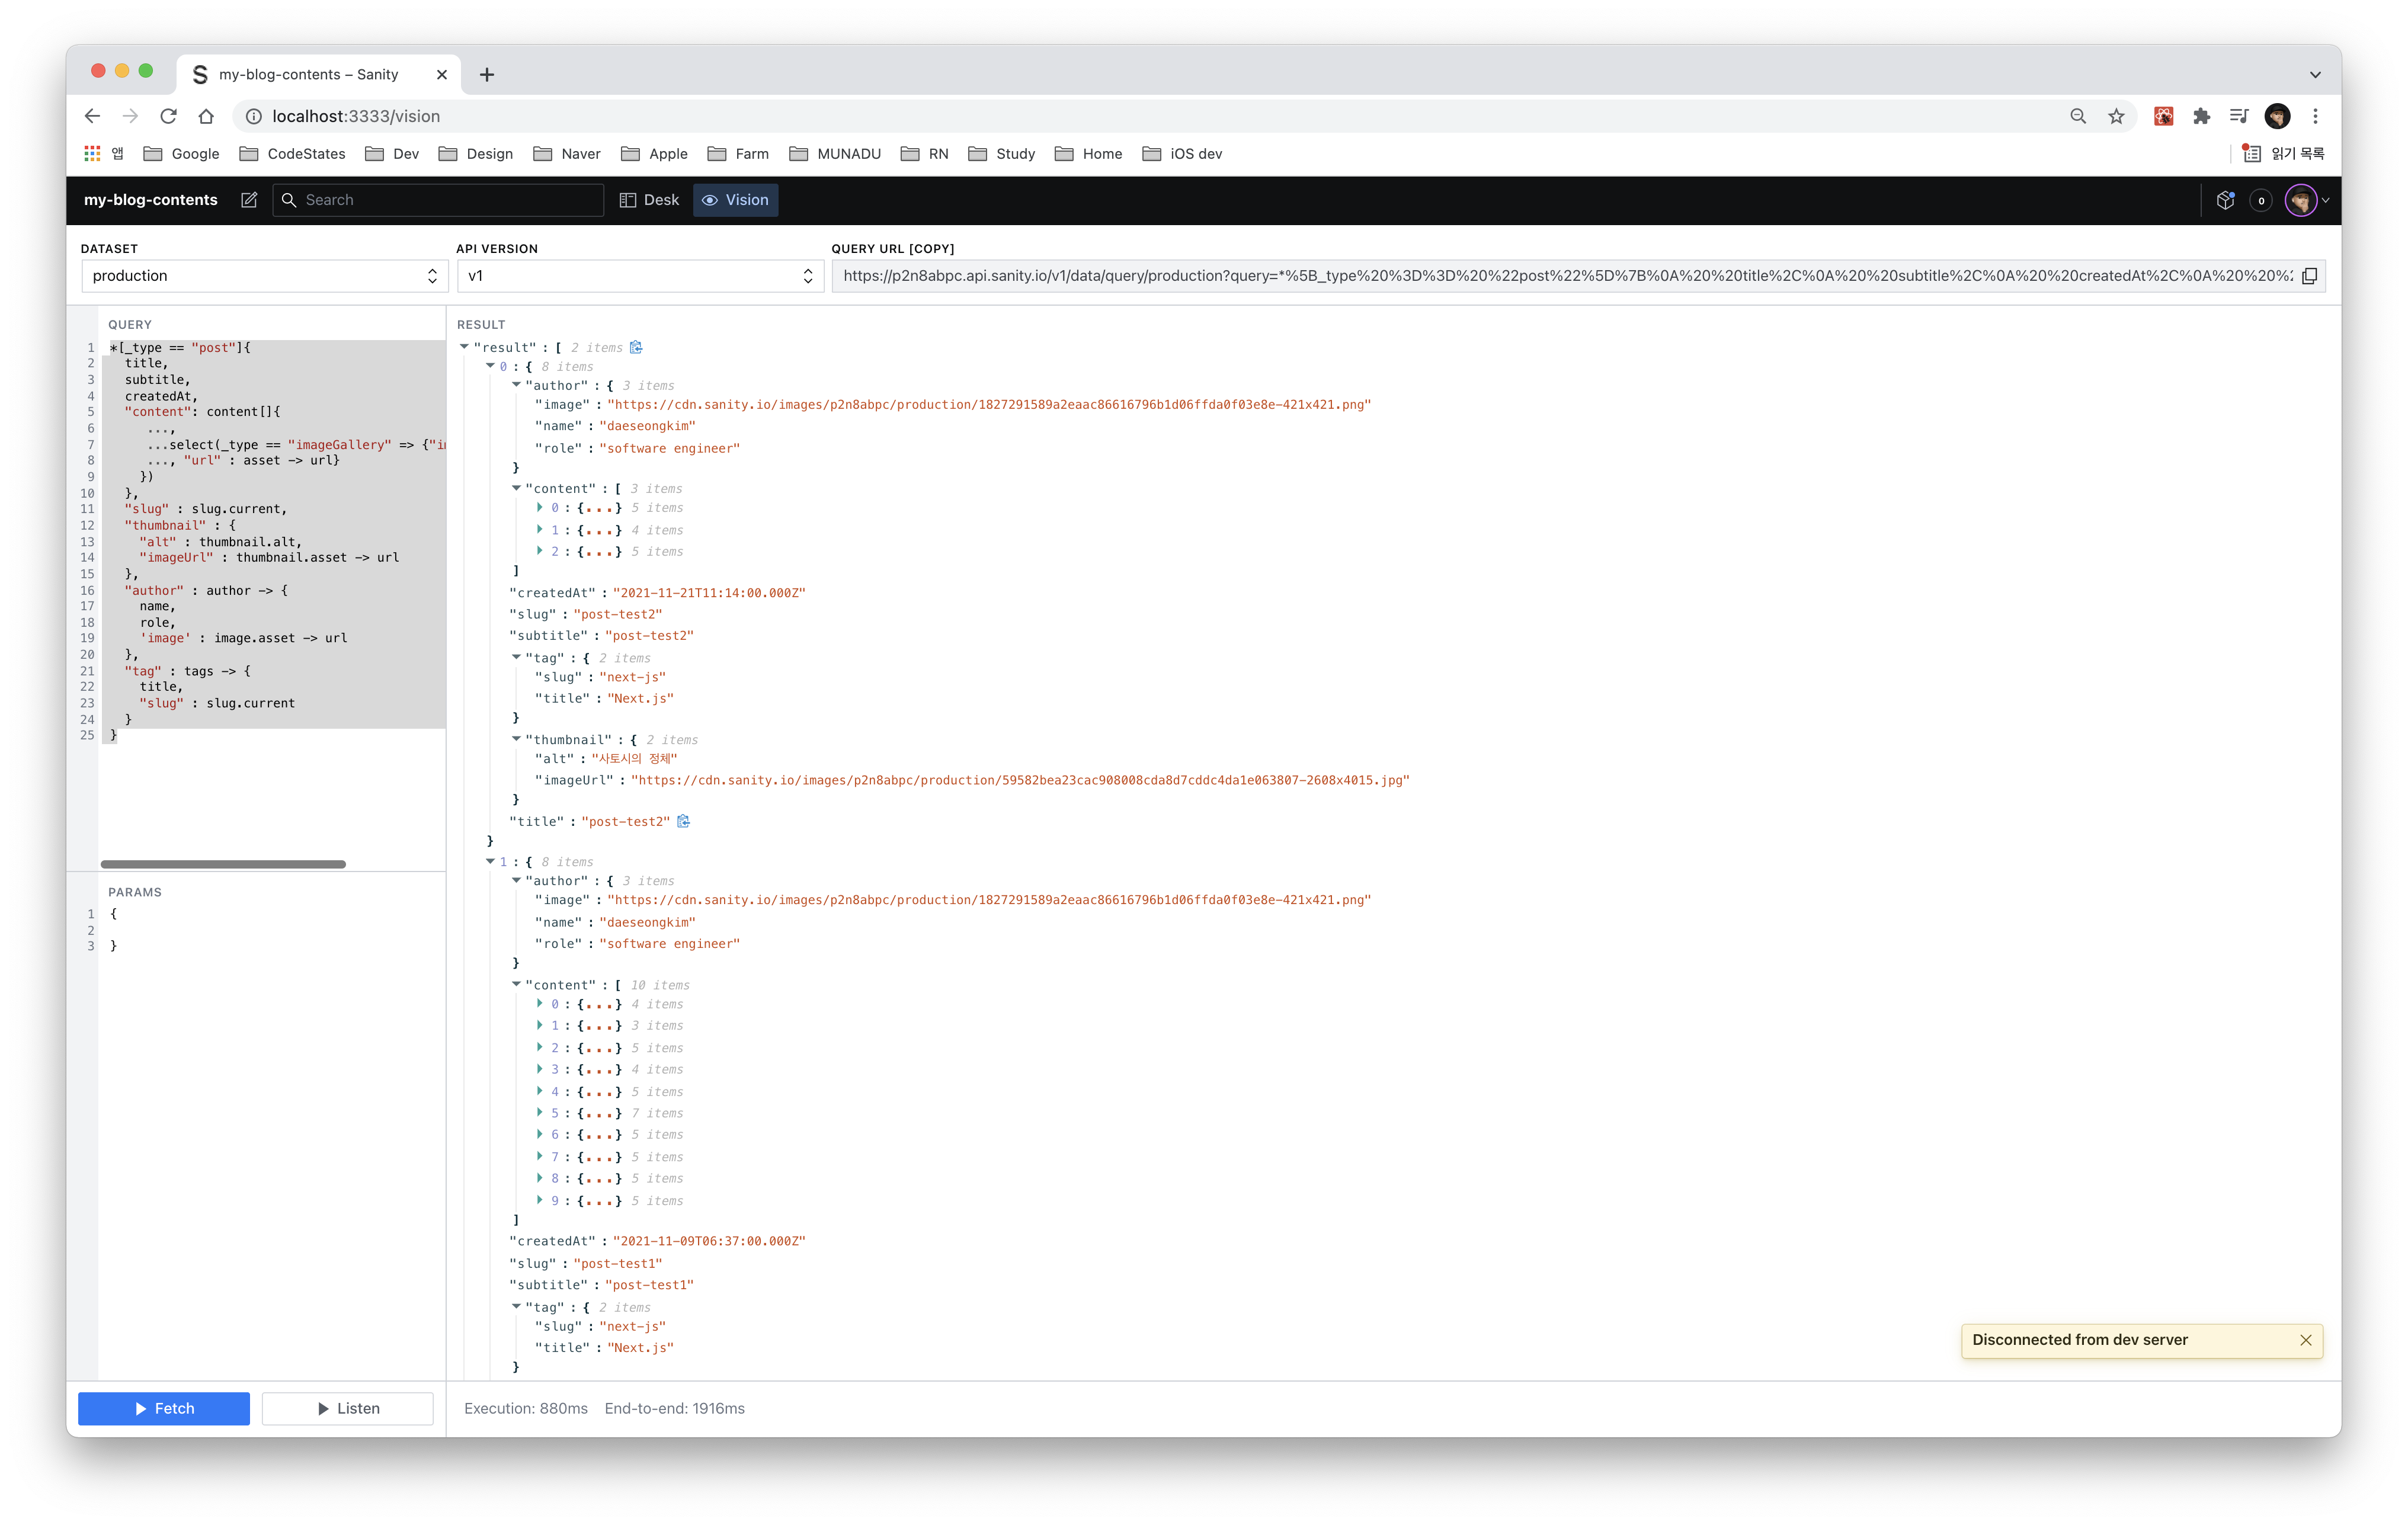
- Query를 통해 현재 작성한 데이터들 중 필요한 것들을 골라서 가져올 수 있다.
*[_type == "post"]{
// type이 "post"인 녀석들 중 밑에 적은 것들을 뽑아줘
  title,
  subtitle,
  createdAt,
  "content": content[]{
     ...,
     ...select(_type == "imageGallery" => {"images" : images[]{
     ..., "url" : asset -> url}
    })
  },
  "slug" : slug.current,
  "thumbnail" : {
    "alt" : thumbnail.alt,
    "imageUrl" : thumbnail.asset -> url
  },
  "author" : author -> {
    name,
    role,
    'image' : image.asset -> url
  },
  "tag" : tags -> {
    title,
    "slug" : slug.current
  }
}
-> 이 역시 공식문서를 보고, 잘 체크해가면서 데이터를 뽑으면 될 것 같다. 당연히 익숙하진 않지만, SQL문이랑 기본적인 원리는 비슷하다.
공식 문서 - 쿼리
배포
- 배포하기(매우 간단!)
$ sanity deploy명령어를 입력하면
✔ Checking project info
✔ Clearing output folder (6ms)
✔ Building Sanity (13071ms)
✔ Building index document (30ms)
✔ Minifying JavaScript bundles (20881ms)
✔ Verifying local content
✔ Deploying to Sanity.Studio

Success! Studio deployed to https://daeseong-kim-blog.sanity.studio/
자동으로 번들링도 하고 알아서 쭉쭉 배포할 수 있게 된다.
이제 자유롭게 갖다 써보자!

드래그 앤 드롭과 유사한 방식으로 웹페이지를 편집할수있나요?