
- 리액트로 To do list만들기
리액트를 공부한 기념(?)으로 가장 기본적인 투두 만들기! 리액트 설치부터 실행까지 우당탕탕이지만 어느정도 구현하고 싶었던 부분은 성공한 것 같다.
- 고려해야 할 부분!
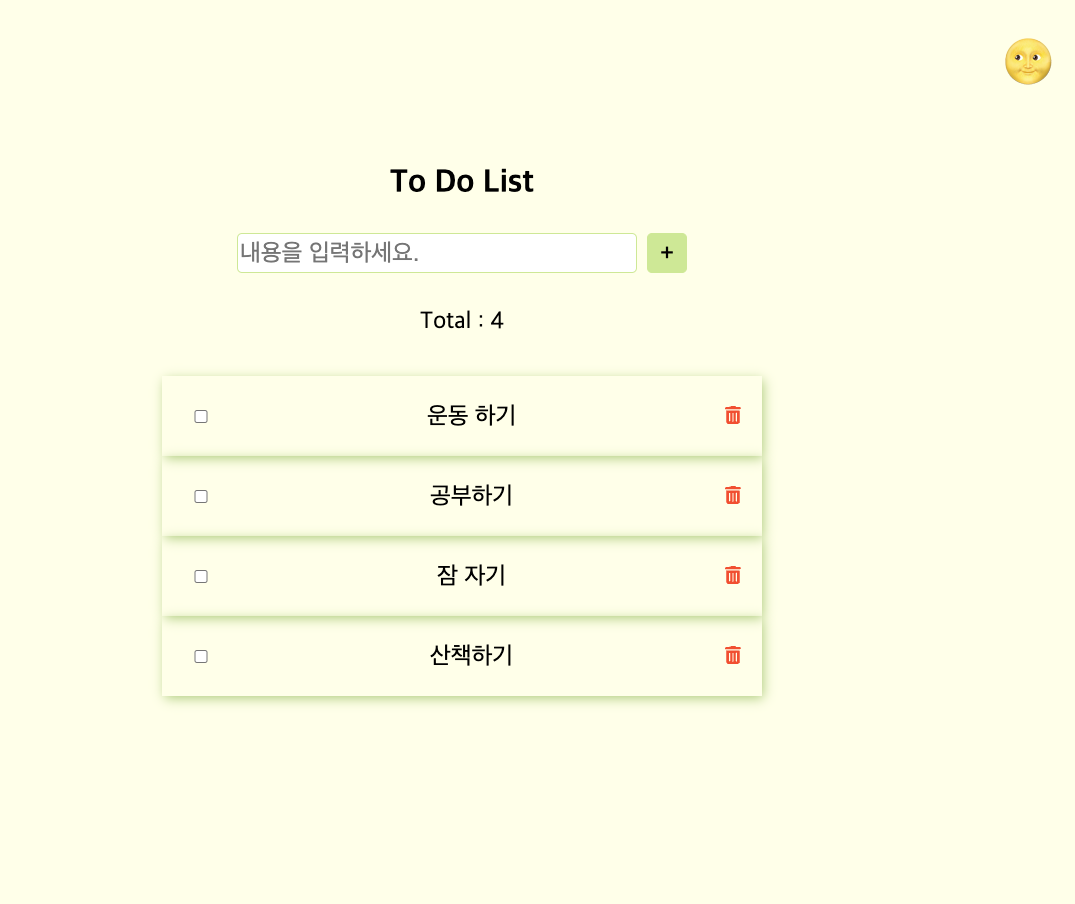
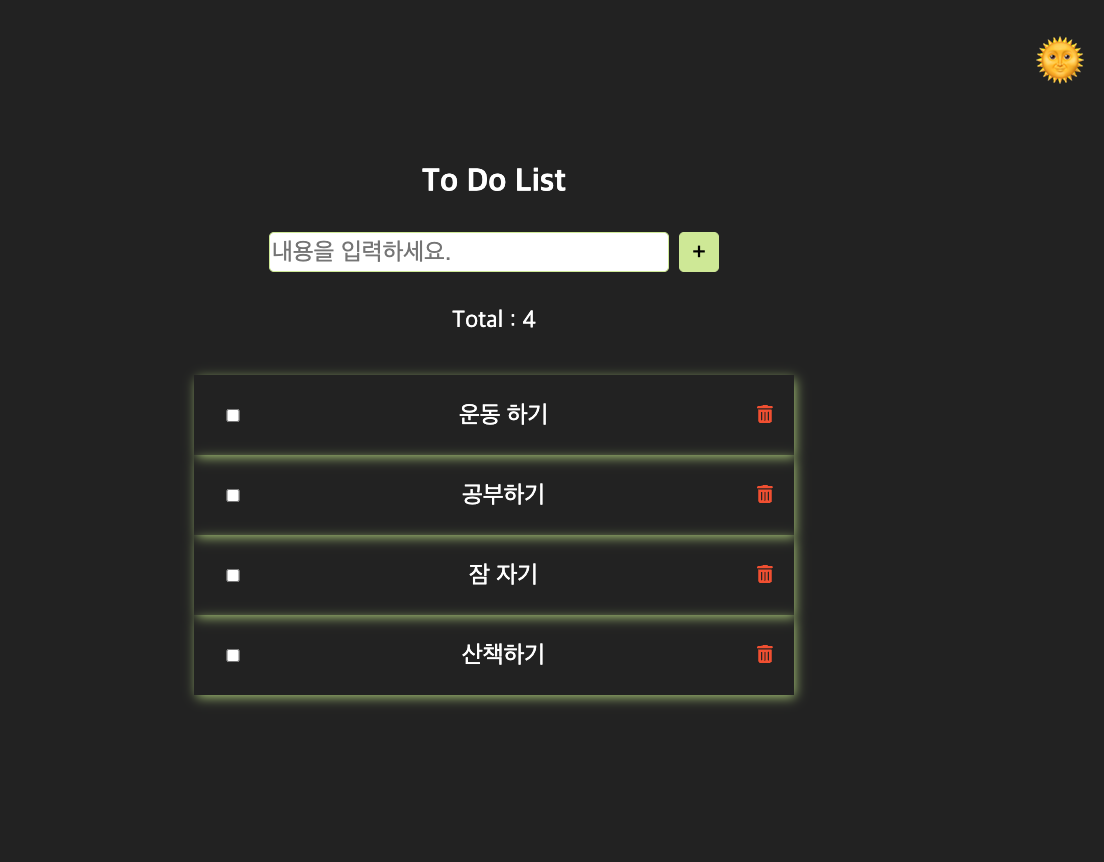
- 구현한 내용
- 할 일 입력하면 밑에 박스에 내용 추가되게 만들기
- 체크 박스 누르면 글씨에 줄 긋기
- 휴지통 그림 누르면 내용 삭제되기
- Total 카운트 만들어서 해야 할 일 개수 기록하기
- 다크 모드, 라이트 모드 적용시키기
- 로컬 스토리지 활용해 새로고침해도 기존 내용 남아있게 만들기
- 나의 코드
App.js
import "./App.css";
import { useState, useEffect } from "react";
import { FontAwesomeIcon } from "@fortawesome/react-fontawesome";
import { faTrashCan } from "@fortawesome/free-solid-svg-icons";
function App() {
  const [isDarkmode, setIsDarkmode] = useState(true);
  const [newTodoText, setNewTodoText] = useState("");
  const storageTodoItemString = window.localStorage.getItem("todoItems");
  const storageTodoItem = storageTodoItemString
    ? JSON.parse(storageTodoItemString)
    : [];
  const [todoItems, setTodoItems] = useState(storageTodoItem);

  useEffect(() => {
    window.localStorage.setItem("todoItems", JSON.stringify(todoItems));
  }, [todoItems]);

  function changeDisplayMode() {
    setIsDarkmode(!isDarkmode);
  }

  function onClickAddButton() {
    setTodoItems([...todoItems, { name: newTodoText, isChecked: false }]);
    setNewTodoText("");
  }

  function onClickDeleteButton(index) {
    const nextTodoItems = [...todoItems];
    nextTodoItems.splice(index, 1);
    setTodoItems(nextTodoItems);
  }

  function onClickCheckboxButton(index) {
    const nextTodoItems = [...todoItems];
    nextTodoItems[index].isChecked = !nextTodoItems[index].isChecked;
    setTodoItems(nextTodoItems);
  }

  return (
    <div className={`App ${isDarkmode && "darkmode"}`}>
      <span className="darkmode-button" onClick={changeDisplayMode}>
        {isDarkmode ? "🌞" : "🌝"}
      </span>
      <h1>To Do List</h1>
      <div className="todo-input-box">
        <input
          className="input-box"
          type="text"
          placeholder="할 일을 입력하세요."
          value={newTodoText}
          onChange={(event) => {
            setNewTodoText(event.target.value);
          }}
        />
        <button className="todo-input-button" onClick={onClickAddButton}>
          +
        </button>
      </div>
      <p className="totalCount">{`Total : ${todoItems.length}`}</p>
      <div className="todo-list">
        <ul>
          {todoItems.map((todoItem, index) => (
            <li key={index}>
              <input
                className="todo-item-checkbox"
                type="checkbox"
                checked={todoItem.isChecked}
                onClick={() => onClickCheckboxButton(index)}
              />
              {todoItem.isChecked === false ? (
                <span className="todo-item-text">{todoItem.name}</span>
              ) : (
                <span className="todo-item-text-line-through">
                  {todoItem.name}
                </span>
              )}

              <button
                className="delete-button"
                onClick={() => {
                  onClickDeleteButton(index);
                }}
              >
                <FontAwesomeIcon icon={faTrashCan} />
              </button>
            </li>
          ))}
        </ul>
      </div>
    </div>
  );
}

export default App;
App.css
* {
  box-sizing: border-box;
  list-style: none;
}

body {
  padding: 0;
  margin: 0;
}

.App {
  background-color: #ffffe8;
  min-height: 100vh;
}

ul {
  margin: 0;
  padding: 0;
}

li {
  display: flex;
  justify-content: space-between;
  align-items: center;
  padding: 10px 15px;
  width: 600px;
  height: 80px;
  -webkit-box-shadow: 2px 3px 12px -1px rgba(170, 203, 115, 1);
  -moz-box-shadow: 2px 3px 12px -1px rgba(170, 203, 115, 1);
  box-shadow: 2px 3px 12px -1px rgba(170, 203, 115, 1);
}

h1 {
  text-align: center;
  padding-top: 20px;
  margin: 0;
  clear: both;
}

.todo-input-box {
  display: flex;
  justify-content: center;
  align-items: center;
  font-size: 1.5rem;
}

.totalCount {
  font-size: 1.5rem;
  text-align: center;
  padding-top: 10px;
}

.todo-list {
  display: flex;
  justify-content: center;
  align-items: center;
  margin-top: 40px;
  font-size: 1.5rem;
}

.input-box {
  width: 400px;
  height: 40px;
  border-radius: 5px;
  border: 1px solid #cde990;
  margin-top: 30px;
  font-size: 1.5rem;
}

.todo-input-button {
  margin-left: 10px;
  width: 40px;
  height: 40px;
  border-radius: 5px;
  border: 1px solid #cde990;
  background-color: #cde990;
  margin-top: 30px;
  cursor: pointer;
  font-size: 1.5rem;
}
.todo-item-checkbox {
  cursor: pointer;
  width: 40px;
}

.todo-item-text {
  padding: 10px 5px;
}

.todo-item-text-line-through {
  text-decoration: line-through;
  color: rgb(182, 176, 176);
}

.delete-button {
  background: none;
  border: none;
  color: #f94a29;
  cursor: pointer;
  font-size: large;
}

.darkmode {
  background-color: #222;
  color: white;
}

.darkmode-button {
  font-size: 3rem;
  padding: 50px;
  float: right;
}
- 추가로 구현하고 싶은 부분!
- 깃허브 버튼 만들고 누르면 깃허브 페이지 연결할 수 있게 만들기
- 오늘의 날짜, 시간 표시하기
- 날씨 API 받아와서 오늘의 날씨 구현하기
- 어려웠던 부분
- useEffect활용하여 localStorage구현하기!
JSON.stringify와JSON.parse의 차이를 이해하여 데이터 교환을 시도해보았다. - 리액트를 깃허브에서 배포하는 것은 아직 해결하지 못하였다. 깃허브를 활용할 수 있는 방법 혹은 깃허브 이외에 배포할 수 있는 방법에 대해 연구해봐야겠다.
- 느낀점
-
투두를 만든 후 추후 블로깅을 작성하다 보니 새로 배운
Styled Components라이브러리를 활용해보고 싶은 마음이 생긴다. 응용을 해보자💪 -
리액트를 사용하니 바닐라JS로 만든 투두보다 훨씬 코드가 간결해진다. 투두 뿐만 아니라 다양하게 만들어 보며 리액트에 익숙해지자.

개발자 꿈나무🌳