1. nfs-server 구축하기
o nfs 설치를 위한 패키지 설치
yum install nfs-utils rpcbind
o 서비스 시작
systemctl enable rpcbind --now ; systemctl status rpcbind
systemctl enable nfs-server --now ; systemctl status nfs-server
systemctl enable rpc-statd ; systemctl status rpc-statd
o nfs 디렉토리 생성 및 외부 open 설정
mkdir -p /home/dame/nfs
chmod 777 /home/dame/nfs
cat <<EOF > /etc/exports
/home/dame/nfs  192.168.241.0/24(rw,sync,no_root_squash)
EOF
exportfs -r
exportfs -v
2. master서버에 마운트 하기
- pv,pvc를 이용하여 바로 nfs서버에 연결하면 되지만
mount 함으로써 OS에서 nfs 서버와의 연결 상태를 관리하자. - 방법은 2가지가 있다.
-
/etc/fstab에 등록
일반적인 방법이기는 하지만 위험성은 nfs를 삭제하고 깜빡하고 fstab 수정을 하지 않을 경우 부팅이 안될수 있으니 위험
-
/etc/rc.local 등록
rc.local에 마운트 명령어를 등록하면 부팅시 마운트하고 올라온다.
so. 설정이 잘못되어도 부팅시 문제가 되지 않아 nfs 관리로는 안정적이다.yum install nfs-utils rpcbind
systemctl enable rpcbind --now ; systemctl status rpcbind
nfs 서버가 잘보이는지 확인
showmount -e 192.168.241.101
1./etc/fstab 등록
vim /etc/fstab
192.168.241.101:/home/dame/nfs /nfs nfs4 rw 0 02.[추천] /etc/rc.local 등록
rc.local 실행하는 방법
vim /etc/rc.local
mount -t nfs 192.168.241.101:/home/dame/nfs /nfs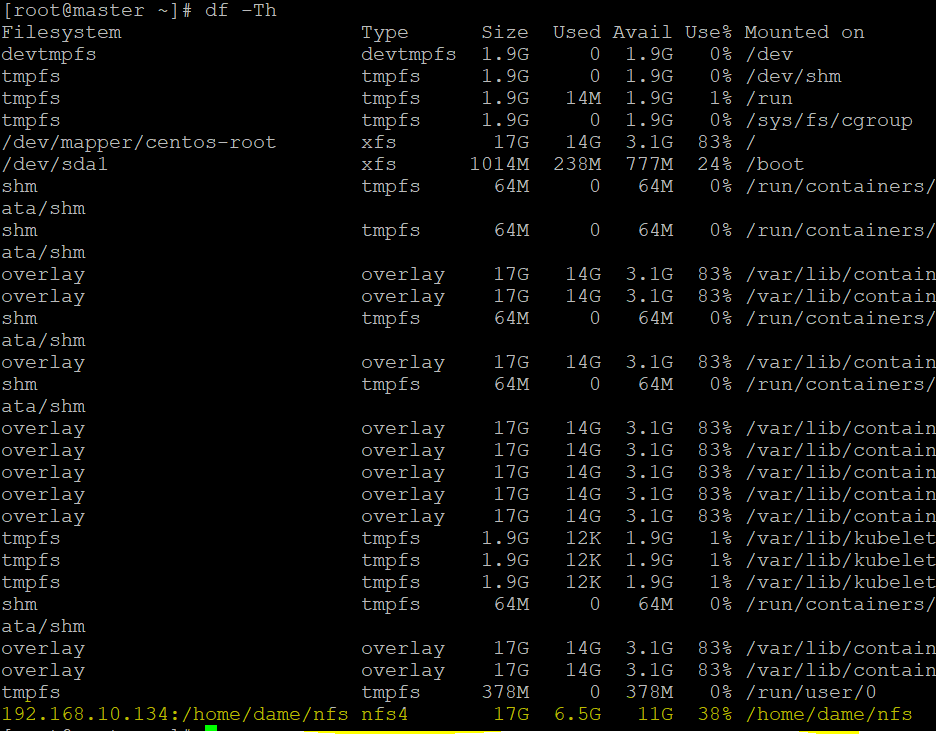
good!
3. pvc 만들기
o pv 만들기
Available 상태 아직 pvc와 연결되지 않은 상태이다
o pvc 만들기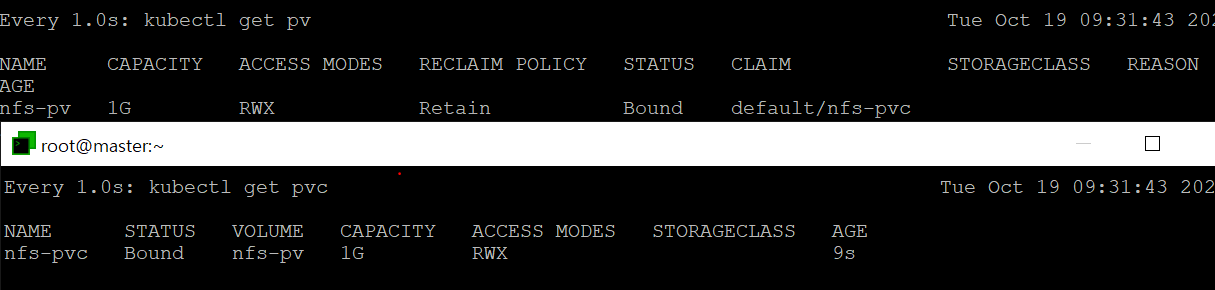
Bound 상태 pv와 pvc가 연결된 상태
o pv, pvc lifecicle
PV, PVC의 LifeCycle은 총 4가지 형태를 갖고 변화한다.
- Available : PV 생성
- Bound : PVC에 의해 바인딩 되었을 경우
- Released : PVC가 삭제되었을 경우
- Fail : PV에 문제가 발생하였을 경우
LifeCycle은 Available → Bound → Released → Bound ... 순으로 반복되며, Released 즉 PVC가 삭제되었을 경우 실제 스토리지에 있는 파일을 어떻게 관리할 것인지에 대한 Reclaiming(재활용) 정책을 결정할 수 있습니다.
PV, PVC의 Reclaiming 정책으로는 다음 세가지를 적용할 수 있다.
- Retain : 삭제하지 않고 PV의 내용 유지
- Recycle : 재 사용이 가능하며, 재 사용시에는 데이터 내용을 자동으로 rm -rf 로 삭제한 후 재사용
- Delete : 볼륨의 사용이 끝나면, 볼륨 삭제
Reclaim 정책을 변경하고자 할 경우 아래와 같이 적용이 가능하다
4. yaml 만들기
o pv.yaml
apiVersion: v1
kind: PersistentVolume
metadata:
  name: nfs-pv
  labels:
    name: nfs-pv
spec:
  capacity:
    storage: 1G
  accessModes:
  - ReadWriteMany
  nfs:
    server: 192.168.241.101
    path: /home/dame/nfs
pvc.yaml
apiVersion: v1
kind: PersistentVolumeClaim
metadata:
  name: nfs-pvc
spec:
  accessModes:
  - ReadWriteMany
  resources:
    requests:
    storages: 1G
  selector:
    matchLabels:
      name: nfs-pv
o deployment.yaml
pod의 Volume mount /data로 설정 했다.
mount를 지정할 경우 pod가 생성되면서 container 내부에 자동으로 디렉토리가 생성된다.
apiVersion: apps/v1
kind: Deployment
metadata:
  name: mavel-home
spec:
  replicas: 2
  strategy:
    type: RollingUpdate
      maxSurge: 1
      maxUnavailable: 0
  selector:
    matchLabels:
      name: marvel
  template:
    metadata:
      labels:
        name: marvel
    spec:
      containers:
      - image: smlinux/marvel
        name: mavel-container
        ports:
        - containerPort: 80
        volumeMounts:
        - name: nfs-app-pvc
          mountPath: /data
      volumes:
      - name: nfs-app-pvc
        persistentVolumeClain:
          clainName: nfs-pvc

 ---
 apiVersion: v1
 kind: Service
 metadata;
   name: marvel-service
 spec:
   ports:
   - port: 80
     protocol: TCP
     targetPort: 80
   selector:
     name: marvel
o 에러....
worker node에도 nfs-utils를 반드시 설치해준다.
$ yum install nfs-utils
$ systemctl enable rpcbind --now ; systemctl status rpcbind
$ watch kubectl describe pod
##해당 에러가 사라지는지 확인한다.
## 나의 경우 바뀌지 않아서 pod를 삭제 후 재기동 했다.
5. 적용확인
o pod1 접근해보기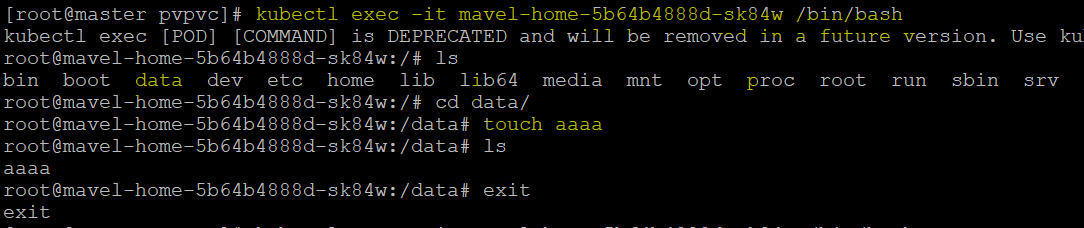
pod에 접속 후 /data 디렉토리에 aaaa라는 파일 생성
o pod2에도 적용되었는지 확인
pod2에도 aaaa가 보이는걸 확인할 수 있다.
o nfs 서버에서도 확인하기
nfs 서버에도 aaaa가 있는걸 확인할 수 있다.
nfs 서버 pv, pvc로 연결해보기 끝!!! good