
Truffle - 배포용 도구
트러플을 사용하는 이유
- 쉬운 스마트 컨트랙트 연결
- 자동화된
ABI만들기 - 스마트 컨트랙트 테스팅이 합쳐져 있음(
chai랑Mocha도 지원) - 여러 네트워크 지원
트러플 기본 구조
기본으로 설치되는 tree 구조
├── contracts
    ├── Migrations.sol
├── migrations
    ├── 1_initial_migration.js
└── test
truffle-config.js
truffle.js
truffle init명령어를 실행하면 위와 같은 기본 구조가 설치된다.
구조 설명
contracts: 트러플이 내가 만든 컨트랙트를 찾는 곳. 보통contracts/tokens처럼nested로 정리한다.migrations: 트러플에게 어떻게 스마트 컨트랙트를 배포할지 말하는 자바스크립트 파일이 위치test: 유닛 테스트 파일을 넣는 곳truffle.js: 네트워크 세팅을 저장하는 곳truffle.config.js: 윈도우 쓰면truffle.js지우고 이걸config파일로 사용해야 한다.
truffle-hdwallet-provider
트랜잭션 sign을 하기 위해 설치하는 프로바이더!
보통truffle init하고 바로 설치함!
- 우리는
Infura를 사용해서 이더리움에 코드를 배포할 것이다. Infura를 쓰면 이더리움 노드나 지갑을 직접run할 필요가 없다.- 하지만 인퓨라의 경우 프라이빗 키를 제공하지 않아서 트랜잭션을 직접 시작할 수 없다.
- 그래서 트랜잭션을 시작할 수 있는
truffle-hdwallet-provider를 따로 설치해서 이용한다.
Compiler
컴파일러를 사용하는 이유
- 이더리움 가상 머신은 솔리디티로 작성된 코드를 바로 이해하지 못한다.
- 따라서 머신이 읽을 수 있도록 컴파일 하는 것이 필요하다.
스마트 컨트랙트 컴파일 하기
├── contracts
    ├── Migrations.sol
    ├── CryptoZombies.sol
    ├── erc721.sol
    ├── ownable.sol
    ├── safemath.sol
    ├── zombieattack.sol
    ├── zombiefactory.sol
    ├── zombiefeeding.sol
    ├── zombiehelper.sol
    ├── zombieownership.sol
├── migrations
└── test- 스마트 컨트랙트 코드를
contracts안에 넣고 컴파일 진행
로컬 테스트
Ganache 이용 로컬 테스트 - migrations
새 migration 만들기
var Migrations = artifacts.require("./Migrations.sol");
module.exports = function(deployer) {
  deployer.deploy(Migrations);
};- 이 스크립트는 트러플에게 우리가
migration컨트랙트와 통신하기를 원한다는 것을 알려준다 - 이 스크립트는
deployer라는 객체를 받는 함수를export한다
- 여기서
deployer라는 객체는 개발자와 프러플의 개발 엔진 간의 인터렉션을 담당한다.
내 앱에 맞게 migrations 수정하기
var CryptoZombies = artifacts.require("./CryptoZombies.sol");
module.exports = function(deployer) {
  deployer.deploy(CryptoZombies);
};- 내 앱에 맞게 변수 이름 수정하기!
Testnet 이용 - Rinkeby
Config 파일 수정으로 네트워크 이용 설정하기
아래 코드는 메인넷과 rinkeby 의 config 객체 두개에 대한 설정을 담고있다.
networks: {
  // Configuration for mainnet
  mainnet: {
    provider: function () {
      // Setting the provider with the Infura Rinkeby address and Token
      return new HDWalletProvider(mnemonic, "https://mainnet.infura.io/v3/YOUR_TOKEN")
    },
    network_id: "1"
  },
  // Configuration for rinkeby network
  rinkeby: {
    // Special function to setup the provider
    provider: function () {
      // Setting the provider with the Infura Rinkeby address and Token
      return new HDWalletProvider(mnemonic, "https://rinkeby.infura.io/v3/YOUR_TOKEN")
    },
    // Network id is 4 for Rinkeby
    network_id: 4
}- 트러플에게 메인넷을 알려준다.
- 트러플에게
rinkeby를 사용할거라고 알려준다.
config 파일 전체 모습
// Initialize HDWalletProvider
const HDWalletProvider = require("truffle-hdwallet-provider");

// Set your own mnemonic here
const mnemonic = "YOUR_MNEMONIC";

// Module exports to make this configuration available to Truffle itself
module.exports = {
  // Object with configuration for each network
  networks: {
    // Configuration for mainnet
    mainnet: {
      provider: function () {
        // Setting the provider with the Infura Rinkeby address and Token
        return new HDWalletProvider(mnemonic, "https://mainnet.infura.io/v3/YOUR_TOKEN")
      },
      network_id: "1"
    },
    // Configuration for rinkeby network
    rinkeby: {
      // Special function to setup the provider
      provider: function () {
        // Setting the provider with the Infura Rinkeby address and Token
        return new HDWalletProvider(mnemonic, "https://rinkeby.infura.io/v3/YOUR_TOKEN")
      },
      // Network id is 4 for Rinkeby
      network_id: 4
    }
  }
};
Faucet으로 이더 받기
- 위 링크에서 주소로 이더 받기 가능!
migrate 실행
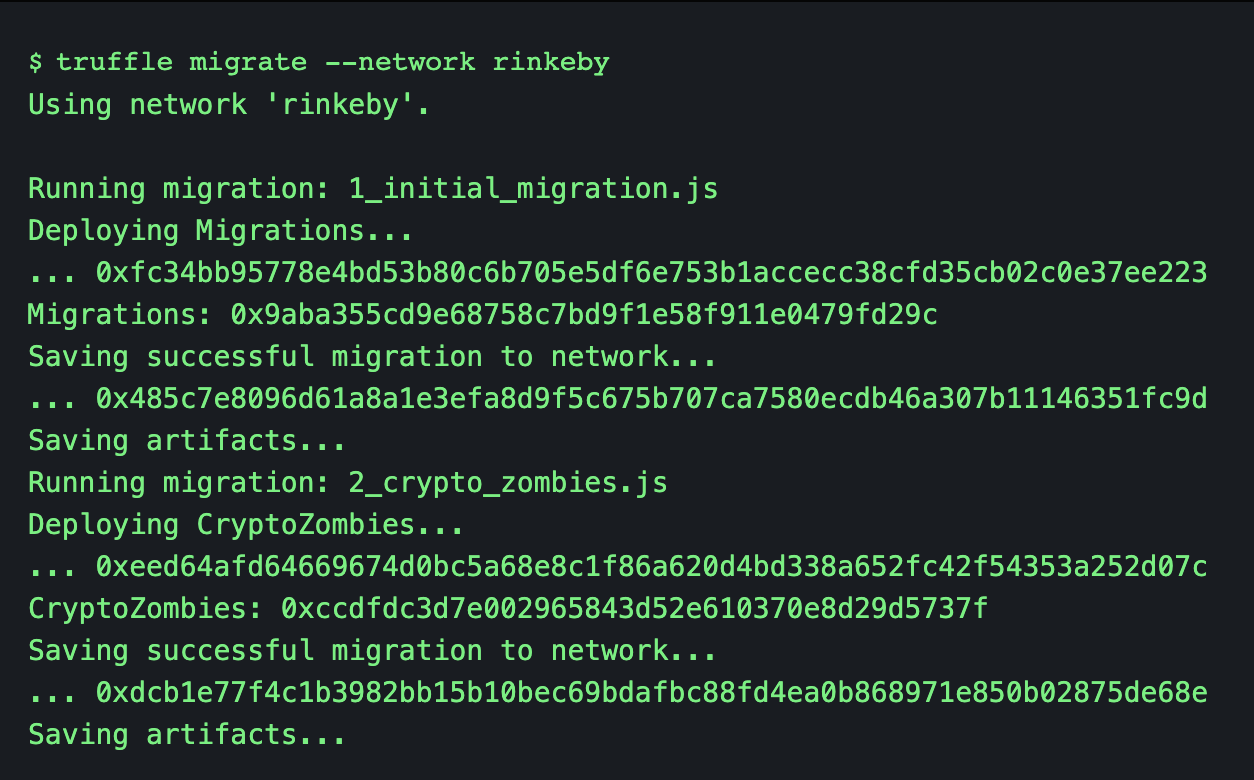
- 위 처럼
truffle migrate --network rinkeby명령어로 실행

devlog