
6.1 입출력 개념
컴퓨터 내부 혹은 회부 장치와 프로그램 간의 데이터 연동을 위한 자바 라이브러리이다.
단방향 데이터 송수신을 하며, 데이터가 이동하는 길을 스트림이라고 한다.
[출발지]—-(입력)—→[메모리]—-(출력)—→[도착지]
6.2 파일 입출력 정리
파일 생성(파일 객체 생성)
JDK 1.0부터 지원하는 API로 파일 처리 수행 클래스
파일을 생성할 수 있는 명령어
file.createNewFile() : 파일 생성. 근데 얘는 예외처리 해주어야 한다.

아래와 같이 파일을 생성할 수 있는 코드를 확인할 수 있다.’
try {
    boolean createSuccess = file.createNewFile();
    System.out.println("createSuccess = " + createSuccess);
} catch (IOException e) {
    throw new RuntimeException(e);
}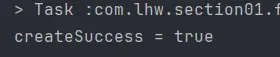
- 파일 생성 후 성공/실패 여부를 boolean으로 리턴(생성되면 true)
위 실행문을 두 번 돌리면 어떻게 될까?

false 가 뜬다. 최초 실행하면 새롭게 파일이 만들어지기 때문에 true를 반환한다. 파일이 한 번 생성되고 난 이후는 새롭게 파일을 만들지 않기 때문에 false를 반환한다.
file.length 파일 크기
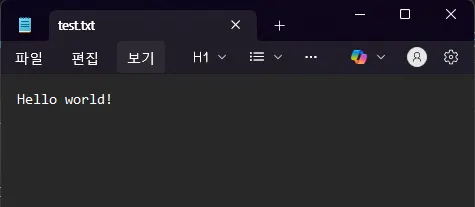
파일의 크기를 측정하는 메소드이다. 아무것도 입력되지 않은 text.txt의 크기는 0이다.
        System.out.println("file.length() = " + file.length());

        file.length() = 0
아래와 같이 text.txt를 수정해보자
결과는
file.length() = 12file.getPath 파일 위치
System.out.println("file.getPath() = " + file.getPath());
System.out.println("file.getParent() = " + file.getParent());
System.out.println("file.getAbsolutePath() = " + file.getAbsolutePath());

결과
file.getPath() = src\main\java\com\lhw\section01\file\test.txt
file.getParent() = src\main\java\com\lhw\section01\file
file.getAbsolutePath() = C:\dev\02_java\20_LEEHYUNGWOOK\chap11-io-lecture-source\src\main\java\com\lhw\section01\file\test.txt
각각
- 파일의 경로
- 파일의 부모
- 파일의 절대 경로
가 나온다.
6.3 파일, 폴더 경로 및 생성
폴더 mkdir()/mkdirs()
String path = "c:\\devTest\\test"; // 폴더(경로)이다.
File filePath = new File(path); // 새로운 파일 객체 생성하고 폴더 경로를 넣어준다.
// 폴더의 생성여부를 exists() 메소드를 통해 확인해야 한다.
System.out.println("filePath.exist() = " + filePath.exists());
하지만 결과는 아래와 같이 나온다.
filePath.exist() = falsemkdir() / mkdirs() 명령어를 통해서 디렉토리를 생성해야 파일이 생성된다.
아래와 같이 생성할 수 있다.
boolean mkdirs = filePath.mkdirs();
System.out.println("mkdirs = " + mkdirs);
잘 만들어 졌음을 확인할 수 있다.
filePath.exist() = false
mkdirs = true
delete
boolean delete = filePath.delete(); // test를 지운다.
System.out.println("delete = " + delete); // true

File file1 = new File("c:\\devTest");//지울 파일 경로를 저장하고
boolean delete2 = file1.delete(); //지워주고 확인하면 dev_test 도 지워준다.
System.out.println("delete2 = " + delete2); // true
삭제할 때 delete() 메소드를 이용해서 삭제한다. 해당 메소드는 삭제 성공 여부를 boolean으로 반환해준다.
마지막으로 test.txt 도 지워주자
// src 파일의 test도 삭제해보자
boolean delete3 = file.delete();
System.out.println("delete3 = " + delete3);

결과
delete3 = true
위와 같이 잘 지워졌음을 볼 수 있다.
조건에 따라 파일 생성하기
File testFile = new File("경로");
boolean createFolder = false; //생성 여부를 빼 놓는다.
if (!testFile.exists()) { //testFile 이 생성되었는가?
    createFolder = testFile.mkdirs();
    // testFile이 존재 하지 않으면 디렉토리를 만들어준다.
}
위와 같이 경로를 설정하여, 그 경로에 파일이존재하는지 확인 하고, 디렉토리를 만들어서 파일을 생성해줄 수 있다.
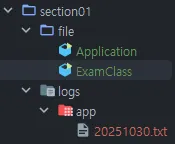
6.3 ExamClass 예시
- 경로 :
src/main/java/com/lhw/section01/logs/app - 생성한 경로에 오늘 날짜로 파일을 생성하고 해당 파일을 열어서 아무 글자나 입력해보자
- 현재 경로, 상위 폴더 경로, 파일의 사이즈 출력
public static void main(String[] args) {
    /*- 경로 : `src/main/java/com/lhw/section01/logs/app`
      - 생성한 경로에 오늘 날짜로 파일을 생성하고
      - 해당 파일을 열어서 아무 글자나 입력해보자
      - 현재 경로, 상위 폴더 경로, 파일의 사이즈 출력*/
    String basePath = "src/main/java/com/lhw/section01/logs/app";
    File baseFolder = new File(basePath); //생성할 폴더 객체
    boolean mkdirs = baseFolder.mkdirs();
    String today = LocalDate.now().format(DateTimeFormatter.ofPattern("yyyyMMdd"));
    String fileName = today + ".txt"; // 20251030
    File todayFile = new File(basePath + File.separator + fileName);
    {
        try {
            boolean createSuccess = todayFile.createNewFile();
            System.out.println("createSuccess = " + createSuccess);
        } catch (IOException e) {
            throw new RuntimeException(e);
        }
    }
    System.out.println("file.length() = " + todayFile.length());
    System.out.println("file.getPath() = " + todayFile.getPath());
    System.out.println("file.getParent() = " + todayFile.getParent());
    System.out.println("file.getAbsolutePath() = " + todayFile.getAbsolutePath());
결과
6.4 FileInputStream(byte) 예시
FileInputStream (byte) -파일 읽어오기
FileInputStream fin = null;
try {
    fin = new FileInputStream("src/main/java/com/lhw/section02/stream/
    int value;
     //read(): 파일에 기록된 값을 순차적으로 읽어오고 더 이상 읽을 데이터가 없을 경우 -1 반환
    while ((value = fin.read()) != -1) {
        System.out.println(value);
    System.out.println((char) value);
    }
    File readFile = new File("src/main/java/com/lhw/section02/stream/t
    System.out.println("파일의 길이 : " + readFile.length());
    int size = (int) readFile.length();
    byte[] buffer = new byte[size];
    fin.read();
    //또 읽어 와야함
    for (int i = 0; i < buffer.length; i++) {
        System.out.println((char) buffer[i]);
    }
} catch (FileNotFoundException e) { //읽어들일 때 파일이 없는 예외가 생길 수 있다.
    throw new RuntimeException(e);
} catch (IOException e) {
    throw new RuntimeException(e);
} finally { // 다 읽었으면 자원을 반납해야 한다. 근데 파일이 발견되지 않으면 NullpointException이
    if (fin != null) {
        try {   //혹시 모르니 한 번 더 try-catch로 감싸준다.
            fin.close();
        } catch (IOException e) {
            throw new RuntimeException(e);
        }
    }
6.5 FileReader(char) 예시
FileReader (char 로 읽어오기 예제)
FileInputStream과 사용하는 방법이 거의 동일하다. 단, byte단위가 아닌 character단위로 읽어들이는 부분이 차이점이다. 따라서 2byte 이던 3byte이던 글자단위로 읽어오기 때문에 한글을 정상적으로 읽어올 수 있다.
File path = new File("src/main/java/com/lhw/section02/stream/testReader.txt");
try (FileReader fr = new FileReader(path);) {
      int value;
      while ((value = fr.read()) != -1) {
          System.out.print((char) value);
      }
    int size = (int) new File("src/main/java/com/lhw/section02/stream/testReade
    System.out.println("size = " + size);
    // char 단위로 받아오는 buffer : 문자기반 : 한글읽기
    char[] buffer = new char[size];
    fr.read(buffer);
    for  (int i = 0; i < buffer.length; i++) {
        System.out.print(buffer[i]);
    }
} catch (FileNotFoundException e) {
    e.printStackTrace();
} catch (IOException e) {
    e.printStackTrace();
}
6.6 FileOutputStream(byte) 예시
FileOutputStream (byte)
프로그램 데이터를 파일로 내보내기 위한 용도의 스트림이다.
1바이트 단위로 데이터를 처리한다.
- OutputStream의 경우 대상 파일이 존재하지 않으면 파일을 자동으로 생성해준다.
- 두 번째 인자를 true를 전달하면 이어쓰기가 된다.
- false는 이어쓰기가 아닌 덮어쓰기이며 기본값은 false이다.
/*
* FileOutputStream
* Write는 파일이 없어도 새로 생성해준다.
* */
FileOutputStream fout = null;
try {
    /*
    - OutputStream의 경우 대상 파일이 존재하지 않으면 파일을 자동으로 생성해준다.
    - 두 번째 인자를 true를 전달하면 이어쓰기가 된다.
    - false는 이어쓰기가 아닌 덮어쓰기이며 기본값은 false이다*/
    fout = new FileOutputStream("src/main/java/com/lhw/section02/stream/testOutputStream.txt", false/*(이어붙이기여부)*/);
    fout.write(97);
    byte[] barr = new byte[]{98,99,100,101,102,10,103};
    fout.write(barr);
    fout.write(barr, 1, 3);
} catch (FileNotFoundException e) {
    throw new RuntimeException(e);
} catch (IOException e) {
    throw new RuntimeException(e);
} finally {
    if (fout != null) {
        try {
            fout.close();
        } catch (IOException e) {
            throw new RuntimeException(e);
        }
    }
}
6.7 FileWriter(char) 예시
FileWriter- char로 읽어오기
public static void main(String[] args) {
    FileWriter fw = null;
    try {
        fw = new FileWriter("src/main/java/com/lhw/section02/stream/testWriter.txt");
        fw.write(97);
        fw.write('A');
        fw.write(new char[]{'a','p','p','l','e'});
        fw.write("한글 한글한글");
    } catch (IOException e) {
        throw new RuntimeException(e);
    } finally {
        try {
            fw.close();
        } catch (IOException e) {
            throw new RuntimeException(e);
        }
    }
6.- 보조스트림
java.io. 패키지의 입출력 스트림은 기본스트림과 필터프트림으로 분류할 수 있다. 기본 스트림은 외부 데이터에 직접 연결되는 스트림이고 필터스트림은 외부 데이터에 직접 연결하는 것이 아니라 기본 스트림에 추가로 사용할 수 있는 스트림이다. 주로 성능을 향상시키는 목적으로 사용되며 생성자를 보면 구분이 가능하다. 생성자쪽에 매개변수로 다른 스트림을 이용하는 클래스는 필터스트림이라고 볼 수 있다.
6.8 BufferedWriter
BufferedWriter
문자 하나하나를 읽어오고나 작성하면 부하가 올 것이다. 그렇다면 버퍼에 저장해놓고 사용할 수 있는 녀석을 써보자.
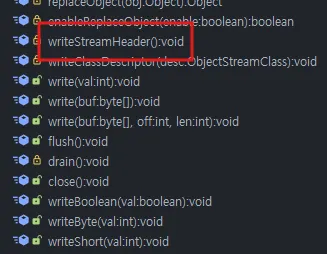
- bw.flush() 와 bw.close().
bw.close() 에는 bw.flush() 가 있다. bw.flush()는 강제로 버퍼 공간을 비워주는 역할로, 버퍼가 차 있으면 write할 수 없기 때문에 write하기 전에 선행되어야 한다.
만약 close를 하지 않은 상태에서 더 작성을 하고 싶다면 bw.flush() 만 해 주어도 충분하다.
  public static void main(String[] args) {
      BufferedWriter bw = null;
      // BufferedWriter는 혼자서 안쓰기고, 매개변수로 FileWriter을 받아서 사용해야만한다.
      // BufferedWriter의 상속 클래스들을 확인해보면, Writer 클래스를 상속받는 것을 확인할 수 있다.
      // Writer 클래스에 포함된 녀석이면 되니, FileWriter도 매개변수로 사용가능하다.
      // 이렇게 혼자서 사용되지 못하고, fileWriter의 도움을 받아서 작성되는 것을 보조스트림이라고 한다.
      try {
          bw = new BufferedWriter(new FileWriter("src/main/java/com/lhw/section03/filterstream/testBuffered.txt")); //생성자를 통해 인스턴스 생성
          bw.write("안녕하세요\n");
          bw.write("반갑습니다.\n");
          //bw.flush();//강제로 버퍼 공간을 비운다.-> bw.close()에 bw.flush()가 있다.
      } catch (IOException e) {
          throw new RuntimeException(e);
      } finally {
          if (bw != null) {
              try {
                  bw.close();
              } catch (IOException e) {
                  throw new RuntimeException(e);
              }
          }
      }
  }
추가내용-fileReader로 읽어오기
BufferedReader br = null;
try {
    br = new BufferedReader(new FileReader("src/main/java/com/lhw/section03/fil
    String temp;
    while( (temp = br.readLine()) != null) {
        System.out.println(temp);
    }
} catch (FileNotFoundException e) {
    throw new RuntimeException(e);
} catch (IOException e) {
    throw new RuntimeException(e);
} finally {
    if (br != null) {
        try {
            br.close();
        } catch (IOException e) {
            throw new RuntimeException(e);
        }
    }
}
6.9 Buffered In/Output Stream
형변환 보조 스트림(buffered Input & Output stream)
기본 스트림이 byte기반스트림이고, 보조스트림이 char기반 스트림인 경우에 사용한다.
표준 스트림 자바에서는 콘솔이나 키보드 같은 표준 입출력 장치로부터 데이터를 입출력하기 위한 스트림을 표준 스트림 형태로 제공하고 있다. System클래스의 필드 in, out, err가 대상 데이터에 스트림을 의미한다.
BufferedReader 의 매개변수로 들어오는 Input(Output)StreamReader는 System 에서 in, out, err 을 사용할 수 있는 메소드이다. 이 녀석들을 사용할 수 있어서 입력을 받을 수 있다.
- System.in(InputStream) : 콘솔로부터 데이터를 입력받는다.
- System.out(PrintStream) : 콘솔로 데이터를 출력한다.
- System.err(PrintStream) : 콘솔로 데이터를 출력한다.
즉 자주 사용되는 자원에 대해 미리 스트림을 생성해 두었기 때문에 개발자가 별도로 스트림을 생성하지 않아도 된다.
BufferedReader br = new BufferedReader(new InputStreamReader(System.in));// 별도로 더 안써줘도 됨.
try {
    System.out.print("문자열 입력 : ");
    String value = br.readLine(); // 읽어오기(라인단위로) -> FileReader보다 향상됨
    System.out.println("value : " + value);
} catch (Exception e) {
    throw new RuntimeException(e);
} finally {
    if (br != null) {
        try {
            br.close();
        } catch (IOException e) {
            throw new RuntimeException(e);
        }
    }
}
System.out.println("================================");
BufferedWriter bw = new BufferedWriter(new OutputStreamWriter(System.out));
try {
    // bw 버퍼에 문자열을 저장하고
    bw.write("java mariadb jdbc asdfasdfasdasfasdfasf");
} catch (IOException e) {
    throw new RuntimeException(e);
} finally {
    if (bw != null) {
        try {
            bw.close();
        } catch (IOException e) {
            throw new RuntimeException(e);
        }
    }
}
6.10 외부 데이터로부터 읽어오는 데이터를 byte,int,char,String으로만 쓰기/읽어오기
여러 데이터 타입을 취급하는 경우 별도로 처리를 해줘야 한다.
- 예) 정수 입력받아 처리하려면 parsing 진행
"1"→ 1
public static void main(String[] args) {
    // 외부 데이터로부터 byte,int,char,String 쓰기: parsing
    DataOutputStream dout = null;
    try {
        dout = new DataOutputStream(new FileOutputStream("src/main/java/com/lhw/section03/filterstream/score.txt"));
        //write를 타입 지정하여 작성한다.
        dout.writeUTF("홍길동"); //문자열 UTF
        dout.writeInt(95);       //숫자나 문자는 각각 Int,Char
        dout.writeChar('A');
    } catch (FileNotFoundException e) {
        throw new RuntimeException(e);
    } catch (IOException e) {
        throw new RuntimeException(e);
    } finally {
        try {
            dout.close();
        } catch (IOException e) {
            throw new RuntimeException(e);
        }
    }
    /*===================================================
    * Data 읽어오기*/
    DataInputStream din = null;
    try {
        din = new DataInputStream(new FileInputStream("src/main/java/com/lhw/section03/filterstream/score.txt"));
        while (true) { //몇 개가 올지 모르니, true를 걸어 반복문을 돌린다.
            //파일에 기록된 순서대로 읽어와야 한다.
            System.out.println(din.readUTF()+","+din.readInt()+","+din.readChar()); //읽어올 때도 readUTF로 한다.
            // 아래처럼, 파싱 순서가 맞지 않으면 아예 불러와지지 않는다.
            //System.out.println(+din.readInt()+","+din.readUTF()+","+din.readChar()); //읽어올 때도 readUTF로 한다.
        }
    } catch (FileNotFoundException e) {
        throw new RuntimeException(e);
    } catch (EOFException e) {
        System.out.println("파일 읽기 완료!");
    } catch (IOException e) {
        throw new RuntimeException(e);
    } finally {
        try {
            din.close();
        } catch (IOException e) {
            throw new RuntimeException(e);
        }
6.11 객체 단위 사용 클래스
객체 단위 입출력을 하기 위한 ObjectInput/OutputStream을 확인하는 내용이다
객체 단위 입력(write)
package com.lhw.section03.filterstream;

import com.lhw.section03.filterstream.dto.MemberDto;

import java.io.BufferedOutputStream;
import java.io.FileOutputStream;
import java.io.IOException;
import java.io.ObjectOutputStream;

public class Application4 {
    public static void main(String[] args) {

        // 객체 단위 입출력을 하기 위한 ObjectInput/OutputStream을 확인하는 내용이다.
        MemberDto[] outputMembers = {
                new MemberDto("user01", "pass01", "홍길동", "hang345@lhw.com", 25, '남', 1250.7),
                new MemberDto("user02", "pass02", "유관순", "korea345@lhw.com", 16, '여', 2000),
                new MemberDto("user03", "pass03", "이순신", "soonshin345@lhw.com", 35, '남', 3125.3)
        };

        ObjectOutputStream objOut = null;

        try {
            objOut = new ObjectOutputStream(
                    new BufferedOutputStream(
                            new FileOutputStream("src/main/java/com/lhw/section03/filterstream/testObjectStream.txt")
                    ));
            for (int i = 0; i < outputMembers.length; i++) { //멤버객체배열의 크기만큼 for문
                objOut.writeObject(outputMembers[i]); //객체 단위의 Write
            }
            objOut.flush(); //버퍼가 안차도 나가고 close() 안해도 나간다.
        } catch (IOException e) {
            throw new RuntimeException(e);
        }
    }
}
하지만 위 코드를 돌리면 아래 오류가 나타난다.

직렬화를 하지 않음 → 어디에 있는 클래스의 어떤 객체인지에 대한 정보가 저장이 안되어 있어서, input output을 들고오는 데 있어서 직열화 처리를 해주어야 한다.
이 때는 클래스에다가 implement java.io.Serializable을 추가해주어야 한다.
public class MemberDto implements java.io.Serializable/*직렬화 처리*/{위 작업 후 실행시킨다면 정상적으로 파일이 생성된다.
System.out.println("=====================================");
MemberDto[] inputMembers = new MemberDto[3];
ObjectInputStream objIn = null;
try {
    objIn = new ObjectInputStream(new BufferedInputStream(new FileInputStream(
            "src/main/java/com/lhw/section03/filterstream/testObjectStream.txt"
    )));
    while (true) {
        System.out.println(objIn.readObject()); //그냥 read x readObject O
    }
} catch (EOFException e) {
    e.printStackTrace();
} catch (IOException e) {
    throw new RuntimeException(e);
} catch (ClassNotFoundException e) {
    throw new RuntimeException(e);
} finally {
    if (objIn != null) {
        try {
            objIn.close();
        } catch (IOException e) {
            throw new RuntimeException(e);
        }
결과
[id='user01', pwd='pass01', name='홍길동', email='hang345@lhw.com', age=25, gender=남, point=1250.7]
[id='user02', pwd='pass02', name='유관순', email='korea345@lhw.com', age=16, gender=여, point=2000.0]
[id='user03', pwd='pass03', name='이순신', email='soonshin345@lhw.com', age=35, gender=남, point=3125.3
6.12 직렬화
Serializable
자바 직렬화란 자바 시스템 내부에서 사용되는 객체 또는 데이터를 외부의 자바 시스템에서도 사용할 수 있도록 바이트(byte) 형태로 데이터 변환하는 기술 및 변환된 데이터를 다시 객체로 변환하는 기술(역직렬화)을 아울러서 칭한다.
시스템적으로 JVM의 Runtime Data Area(Heap 또는 스택 영역)에 상주하고 있는 객체 데이터를 바이트 형태로 변환하는 기술과 직렬화된 바이트 형태의 데이터를 객체로 변환해서 JVM으로 상주시키는 형태를 말하기도 한다.
public interface Serializable() {
}
우리가 만든 클래스가 파일에 읽거나 쓸 수 있도록 할 때, 다른 서버로 보내고 받을 수 있도록 할 때 반드시 이 인터페이스(Serializable)를 구현해야 한다.
- 생성한 객체를 파일로 저장할 때
- 저장한 객체를 읽을 때
- 다른 서버에서 생성한 객체를 받을 때
6.13 객체 단위 output 파일에 이어쓰기로 설정했을 떄 생기는 오류
새롭게 덮어쓰기할 때는 아무런 문제가 없는데, 이어붙이기를 했을 때 메타정보에 Head가 두 개가 중첩된다. 그렇게 중첩되면 읽을 때 어디를 봐야할지 몰라서 직렬화 오류를 발생시키는 것이다. ⇒ 쓸 때 문제가 되는 것.

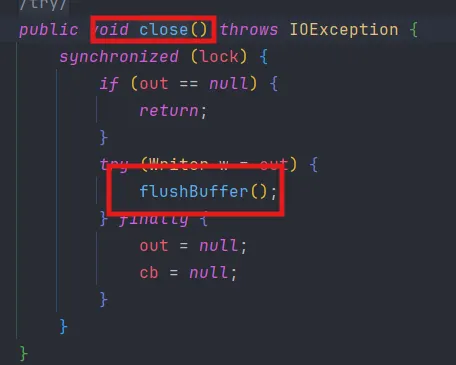
이렇게 문제가 발생할 때, 문제가 생기는 상위 클래스의 메소드를 오버라이딩하는 클래스를 작성하여 사용하면 문제가 해결된다.
ObjectOutputStream 을 상속받아 오버라이딩 메소드를 찾아보면 아래와 같은 헤더를 넣는 작업을 하는 메소드를 발견할 수 있다.
해당 메소드를 오버라이딩하면 문제를 해결할 수 있는 것이다.

위 writeStreamHeader 메소드에 있는 내용을 모두 삭제하면 다 끝난다.\
public static void main(String[] args) {
    // 객체 단위 입출력을 하기 위한 ObjectInput/OutputStream을 확인하는 내용이다.
    /* Write 입력하기*/
    MemberDto[] outputMembers = {
            new MemberDto("user01", "pass01", "홍길동", "hang345@lhw.com", 25, '남', 1250.7),
            new MemberDto("user02", "pass02", "유관순", "korea345@lhw.com", 16, '여', 2000),
            new MemberDto("user03", "pass03", "이순신", "soonshin345@lhw.com", 35, '남', 3125.3)
    };
    ObjectOutputStream objOut = null;
    try { //기존에 덮어쓰기할 때 발생하는 오류를 잡기 위해 아래처럼 예외처리한다.
          //objOut = new ObjectOutputStream(
          //        new BufferedOutputStream(
          //               new FileOutputStream("src/main/java/com/lhw/section03/filterstream/testObjectStream.txt")
          //        ));
        // 먼저 해당 경로에 파일이 존재하는지 확인한다.
        boolean exists = new File("src/main/java/com/lhw/section03/filterstream/testObjectStream.txt").exists();
        if (exists) {
            //파일이 있을 경우
            objOut = new MyOutputStream( // 재정의한 메소드를 담은 클래스 객체를 생성한다.
                    // 위 클래스는 헤더값을 추가하는 기능을 삭제한 클래스이다. 따라서, 만약 파일이 있을경우
                    // 더 이상 헤더를 추가하지 않고(기존 ObjectOutputStream에선 헤더 매번 추가함),
                    // 내용만 추가하는 것이다.
                    new BufferedOutputStream(
                            new FileOutputStream("src/main/java/com/lhw/section03/filterstream/testObjectStream.txt")
                    ));
        } else {
            //파일이 없을 경우
            objOut = new ObjectOutputStream(
                    new BufferedOutputStream(
                            new FileOutputStream("src/main/java/com/lhw/section03/filterstream/testObjectStream.txt")
                    ));
        }
        for (int i = 0; i < outputMembers.length; i++) { //멤버객체배열의 크기만큼 for문
            objOut.writeObject(outputMembers[i]); //객체 단위의 Write
        }
        objOut.flush(); //버퍼가 안차도 나가고 close() 안해도 나간다.
    } catch (IOException e) {
        throw new RuntimeException(e);
    }
    /*읽어오기(Read)*/
    System.out.println("=====================================");
    MemberDto[] inputMembers = new MemberDto[3];
    ObjectInputStream objIn = null;
    try {
        objIn = new ObjectInputStream(new BufferedInputStream(new FileInputStream(
                "src/main/java/com/lhw/section03/filterstream/testObjectStream.txt"
        )));
        while (true) {
            System.out.println(objIn.readObject()); //그냥 read x readObject O
        }
    } catch (EOFException e) {
        e.printStackTrace();
    } catch (IOException e) {
        throw new RuntimeException(e);
    } catch (ClassNotFoundException e) {
        throw new RuntimeException(e);
    } finally {
        if (objIn != null) {
            try {
                objIn.close();
            } catch (IOException e) {
                throw new RuntimeException(e);
            }
        }
    }
}