구글 OAuth 2.0 발급 받기
-
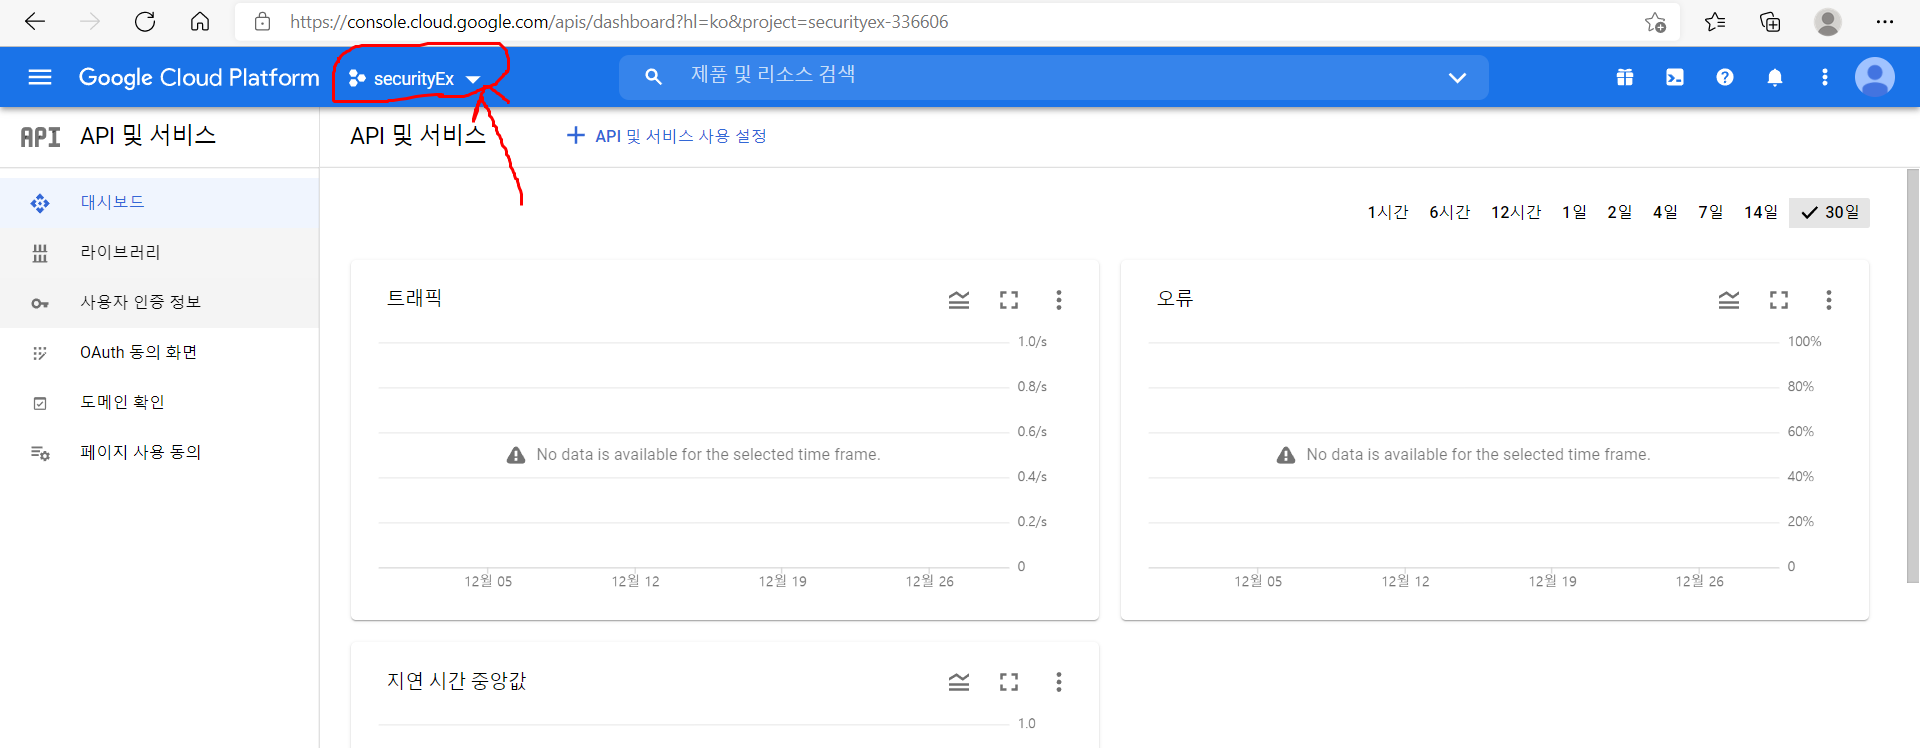
구글 api console 개발자 홈페이지로 접속한다. 그 후 다음 버튼을 누른다.
-
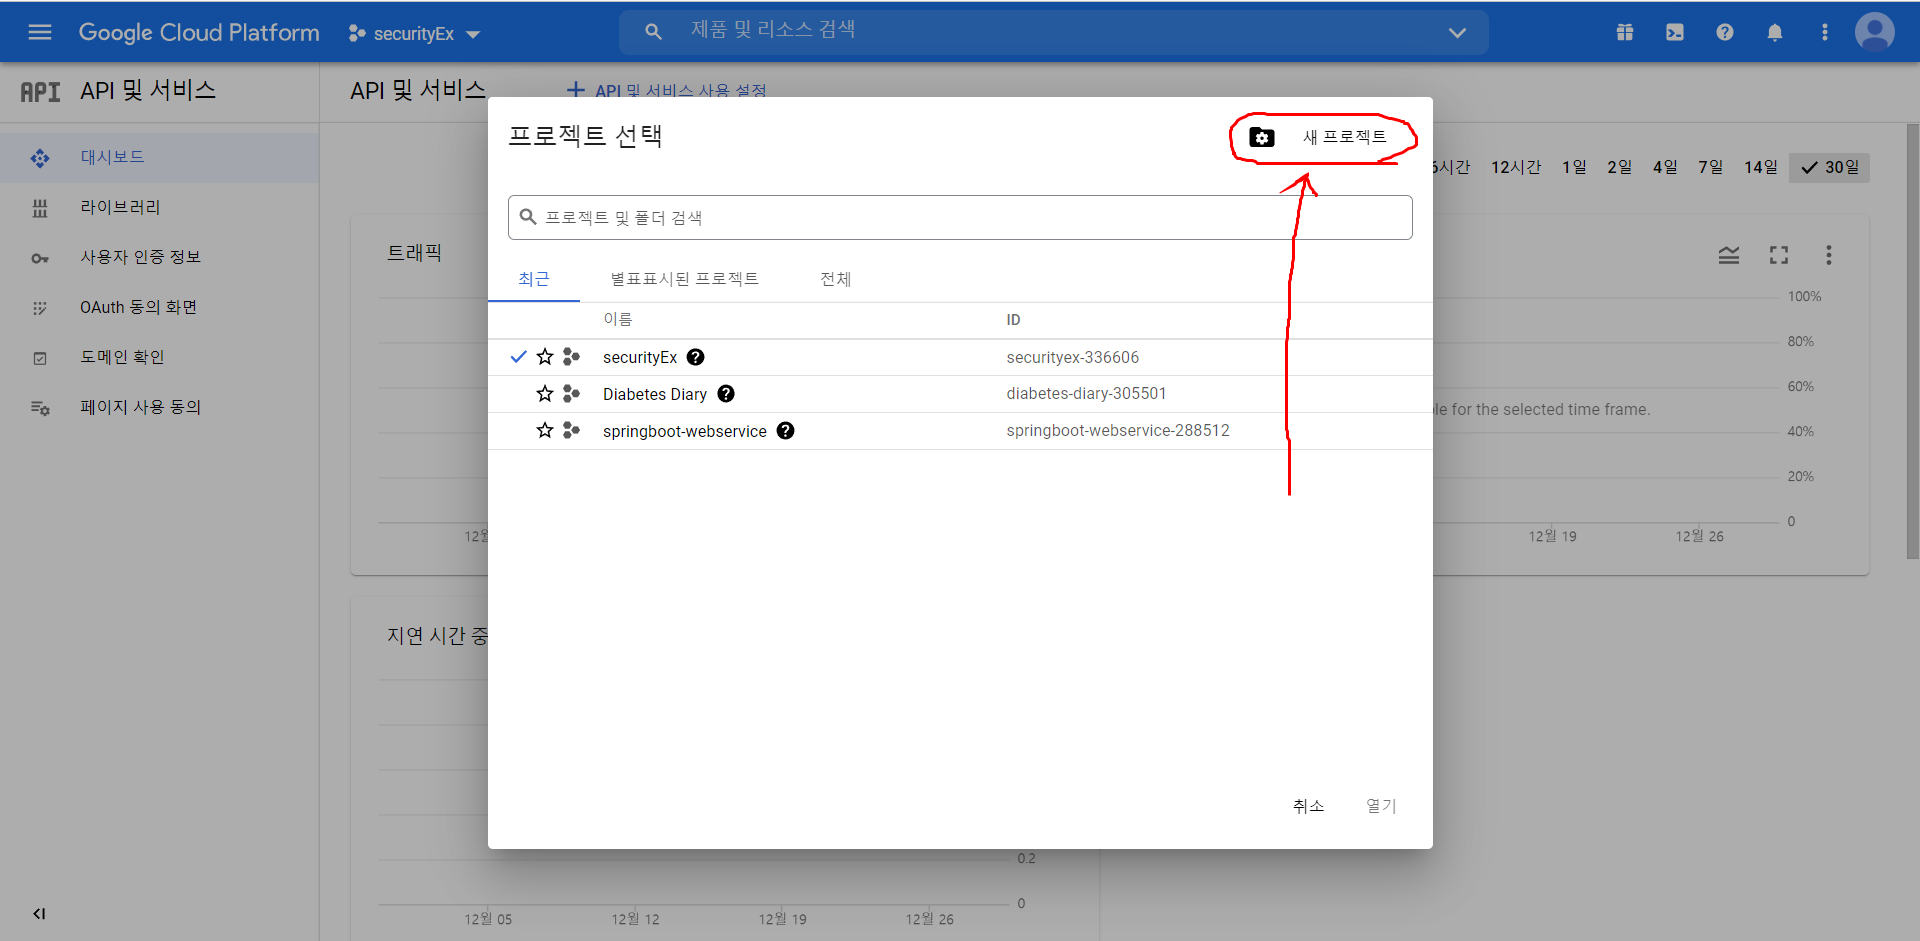
누르면 다음 창이 나온다. 새 프로젝트를 누른다.
-
프로젝트 이름을 작성하고 만들기를 누른다.

-
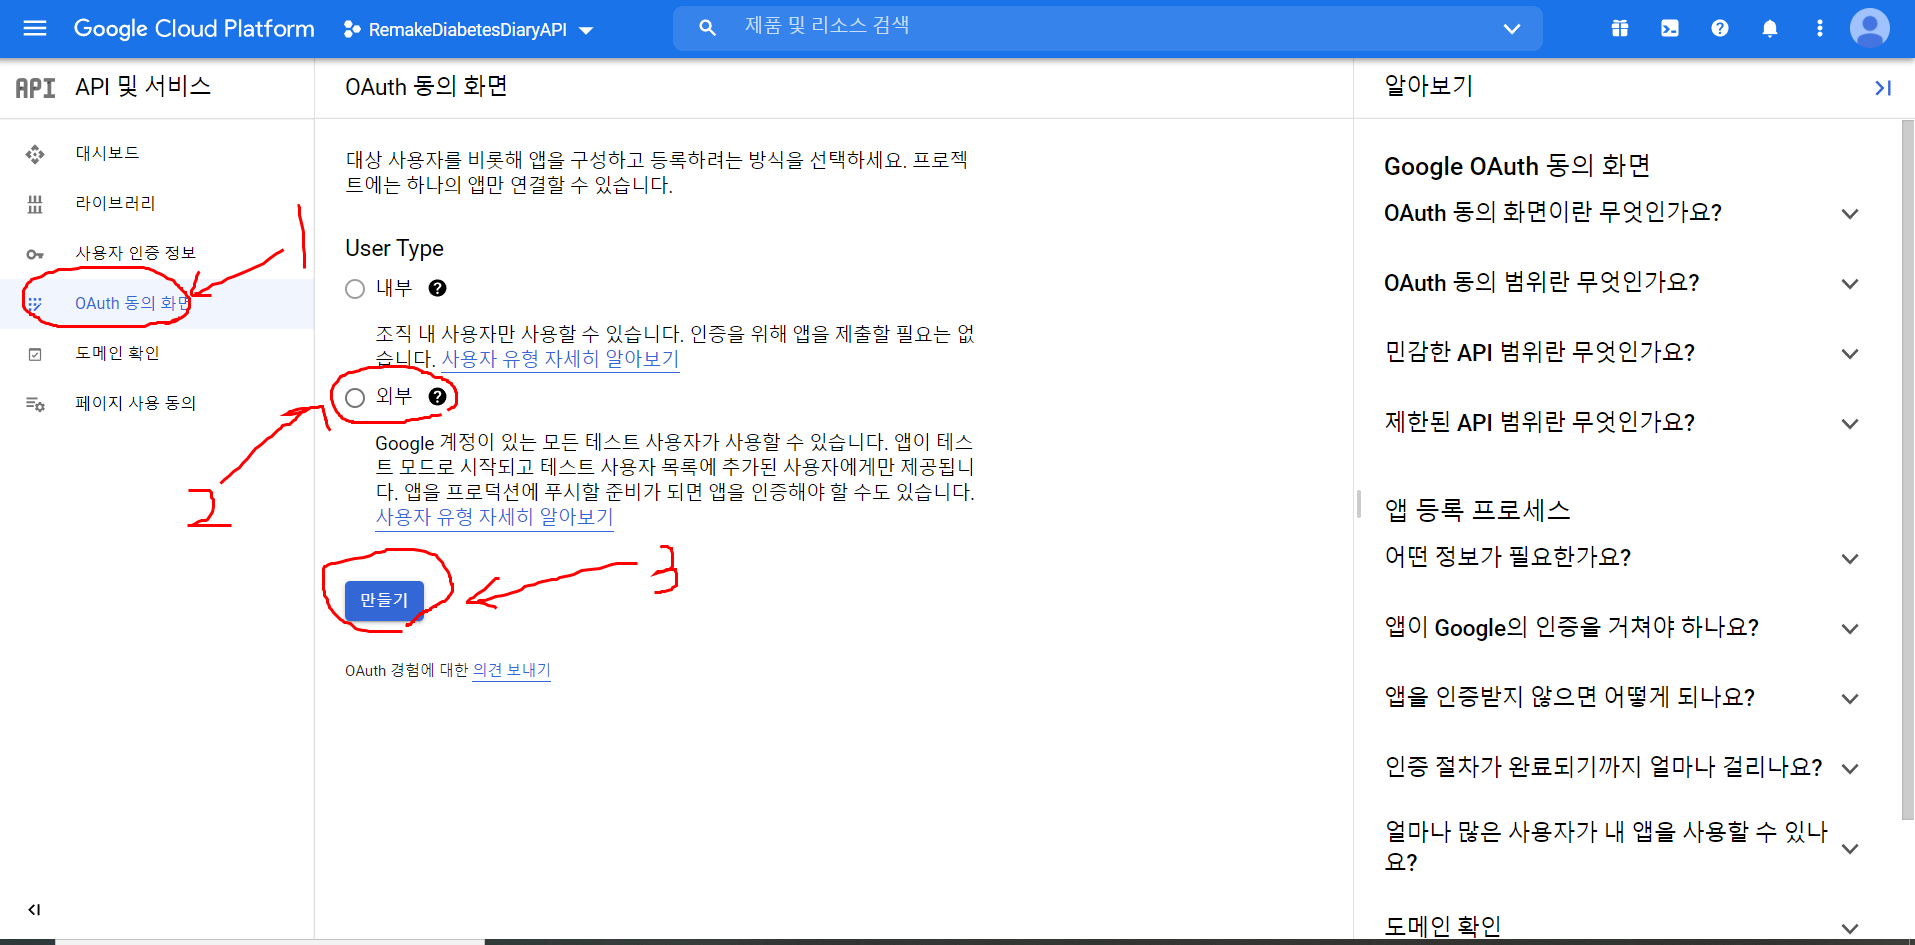
OAuth 동의 화면 클릭. 그리고 외부로 설정한 다음 만들기 클릭.
-
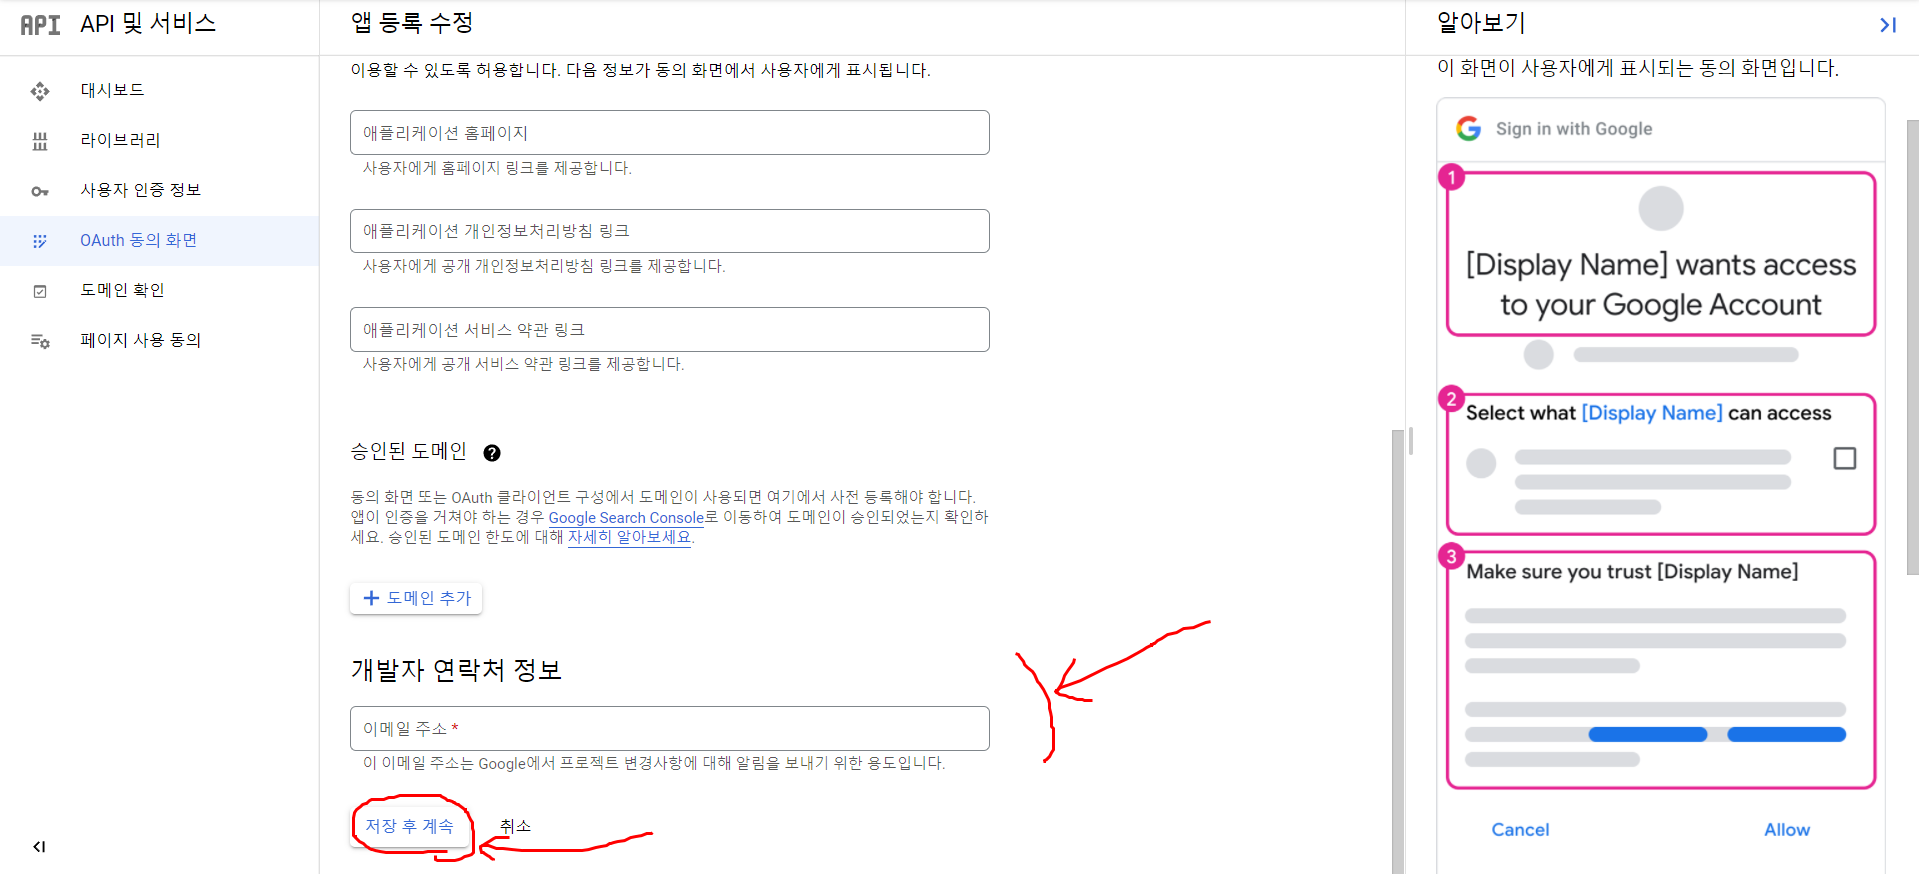
애플리케이션 이름과 이메일 작성 후에, 저장 후 계속 클릭.

-
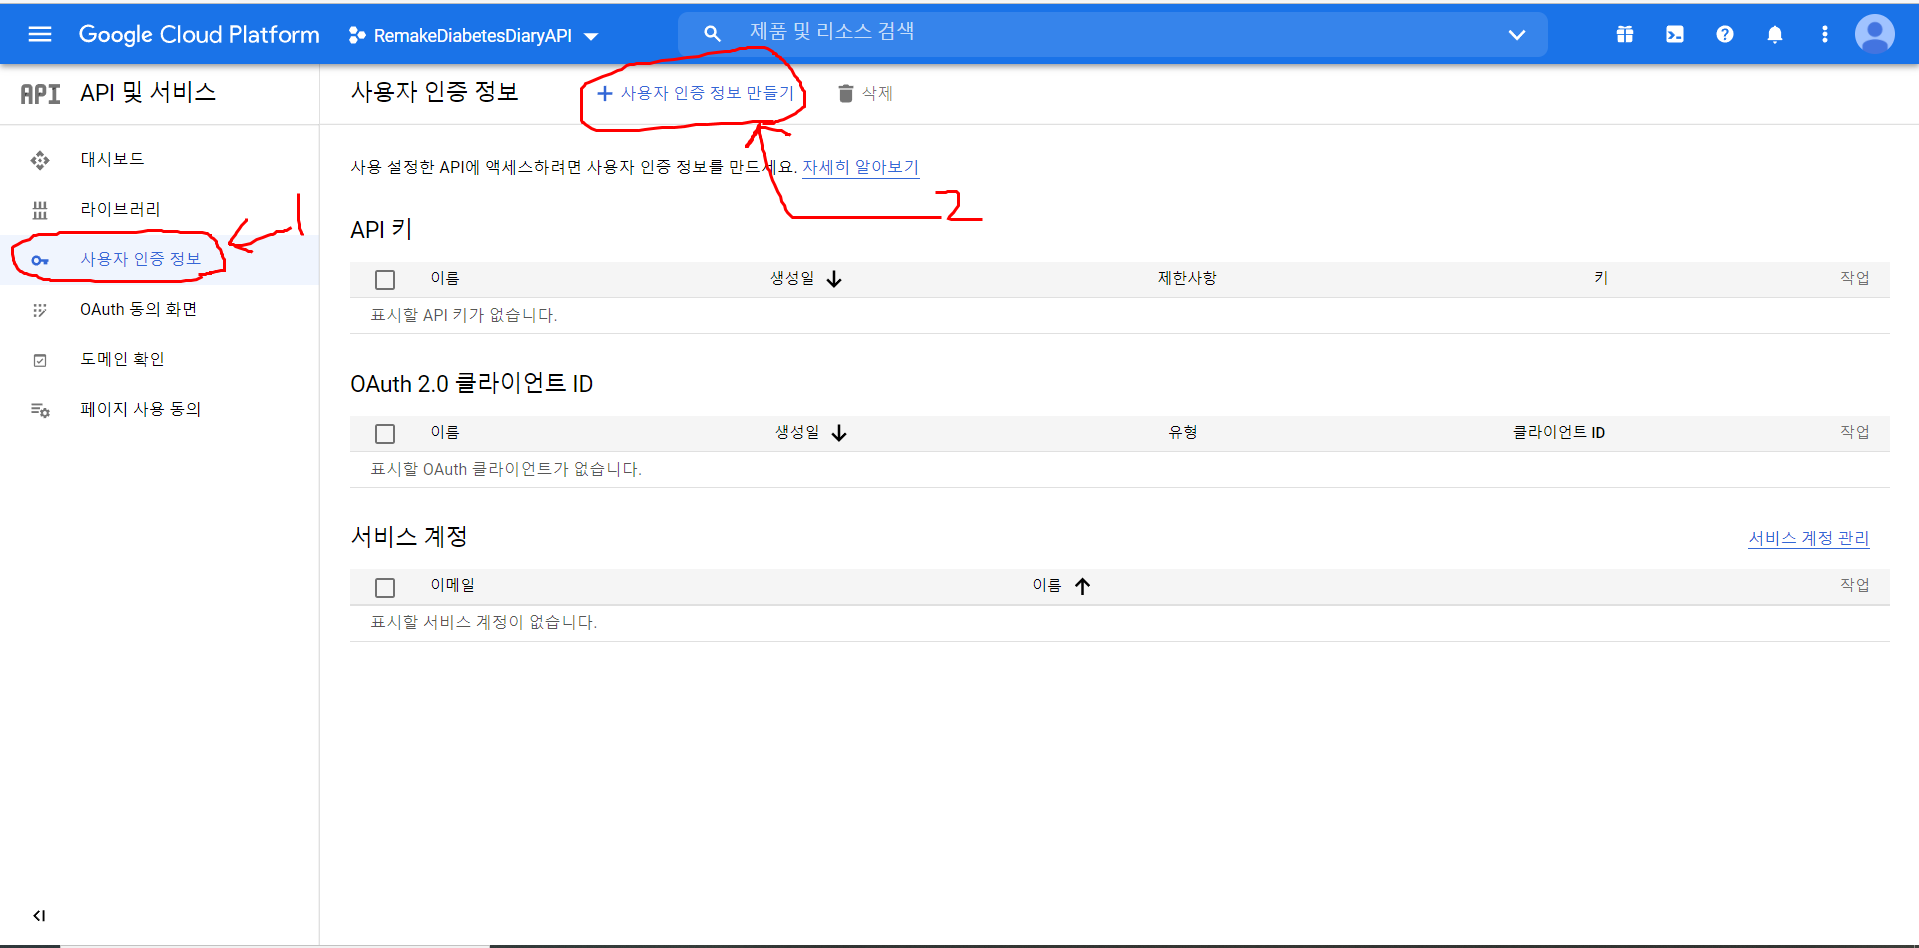
사용자 인증 정보를 클릭. 그리고 사용자 인증 정보 만들기를 클릭.
-
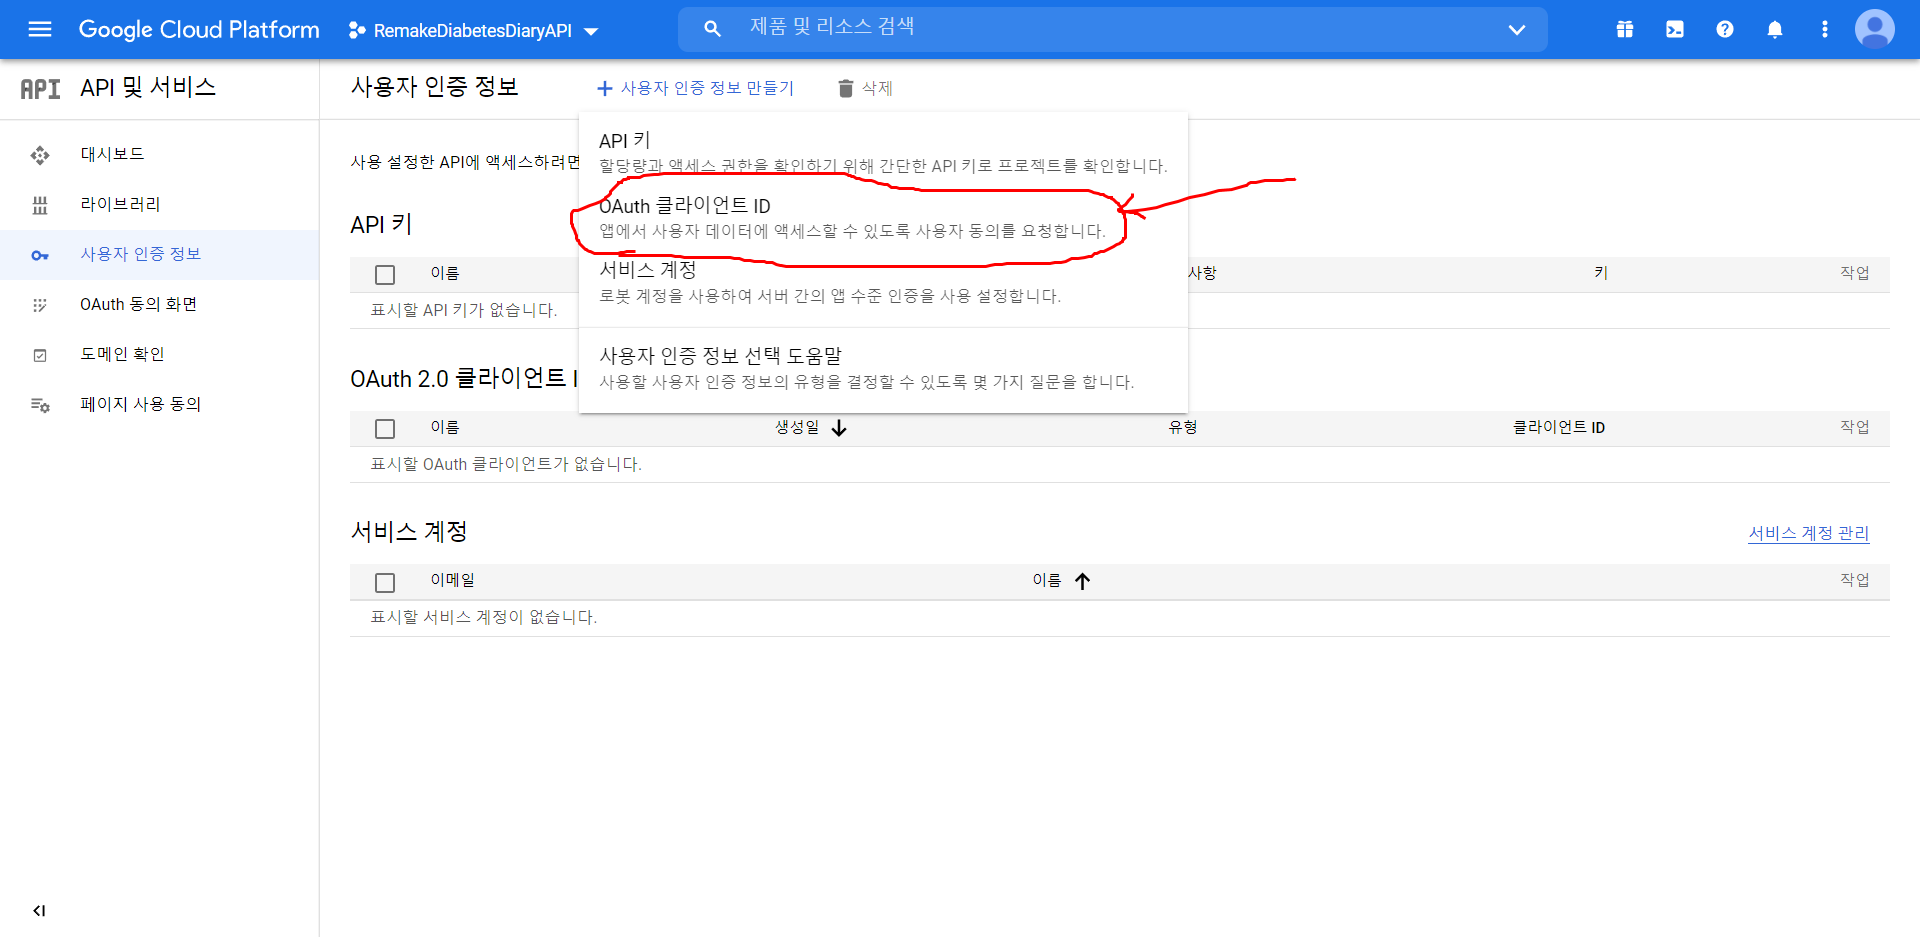
그리고 OAuth 클라이언트 id 클릭.
-
애플리케이션 유형 설정. 웹이면 웹 애플리케이션.

-
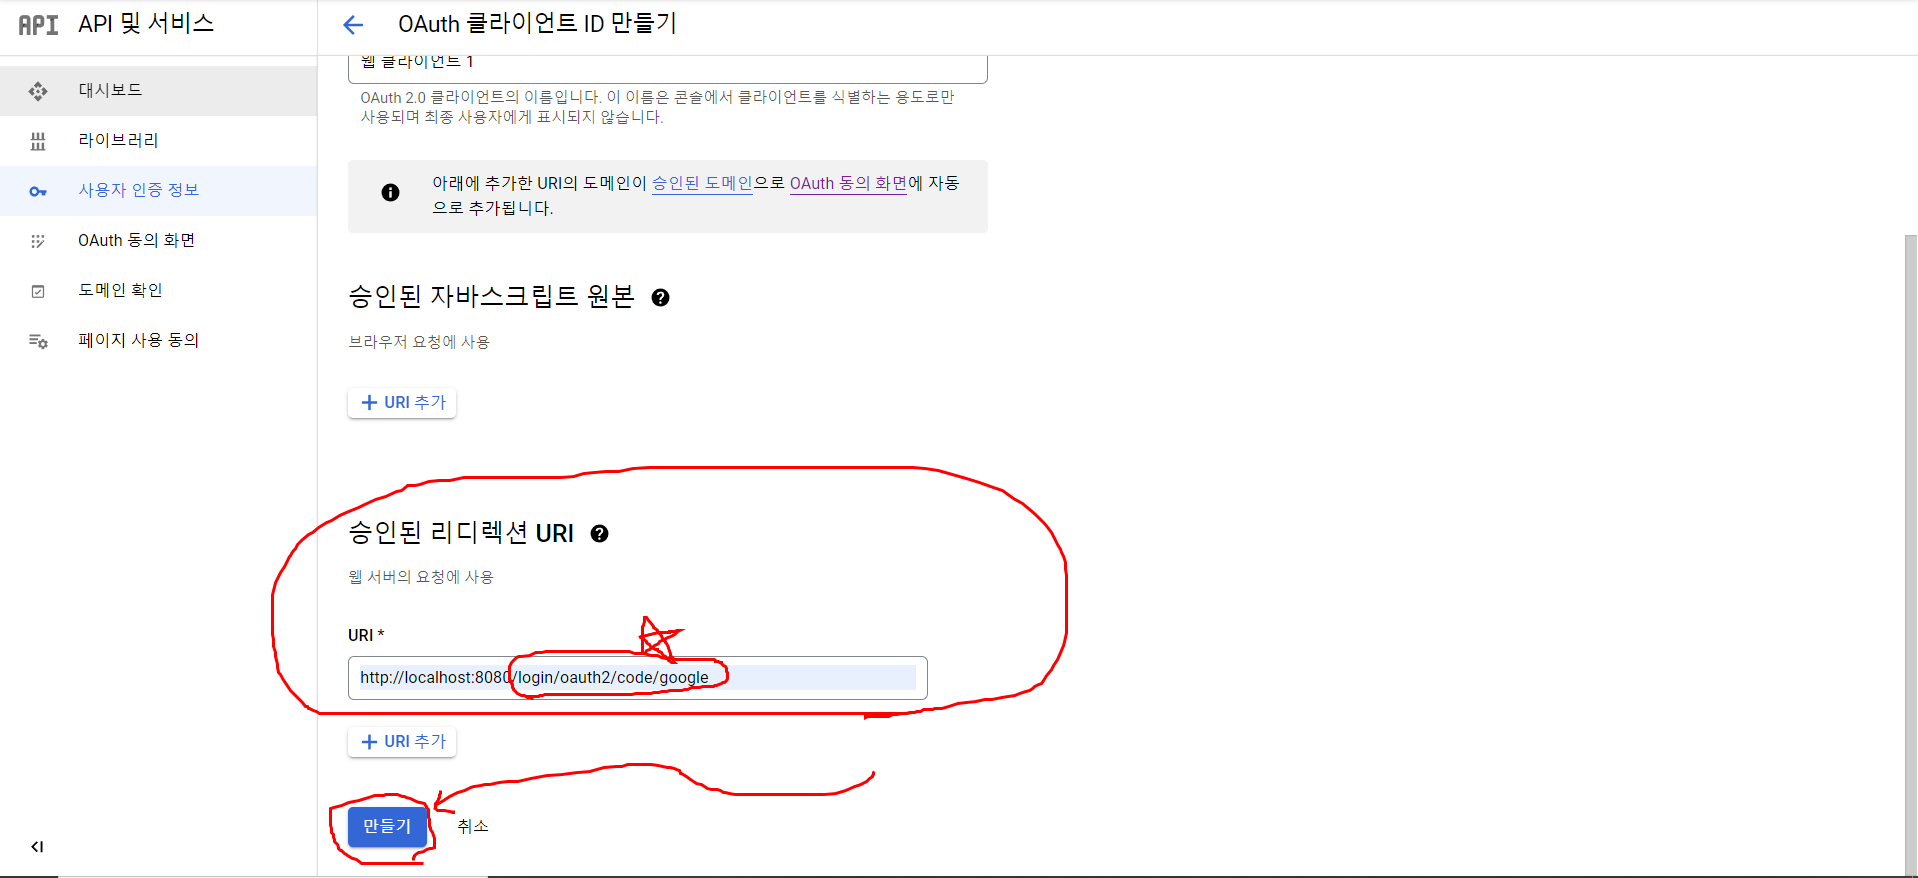
승인된 리디렉션 URI 설정.
중요한 것은 “/login/oauth2/code/google” 이다.
해당 부분이 OAuth 라이브러리가 인식하는 url이기 때문이다. 그 이전 부분은 아무 상관 없지만, 해당 부분은 반드시 동일하게 작성해야 한다.
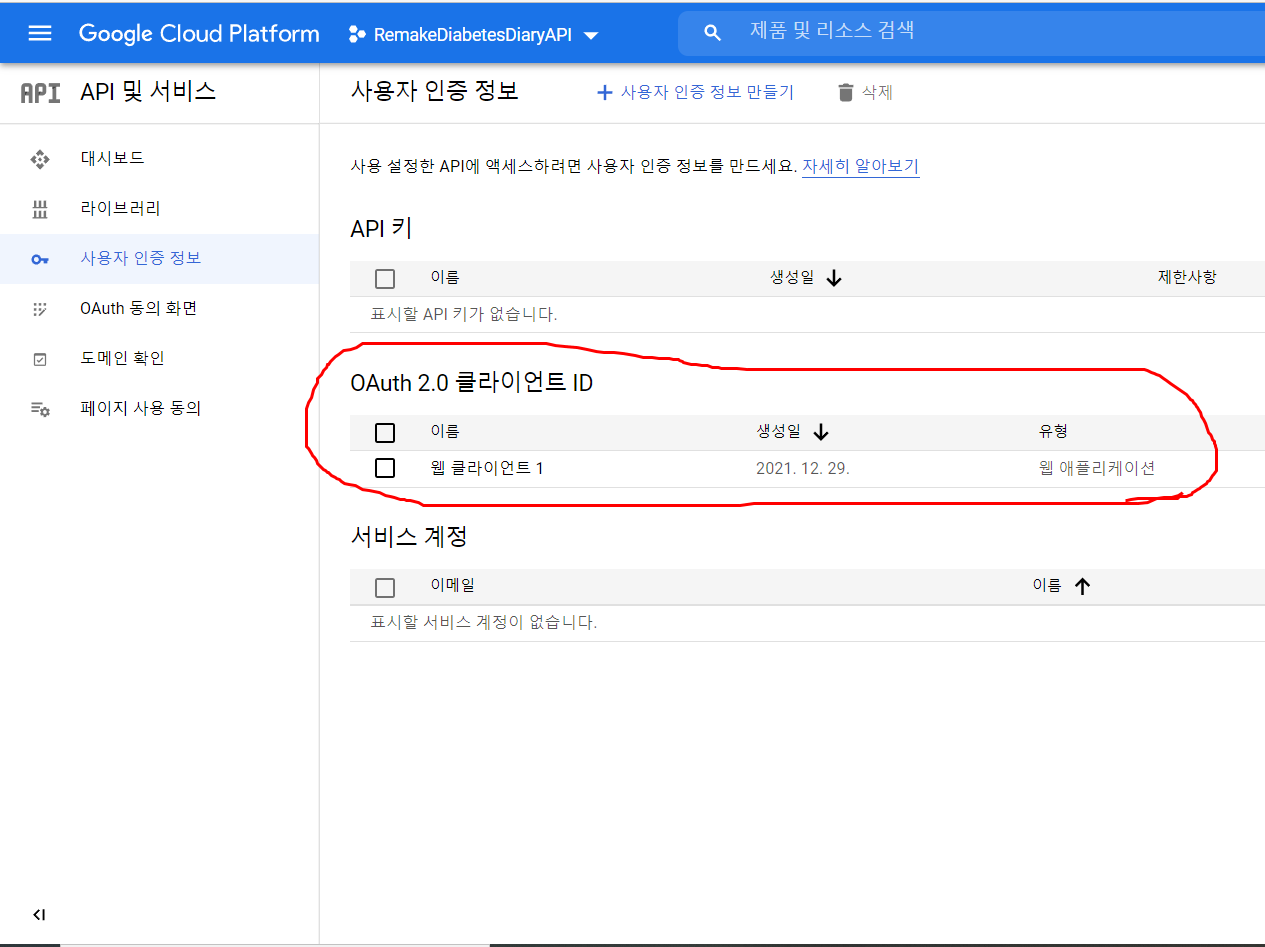
- 사용자 인증정보에 다시 들어가보면 클라이언트 ID가 지급된다. 클라이언트 id부분은 노출되면 안되므로 잘라냈다.
의존성 주입
Oauth2 라이브러리를 주입해야 위 기능을 사용할 수 있다.
    <dependency>
        <groupId>org.springframework.boot</groupId>
        <artifactId>spring-boot-starter-oauth2-client</artifactId>
    </dependency>
설정용 클래스에 OAuth 설정 추가.
@Configuration
@EnableWebSecurity
public class SecurityConfig extends WebSecurityConfigurerAdapter {
    @Override
    protected void configure(HttpSecurity http) throws Exception {
        http.csrf().disable();//<-사이트 간 위조 요청 방지를 disable한 것.

        http.authorizeRequests()
                .antMatchers("/user/**").authenticated()
                .antMatchers("/manager/**").access("hasRole('ROLE_ADMIN') or hasRole('ROLE_MANAGER')")
                .antMatchers("/admin/**").access("hasRole('ROLE_ADMIN')")
                .anyRequest().permitAll()
                .and()
                .formLogin()
                .loginPage("/loginForm")
                .loginProcessingUrl("/login")
                .defaultSuccessUrl("/")
                .and()
                .oauth2Login()//oauth 로그인을 진행하면 /loginForm 으로 진행하도록 함.
                .loginPage("/loginForm");
    }
}
application-oauth.properties 만들기. 그리고 구글 클라이언트 ID와 시클릿 기재. (보안상 치명적이기 때문에 깃헙 등에 절대 기재하지 말것.)
loginForm.mustache 만들기
다른 것은 중요하지 않다. 구글 로그인의 a 태그의 href 속성이 중요하다.
“/oauth2/authorization/google”로 기재해야만 spring-boot-starter-oauth2-client 라이브러리가 구글 OAuth 로그인으로 인식한다.
<!DOCTYPE html>
<html lang="en">
<head>
    <meta charset="UTF-8">
    <title>로그인 페이지</title>
</head>
<body>
<h1>로그인 페이지</h1>
<form action="/login" method="post">
    <input type="text" name="username" placeholder="username"/><br/>
    <input type="password" name="password" placeholder="password"/><br/>
    <button>로그인</button>
</form>
<a href="/oauth2/authorization/google">구글 로그인</a>
<a href="/joinForm">회원가입</a>
</body>
</html>