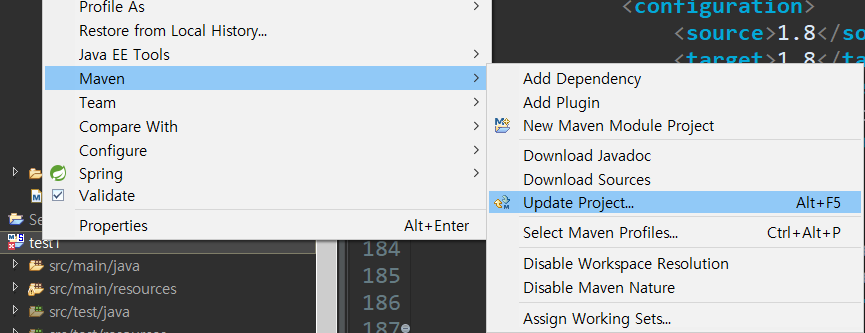
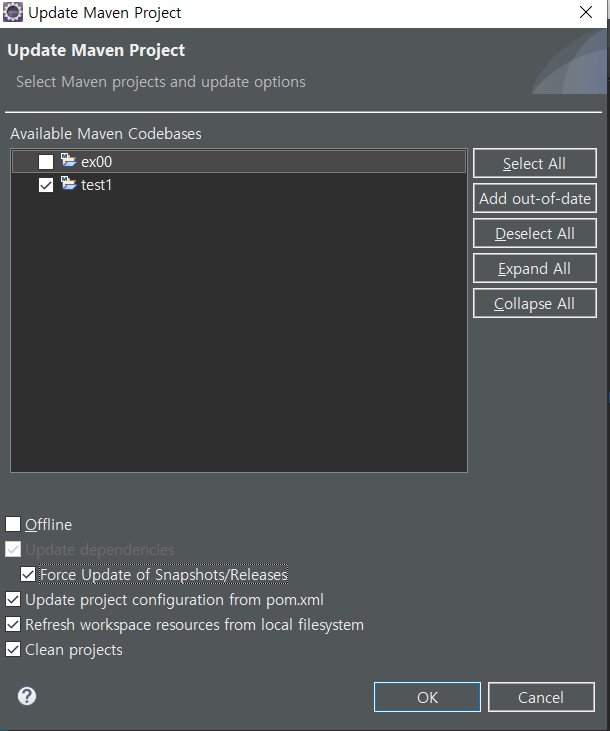
폴더 오류 잡기
이안에 있는거 삭제


수정되는 것들이 있으면
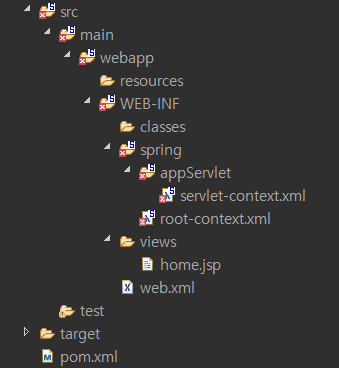
프로젝트 기본 구성 요소
	src/main/java				  : 작성되는 코드의 경로 / 서버단 JAVA 파일
    src/main/resource			  : 실행할 때 참고하는 기본 경로
    							    (src/main/java 설정 파일)
    src/test/java				  : 단위 테스트를 위한 JAVA 파일
    src/test/resource			  : 테스트 관련 설정 파일 보관 경로
    src/main/webapp/WEB-INF/views : jsp, html 파일 경로
    pom.xml						  : 라이브러리 의존성 관리
웹과 관련된 스프링 설정 파일
src/main/webapp/WEB-INF/spring/appServlet/servlet-context.xml 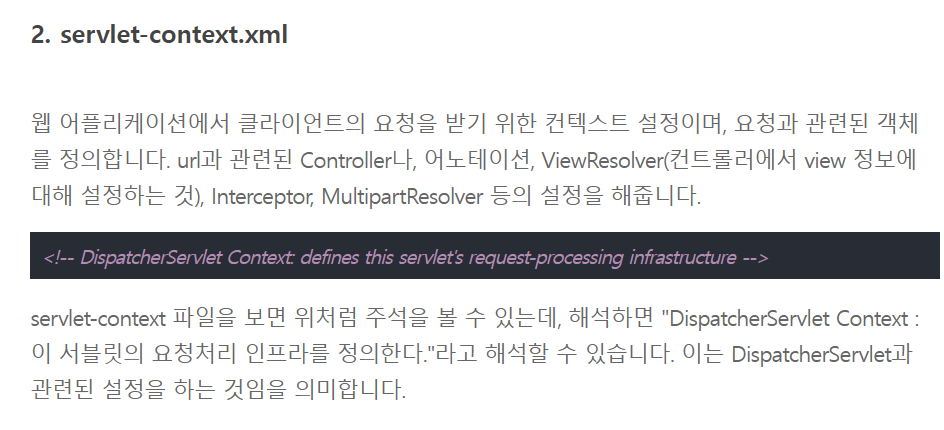
bean 관리용 스프링 설정 파일
src/main/webapp/WEB-INF/spring/root-context.xmlTomcat의 web.xml 파일
WEB-INF/web.xml 
템플릿 프로젝트의 jsp 파일 경로
src/main/webapp/WEB-INF/viewsMaven이 사용하는 pom.xml
ex00/pom.xmlSpring 구조

- pom.xml 작성
회사마다 다르지만 지금 작성한 것은 공부할 때 사용할 설정
<?xml version="1.0" encoding="UTF-8"?>
<project xmlns="http://maven.apache.org/POM/4.0.0" xmlns:xsi="http://www.w3.org/2001/XMLSchema-instance"
xsi:schemaLocation="http://maven.apache.org/POM/4.0.0 https://maven.apache.org/maven-v4_0_0.xsd">
<modelVersion>4.0.0</modelVersion>
<groupId>com.example</groupId>
<artifactId>ex00</artifactId>
<name>ex00</name>
<packaging>war</packaging>
<version>1.0.0-BUILD-SNAPSHOT</version>
<!-- 여기서 수정을 하면 알아서 다운받는다. -->
<properties>
<java-version>11</java-version>
<org.springframework-version>5.1.20.RELEASE</org.springframework-version>
<org.aspectj-version>1.9.0</org.aspectj-version>
<org.slf4j-version>1.7.25</org.slf4j-version>
</properties>
<dependencies>
<!-- Spring -->
<dependency>
<groupId>org.springframework</groupId>
<artifactId>spring-context</artifactId>
<version>${org.springframework-version}</version>
<exclusions>
<!-- Exclude Commons Logging in favor of SLF4j -->
<exclusion>
<groupId>commons-logging</groupId>
<artifactId>commons-logging</artifactId>
</exclusion>
</exclusions>
</dependency>
<dependency>
<groupId>org.springframework</groupId>
<artifactId>spring-webmvc</artifactId>
<version>${org.springframework-version}</version>
</dependency>
<dependency>
<groupId>org.springframework</groupId>
<artifactId>spring-tx</artifactId>
<version>${org.springframework-version}</version>
</dependency>
<dependency>
<groupId>org.springframework</groupId>
<artifactId>spring-jdbc</artifactId>
<version>${org.springframework-version}</version>
</dependency>
<!-- https://mvnrepository.com/artifact/org.mybatis/mybatis -->
<dependency>
<groupId>org.mybatis</groupId>
<artifactId>mybatis</artifactId>
<version>3.5.2</version>
</dependency>
<!-- https://mvnrepository.com/artifact/org.mybatis/mybatis-spring -->
<dependency>
<groupId>org.mybatis</groupId>
<artifactId>mybatis-spring</artifactId>
<version>1.3.2</version>
</dependency>
<dependency>
<groupId>com.zaxxer</groupId>
<artifactId>HikariCP</artifactId>
<version>2.7.4</version>
</dependency>
<dependency>
<groupId>mysql</groupId>
<artifactId>mysql-connector-java</artifactId>
<scope>runtime</scope>
<version>8.0.28</version>
</dependency>
<!-- AspectJ -->
<dependency>
<groupId>org.aspectj</groupId>
<artifactId>aspectjrt</artifactId>
<version>${org.aspectj-version}</version>
</dependency>
<!-- Logging -->
<dependency>
<groupId>org.slf4j</groupId>
<artifactId>slf4j-api</artifactId>
<version>${org.slf4j-version}</version>
</dependency>
<dependency>
<groupId>org.slf4j</groupId>
<artifactId>jcl-over-slf4j</artifactId>
<version>${org.slf4j-version}</version>
<scope>runtime</scope>
</dependency>
<dependency>
<groupId>org.slf4j</groupId>
<artifactId>slf4j-log4j12</artifactId>
<version>${org.slf4j-version}</version>
<scope>runtime</scope>
</dependency>
<dependency>
<groupId>log4j</groupId>
<artifactId>log4j</artifactId>
<version>1.2.17</version>
</dependency>
<dependency>
<groupId>org.bgee.log4jdbc-log4j2</groupId>
<artifactId>log4jdbc-log4j2-jdbc4</artifactId>
<version>1.16</version>
</dependency>
<dependency>
<groupId>org.projectlombok</groupId>
<artifactId>lombok</artifactId>
<version>1.18.0</version>
<scope>1.2.17</scope>
</dependency>
<!-- @Inject -->
<dependency>
<groupId>javax.inject</groupId>
<artifactId>javax.inject</artifactId>
<version>1</version>
</dependency>
<!-- Servlet -->
<dependency>
<groupId>javax.servlet</groupId>
<artifactId>javax.servlet-api</artifactId>
<version>3.1.0</version>
<scope>provided</scope>
</dependency>
<dependency>
<groupId>javax.servlet.jsp</groupId>
<artifactId>jsp-api</artifactId>
<version>2.1</version>
<scope>provided</scope>
</dependency>
<dependency>
<groupId>javax.servlet</groupId>
<artifactId>jstl</artifactId>
<version>1.2</version>
</dependency>
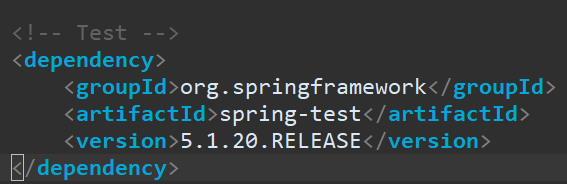
<!-- Test -->
<dependency>
<groupId>org.springframework</groupId>
<artifactId>spring-test</artifactId>
<version>5.1.20.RELEASE</version>
</dependency>
<dependency>
<groupId>junit</groupId>
<artifactId>junit</artifactId>
<version>4.12</version>
<scope>test</scope>
</dependency>
</dependencies>
<build>
<plugins>
<plugin>
<artifactId>maven-eclipse-plugin</artifactId>
<version>2.9</version>
<configuration>
<additionalProjectnatures>
<projectnature>org.springframework.ide.eclipse.core.springnature</projectnature>
</additionalProjectnatures>
<additionalBuildcommands>
<buildcommand>org.springframework.ide.eclipse.core.springbuilder</buildcommand>
</additionalBuildcommands>
<downloadSources>true</downloadSources>
<downloadJavadocs>true</downloadJavadocs>
</configuration>
</plugin>
<plugin>
<groupId>org.apache.maven.plugins</groupId>
<artifactId>maven-compiler-plugin</artifactId>
<version>2.5.1</version>
<configuration>
<source>1.6</source>
<target>1.6</target>
<compilerArgument>-Xlint:all</compilerArgument>
<showWarnings>true</showWarnings>
<showDeprecation>true</showDeprecation>
</configuration>
</plugin>
<plugin>
<groupId>org.codehaus.mojo</groupId>
<artifactId>exec-maven-plugin</artifactId>
<version>1.2.1</version>
<configuration>
<mainClass>org.test.int1.Main</mainClass>
</configuration>
</plugin>
</plugins>
</build>
</project>
-
servlet-context.xml
	<?xml version="1.0" encoding="UTF-8"?>
<beans:beans xmlns="http://www.springframework.org/schema/mvc"
	xmlns:xsi="http://www.w3.org/2001/XMLSchema-instance"
	xmlns:beans="http://www.springframework.org/schema/beans"
	xmlns:context="http://www.springframework.org/schema/context"
	xsi:schemaLocation="http://www.springframework.org/schema/mvc https://www.springframework.org/schema/mvc/spring-mvc.xsd
		http://www.springframework.org/schema/beans https://www.springframework.org/schema/beans/spring-beans.xsd
		http://www.springframework.org/schema/context https://www.springframework.org/schema/context/spring-context.xsd">

	<!-- DispatcherServlet Context: defines this servlet's request-processing infrastructure -->

	<!-- Enables the Spring MVC @Controller programming model -->
	<annotation-driven />

	<!-- Handles HTTP GET requests for /resources/** by efficiently serving up static resources in the ${webappRoot}/resources directory -->
	<!-- 최상위 폴더에 있는 resources폴더를 찾아  -->
	<resources mapping="/resources/**" location="/resources/" />

	<!-- Resolves views selected for rendering by @Controllers to .jsp resources in the /WEB-INF/views directory -->
	<beans:bean class="org.springframework.web.servlet.view.InternalResourceViewResolver">
		<beans:property name="prefix" value="/WEB-INF/views/" />
		<beans:property name="suffix" value=".jsp" />
	</beans:bean>
	<!-- 니가 scan해야하는 것은 "com.koreait.controller"라는 의미 -->
	<context:component-scan base-package="com.example.controller" />
</beans:beans>
3. root-context.xml
빈(bean)을 작성해서 주입해주는 역할을 한다.
```xml
<?xml version="1.0" encoding="UTF-8"?>
<beans xmlns="http://www.springframework.org/schema/beans"
xmlns:xsi="http://www.w3.org/2001/XMLSchema-instance"
xmlns:context="http://www.springframework.org/schema/context"
xmlns:mybatis-spring="http://mybatis.org/schema/mybatis-spring"
xsi:schemaLocation="http://mybatis.org/schema/mybatis-spring http://mybatis.org/schema/mybatis-spring-1.2.xsd
http://www.springframework.org/schema/beans https://www.springframework.org/schema/beans/spring-beans.xsd
http://www.springframework.org/schema/context http://www.springframework.org/schema/context/spring-context-4.3.xsd">
<!-- property를 참고로 hikariConfig라는 bean이 생성된다. -->
<bean id="hikariConfig" class="com.zaxxer.hikari.HikariConfig">
<property name="driverClassName" value="com.mysql.cj.jdbc.Driver"></property>
<property name="jdbcUrl" value="jdbc:mysql://localhost:3306/web0315"></property>
<property name="username" value="root"></property>
<property name="password" value="1234"></property>
</bean>
<!-- 위에서 hikariConfig라는 bean을 참고로 해서 DataSource라는 bean 생성된다. -->
<bean id="dataSource" class="com.zaxxer.hikari.HikariDataSource" destroy-method="close">
<!-- hikariConfig라는 객체를 참고하라는 것 -->
<constructor-arg ref="hikariConfig"/>
</bean>
<!-- Root Context: defines shared resources visible to all other web components -->
<!-- 어디서 scan하면 니가 주입할 객체들을 찾을 수 있는지 알려주는 것 -->
<context:component-scan base-package="com.example.sample"></context:component-scan>
</beans>
localhost 9090 실패시
404가 계속 뜬다면 아래와 같이 실행해야 한다!

이렇게 했는데 500번이 뜰 수 있다. JSTL이 인식이 되지 않는 것인데 그러면 아래와 같이 해준다.
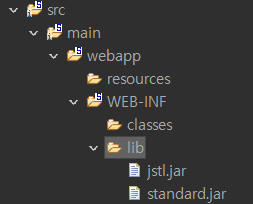
이 경로에 jstl, standard를 넣어주면 된다.
의존성 주입 테스트
호텔, 레스토랑 안에 셰프 객체를 주입하는 예제
생성자, setter 메소드를 이용한 주입으로 의존성 주입 구현
설정 방식은 XML이나 어노테이션을 이용해서 처리
스프링 프레임워크 동작시 생기는 일
스프링 프레임워크가 시작되면서 먼저 스프링이 사용하는 메모리 영역을 만든다.
스프링 내부적으로 ApplicationContext라는 이름의 객체가 만들어진다.
스프링은 자신이 생성하고 관리해야 하는 객체들에 대한 설정을 알아야 하고
이 설정파일은 root-context.xml 이라는 파일로 만들어져 있다.
root-context.xml에 설정되어 있는 <context:component-scan>
태그의 내용을 통해서 com.koreait.sample 패키지를 스캔하기 시작한다.
해당 패키지에 있는 크래스들 중에서 스프링이 사용하는 @Component라는
어노테이션이 존재하는 클래스의 인스턴슬르 생성한다. Restaurant 객체는
Chef 객체가 필요하다는 어노테이션(@Autowired) 설정이 있으므로
Chef 객체의 레퍼런스를 Restaurant 객첵에 주입한다. 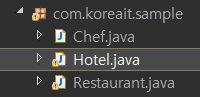
	package com.koreait.sample;

import org.springframework.stereotype.Component;

import lombok.Data;

// 스프링에게 해당 클래스가 스프링에서 관리해야 하는 대상임을 표시
@Component
/*
 * @Data : Lombok의 @Getter / @Setter, @ToString, @EqualsAndHashCode, @RequiredArgsConstructor를 합쳐놓은 종합 선물 세트라고
 * 할수 있다.
 */
@Data
public class Chef {
}
	package com.koreait.sample;

import org.springframework.stereotype.Component;

import lombok.AllArgsConstructor;
import lombok.Getter;
import lombok.NonNull;
import lombok.RequiredArgsConstructor;
import lombok.Setter;
import lombok.ToString;

/* @AllArgsConstructor : 인스턴스 변수로 선언된 모든 것을 매개변수로 받는 생성자를 작성한다. */
/* new Hotel로 하면은 자동으로 안넘겨주고 우리가 직접해야지만 Spring에게 Hotel객체좀 만들어줘 했을때는
      알아서 주입을 해준다. */
/* @RequiredArgsConstructor: 특정 변수에 대해서만 생성자를 작성할 때 사용한다.
 * @NonNull이나 final이 붙은 인스턴스 변수에 대한 생성자를 만들어 낸다.
 * @NonNUll : 비어있으면 안된다고 알려주는 것
 */
@RequiredArgsConstructor
@Component
@Setter
@Getter
@ToString
public class Hotel {
	@NonNull
	Chef chef;
	int data;
}
	package com.koreait.sample;

import org.springframework.beans.factory.annotation.Autowired;
import org.springframework.stereotype.Component;

import lombok.Data;
import lombok.Setter;

/*@Data : 이거는 lombok을 사용하는 건데 이렇게 하면 setter, getter 등 전부 다 생긴다. */
@Component
public class Restaurant {
	// @setter : setter만 생긴다.
	// @Autowired: 자동으로 연결되어 있는 것을 주입
	// @Setter(onMethod_ = @Autowired ) : setter을 호출하면서 주입을 시킨다.
	@Setter(onMethod_ = @Autowired )
	Chef chef;


}
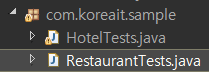
테스트 환경(JUnit)
자바 프로그래밍 언어용 유닛 테스트 프레임워크
가장 많이 사용되는 테스트 환경
테스트 성공시 JUnit GUI 창에 녹색으로 표시 / 실패시 적색으로 표시
하나하나의 케이스별로(단위로 나누어서) 테스트를 하는 단위 테스트 도구
JUnit이 되면 text할 수 있는 폴더가 생긴다.
JUnit(제이 유닛)은 자바 프로그래밍 언어용 단위 테스트 도구로 보이지 않고 숨겨진 단위 테스트를 끌어내어 정형화시켜 단위 테스트를 쉽게 해주는 테스트용 Framework입니다. 플러그인 형태로 Eclipse에 포함되어있으며, 하나의 jar 파일이 전부이기 때문에 사용법도 간단합니다. JUnit은 외부 테스트 프로그램(케이스)을 작성하여 번거롭게 디버깅하지 않아도 되며, 프로그램 테스트 시 걸릴 시간도 관리할 수 있는 기능을 가지고 있습니다. 테스트 결과를 확인하는 것 이외 최적화된 코드를 유추해내는 기능도 제공합니다. 또한, 테스트 결과를 단순한 텍스트로 남기는 것이 아니라 Test클래스로 남깁니다. 그래서 개발자에게 테스트 방법 및 클래스의 History를 넘겨줄 수도 있습니다.
JUint의 특징
- @Test 메서드가 호출할 때마다 새로운 인스턴스가 생성되어 독립적인 테스트 가능
- 단위 테스트 Framework 중 하나
- 문자 혹은 GUI 기반으로 실행됨
- 단정 문으로 테스트 케이스의 수행 결과를 판별함(assertEquals(예상 값, 실제 값))
- JUnit4부터는 어노테이션으로 간결하게 테스트를 지원함
- 결과는 성공(녹색), 실패(붉은색) 중 하나로 표시
- 테스트 결과를 확인하는 것 이외 최적화된 코드를 유추해내는 기능도 제공
	package com.koreait.sample;

import static org.junit.Assert.assertNotNull;

import org.junit.Test;
import org.junit.runner.RunWith;
import org.springframework.beans.factory.annotation.Autowired;
import org.springframework.test.context.ContextConfiguration;
import org.springframework.test.context.junit4.SpringJUnit4ClassRunner;

import lombok.Setter;
import lombok.extern.log4j.Log4j;

/*
 * spring-test 모듈을 이용해서 간단하게 스프링을 가동시키고 스프링 동작을 활성화한다.
 * 반드시 Junit 4.10 이상 버전을 사용
 * SpringJUnit4ClassRunner.class를 실행한다는 것이고, 이 클래스는 내부적으로 스프링 컨테이너를 생성해준다.
 */
@RunWith(SpringJUnit4ClassRunner.class)
/*  생성된 스프링 컨테이너에 스프링 빈을 추가하기 위해서는 application-context.xml 파일과 같은 설정 파일을 읽어야 하는데,
 *  이런 설정파일을 로드하는 어노테이션이 ContextConfiguration이다.
 *  지정된 클래스나 문자열을 이용해서 필요한 객체들을 스프링 내에 객체로 등록하는 것이다.
	만약 스프링 컨테이너가 필요 없다면,
	즉, 스프링 빈 팩토리에서 빈을 로드하는 것이 아닌, 직접 new로 객체를 생성해가며 테스트 코드를 작성할 것이라면
	위의 어노테이션을 제거해도 된다.
*/
@ContextConfiguration("file:src/main/webapp/WEB-INF/spring/root-context.xml")
@Log4j
public class HotelTests {

	@Setter(onMethod_ = @Autowired)
	// 주입만 가능함
	private Hotel hotel;

	// @Test를 사용하면 이 어노테이션이 붙은것만 실행해준다.(단위 테스트)
	// JUnit에서 테스트 대상임을 표시
	@Test
	// 존재하는지 확인하는 메소드
	public void testExist() {
		// hotel 객체가 null이 아니어야만 테스트를 통과
		/*
		 * assertNotNull(hotel); System.out.println(hotel.getChef());
		 */
		log.info(hotel);
		log.info(hotel.getChef());
	}
	// 1. 테스트 코드가 실행되기 위해서 스프링 프레임워크가 동작
	// 2. 동작되는 과정에서 필요한 객체들이 스프링에 등록
	// 3. 의존성 주입이 필요한 객체는 자동으로 주입이 이루어짐
}

여기서 에러가 발생하는 경우가 있는데 이 에러가 발생하는 원인은 스프링 버전과 JUnit 테스트 환경 버전과 차이가 있어서 발생하는 오류입니다.

여기에서 스프링프레임워크 버전과 테스트 버전과 일치하게 해주면 에러가 해결됩니다.
	package com.koreait.sample;

import static org.junit.Assert.assertNotNull;

import org.junit.Test;
import org.junit.runner.RunWith;
import org.springframework.beans.factory.annotation.Autowired;
import org.springframework.test.context.ContextConfiguration;
import org.springframework.test.context.junit4.SpringJUnit4ClassRunner;

import lombok.Setter;

@RunWith(SpringJUnit4ClassRunner.class)
@ContextConfiguration("file:src/main/webapp/WEB-INF/spring/root-context.xml")
public class RestaurantTests {

	@Setter(onMethod_ = @Autowired)
	private Restaurant restaurant;


	@Test
	public void testExist() {
		assertNotNull(restaurant);
	}
}
JDBC
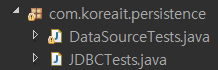

	package com.koreait.persistence;


import java.sql.Connection;
import java.sql.DriverManager;

import org.junit.Test;


import lombok.extern.log4j.Log4j;

@Log4j
public class JDBCTests {
	// static 블럭 : 클래스 로딩시 딱 한번만 수행되는 영역, 프로젝트 빌드시 가장 먼저 수행되는 영역이다.
	static {
		try {
			Class.forName("com.mysql.cj.jdbc.Driver");
		} catch (ClassNotFoundException e) {
			System.out.println(e);
		}
	}

	@Test
	public void connectionTest() {
		// try(Statement) : 소괄호 안에 close를 필요로 하는 인스턴스를 작성하게 되면
		// try문이 끝났을 때 자동으로 close()를 실행해준다.
		try(Connection conn = DriverManager.getConnection(
				"jdbc:mysql://localhost:3306/web0315",
				"root",
				"1234")) {
			log.info(conn);
		} catch(Exception e) {
			log.warn(e);
		}
	}
}
	package com.koreait.persistence;

import static org.junit.Assert.fail;

import java.sql.Connection;

import javax.sql.DataSource;

import org.junit.Test;
import org.junit.runner.RunWith;
import org.springframework.beans.factory.annotation.Autowired;
import org.springframework.test.context.ContextConfiguration;
import org.springframework.test.context.junit4.SpringJUnit4ClassRunner;

import lombok.Setter;
import lombok.extern.log4j.Log4j;

// Spring이 돌아가야니까 작성
@RunWith(SpringJUnit4ClassRunner.class)
// DataSource를 직접 만드는게 아니라 bean을 주입받아서 사용하므로 root-context.xml를 참고해야 하므로 이것을 작성해준다.
@ContextConfiguration("file:src/main/webapp/WEB-INF/spring/root-context.xml")
@Log4j
public class DataSourceTests {
	@Setter(onMethod_ = @Autowired)
	private DataSource dataSource;

	@Test
	public void connectionTest() {
		try(Connection conn = dataSource.getConnection()) {
			log.info(conn);
		} catch(Exception e) {
			fail(e.getMessage());
		}
	}
}

최선을 다하자!!