JPA로 이전에 만들었던 VO와 Mapper를 구현해보도록 하겠습니다.
application.yml 수정
jpa.hibernate.ddl-auto를 update로 합니다. 이렇게 하면 기존에 테이블이 있다면 내용을 업데이트 하고 없다면 테이블을 생성합니다. jpa.show-sql을true로 하면 로그에서 SQL문을 확인할 수 있습니다.
spring:
  datasource:
    driver-class-name: com.mysql.cj.jdbc.Driver
    url: "jdbc:mysql://localhost:3306/springboot"
    username: "spring"
    password: 1111
  jpa:
    hibernate:
      ddl-auto: update
    show-sql: true
build.gradle 수정
dependencies 안에 org.springframework.boot:spring-boot-starter-test를 아래와 같이 수정하고 SpringBoot-API의 의존성을 추가합니다. SpringBoot-Domain에 구현할 코드들을 의존하므로 추가해줍니다.
    testImplementation('org.springframework.boot:spring-boot-starter-test') {
                exclude group: 'org.junit.vintage', module: 'junit-vintage-engine'
    }
  }
}

project(":SpringBoot-API") {
    dependencies {
        implementation project(path: ':SpringBoot-Domain', configuration: 'default')

    }
}
domain 구현
User
유저의 정보를 저장할 User클래스를 구현합니다.
@Table
@Entity
@NoArgsConstructor
@AllArgsConstructor
@Data
@Builder
public class User implements Serializable {
    @Id
    @GeneratedValue(strategy = GenerationType.IDENTITY)
    private Long id;

    @Column
    private String name;

    @Column
    @JsonIgnore
    private String password;

    @Column
    private String email;

}@Id는 이 필드가 primary key라는 것을 뜻합니다.
@GeneratedValue는 Id를 어떻게 생성할 것인지 정합니다. strategy를 GenerationType.IDENTITY로 하면 MySQL에서 설정한 대로 생성됩니다.
@Column은 DB에서의 column을 의미합니다.
@JsonIgnore은 JSON형식으로 반환할 때 반환하지 않는다는 의미입니다. User에서는 비밀번호를 반환할 필요가 없으므로 적용해줍니다.
@Entity는 이 클래스가 Entity라는 것을 의미합니다.
@Table은 이 클래스가 DB에 테이블로 저장된다는 의미입니다. name을 지정하면 다른 이름으로도 저장할 수 있습니다.
File
파일의 정보를 저장할 File클래스를 생성합니다.
@Table
@Entity
@Data
@Builder
@AllArgsConstructor
@NoArgsConstructor
public class File implements Serializable {
    @Id
    @GeneratedValue(strategy = GenerationType.IDENTITY)
    private Long id;

    @Column
    private String name;

    @Column
    private String uuid;

    @Column
    private String upload_path;

    @ManyToOne(fetch = FetchType.LAZY)
    @JsonIgnore
    private Post post;
}@ManyToOne은 이 클래스가 다른 테이블과 외래키로 연결되어 있고 그 관계가 N:1 관계라는 것을 의미합니다. fetch = FetchType.LAZY로 두면 이 클래스에 Post 정보를 다 불러오는 것이 아니라 가짜 객체를 넣어놨다가 필요할 때 정보를 불러오는 속성입니다. 따라서 속도적으로 FetchType.EAGER보다 빠릅니다.
Post
글의 정보를 저장하는 Post클래스를 생성합니다.
@Entity
@Table
@NoArgsConstructor
@AllArgsConstructor
@Builder
@Data
public class Post implements Serializable {
    @Id
    @GeneratedValue(strategy = GenerationType.IDENTITY)
    private Long id;

    @Column
    private String title;

    @Column
    private String content;

    @OneToOne(fetch =  FetchType.EAGER)
    @JoinColumn("user_id")
    private User user;

    @OneToMany(mappedBy = "id")
    private List<File> fileList = new ArrayList<>();

}@OneToOne은 외래키로 다른 테이블과 연결되어 있고 그 관계가 1:1 관계라는 것을 의미합니다.
@JoinColumn은 외래키를 의미합니다. name을 주지 않으면 자동적으로 생성해주고 name을 주면 그 이름으로 column에 매핑됩니다.
@OneToMany는 외래키로 다른 테이블과 연결되어 있고 그 관계가 1:N 관계라는 것을 의미합니다. mappedBy는 외래키의 이름을 의미합니다. Post는 File의 id와 연결되어 있으므로 id라 입력한 것입니다. 그리고 이 외래키는 File에서만 업데이트 됩니다.
EX) 외래키 지정
post.fileList.add(file) - X
file.setPost(post) - O
Repository 구현
JpaRepository
다음과 같이 인터페이스가 JpaRepository가 상속받으면 기본적인 메소드들을 사용할 수 있습니다. 제네릭에서 앞은 저장할 객체 뒤는 키의 타입을 의미합니다. 이 클래스는 메소드 명에 따라서 자동으로 각 DB에 맞는(MySQL, MongoDB, Oracle 등등..) 명령문을 생성해줍니다. 예를 들면 save메소드는 insert문을 자동으로 생성하고 findById메소드는 id로 select를 하는 SQL문을 자동으로 생성합니다. PostRepository, UserRepository, FileRepository을 각각 생성해줍니다.
public interface UserRepository extends JpaRepository<User,Long> {
}
build.gradle 수정
의존하는 프로젝트의 build.gradle에 다음 코드를 넣어야 성공적으로 빌드할 수 있습니다. SpringBoot-Domain모듈의 build.gradle에 다음 코드를 추가합니다.
jar{
    enabled(true)
}
BoardApplication 수정
@SpringBootApplication
@EnableJpaRepositories("ac.kr.smu.repository")
@EntityScan("ac.kr.smu.domain")
public class BoardApplication {
    public static void main(String[] args) {
        SpringApplication.run(BoardApplication.class,args);
    }
}@EnableJpaRepositories는 JpaRepository를 등록하는 역할입니다.
@EntityScan은 Entity 클래스들의 위치를 알려줘 자동 설정을 하는 역할입니다.
SecurityConfig 생성
편의를 위해 모든 사용자가 접근을 가능하게 생성합니다.
@Configuration
@EnableWebSecurity
public class SecurityConfig extends WebSecurityConfigurerAdapter {
    @Override
    protected void configure(HttpSecurity http) throws Exception {
        http.httpBasic().and().authorizeRequests().anyRequest().permitAll();
    }
}
PostController 생성
이번 시리즈는 조금 더 Restful하게 맞춰볼 예정입니다. 따라서 @RestController로 생성합니다. 간단하게 모든 글과 Http 200번 코드를 반환하는 코드를 작성합니다.
@RestController
@RequiredArgsConstructor
@RequestMapping("/post")
public class PostController {
    private final PostRepository postRepository;

    @GetMapping
    public ResponseEntity<?> getPost(){
        return ResponseEntity.ok(postRepository.findAll());
    }
}
더미 데이터 삽입
test모듈의 java폴더에 생성합니다. 그 후 test메소드를 실행시켜 더미 데이터를 삽입합니다.
@SpringBootTest(classes = BoardApplication.class)
public class BoardTest {
    @Autowired
    private PostRepository postRepository;
    @Autowired
    private UserRepository userRepository;
    @Autowired
    private FileRepository fileRepository;

    @Test
    public void test(){
        System.out.println("test");
        User user = User.builder().name("test").password("test").email("test").build();
        Post post = Post.builder().title("test").content("test").user(user).build();
        File file = File.builder().name("test").uuid(UUID.randomUUID().toString()).upload_path("/").post(post).build();

        userRepository.save(user);
        postRepository.save(post);
        fileRepository.save(file);
    }

}@SpringBootTest는 이 클래스가 Spring Boot의 test클래스라는 것을 의미하며 classes에 입력된 클래스의 설정대로 실행이됩니다.
@Test는 이 메소드가 테스트를 할 메소드라는 것을 의미합니다.
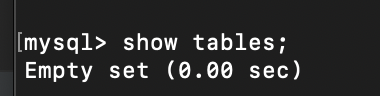
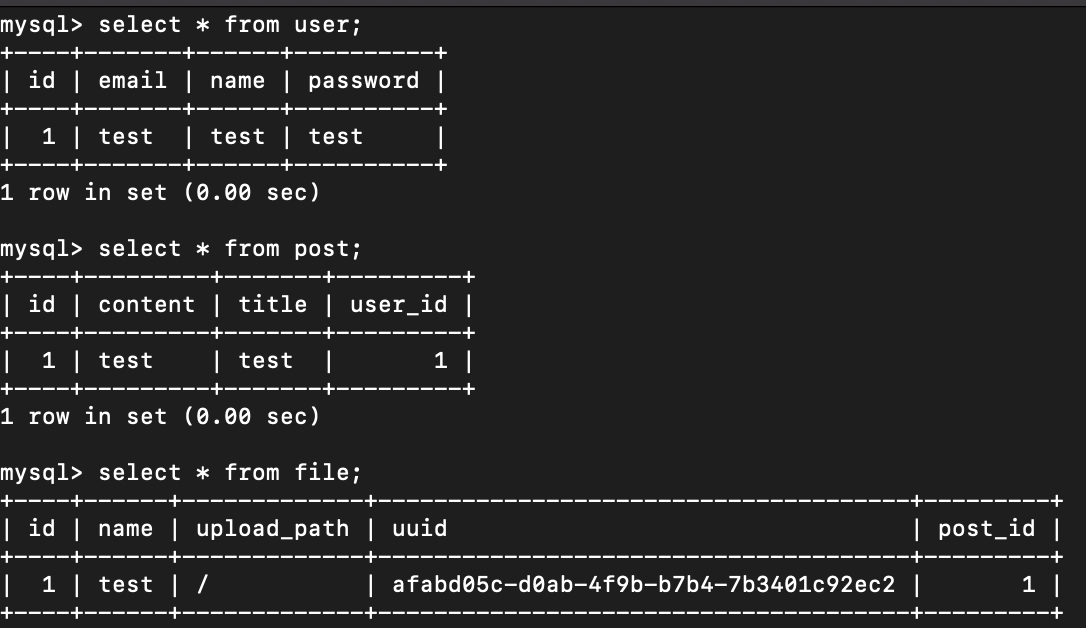
다음과 같이 자동으로 테이블을 만드는 것을 확인할 수 있습니다.

SQL또한 자동으로 만들어줍니다.

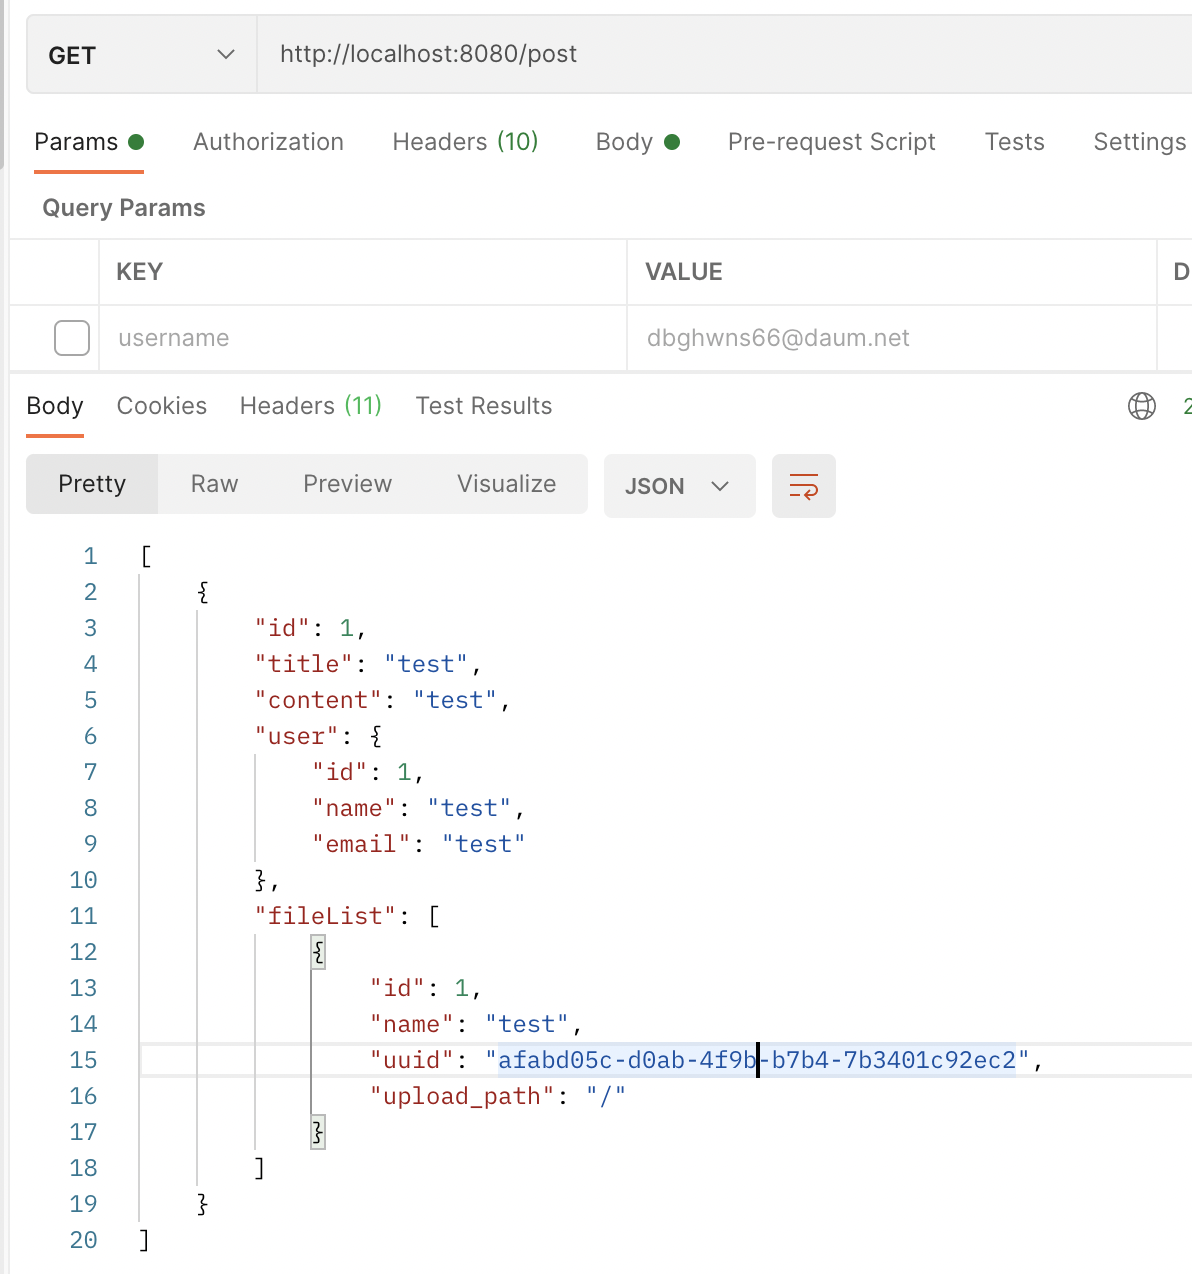
테스트
다음과 같이 @JsonIgnore를 붙인 부분은 반환을 하지 않는다는 것을 확인할 수 있습니다.
테이블과 테이블이 연결되어 있을 때 @JsonIgore를 해주지 않는다면 무한의 데이터를 반환합니다. File에서 Post를 반환해보겠습니다.
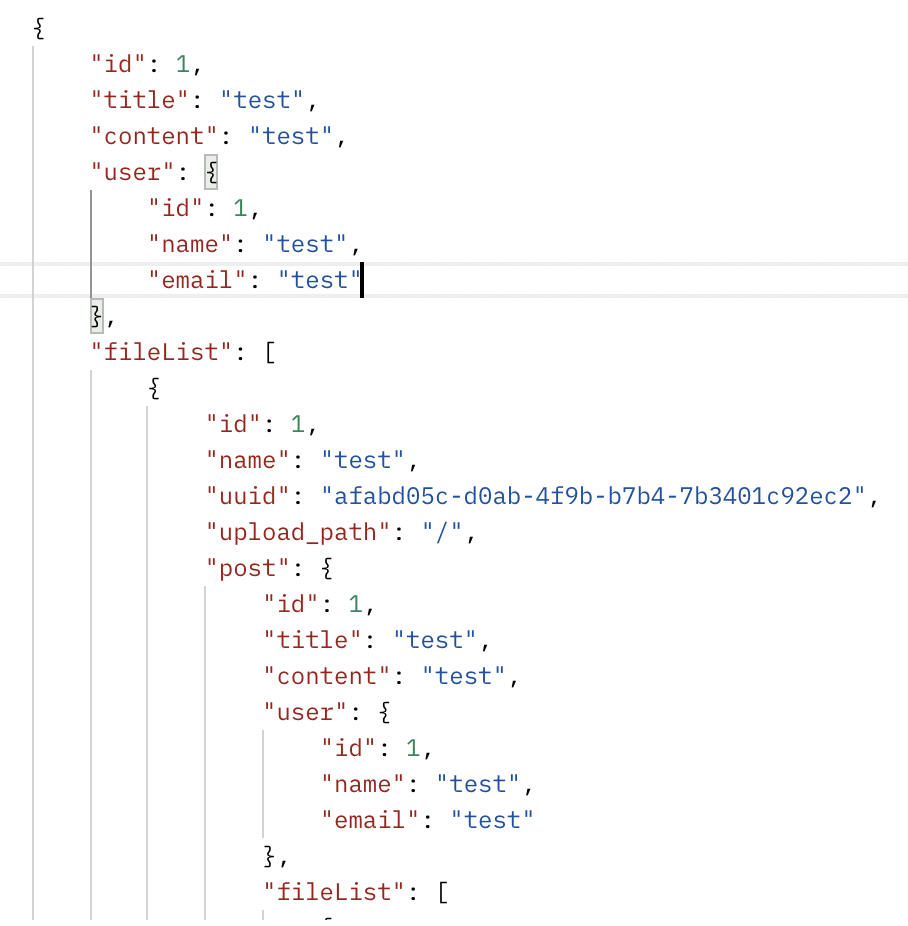
다음과 같이 fileList안에 있는 file에서 post를 반환하고 또 그 안에도 fileList가 있으며 그 안에 있는 file에서 post를 반환을 하는 과정을 무한으로 반복하는 것을 확인할 수 있습니다.