🔑Spring Security를 추가해보자!
Spring Framework에는 보안을 강화하는 Spring Security가 있습니다. 우리가 전에는 직접 로그인을 구현했지만 이번엔 Spring Security를 사용해 구현할 것 입니다.
pom.xml 수정
다음 라이브러리를 추가하고 Spring의 버전을 5.2.13.RELEASE로 낮춥니다.
<properties>
        <java-version>1.8</java-version>
        <org.springframework-version>5.2.13.RELEASE</org.springframework-version>
        <org.springframework.security-version>5.4.5</org.springframework.security-version>
        <org.aspectj-version>1.9.4</org.aspectj-version>
        <org.slf4j-version>1.7.29</org.slf4j-version>
</properties>

<dependencies>
   <!-- https://mvnrepository.com/artifact/org.springframework.security/spring-security-core -->
  <dependency>
      <groupId>org.springframework.security</groupId>
      <artifactId>spring-security-core</artifactId>
      <version>${org.springframework.security-version}</version>
  </dependency>
  <!-- https://mvnrepository.com/artifact/org.springframework.security/spring-security-core -->
  <dependency>
      <groupId>org.springframework.security</groupId>
      <artifactId>spring-security-taglibs</artifactId>
      <version>${org.springframework.security-version}</version>
  </dependency>
  <!-- https://mvnrepository.com/artifact/org.springframework.security/spring-security-core -->
  <dependency>
      <groupId>org.springframework.security</groupId>
      <artifactId>spring-security-web</artifactId>
      <version>${org.springframework.security-version}</version>
  </dependency>

  <!-- https://mvnrepository.com/artifact/org.springframework.security/spring-security-config -->
  <dependency>
      <groupId>org.springframework.security</groupId>
      <artifactId>spring-security-config</artifactId>
      <version>5.4.5</version>
  </dependency>
Spring Security이 5.4.5버전 기준 Spring Framework 5.2.13.RELEASE에 의존하고 있어 버전을 내려주어야합니다.
SecurityConfig 추가
Spring Security 관련 설정을 하는 SecurityConfig 클래스를 작성합니다. 코드의 내용을 설명하면 form으로 로그인을 수행하고 그 페이지는 /로 요청, 처리는 /login으로 처리를 하고 성공하면 /board로 이동합니다. 로그아웃은 성공하면 세션과 쿠키를 모두 지웁니다. 또한 요청은 인증되있어야 하며 아래에 적힌 경로는 모든 요청을 허용하고 남은 요청은 모두 인증되어 있어야합니다. 마지막으로 csrf 토큰을 비활성화합니다.
@Configuration
@EnableWebSecurity //security 자동설정 허용
@EnableGlobalMethodSecurity(securedEnabled = true, prePostEnabled = true)//Security 관련 Annotation 허용
public class SecurityConfig extends WebSecurityConfigurerAdapter {

    @Override
    protected void configure(HttpSecurity http) throws Exception {
        http.httpBasic().and().formLogin().loginPage("/").loginProcessingUrl("/login").defaultSuccessUrl("/board",true)
                .and().logout().deleteCookies("JSESSIONID").invalidateHttpSession(true)
                .and().authorizeRequests()
                .antMatchers("/vendor/**","/css/**","/js/**","/scss/**","/img/**","/","/user").permitAll()
                .anyRequest().authenticated().and().csrf().disable();
    }

    @Override
    protected void configure(AuthenticationManagerBuilder auth) throws Exception {
	/*
		테스트를 위해 username user와 비밀번호 1111 권한은 USER권한을 가진 user를 만듭니다.
		{noop}은 비밀번호를 인코딩하지 않았다는 의미입니다.
		Spring Security에서 설정을 하지 않는다면 우리가 표현하는 id는 username이고 비밀번호는 password입니다.
	*/
       auth.inMemoryAuthentication().withUser("user").password("{noop}1111").roles("USER");
    }
}
csrf 토큰이란 csrf 공격을 막기 위해 서버에서 발행하는 view가 맞는지 확인하는 토큰입니다. 이걸 활성화하면 우리는 모든 POST 요청에 토큰을 포함하여 보내야 합니다.
ServletConfig 클래스 수정
이제 LoginInterceptor가 필요 없으므로 주석처리합니다.
@Override
public void addInterceptors(InterceptorRegistry registry) {
        WebMvcConfigurer.super.addInterceptors(registry);
//        registry.addInterceptor(new LoginInterceptor())
//                .addPathPatterns("/board","/post/**","/*/file","/*/file/**");
        registry.addInterceptor(new PostInterceptor()).addPathPatterns("/post/**");
WebConfig 클래스 수정
설정에 SecurityConfig 클래스를 추가합니다. 그리고 모든 요청이 Spring Security의 필터를 거쳐서 들어오도록 합니다.
public class WebConfig implements WebApplicationInitializer {
    public final static String UPLOAD_PATH = "/Users/youhojoon/Desktop/CS/upload";
    private final long MAX_FILE_SIZE = 20971520; //파일 최대 크기 1024 * 1024 * 20 = 20MB
    private final long MAX_REQUEST_SIZE = 41943040; // 요청에서 받을 수 있는 최대 크기 40MB
    private final int FILE_SIZE_THRESHOLD = 20971520; // 파일이 디스크에 기록되는 크기 제한 20MB

    @Override
    public void onStartup(ServletContext servletContext) throws ServletException {
    	/*
        	빈을 등록하는 xml에서의 root-context.xml 설정
        */
        AnnotationConfigWebApplicationContext rootContext = new AnnotationConfigWebApplicationContext();
        rootContext.register(RootConfig.class, SecurityConfig.class);
        servletContext.addListener(new ContextLoaderListener(rootContext));

        /*
       	서블렛을 설정하는 xml설정에서의 servlet-context.xml 설정
       */
        AnnotationConfigWebApplicationContext applicationContext = new AnnotationConfigWebApplicationContext();
        applicationContext.register(ServletConfig.class);
        ServletRegistration.Dynamic dispatcher = servletContext.addServlet("dispatcher",
                new DispatcherServlet(applicationContext));
        dispatcher.setLoadOnStartup(1);
        dispatcher.addMapping("/");

        MultipartConfigElement multipartConfigElement = new MultipartConfigElement(UPLOAD_PATH, MAX_FILE_SIZE, MAX_REQUEST_SIZE, FILE_SIZE_THRESHOLD);
        dispatcher.setMultipartConfig(multipartConfigElement);


        /*        	인코딩 설정, 해주지 않으면 한글이 깨진다
         */
        FilterRegistration.Dynamic filter = servletContext.addFilter("CHARACTER_ENCODING_FILTER",
                CharacterEncodingFilter.class);
        filter.setInitParameter("encoding", "UTF-8");
        filter.setInitParameter("forceEncoding", "true");
        filter.addMappingForUrlPatterns(null, false, "/*"); // /경로로 들어오는 모든 요청에 필터를 적용

	/*
		이 필터의 이름은 반드시 springSecurityFilterChain이어야 합니다.
	*/
        FilterRegistration.Dynamic securityFilter = servletContext.addFilter("springSecurityFilterChain",
                DelegatingFilterProxy.class);
        securityFilter.addMappingForUrlPatterns(null, false, "/*");

    }
LoginController 수정
로그인 관련 기능은 Spring Security가 구현해주므로 로그인 페이지를 반환하도록 수정하고 나머지는 모두 주석처리합니다.
@Controller
@RequestMapping("/")
public class LoginController {

    @GetMapping
    public String getLogin(){
        return "login";
    }

//    @PostMapping
//    public ResponseEntity<?> postLogin(@RequestBody UserVO userVO, HttpSession session){
//        Map<String,Boolean> body = new HashMap<>();
//        boolean result = userService.checkPassword(userVO.getEmail(),userVO.getPassword());
//
//        body.put("success",result);
//        log.info(result+"");
//        if(result) {
//            session.setMaxInactiveInterval(60*30);//초 단위로 세션의 만료시간 설정
//            session.setAttribute("userSession",userVO.getEmail());
//        }
//
//        return ResponseEntity.ok(body);
//
//    }
//
//    @PostMapping("/logout")
//    public void logout(HttpSession session){
//        session.invalidate();
//    }
}
login.jsp 수정
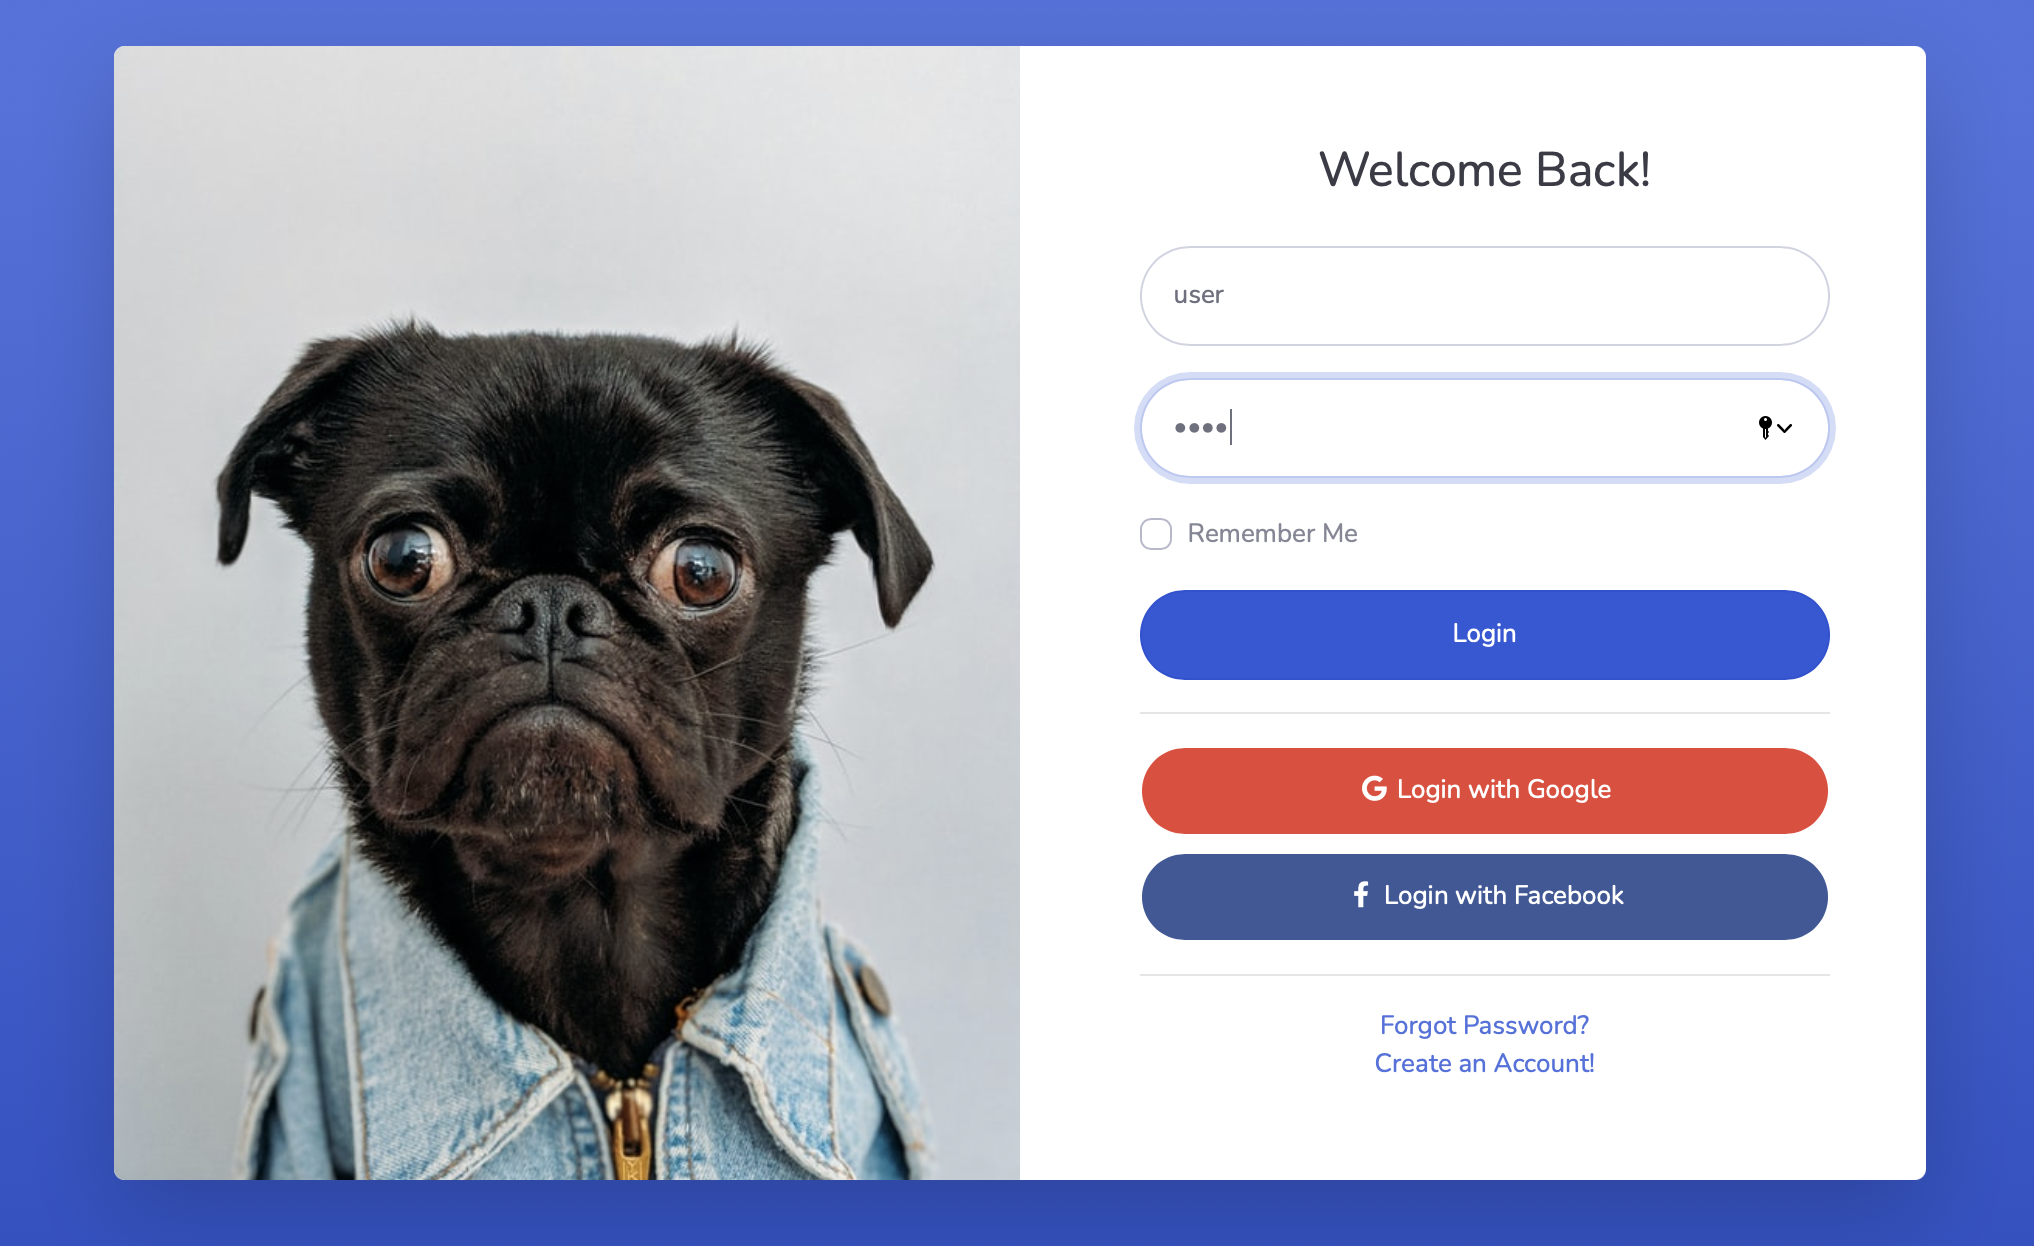
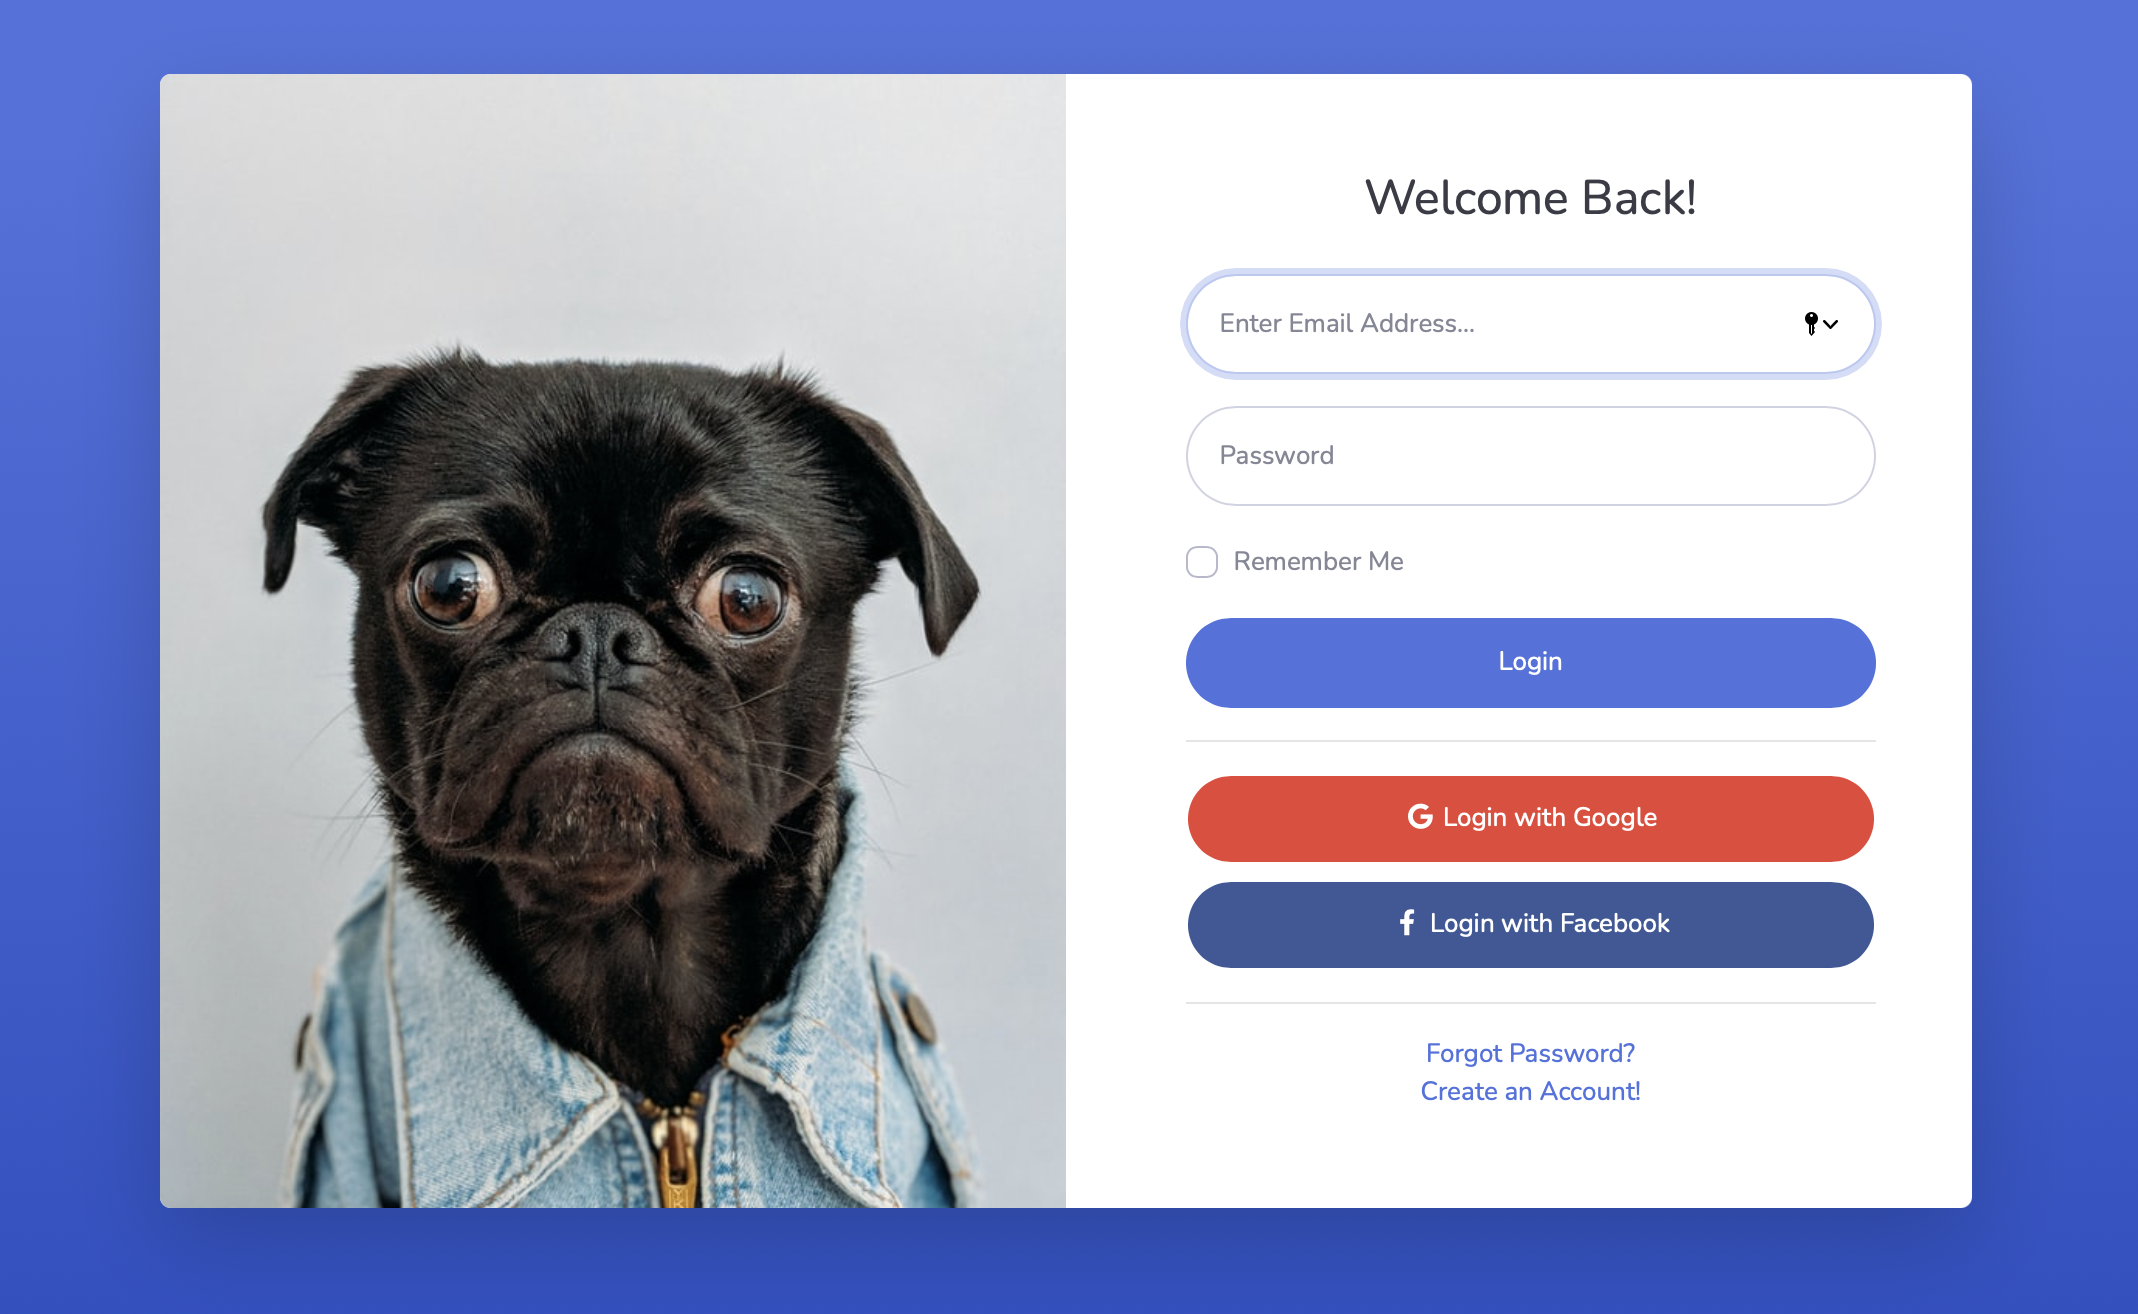
form을 아래와 같이 수정하고 스크립트를 모두 주석처리합니다. 여기서 email이 username이 된 이유는 위에서 말했다싶이 우리가 일반적으로 생각하는 id가 Spring Security에서는 username이기 때문입니다.
<form class="user" method="POST" action="/login">
	<div class="form-group">
		<input type="text" class="form-control form-control-user" id="username"name="username" aria-describedby="emailHelp" placeholder="Enter Email Address...">
	</div>
	<div class="form-group">
		<input type="password" class="form-control form-control-user" id="password" name="password" placeholder="Password">
	</div>
	<div class="form-group">
		<div class="custom-control custom-checkbox small">
        		<input type="checkbox" class="custom-control-input" id="customCheck">
			<label class="custom-control-label" for="customCheck">Remember Me</label>
		</div>
	</div>
	<button type="submit" class="btn btn-primary btn-user btn-block">
    		Login
	</button>
	<hr>
	<a href="index.html" class="btn btn-google btn-user btn-block">
		<i class="fab fa-google fa-fw"></i> Login with Google
	</a>
	<a href="index.html" class="btn btn-facebook btn-user btn-block">
		<i class="fab fa-facebook-f fa-fw"></i> Login with Facebook
	</a>
</form><script>
// $("#login").click(function (){
// var userVO = new Object()
// userVO.email = $("[name='email']").val()
// userVO.password = $("[name='password']").val()
//
// $.ajax({
// type:'POST',
// url:'/',
// data:JSON.stringify(userVO),
// contentType:'application/json; charset=UTF-8',
// success:function (data){
// if(data.success)
// location.href='/board'
// else
// alert('email 혹은 비밀번호를 확인해주세요!')
// }
// })
// })
</script>테스트
아래 사진처럼 Spring Security 필터가 적용되는 것을 확인할 수 있습니다.