방대한 기능 없이 함수 작동에 걸리는 시간만 로깅해주는 데코레이터만 만들어 이후 프로젝트에 사용하고자 한다.
- 거시적으로 cron 기반 작업들의 동작 타이머를 보기 위해 datetime 형태로 읽을 수 있는 로거
- 나노세컨단위로 높은 해상도를 기반으로 함수의 성능을 체크할 수 있는 로거
- 가볍고 빠른 사용을 위해 데코레이터로 작성
- 이후 프로젝트에서도 쉽게 import 하여 사용할 수 있도록 PyPi에 업로드
구현단계
로거 클래스 구현
class Logger(object):
    logging.basicConfig(
        format='%(message)s',
        level=logging.INFO
    )

    def log(self, *args):
        logging.info(args[0])
        return
메시지를 로깅하는 로거 클래스를 만들어준다.
👉 단순히 작동시간을 나타내는 로거니까 로깅 레밸은 INFO가 적당하다.
👉 datetime기반 로거와, nano_sec기반 로거 두개가 필요하기 때문에
부모클래스에서는 일단 메시지 출력 메서드만 정의해둔다.
🤔 log 메서드의 인자로 *args를 받는 이유는 자식 클래스에서 super() 메서드 사용시 경고 메시지를 지우기 위함인데, 결코 추천하는 방법은 아니다.
(급하게 짜느라..)
class PerformanceLoggerDateTime(Logger):
    @classmethod
    def reset_timer(cls):
        cls.__start_time = datetime.datetime.now()

    def log(self, func_name, msg):
        message = f"{func_name} : {(datetime.datetime.now() - self.__start_time)} {msg}"
        super().log(message)


class PerformanceLoggerNanoSec(Logger):
    @classmethod
    def reset_timer(cls):
        cls.__start_time = time.perf_counter_ns()

    def log(self, func_name, msg):
        message = f"{func_name} : {(time.perf_counter_ns() - self.__start_time)} {msg}"
        super().log(message)
datetime 형태로 로그를 출력하는 PerformanceLoggerDateTime 클래스와 nanosec 형태로 로그를 출력하는 PerformanceLoggerNanoSec 클래스를 정의한다.
time 모듈의 perf_counter_ns() 에 대한 설명은 아래의 공식문서를 참고하자.
https://docs.python.org/ko/3/library/time.html
메시지로 아래 3개의 인자를 출력한다.
1️⃣ "함수 이름",
2️⃣ "로거 호출 당시의 시간 - 로거가 초기화된 시간" (즉, 함수의 작업시간),
3️⃣ "메시지"
데코레이터 만들기
이제 로거 클래스를 다 정의하였으니, 이를 가지고 데코레이터를 만들어보자.
'''
데코레이터에 파라미터를 받을 수 있도록 데코레이터를 한번 더 랩핑해준다.
'''
def parametrized(dec):
    def layer(*args, **kwargs):
        def repl(f):
            return dec(f, *args, **kwargs)
        return repl
    return layer

'''
데코레이터를 정의해준다.

"time_format"이라는 인자를 받아야하기 때문에,
@parametrized라는 데코레이터를 달아줘야한다.

* 일반적인 데코레이터는 인자를 받을 수 없다.
'''
@parametrized
def perf_logger(func, time_format):
    def decorated_func(*args, **kwargs):
        if time_format == "datetime":
            log = PerformanceLoggerDateTime()
            log.reset_timer()
            func(*args, **kwargs)
            name = func.__name__
            log.log(f"Run Func \'{name}\'", "time logged")
            return
        elif time_format == "ns":
            log = PerformanceLoggerNanoSec()
            log.reset_timer()
            func(*args, **kwargs)
            name = func.__name__
            log.log(f"Run Func \'{name}\'", "time logged")
            return
    return decorated_func
아래의 순서로 작동하는 데코레이터이다.
1️⃣ 타임 포맷에 따라 다른 로거 인스턴스를 생성한다.
2️⃣ 그리고 시작 시간을 초기화한다.
3️⃣ 함수를 실행시킨다.
4️⃣ "Run Func __함수명__", 현재 시간에서 시작시간을 뺀 값, "time logged" 라는 메시지를 로깅한다.
5️⃣ 명시적으로 True 리턴
끝이다.
linear_search / binary_search로 테스트를 해보자.
def linear_search(target, data):
    i = 0
    while i < len(data):
        if data[i] == target:
            return i
        i += 1
    return "Fail"

def binary_search(target, data):
    start = 0
    end = len(data) - 1
    while start <= end:
        mid = (start + end) // 2

        if data[mid] == target:
            return mid  # 함수를 끝내버린다.
        elif data[mid] < target:
            start = mid + 1
        else:
            end = mid - 1
    return 'Fail'
우선 linear_search 함수와, binary_search 함수를 만들었다.
linear_search는 0부터 순서대로 인덱싱하여 내가 원하는 숫자를 찾는다.
binary_search는 가운데 값부터 검색값의 존재 유무를 체크해가며 내가 원하는 숫자를 찾는다.
👉 따라서 binary_search를 사용하려면 sorted_list를 활용해야한다.
----
알고리즘 관련 포스팅이 아니기 때문에 자세한 설명은 생략한다.
테스트 코드는 다음과 같다.
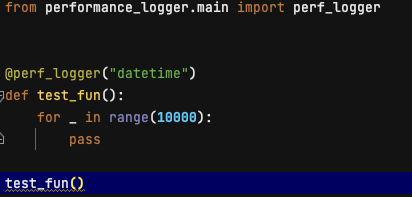
@perf_logger("datetime")
def test_fun():
    print(linear_search(999, [random.randrange(1000) for _ in range(10_000_000)]))

@perf_logger("datetime")
def test_fun2():
    print(binary_search(999, [i for i in range(10_000_000)]))
test_fun은 0부터 999까지의 숫자 10,000,000개가 랜덤하게 채워져있는 리스트이다.
수의 분포가 랜덤하기 때문에, 999가 있는지 없는지를 찾으려면 첫번째 값부터 10,000,000번째 값까지 순서대로 올라가며 찾을 수 밖에 없다.
->
999가 10,000,000번째 인덱스에 있다면 10,000,000번 검색해야한다.비효율적이다.
test_fun2는 0부터 9,999,999까지의 숫자 총 10,000,000개가 순서대로 채워져있는 리스트이다.
수의 분포가 정렬되어있다. 내가 원하는 수를 찾기 위해서 "가운데(5,000,000)일때 내가 찾는게 작거나 큰지"를 쪼개가며 검색한다면,
999라는 숫자를 찾는 과정은 다음과 같다.5,000,000(👇) -> 2,500,000(👇) -> 1,250,000(👇) ->
625,000(👇) -> 312,500(👇) -> 156,250(👇) ->
78,125(👇) -> 39,062(👇) -> 19,531(👇) ->
9,765(👇) -> 4,882(👇) -> 2,441(👇) ->
1,220(👇) -> 610(👆) -> 915(👆) ....
약 20번 정도만 검색하면 999를 검색해낼 수 있을만큼, 효율적이다
내가 만든 데코레이터의 결과가 이러한 효율성을 제데로 체크해낼 수 있을지 확인해보자
test_fun()
>>>
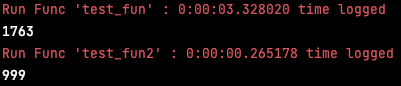
Run Func 'test_fun' : 0:00:03.328020 time logged
1763linear_search 기법을 사용한 test_fun은 999라는 숫자를 찾아내는데 3초의 시간이 걸렸다.
999라는 숫자는 리스트의 1763번째 인덱스에 배정되었나보다.
test_fun2()
>>>
Run Func 'test_fun2' : 0:00:00.265178 time logged
999
binary_search를 사용한 test_fun2는 999라는 숫자를 찾아내는데 0.2초의 시간이 걸렸다.
999라는 숫자는 너무나 당연하기 리스트의 999번째 인덱스에 배정되어있었다.
PyPi 배포하기
배포 사전작업
제데로 작동하는 것을 확인했으니 이제 패키지로 만들어 PyPi에 올려보자.
pip install setuptools wheel twinePyPi에 올리기 위해 패키지 빌드를 도울 패키지들을 설치한다.
from setuptools import setup, find_packages

setup(
    name             = 'performance_logger',
    version          = '1.0.0',
    description      = 'check performance of the func using decorator',
    author           = 'Sean Kim',
    author_email     = 'ddhyun93@gmail.com',
    url              = '',
    download_url     = '',
    install_requires = None,
	include_package_data=True,
	packages=find_packages(),
    keywords         = ['performance_logger'],
    python_requires  = '>=3',
    zip_safe=False,
    classifiers      = [
        "Programming Language :: Python :: 3",
        "License :: OSI Approved :: MIT License",
        "Operating System :: OS Independent"
    ]
)
setup.py를 작성한다.
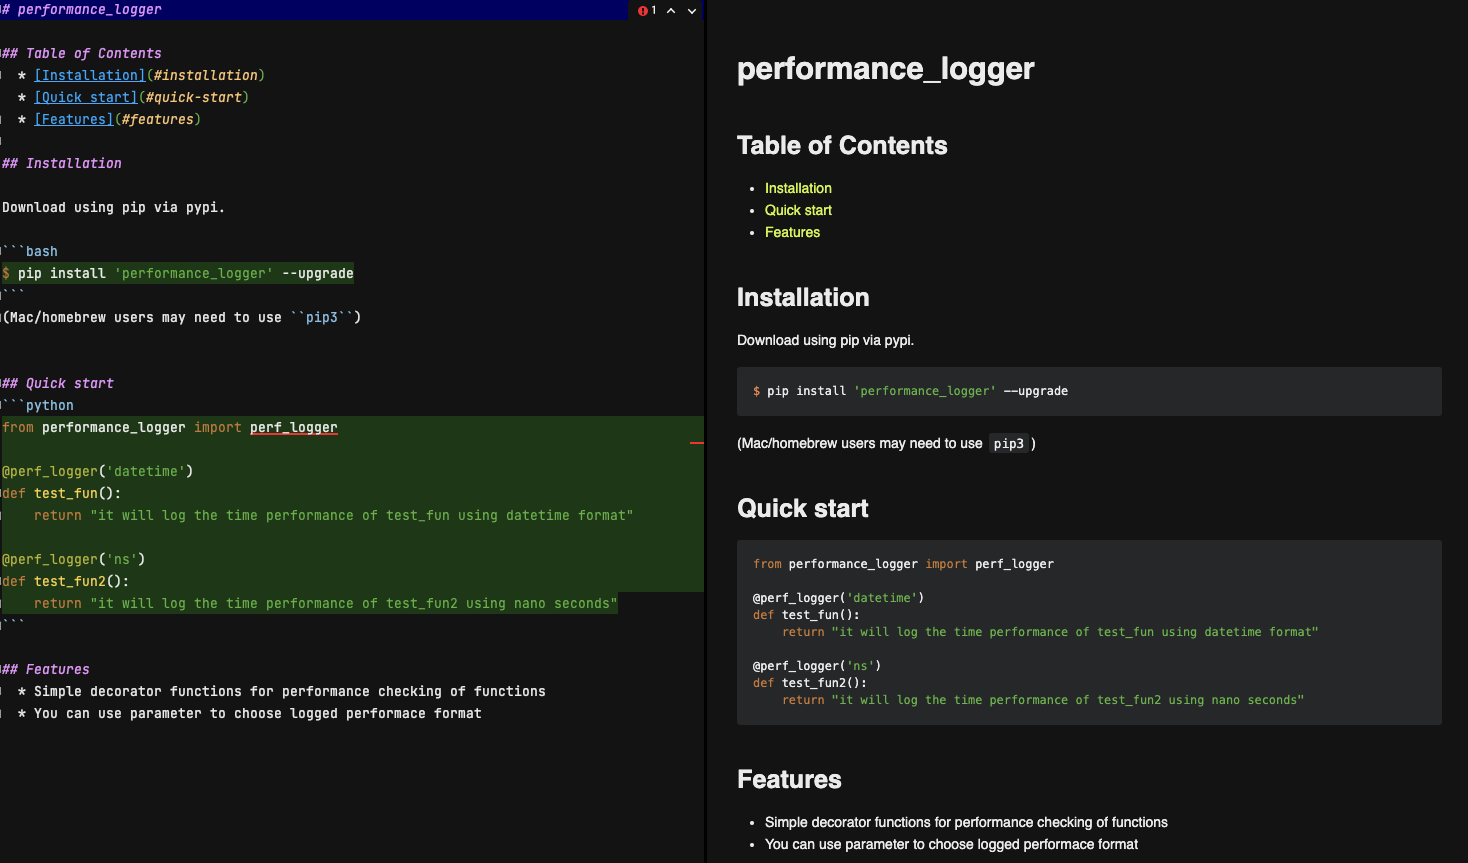 README.md 를 작성한다.
Copyright (c) 2021 Sean Kim

Permission is hereby granted, free of charge, to any person obtaining a copy of
this software and associated documentation files (the "Software"), to deal in
the Software without restriction, including without limitation the rights to
use, copy, modify, merge, publish, distribute, sub-license, and/or sell copies
of the Software, and to permit persons to whom the Software is furnished to do
so, subject to the following conditions:

The above copyright notice, and every other copyright notice found in this
software, and all the attributions in every file, and this permission notice
shall be included in all copies or substantial portions of the Software.

THE SOFTWARE IS PROVIDED "AS IS", WITHOUT WARRANTY OF ANY KIND, EXPRESS OR
IMPLIED, INCLUDING BUT NOT LIMITED TO THE WARRANTIES OF MERCHANTABILITY,
FITNESS FOR A PARTICULAR PURPOSE AND NON-INFRINGEMENT. IN NO EVENT SHALL THE
AUTHORS OR COPYRIGHT HOLDERS BE LIABLE FOR ANY CLAIM, DAMAGES OR OTHER
LIABILITY, WHETHER IN AN ACTION OF CONTRACT, TORT OR OTHERWISE, ARISING FROM,
OUT OF OR IN CONNECTION WITH THE SOFTWARE OR THE USE OR OTHER DEALINGS IN THE
SOFTWARE.
라이센스를 명기한다 (MIT 라이센스 예시)
[metadata]
description-file = README.md
setup.cfg 를 작성한다.
include LICENSE
include README.md
include requirements.txt
MANIFEST.in 파일을 작성하여 소스코드 외에 패키지에 함께 포함시킬 파일들을 명기해준다.
배포파일 빌드
python setup.py sdist bdist_wheel위에서 작성한 setup.py 파일을 기반으로 PyPi에 업로드할 수 있는 형태로 내 패키지들을 빌드한다.
배포파일 업로드
python -m twine upload dist/* twine 라이브러리를 통해 CLI 환경에서 PyPi에 바로 업로드 할 수 있다.
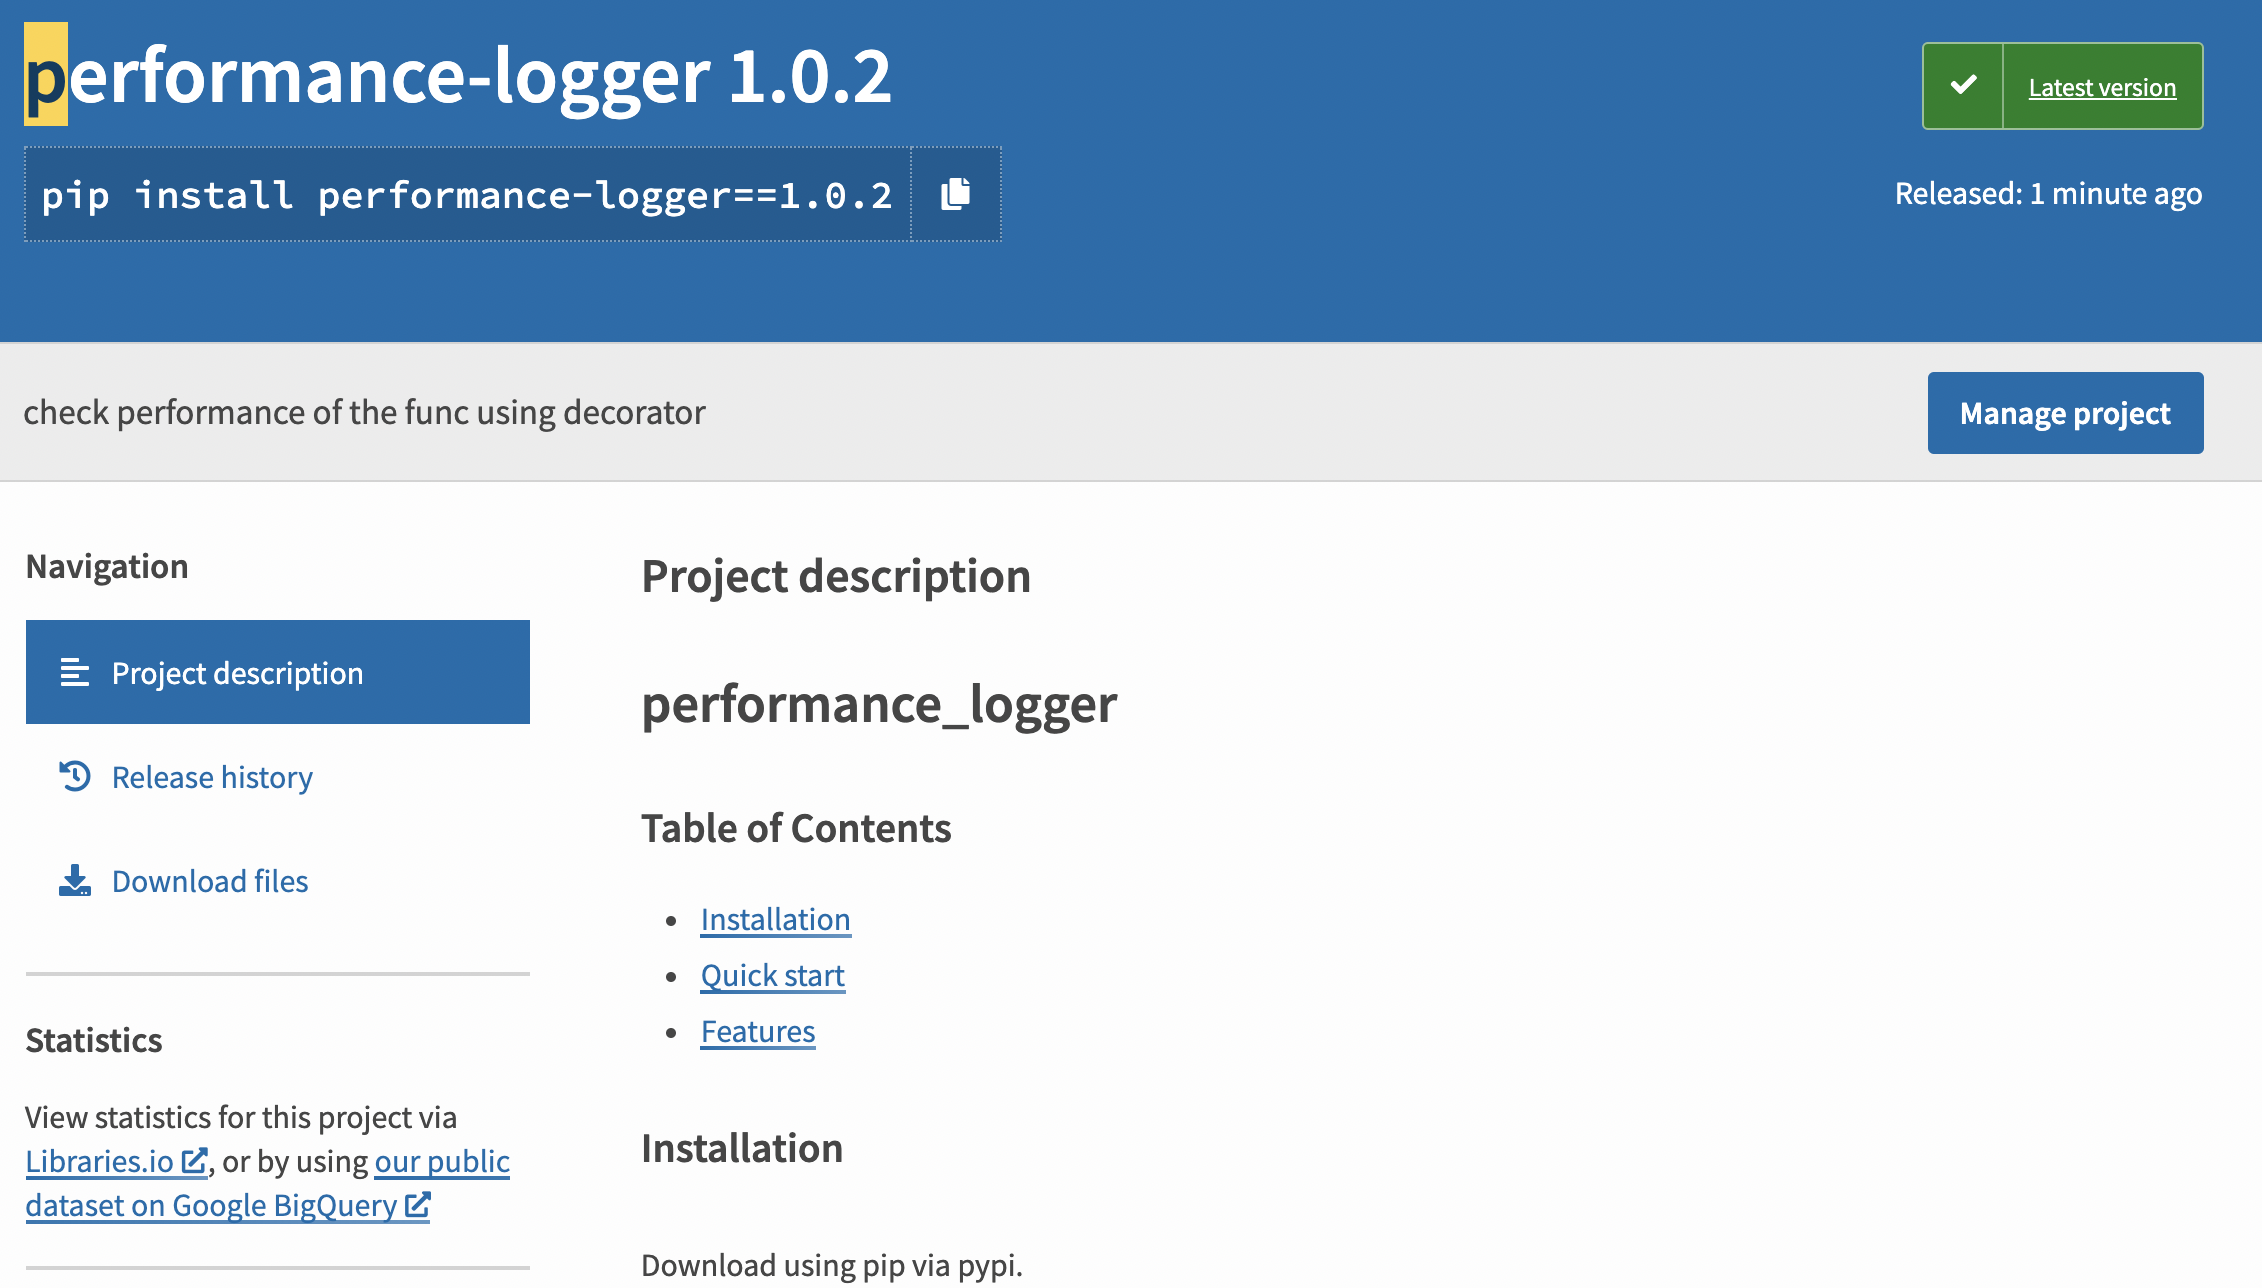 제데로 배포가 된 것을 확인할 수 있다.
테스트 하기
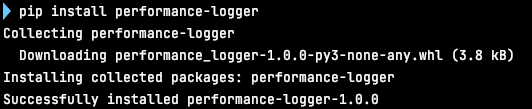 pip install 명령어로 내가 배포한 패키지를 설치해보았다.
 잘 작동한다.
마치며
내가 만든 모듈들을 패키지화 하여 PyPi에 배포해보았다.
라이센스나, README 등 신경쓸 것이 많았다.
하지만 여러 프로젝트에서의 재활용성을 고려한다면, 패키지 단위로 자주쓰는 내 함수들을 관리하는 것도 나쁘지 않을 것 같다.
그럼 20000