소개글
이전 포스팅 에서 Xcoding with Alfian 이라는 유튜브 채널을 보며 캐릭터들이 컬렉션뷰로 그리드 형태를 이루고 있는 CharactersGrid를 따라 만들었습니다.
이번에는 더 나아가 List 형태의 컬렉션뷰와 Diffable Datasource를 활용했는데, 만들면서 배울만하다고 생각이 든 요소들을 공유하고자 합니다.
해당 영상은 아래 링크를 통해 볼 수 있으며, UICollectionView에 대해 자세히 설명해주시니 관심이 있다면 보시는 것을 추천드립니다.
Registration
기존에는 아래 코드와 같이 특정 String 값으로 셀의 identifier를 지정해줘야 했습니다.
이후 꺼내 쓸때, 타입 캐스팅도 해줘야 하고 String 값에 오타라도 있다면 제대로 동작하지 않게 됩니다.
// 셀 등록하기
collectionView.register(CharacterCell.self, forCellWithReuseIdentifier: "Cell")

extension SingleSectionCharactersViewController: UICollectionViewDataSource, UICollectionViewDelegateFlowLayout {
    func collectionView(_ collectionView: UICollectionView, cellForItemAt indexPath: IndexPath) -> UICollectionViewCell {
    	// 셀 꺼내쓰기
        let cell = collectionView.dequeueReusableCell(withReuseIdentifier: "Cell", for: indexPath) as! CharacterCell
        ...
        return cell
    }
}
하지만 "등록" 자체를 변수로 지정할 수 있습니다.
이렇게 되면 위에서 말했던 타입캐스팅도 필요없으며 따로 identifier를 정해줄 필요도 없어서 편리하게 사용할 수 있습니다.
private var cellRegistration: UICollectionView.CellRegistration<CharacterCell, Character>!

// 셀 등록 변수 생성하기
cellRegistration = UICollectionView.CellRegistration(handler: { cell, _, character in
     cell.setup(character: character)
})

func collectionView(_ collectionView: UICollectionView, cellForItemAt indexPath: IndexPath) -> UICollectionViewCell {
	...
    // 셀 꺼내쓰기
    let cell = collectionView.dequeueConfiguredReusableCell(using: cellRegistration, for: indexPath, item: character)
    return cell
}
물론 헤더 또한 등록 변수를 생성할 수 있습니다.
// 헤더 등록 변수 생성하기
private var headerRegistration: UICollectionView.SupplementaryRegistration<HeaderView>!
ListLayout
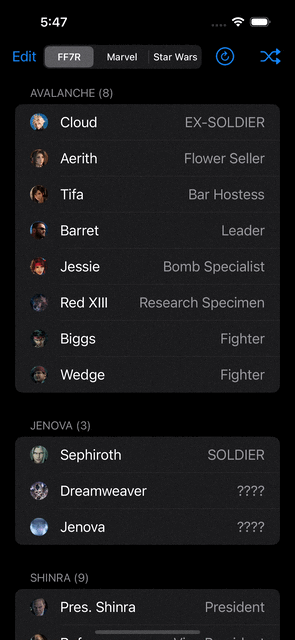
셀과 레이아웃을 직접 구현해도 되지만, UICollectionViewListCell과 UICollectionLayoutListConfiguration을 사용하면 리스트 형태의 컬렉션뷰를 쉽게 구현 가능합니다.
추가적으로 accessories 속성이 있는데, 이 속성에는 우리가 흔히 볼 수 있는 삭제 버튼 또는 정렬 버튼 같은 요소들을 추가할 수 있습니다.
// list 레이아웃 초기화
private lazy var listLayout: UICollectionViewLayout = {
    var listConfig = UICollectionLayoutListConfiguration(appearance: .insetGrouped)
    ...
    return UICollectionViewCompositionalLayout.list(using: listConfig)
}()

// 컬렉션뷰에 list 레이아웃 적용
collectionView = .init(frame: view.bounds, collectionViewLayout: listLayout)

cellRegistration = UICollectionView.CellRegistration(
    handler: { (cell: UICollectionViewListCell, _, character: Character) in
        // 셀 안의 내용물 채우기
        var content = UIListContentConfiguration.valueCell()
        content.text = character.name
        content.secondaryText = character.job
        content.image = UIImage(named: character.imageName)
        content.imageProperties.maximumSize = .init(width: 24, height: 24)
        content.imageProperties.cornerRadius = 12
        cell.contentConfiguration = content

        // 각각의 셀에 요소 (삭제 버튼, 정렬 버튼 등) 추가
        var accessories: [UICellAccessory] = [
        	.delete(displayed: .whenEditing, actionHandler: { [weak self] in
            	self?.deleteCharacter(character)
             }),
            .reorder(displayed: .whenEditing)
        ]
        cell.accessories = accessories
	}
)
Diffable Datasource
기존에 데이터를 변경하고 이를 적용하기 위해서는, reloadData() 또는 performBatchUpdates()를 통해 컬렉션뷰 전체를 업데이트 해줘야 했습니다.
하지만 Diffable DataSource를 활용하면 오직 변경된 데이터에 관한 뷰만 업데이트를 함으로써 효율적이게 동작합니다.
간단히 동작 원리를 말씀드리자면, 이전 데이터와 바뀐 데이터에 대하여 스냅샷을 찍어서 두 스냅샷 사이에 달라진 부분만 애니메이션을 적용해서 업데이트 해줍니다.
아래는 Diffable Datasource를 생성하는 코드입니다.
private var dataSource: UICollectionViewDiffableDataSource<Section, Character>!

private func setupDataSource() {
	// 셀 등록 정보를 바탕으로 datasource 초기화
    dataSource = UICollectionViewDiffableDataSource(collectionView: collectionView, cellProvider: { [weak self] collectionView, indexPath, character in
        guard let self = self else { return nil }
        let cell = collectionView.dequeueConfiguredReusableCell(using: self.cellRegistration, for: indexPath, item: character)
        return cell
    })

    // 헤더를 쓴다면 해당 값을 할당
    dataSource.supplementaryViewProvider = { [weak self] collectionView, kind, indexPath -> UICollectionReusableView in
        guard let self = self else { return UICollectionReusableView()}
        let headerView = collectionView.dequeueConfiguredReusableSupplementary(using: self.headerRegistration, for: indexPath)
        return headerView
    }
    ...
}
아래는 스냅샷을 적용하는 특정 코드들입니다.
// 달라진 부분에 대한 스냅샷 적용하기
private func setupSnapshot(store: [SectionCharactersTuple]) {
    var snapshot = NSDiffableDataSourceSnapshot<Section, Character>()
    store.forEach { sectionCharacters in
        let (section, characters) = sectionCharacters
        snapshot.appendSections([section])
        snapshot.appendItems(characters, toSection: section)

        dataSource.apply(snapshot, animatingDifferences: true, completion: reloadHeaders)
    }
}

// 셀 삭제하기
private func deleteCharacter(_ character: Character) {
	...
    // 달라진 부분, 즉 삭제한 부분만 스냅샷을 통해 업데이트
    var snapshot = dataSource.snapshot()
    snapshot.deleteItems([character])
    dataSource.apply(snapshot, animatingDifferences: true)
}

// 셀 선택하기
func collectionView(_ collectionView: UICollectionView, didSelectItemAt indexPath: IndexPath) {
	...

    if selectedCharacters.contains(character) {
        selectedCharacters.remove(character)
    } else {
        selectedCharacters.insert(character)
    }

    // 달라진 부분, 즉 선택한 부분만 스냅샷을 통해 업데이트
    var snapshot = dataSource.snapshot()
    snapshot.reloadItems([character])
    dataSource.apply(snapshot, animatingDifferences: true)
}