
잘못된 부분, 바꾸면 더 좋을 부분이 있다면 댓글 부탁드리겠습니다. :)
사전 작업
-
라이브러리 설치
npm i @notifee/react-native

npm i @react-native-firebase/messaging
푸시알림 구현 방법
react-native에서 푸시 알림을 구현하는 방법은 여러가지가 있다.
이중 나는 firebase + notifee 조합으로 구현해 보았다.
- 서버 푸시알림
firebase - 로컬 푸시알림
1. @notifee/react-native
2. react-native-push-notification / @react-native-community/push-notification-ios (IOS)
3. react-native-notifications
....
react-native-push-notification을 이용해 구현하는 자료가 많아 2번 방법으로 가려했지만, 라이브러리 github에

라이브러리 유지 문제관련 글이 있어 1번 @notifee/react-native를 이용했다. (설명에는 notifee, react-native-notifications을 추천한다.)
react-native-push-notification으로 구현해도 문제는 없을것 같다. notifee보다 다운로드수가 세배를 넘는다.
구현
1. fireabse로 푸시알림 메시지 받기 (firebase)
firebase에서는 앱을 3가지 상태로 나누어서 구분한다.
1.Foreground : 앱 실행중
2.Background : 앱 최소화
3.Quit : 앱 꺼짐
각 상태들에서 날라오는 푸시알림 메세지를 @react-native-firebase/messaging을 이용해 받아준다.
background & quit에서는 setBackgroundMessageHandler 메소드
foreground에서는 onMessage 메소드를 활용해준다.
Background & Quit
- index.js
import messaging from '@react-native-firebase/messaging';

messaging().setBackgroundMessageHandler(async msg => {
   console.log(msg)
});
Foreground
- app.js
const App = () => {

...
useEffect(() => {
    const unsubscribe = messaging().onMessage(async remoteMessage => {
       console.log(remoteMessage)
    });

    return unsubscribe;
  }, []);

  ...

  }
2. fireabse로 푸시알림 메시지 보내기(Postman)
푸시알림을 보내기 위해서는 우선 firebase 키 값과 보낼 기기의 토큰 값이 필요하다.
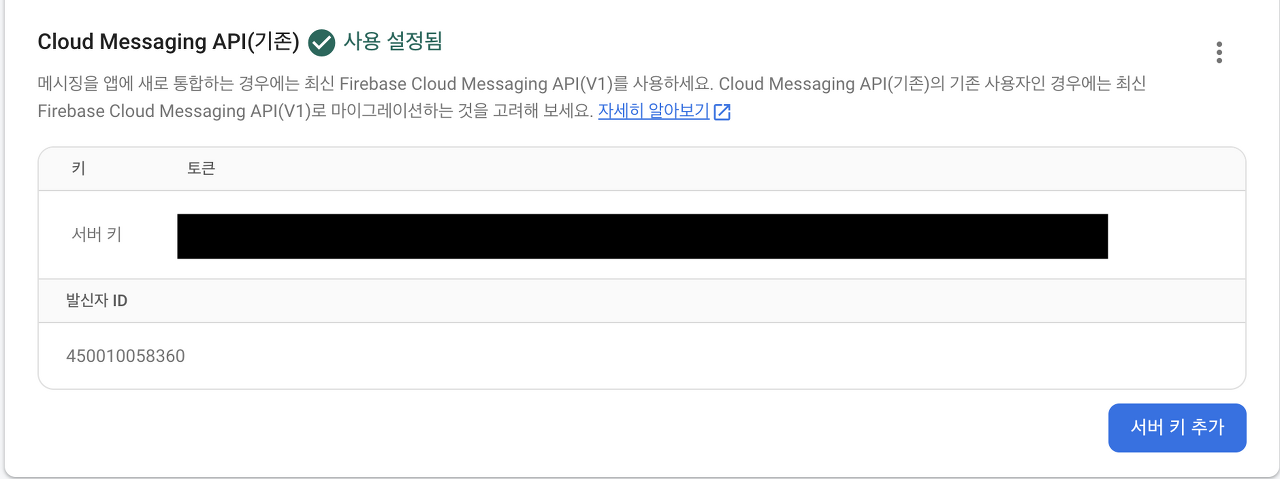
1. firebase 키 값
firebase프로젝트 선택 > 설정버튼 > 프로젝트 설정 > 클라우드 메세징 선택 > 서버키
2. 기기 토큰 값
import messaging from '@react-native-firebase/messaging';
useEffect(() => {
requestUserPermission();
}, []);
const requestUserPermission = async () => {
const authStatus = await messaging().requestPermission();
const enabled = authStatus === messaging.AuthorizationStatus.AUTHORIZED ||
authStatus === messaging.AuthorizationStatus.PROVISIONAL;
if (enabled) {
return getToken();
}
};
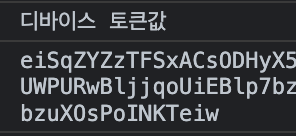
const getToken = async () => {
const fcmToken = await messaging().getToken();
console.log('디바이스 토큰값');
console.log(fcmToken);
dispatch(set_deviceToken(fcmToken));
};ios는 유저의 알람 동의가 필요하기 때문에 permissionRequest() 이후 getToken()을 해야한다.
안드로이드는 바로 getToken()으로 디바이스 토큰값 구할수 있다.
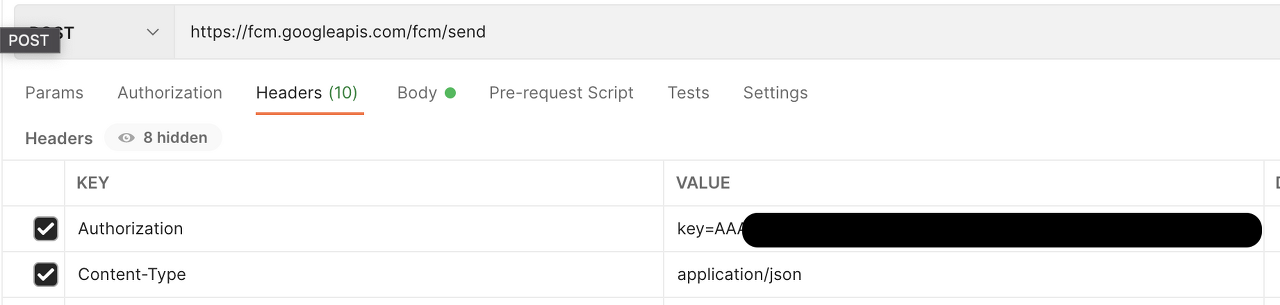
3. postman으로 메시지 보내기
리퀘스트를 생성
POST 셋팅
Headers
Authorization : key=fireabse키값 , Content-Type: application/json으로 셋팅해준다.
Body
{
"to":"기기토큰값",
"notification":{
"title" : "노티 타이틀",
"body" : "노티 바디"
},
"data" : {
"title" : "데이터 타이틀",
"body" : "데이터 바디"
}
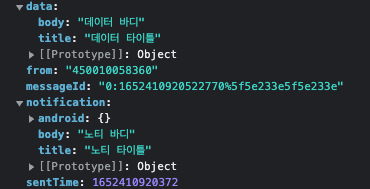
}다음과 같이 작성후 SEND를 눌러주면
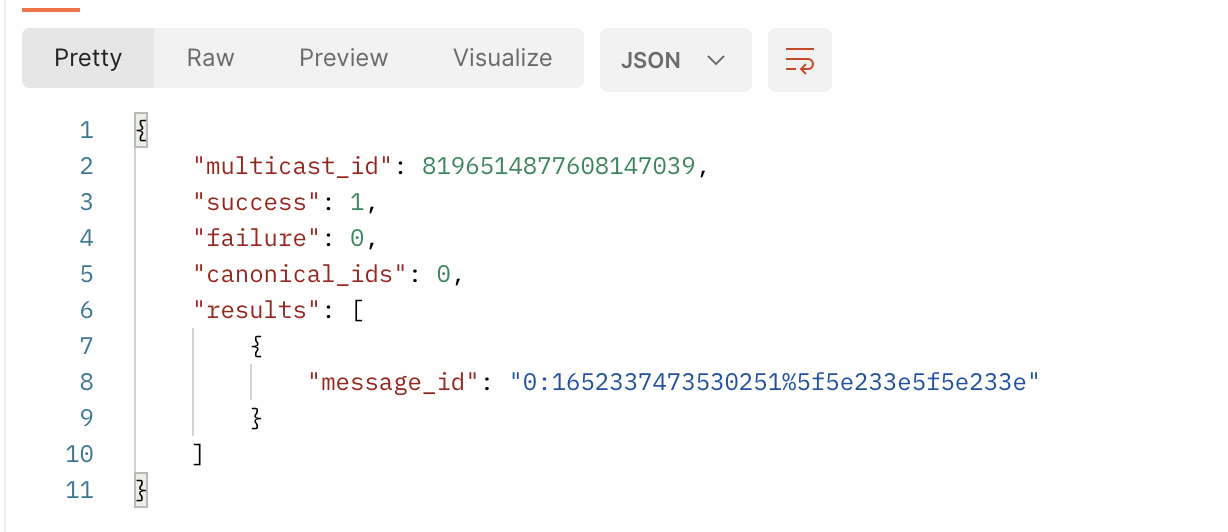
success가 뜨고, index.js , app.js에서도 메세지가 잘 들어오는것을 확인할 수있다.
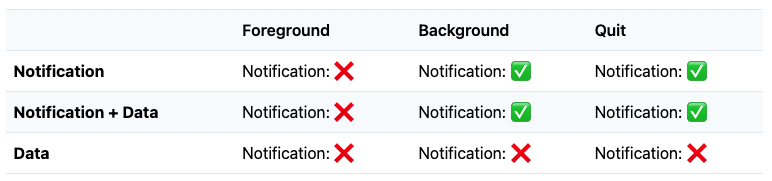
notification을 제외하고 data에만 값을 담아 보내면 디바이스에서는 메세지의 우선순위가 낮다 판단하고
핸드폰을 깨우지 않고 메세지를 무시한다.
만일 'data-only' 메세지로 알람을 주고 싶으면 android에서는 priority: high로 , ios 에서는 contentAvailable: true로 설정해 주어야 한다.
{
    "to":"기기토큰값",
    "notification":{},
    "data" : {
    	"title" : "데이터 타이틀",
     	"body" : "데이터 바디"
    },
    // Required for background/quit data-only messages on iOS
    contentAvailable: true,
    // Required for background/quit data-only messages on Android
    priority: 'high',
}
3. 푸시알림 띄우기 (notifee)
background&quit 상태에서는 서버알림이 오면 바로 디바이스에서 알람이 오지만 foreground 상태에서는 데이터 메세지를 받아도 알림이 오지는 않는다.
그렇기 때문에 foreground 상태에서는 local notification을 사용해 알림을 띄운다.
notifee
- ./src/uitls/pushNoti.js
pushNoti.js 파일을 생성 후 작성한 코드
import {AppState} from 'react-native';
import notifee, {AndroidImportance, AndroidColor} from '@notifee/react-native';

const displayNotification = async message => {
  const channelAnoucement = await notifee.createChannel({
    id: 'default',
    name: '카테고리 이름',
    importance: AndroidImportance.HIGH,
  });

  await notifee.displayNotification({
    title: message.data.title,
    body: message.data.body,
    android: {
      channelId: channelAnoucement,
      smallIcon: 'ic_launcher', //
    },
  });
};

export default {
  displayNoti: remoteMessage => displayNotification(remoteMessage),
};
1. 채널만들기 (Android)
- 알림 채널 그룹 (Android)
안드로이드 알림에는 채널과 그룹이라는 개념이 있다.
알림 채널을 여러개로 나누어 알림에 적용되는 시각적, 음향적 동작의 설정이 가능하다.
ex) 공지사항 알림, 채팅 알림, 기타 알림 등 - 채널 중요도에 따른 알림 형태
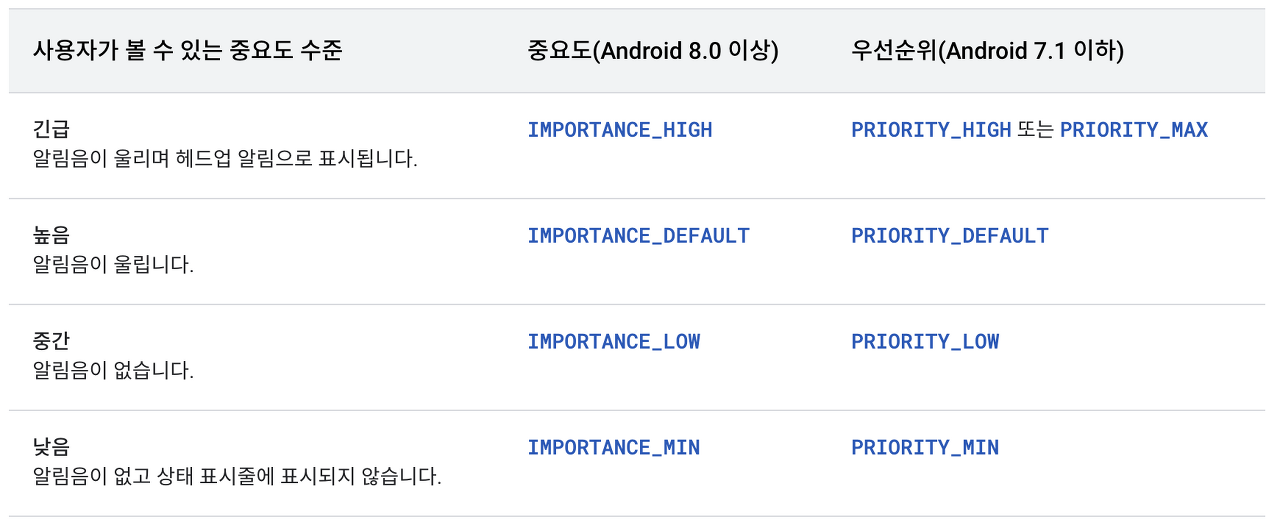
import notifee, {AndroidImportance, AndroidColor} from '@notifee/react-native';

const displayNotification = async message => {
	...
	const channelAnoucement = await notifee.createChannel({
    	id: 'default',
    	name: '카테고리 이름',     // 저는 카테고리 세분화가 필요 없어 서비스 이름으로 적용했습니다.
    	importance: AndroidImportance.HIGH,  // 채널 생성시 중요도를 설정해줍니다.
  	});
    ...
}
2.푸시알림 띄우기
notifee에서 displayNotification 메소드를 이용한다.
서버에서 받은 메시지로 로컬알람을 보낸다.
import {AppState} from 'react-native';
import notifee, {AndroidImportance, AndroidColor} from '@notifee/react-native';

const displayNotification = async message => { // 파라미터 message는 서버에서 받은 메세지
  ...
  await notifee.displayNotification({
    title: message.data.title,
    body: message.data.body,
    android: {
      channelId: channelAnoucement,
      smallIcon: 'ic_launcher',
    },
  });
};
foreground에서 메세지를 받으면 displayNotification함수로 넘겨준다.
- App.js
useEffect(() => {
    const unsubscribe = messaging().onMessage(async remoteMessage => {
      console.log(remoteMessage);
      pushNoti.displayNoti(remoteMessage);  // 위에서 작성한 함수로 넘겨준다
    });

    return unsubscribe;
  }, []);
4. 테스트
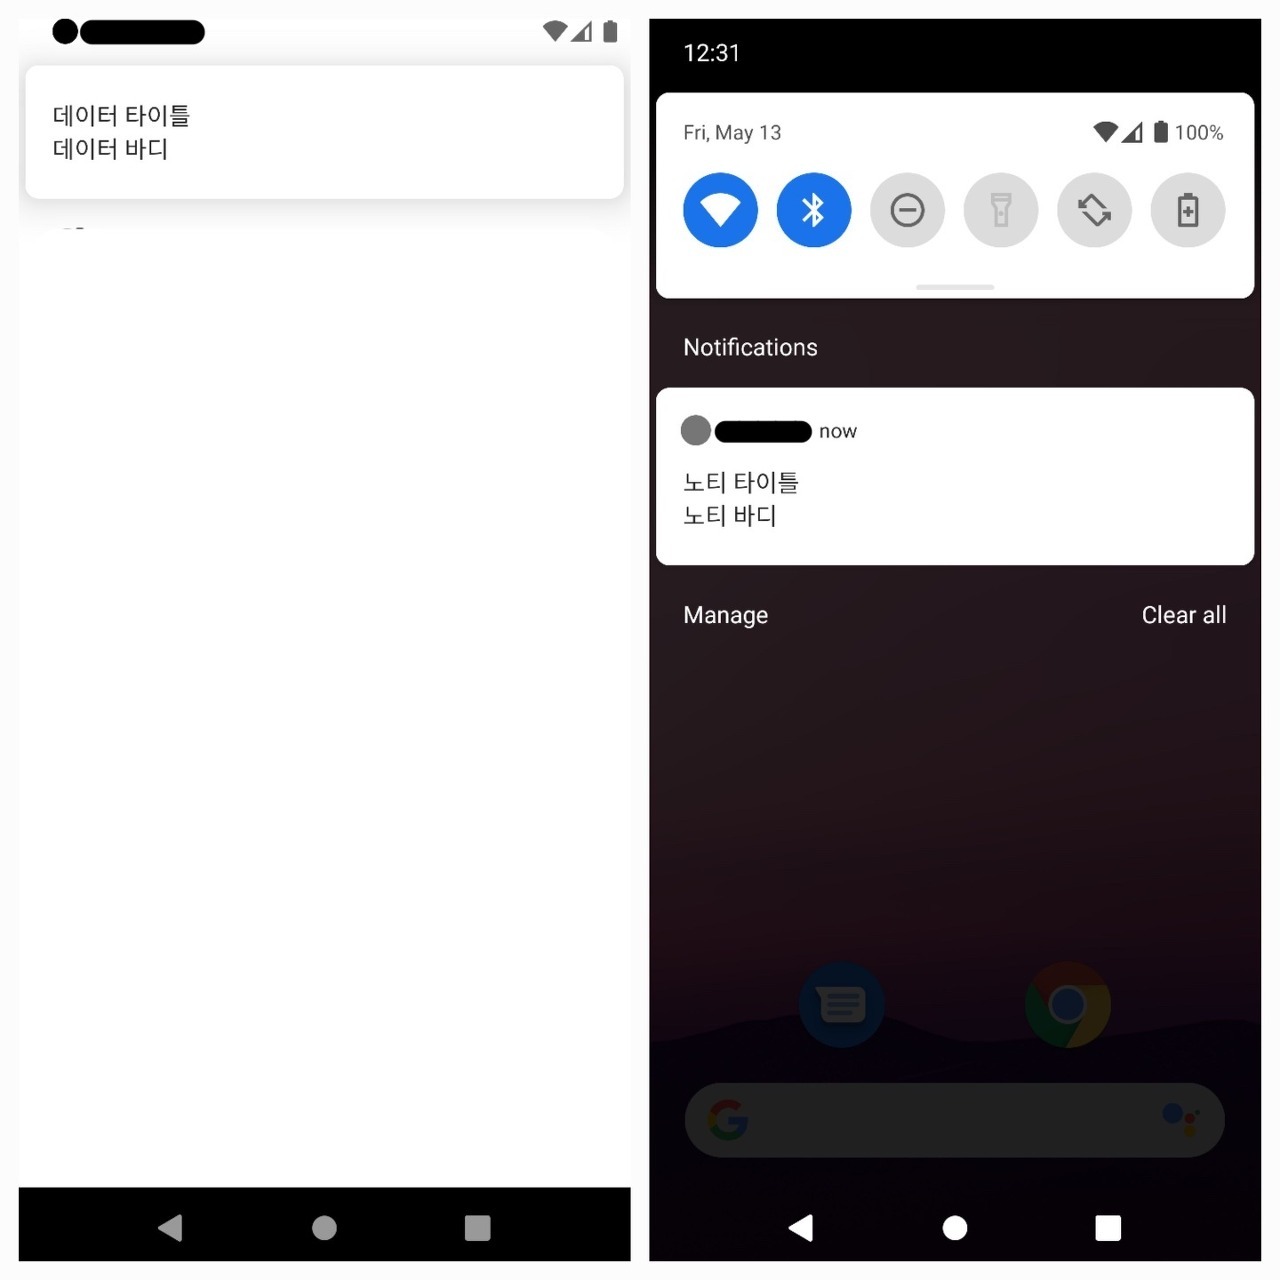
foreground , background & quit 모든 상황에서 푸시알림이 잘 보내졌다.
background & quit일때는 notification에 담은 값을 알아서 띄워졌고,
foreground에서는 data에 담긴 값들을 보여주도록 했다.
참고
https://rnfirebase.io/messaging/usage
https://notifee.app/
https://developer.android.com/training/notify-user/channels?hl=ko
https://popcorn16.tistory.com/71

덕분에 React Native 알림이 잘 구현되었습니다!!
정말정말 진심을 담아 감사드립니다!!