webpack은 여러 개의 assets (js, css, png, jpg)을 웹 브라우저가 이해할 수 있는 번들로 묶고 패킹할 수 있는 자바스크립트 모듈 번들러이다. Node.js 환경에서 실행되며, npm으로 설치할 수 있다.
웹팩을 사용하는 이유
각기 다른 자바스크립트를 로딩할 때, 스크립트 로딩 순서와 해당 HTML에서 필요하지 않은 js 파일들까지 로딩하여 리소스 낭비가 생김. 필요한 파일만 로딩하고 관리하고자 웹팩을 사용하게 됨.
1. 웹팩 시작하기
node.js를 설치하고, npm을 설치한다. 그런다음 CLI 환경에서 아래와 같이 작성한다.
$ mkdir webpack-demo
$ cd webpack-demo
$ npm init -y		// -y는 default 설치
$ npm install webpack --save-dev (-global)	// -global 일때는 global 설치됨
$ npm install webpack-cli --save-dev--save: 앱이 구동하기 위한 모듈 설치, react는 앱 전체를 구동하기 위해 반드시 필요한 모듈--save-dev: 앱 개발할 때 필요한 모듈 설치, test나 build 툴은 앱 개발시만 필요한 모듈
웹팩 프로젝트 폴더 구조는 아래와 같다.
project
webpack-demo
|-- package.json
|-- index.html
|-- /src
|-- index.js/src/index.js와 index.html를 아래와 같이 작성한다.
/src/index.js
function component() {
  const element = document.createElement('div');

  // Lodash, currently included via a script, is required for this line to work
  element.innerHTML = _.join(['Hello', 'webpack'], ' ');

  return element;
}

document.body.appendChild(component());
index.html
<!doctype html>
<html>
  <head>
    <title>Getting Started</title>
    <script src="https://unpkg.com/lodash@4.16.6"></script>
  </head>
  <body>
    <script src="./src/index.js"></script>
  </body>
</html>
CLI환경에서 작성된 package.json 파일에서 private속성을 작성하고 main 속성을 삭제한다.
package.json
{
"name": "webpack-demo",
"version": "1.0.0",
"description": "",
+ "private": true,
- "main": "index.js",
"scripts": {
"test": "echo \"Error: no test specified\" && exit 1"
},
"keywords": [],
"author": "",
"license": "ISC",
"devDependencies": {
"webpack": "^4.20.2",
"webpack-cli": "^3.1.2"
},
"dependencies": {}
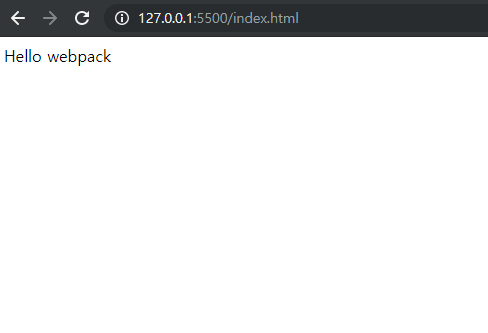
}아래 화면은 index.html을 VS Code에서 Live Server로 띄운 결과이다.
결과 화면
2. 웹팩 번들링하기
dist 폴더를 생성하고 /dist/index,html을 만든다. root 경로의 index.html은 삭제한다.
project
webpack-demo
|- package.json
|- /dist
   |-- index.html
|- index.html (x)
|- /src
   |-- index.js
CLI 환경에서 lodash 패키지를 설치한다.
$ npm install --save lodash/src/index.js파일에 lodash 모듈을 추가한다.
/src/index.js
// add lodash
import _ from 'lodash';

function component() {
    const element = document.createElement('div');

    // Lodash, currently included via a script, is required for this line to work
    element.innerHTML = _.join(['Hello', 'webpack'], ' ');

    return element;
}

document.body.appendChild(component());/dist/index.html파일에서 main.js 스크립트 경로를 추가하고, lodash CDN 경로와 /src/index.js 경로를 삭제한다.
/dist/index.html
<!doctype html>
  <html>
   <head>
     <title>Getting Started</title>
-    <script src="https://unpkg.com/lodash@4.16.6"></script>
   </head>
   <body>
-    <script src="./src/index.js"></script>
+    <script src="./main.js"></script>
   </body>
  </html>
CLI 환경에서 웹팩 번들링을 실행한다.
$ npx webpack/dist/index.html 파일을 Live server로 실행하면 아래와 같이 나타난다.

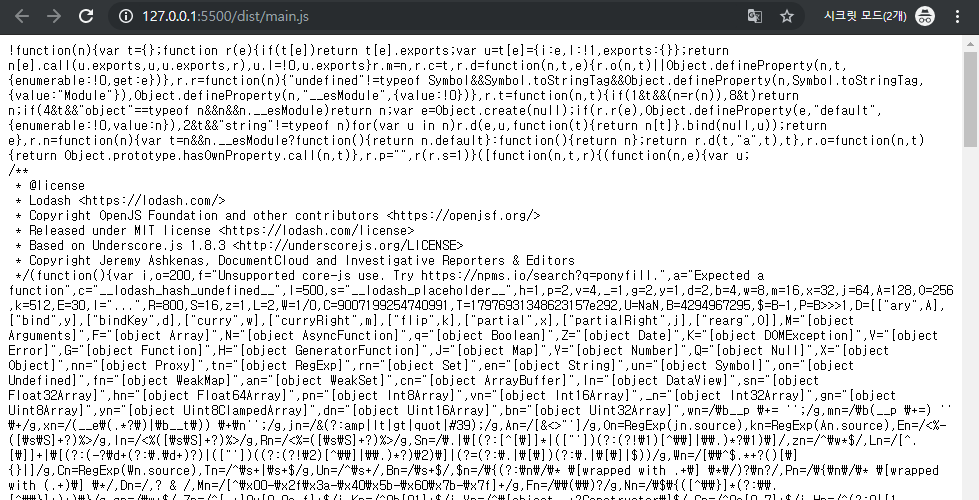
http://127.0.0.1:5500/dist/main.js 경로로 보면 압축되어 번들링된 js 소스를 확인할 수있다.
3. 웹팩 config 파일 사용하기
프로젝트 폴더에 webpack.config.js를 추가한다.
project
webpack-demo
|- package.json
|- webpack.config.js (+)
|- /dist
   |-- index.html
|- /src
   |-- index.js
webpack.config.js 소스를 아래와 같이 작성한다.
webpack.config.js
const path = require('path');

module.exports = {
  entry: './src/index.js',
  output: {
    filename: 'main.js',
    path: path.resolve(__dirname, 'dist')
  }
};
webpack.config.js 를 이용하여 번들링 하기
$ npx webpack --config webpack.config.jsNPM 스크립트 추가하기
package.json에서 scripts 부분에 build 속성을 추가한다.
package.json
{
    "name": "webpack-demo",
    "version": "1.0.0",
    "description": "",
    "scripts": {
-      "test": "echo \"Error: no test specified\" && exit 1"
+      "test": "echo \"Error: no test specified\" && exit 1",
+      "build": "webpack"
    },
    "keywords": [],
    "author": "",
    "license": "ISC",
    "devDependencies": {
      "webpack": "^4.20.2",
      "webpack-cli": "^3.1.2"
    },
    "dependencies": {
      "lodash": "^4.17.5"
    }
  }
NPM으로 빌드 실행
$ npm run build