
리코일 공식 문서 따라해보기 : https://recoiljs.org/docs/introduction/getting-started
테스트 repository : https://github.com/deli-ght/recoil
초기 셋팅
react-app 설치
npx create-react-app my-app
나는 현재 프로젝트를 next로 하고 있어 next 앱을 설치해주었다.
yarn create next-app (프로젝트 명)
현재 폴더에 프로젝트를 설치하고 싶다면 yarn create next-app .
recoil 설치
yarn add recoil
RecoilRoot
컴포넌트에서 사용된 리코일 상태값을 부모 컴포넌트에서 사용하기 위해선 RecoilRoot를 설정해주는 게 필요하다. RecoilRoot는 가장 최상위 컴포넌트에 설치하는게 가장 적합하기 때문에, _app.js 컴포넌트에 설정해주었다.
_app.js
import React from 'react';
import {
  RecoilRoot,
  atom,
  selector,
  useRecoilState,
  useRecoilValue,
} from 'recoil';

function App() {
  return (
    <RecoilRoot>
      <CharacterCounter />
    </RecoilRoot>
  );
}
Atom
atom(아톰)은 하나의 상태값을 나타낸다. 어느 컴포넌트에서든 읽고, 수정할 수 있다는 장점이 있다. 컴포넌트는 구독하고 있던 아톰에서 즉시 값을 가져오기 때문에 아톰에 새로운 값이 업데이트되면 해당 아톰을 구독하고 있는 모든 컴포넌트들이 리렌더링이 된다.
atom 생성
atom/index.js
export const atomTextState = atom({
  key: 'textState', // 다른 아톰이나 셀렉터와 구분되는 유니트 키값
  default: '', // 초기 상태값
});
useRecoilState
생성한 아톰 값을 사용하고 싶을 때 사용하는 hook
useState처럼 사용하면 돼서 굉장히 편리하다!
TextInput.jsx
import { useRecoilState } from "recoil"
import { atomTextState } from "../atom"

export const TextInput = () => {
  const [text, setText] = useRecoilState(atomTextState)
  const handleInput = (event) => {
    setText(event.target.value)
  }
  return <input type="text" value={text} onChange={(e) => handleInput(e)} />
}
해당 상태값을 공유하는 컴포넌트끼리 사용하면 된다.
위에서 변경한 인풋값을 보여주는 컴포넌트 ShowResult라는 컴포넌트를 만들어주었다.
ShowResult.jsx
import { atomTextState } from "../atom"
import { useRecoilState } from "recoil"
export const ShowResult = () => {
const [text, setText] = useRecoilState(atomTextState)
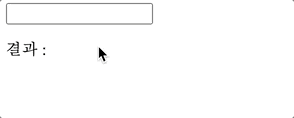
return <p>결과 : {text}</p>
}import { ShowResult } from "../component/ShowResult"
import { TextInput } from "../component/TextInput"
export default function Home() {
return (
<div>
<TextInput />
<ShowResult />
</div>
)
}

상태값이 바뀔 때 마다 리렌더링 되는 것을 확인 할 수 있다.
Selector
selector는 아톰값에서 파생된 상태를 리턴한다.
위에서 생성한 아톰값을 참조하는 selectorText 셀렉터를 만들어보았다.
export const selectorText = selector({
  key: "selectorText", // unique ID (with respect to other atoms/selectors)
  get: ({ get }) => {
    const text = get(atomTextState)
    let result = ""

    switch (text) {
      case "월":
      case "화":
      case "수":
      case "목":
      case "금":
        result = "출근하는 날"
        break
      case "토":
      case "일":
        result = "쉬는 날!!!!!"
        break;
      default:
        break;
    }
    return result
  },
})
useRecoilValue
아톰과 다르게 selector를 사용하고 싶다면 useRecoilValue를 사용해주어야 한다. selector는 외부에서 값을 바꿀 수 없는 순수함수처럼 동작하기 때문에 바로 변수에 할당해 사용해주면 된다.
ShowSelector.jsx
import { useRecoilValue } from "recoil"

export const ShowSelector = () => {
  const weekend = useRecoilValue(ShowSelector)
  return <p>{weekend}</p>
}
끝!

다른 상태관리 라이브러리들보다 훨씬 간편하네요..! 잘 읽었습니다~!