How to Set Up a Quick-Mount Hybrid Workflow with Your Phone Tripod
Modern content creators face a constant juggling act between smartphones and traditional cameras, each offering unique advantages but creating friction when switching mid-shoot. The frustration of missing spontaneous moments while fumbling with incompatible mounts or watching creative momentum evaporate during lengthy equipment changes is all too familiar. A hybrid workflow emerges as the elegant solution to this challenge, allowing you to harness your phone's convenience for quick captures and social media content while leveraging your camera's superior quality for primary footage. The phone tripod, particularly versatile models designed with modularity in mind, serves as the cornerstone of this seamless system. Rather than maintaining separate setups for each device, a properly configured tripod becomes a unified command center that accommodates both smartphones and cameras through intelligent quick-mount solutions. This guide will walk you through building an efficient multi-device shooting rig that eliminates setup delays, maximizes your creative options, and ensures you're always ready to capture the perfect shot regardless of which device the moment demands.
Why a Hybrid Workflow is Essential for Modern Vloggers
A hybrid workflow means strategically using both your smartphone and dedicated camera within a single shooting session, each device playing to its strengths. Your phone excels at capturing spontaneous B-roll, behind-the-scenes content, and quick social media stories thanks to its instant connectivity and intuitive interface. Meanwhile, your camera delivers the superior image quality, dynamic range, and manual controls necessary for polished A-roll footage that defines your channel's professional look. This dual-device approach addresses the modern vlogger's core need for versatility across unpredictable shooting scenarios—whether you're filming a controlled indoor interview, capturing run-and-gun street footage, or pivoting between wide establishing shots and intimate close-ups.
The problem emerges when your gear fights against this flexibility. Maintaining separate tripods, mounts, and accessory ecosystems for each device creates a logistical nightmare that drains creative energy. You waste precious minutes dismantling one setup to configure another, often missing fleeting moments or losing your creative flow entirely. A disjointed system forces you to choose between devices before the shot rather than responding organically to what the moment demands. The solution lies in treating your phone tripod not as a simple support tool but as a unified platform that bridges both devices. When properly configured with quick-mount capabilities and multi-accessory integration, a single tripod becomes the foundation that eliminates friction, letting you transition seamlessly between smartphone convenience and camera quality without breaking stride.
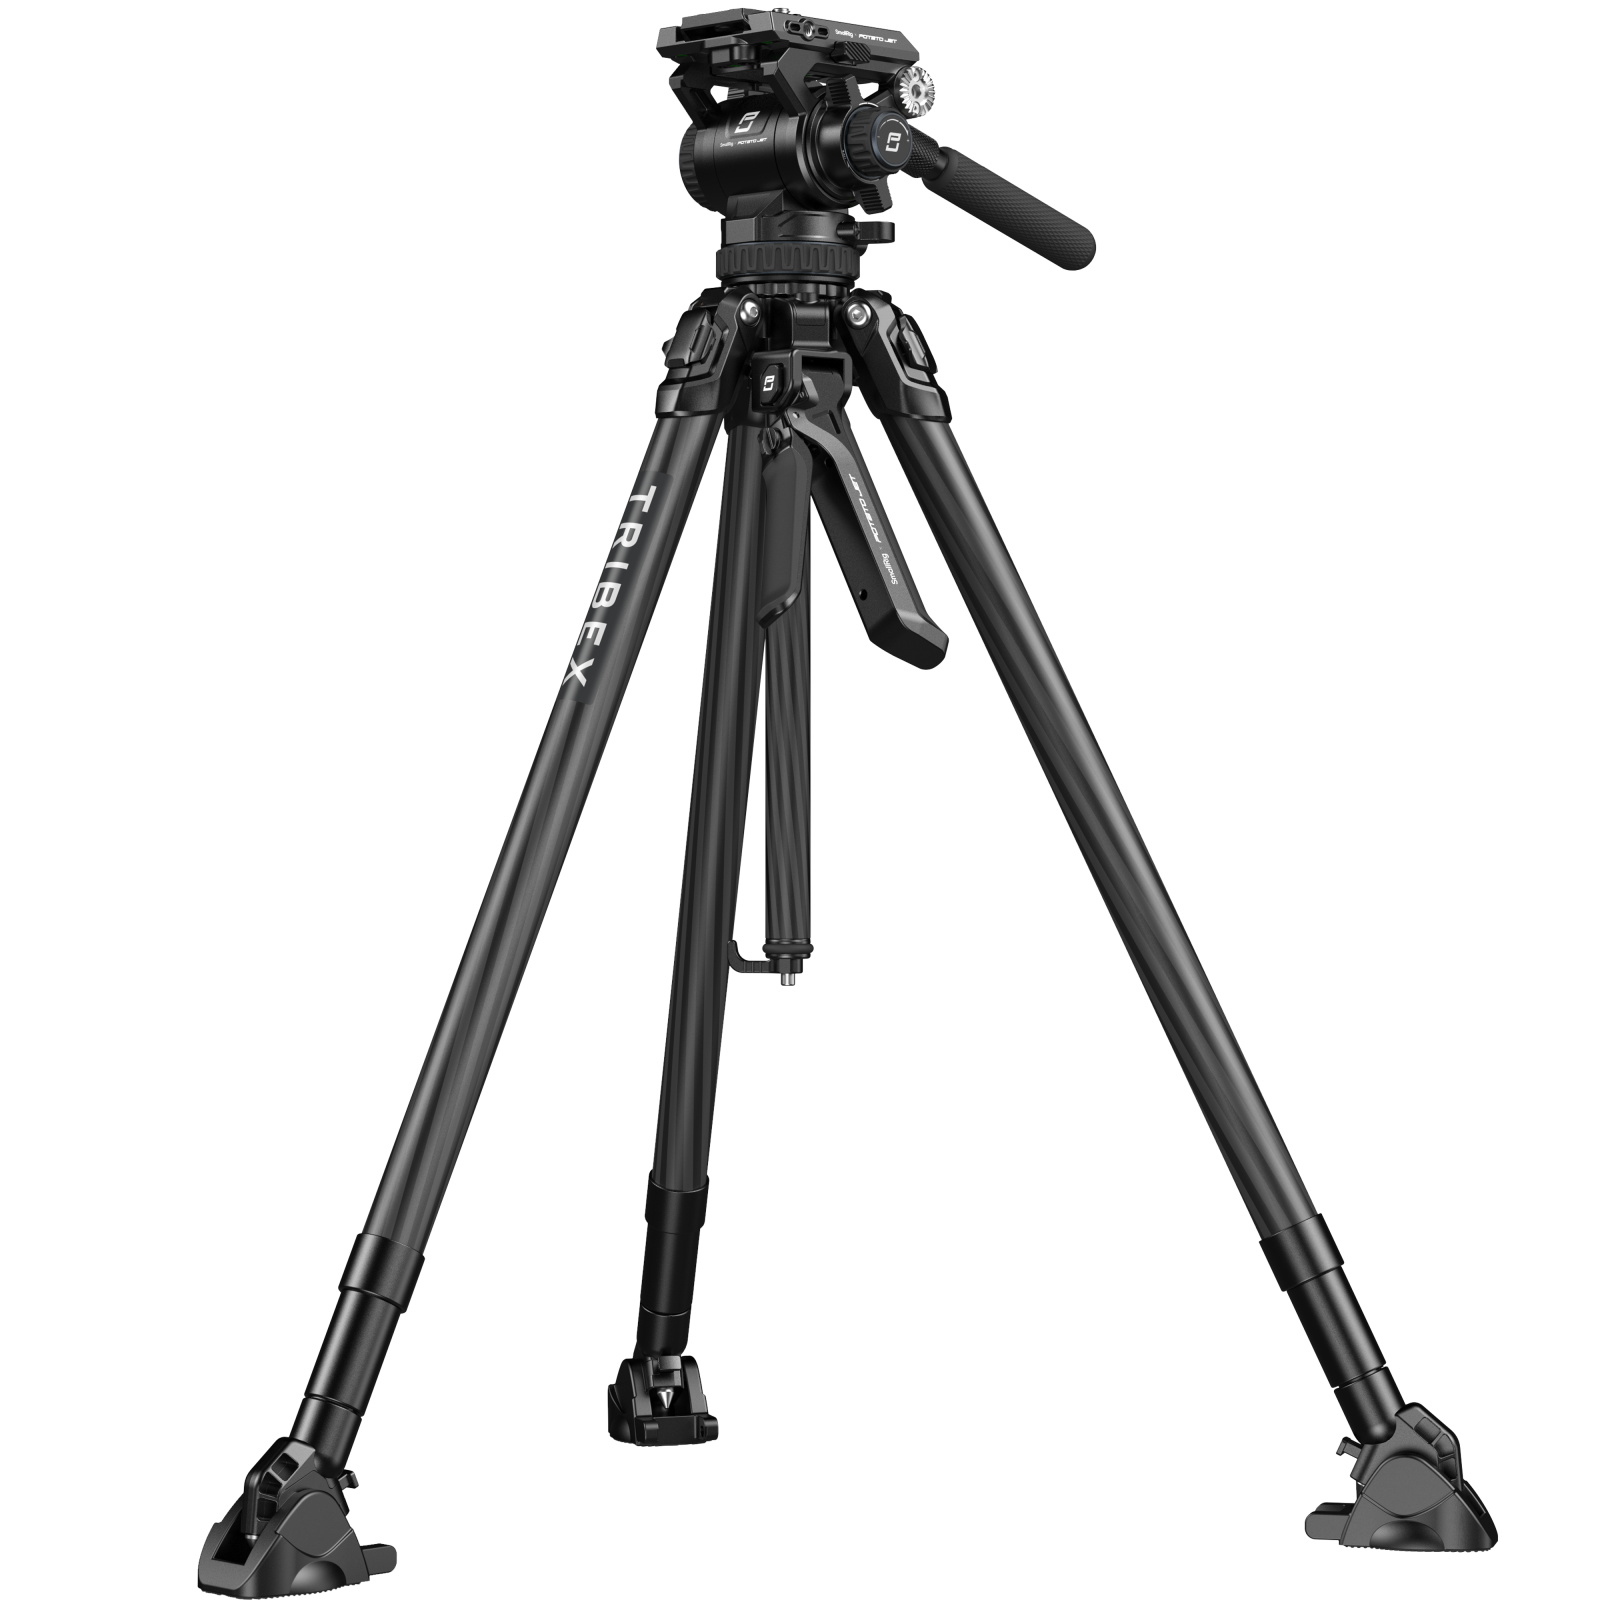
Choosing the Right Phone Tripod: Spotlight on Multi-Accessory Rigs
The foundation of an effective hybrid workflow starts with selecting a tripod that transcends basic phone support to become a true multi-device platform. Stability remains paramount—look for tripods with rubberized feet, a wide stance, and sufficient weight to resist wobbling when accessories are attached. Adjustable height is equally critical, with models offering a range from ground-level to eye-level shooting positions providing maximum versatility. A robust ball head with secure locking mechanisms ensures smooth angle adjustments without drift, while a quality quick-release system becomes the linchpin of your rapid device-switching capability.
SmallRig has built a reputation for tripods designed specifically for this modular approach, featuring multiple 1/4"-20 threaded mounting points and cold shoe slots integrated into center columns and even leg sections. These attachment points transform a simple tripod into a multi-accessory rig capable of hosting lights, microphones, and monitors simultaneously. When evaluating options, consider your primary shooting environment: lightweight carbon fiber models excel for travel and outdoor work where portability matters, while heavier aluminum studio tripods provide rock-solid stability for controlled indoor shoots with extensive accessory loads.
Before committing to a system, verify these essential features: Arca-Swiss compatible quick-release plates for universal device mounting, at least two additional 1/4"-20 ports beyond the main head mount, cold shoe slots positioned for easy access, and a center column that can be inverted or positioned horizontally for low-angle shots. Check that the tripod's payload capacity exceeds your heaviest anticipated configuration by at least fifty percent to maintain stability. A leg system with independent angle adjustments allows adaptation to uneven terrain, while a removable center column that doubles as a monopod adds handheld shooting flexibility to your workflow arsenal.
Building Your Multi-Accessory Rig: A Step-by-Step Setup Guide
Step 1: The Foundation - Mounting Your Phone Securely
Your phone mount represents the critical first contact point between device and tripod, making its selection non-negotiable for stability. Traditional spring-loaded clamps offer universal compatibility across phone sizes, with adjustable side grips that accommodate devices from compact models to larger pro-max variants. These clamps typically feature rubberized contact points that prevent scratching while maintaining a firm grip, though you should verify the clamp opens wide enough for your phone with its case attached. Magnetic mounting systems present an alternative approach, using adhesive metal plates or MagSafe compatibility for instant attachment, but require careful consideration of weight distribution to prevent sagging during extended shoots. The optimal solution combines a quality phone clamp with an Arca-Swiss quick-release plate permanently attached to its base, creating a unified mounting system that locks securely to your tripod head with a single lever action. Before your first shoot, stress-test the assembly by gently shaking the mounted phone—any perceptible movement indicates insufficient tightening or an inadequate clamp that will translate to visible vibration in footage, particularly during critical moments when you're adjusting angles or when environmental factors like wind come into play.
Step 2: Expanding Your Toolkit - Integrating Essential Accessories
Transforming your basic phone-on-tripod into a complete production rig requires strategic accessory placement that balances functionality with stability. Begin by identifying your tripod's mounting points: the primary 1/4"-20 threads typically located on the center column and sometimes integrated into leg joints, plus cold shoe slots often positioned near the head assembly. An on-camera LED light becomes your first addition, mounted via cold shoe directly above or beside your phone to eliminate harsh shadows and provide consistent illumination across changing ambient conditions. Position your external microphone—whether a shotgun mic for directional capture or a wireless receiver for lavalier systems—on the opposite side of the light to maintain visual balance and prevent the light housing from creating audio interference or casting shadows on your microphone's pickup pattern.
For more complex setups requiring multiple accessories beyond available mounting points, a NATO rail system or multi-accessory bracket attaches to your tripod's center column, providing a horizontal mounting platform with multiple threaded holes and cold shoes. This expansion layer accommodates field monitors, additional lights, or backup audio recorders without compromising your primary phone mount. Cable management becomes critical at this stage—use velcro straps or cable clips attached to tripod legs to secure power cables and audio connections, preventing them from snagging during position changes or creating visible clutter in reflective surfaces. Always route cables with enough slack to allow full pan and tilt range without creating tension that could destabilize your phone mount or accidentally disconnect mid-recording.
Step 3: The Quick-Mount Heart of the System
The Arca-Swiss quick-release system transforms your rig from a static setup into a dynamic, adaptable workflow engine. This standardized mounting platform uses a dovetail plate that slides into a corresponding clamp, securing with a single lever or knob turn. The key to hybrid efficiency lies in attaching identical Arca-Swiss plates to every device in your arsenal: one permanently fixed to your phone clamp base, another to your camera's bottom plate, and a third to your gimbal's mounting platform. This uniformity means each device becomes instantly interchangeable on your tripod without tools or adjustment delays.
Consider a practical scenario: you're filming a product review and need to switch from a phone-based talking-head segment to a camera-captured detail shot showing intricate features. With your quick-mount system, you unlock the phone assembly with a single lever flip, lift it away, grab your camera with its pre-attached plate, slide it into the tripod clamp, and lock down—total elapsed time under thirty seconds. The accessories remain in position, lights stay powered and aimed correctly, and your audio setup continues recording without interruption. To maximize this efficiency, keep a small tray or magnetic mat near your shooting position to safely hold the device you've just removed, with its quick-release plate still attached and ready for the next swap. Mark each plate with colored tape corresponding to its device to eliminate any confusion during rapid transitions, and periodically check that all plate-mounting screws remain tight, as the repeated attachment cycles can gradually loosen connections over weeks of regular use.
Implementing Your Quick-Mount Hybrid Workflow in Action
Scenario A: Solo Indoor Vlogging
When filming solo content in a controlled indoor environment, your hybrid rig reaches its full potential as a self-contained production studio. Extend your tripod to eye level, positioning your phone as the primary camera with the screen facing you for framing verification. Mount your LED light via cold shoe on the center column, angled slightly downward to create flattering fill illumination that softens facial shadows without overexposing highlights. Attach your external microphone—a shotgun mic works exceptionally well here—on the opposite side to capture clean dialogue while remaining outside your frame. This single, stable configuration eliminates the need for multiple stands or assistants, with everything accessible from your shooting position. The beauty of this setup lies in its completeness: you can monitor your framing, adjust lighting intensity, check audio levels, and even swap to your camera for higher-quality segments without relocating any support equipment or reconfiguring your lighting scheme.
Scenario B: Dynamic Outdoor Shooting
Outdoor shooting demands adaptability that your quick-mount system delivers effortlessly. Collapse your tripod to a compact, mid-height position that allows rapid repositioning across locations, or detach a leg section to use as a makeshift monopod for mobile shots. When capturing a walking sequence, unlock your phone from the tripod head, slide your gimbal's Arca-Swiss plate into the clamp, and you're instantly ready for stabilized motion footage. Meanwhile, mount your camera on the tripod to continuously record wide establishing shots of your environment. This parallel capture approach maximizes coverage—your camera documents the broader scene while your phone on gimbal captures intimate, dynamic perspectives. For spontaneous social media content, reverse the roles: leave your camera recording on the tripod while you grab your phone for quick Instagram stories or behind-the-scenes clips, knowing you can return it to the tripod mount within seconds if the primary shot requires a different angle or device.
Workflow Efficiency Tips
Maximize your shooting time by pre-configuring "accessory clusters" during downtime—keep your phone clamp with attached light and microphone as one unit, your camera with its preferred lens and monitor as another, each with quick-release plates permanently mounted. Store these assemblies in labeled pouches or padded dividers within your gear bag, so grabbing the "phone interview cluster" or "camera cinematic cluster" becomes a single motion. Establish a consistent setup routine: tripod legs first, center column height second, primary device third, then accessories in the same order every time. This muscle memory reduces cognitive load during shoots, letting you focus on creative decisions rather than technical assembly. After each session, photograph your rig configuration from multiple angles—these reference images become invaluable when replicating successful setups or troubleshooting what worked best for specific shooting conditions.
Mastering Your Multi-Device Content Creation System
A unified hybrid workflow built around a capable phone tripod fundamentally transforms how you approach content creation, eliminating the artificial barriers between smartphone convenience and camera quality. By investing in a modular system with quick-release capabilities and multiple accessory mounting points, you've solved the twin challenges of sluggish device switching and limited shooting capabilities that plague traditional single-device setups. The beauty of this approach lies in its scalability—whether you're working with a basic phone clamp and single LED light or a fully-loaded rig bristling with monitors, microphones, and recording devices, the core principle remains unchanged: one stable platform that adapts instantly to whatever your creative vision demands. Start with your existing gear and incrementally add components as your workflow reveals specific needs, prioritizing the quick-release system first since it delivers the most dramatic efficiency gains. Remember that technical sophistication serves creativity, not the other way around. A streamlined setup that you can deploy confidently in under two minutes will always outperform an elaborate rig that keeps you fumbling with connections while moments slip away. Embrace this systematic approach to equipment organization, and you'll find yourself shooting more consistently, capturing better coverage, and spending less mental energy on logistics and more on the storytelling that defines exceptional content.
