💡 sprint#1
이번 명절에도 코로나로 인해 집에서 프로젝트를 진행하기로 했다.
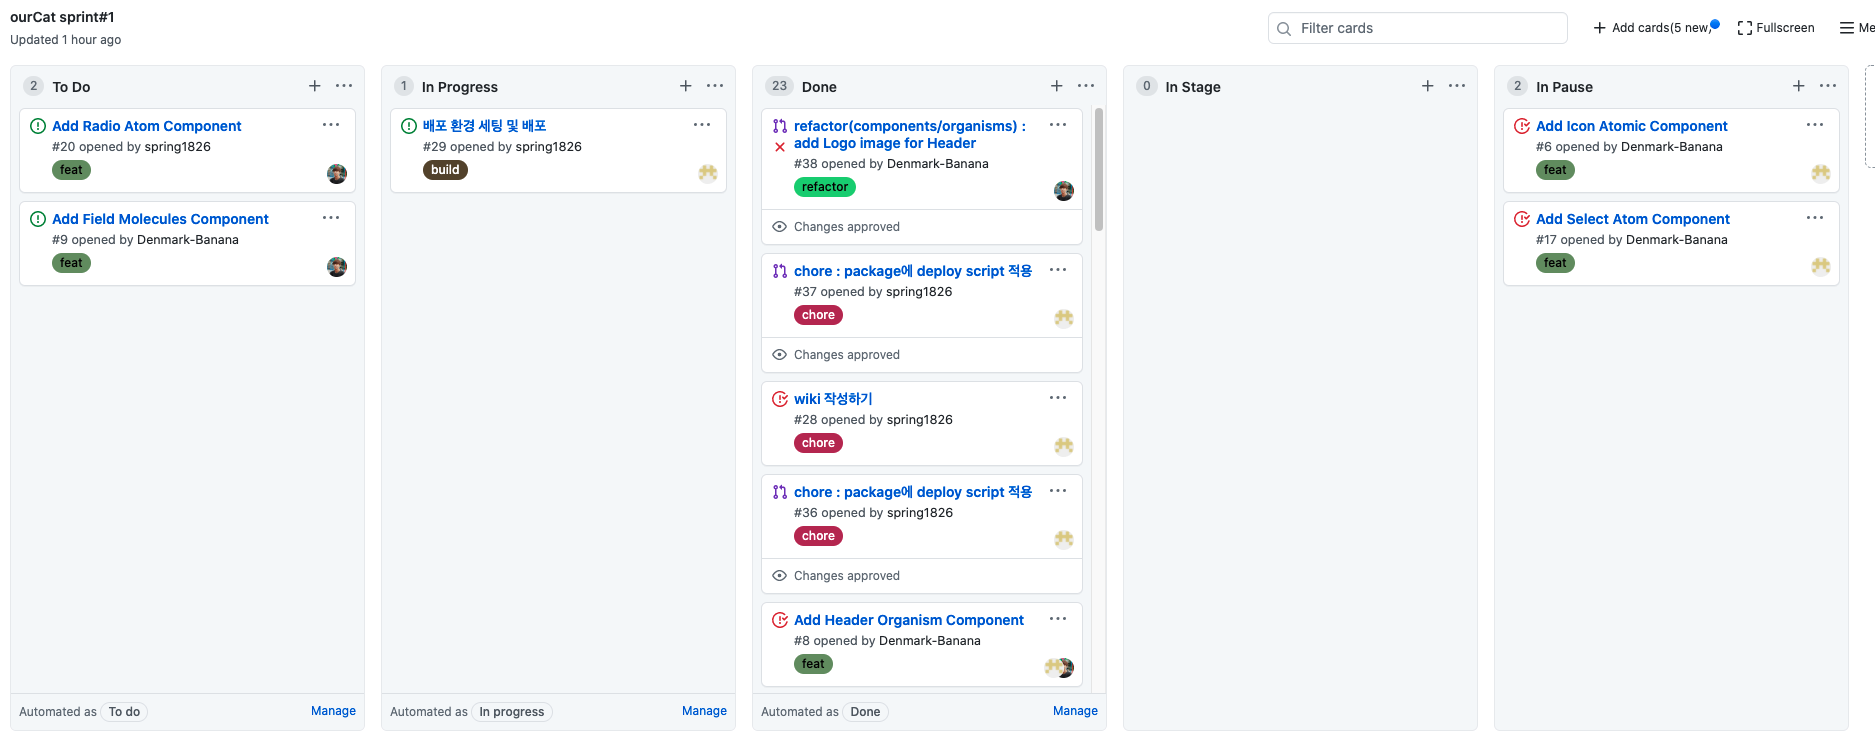
프론트 팀원인 김대현 개발자와 협업을 진행했고 미팅은 Google Meet을 사용했다. 먼저 prettier와 eslint를 적용하고 github project & issue 연결해서 칸반차트를 적용했다. github에서 제공하는 서비스를 최대한 이용해보고자 wiki도 같이 작성했다.
Mixin
font와 color는 공통적으로 사용하는 요소라는 것을 감안해 styled-components의 ThemeProvider을 이용해 theme을 적용했다.
그리고 프로젝트에 atomic 디자인을 적용하기로 했으니 컴포넌트를 먼저 구현하기로 했다. 컴포넌트 구현시 재사용성을 고려하며 구현을 하다보니 공통적으로 받는 props가 있었고 이것을 mixin해야할 필요성을 느꼈다. props의 interface도 동일하게 적용해야해서 타입도 같이 지정을 해주었다.
// props의 interface
export interface IComponent {
    id?: string;
    name?: string;
    className?: string;
    children?: React.ReactNode;

    font?: fontType;
    weight?: fontWeightType;
    position?: string;
    top?: string;
    right?: string;
    bottom?: string;
    left?: string;
    width?: string;
    height?: string;
    margin?: string;
    padding?: string;
    border?: string;
    borderRadius?: string;
    color?: string;
    opacity?: number;
}
// props의 css
import { css } from 'styled-components';
import { IComponent } from 'common/Interfaces/IComponent';

export const ComponentMixin = css<IComponent>`
  position: ${props => props.position && props.position};
  top: ${props => props.top && props.top};
  right: ${props => props.right && props.right};
  bottom: ${props => props.bottom && props.bottom};
  left: ${props => props.left && props.left};
  width: ${props => props.width && props.width};
  height: ${props => props.height && props.height};
  margin: ${props => props.margin && props.margin};
  padding: ${props => props.padding && props.padding};
  border: ${props => props.border && props.border};
  border-radius: ${props => props.borderRadius && props.borderRadius};
  color: ${props => props.color && props.color};
  opacity: ${props => props.opacity && props.opacity};
  font: ${props => props.font && props.theme.fonts[props.font]};
  font-weight: ${props => props.weight ? props.theme.fontWeights[props.weight] : 400};
`;
컴포넌트 구현
mixin을 적용하여 컴포넌트를 구현하면 props의 길이도 짧아져 가독성이 좋아지고 컴포넌트별로 필요한 props만 추가하면 사용하는 입장에서도 훨씬 가볍게 느껴지는 느낌이었다.
// mixin props interface를 적용
import { IComponent } from 'common';
import * as S from './style';

export interface IRangeProps extends IComponent {
  onClick?: React.MouseEventHandler<HTMLElement>;
  onChange?: React.ChangeEventHandler<HTMLElement>;
  ref?: React.RefObject<HTMLInputElement>;
  defaultValue?: string | string[] | number;
  maxStep?: string;
  minStep?: string;
  step?: string;
}

export const Range: React.FC<IRangeProps> = ({
  maxStep = '100',
  minStep = '0',
  step = '10',
  ...props
}) => {
  return <S.Wrap type="range" min={minStep} max={maxStep} step={step} {...props} />;
};
// mixin props css를 적용
import { ComponentMixin } from 'common';
import { IRangeProps } from './index';
import styled from 'styled-components';

export const Wrap = styled.input<IRangeProps>`
  ${ComponentMixin};
  cursor: pointer;
  &::-webkit-slider-thumb {
    -webkit-appearance: none;
    margin-top: -4px;
    width: 4px;
    height: 12px;
    border-radius: 6px;
    background-color: ${props => props.theme.colors.MAIN};
  }
  &::-webkit-slider-runnable-track {
    height: 4px;
    background-color: ${props => props.theme.colors.GRAY[400]};
    border-radius: 10px;
  }
`;
Deploy
nextJS를 배포하기 위해서 Netlify, vercel등을 알아보았다. 처음에는 vercel을 이용해서 배포를 하려고 했지만 레포가 개인 레포가 아니면 요금이 발생한다고 해서 Netlify로 배포를 했다
배포방법은 간단했다. 먼저 package.json파일에 아래의 script를 추가해준다.
"scripts": {
...,
"netlify-deploy": "next build && next export"
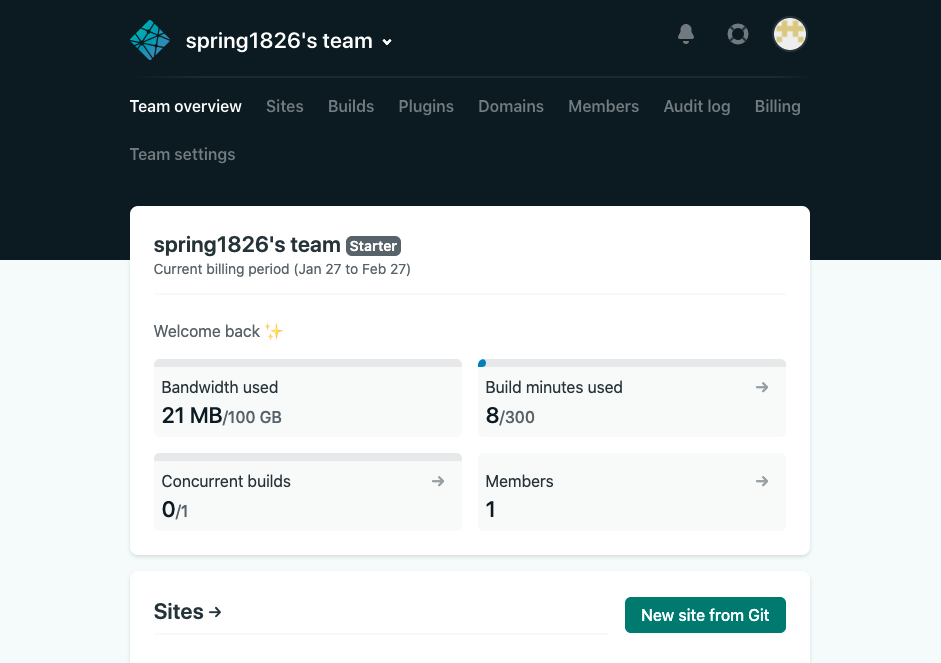
},Netlify 홈페이지에 접속해 로그인을 한 후 'New site from Git'버튼을 클릭한다.
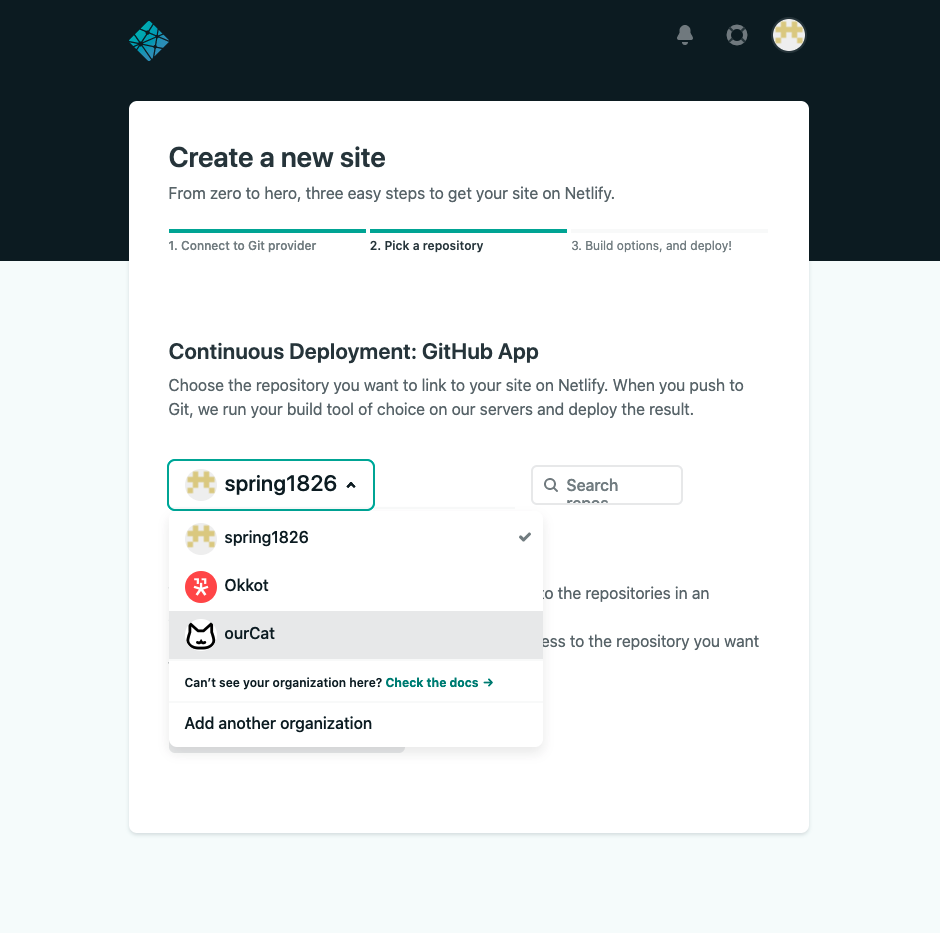
'GitHub'버튼을 클릭하고 레포를 클릭해준다.
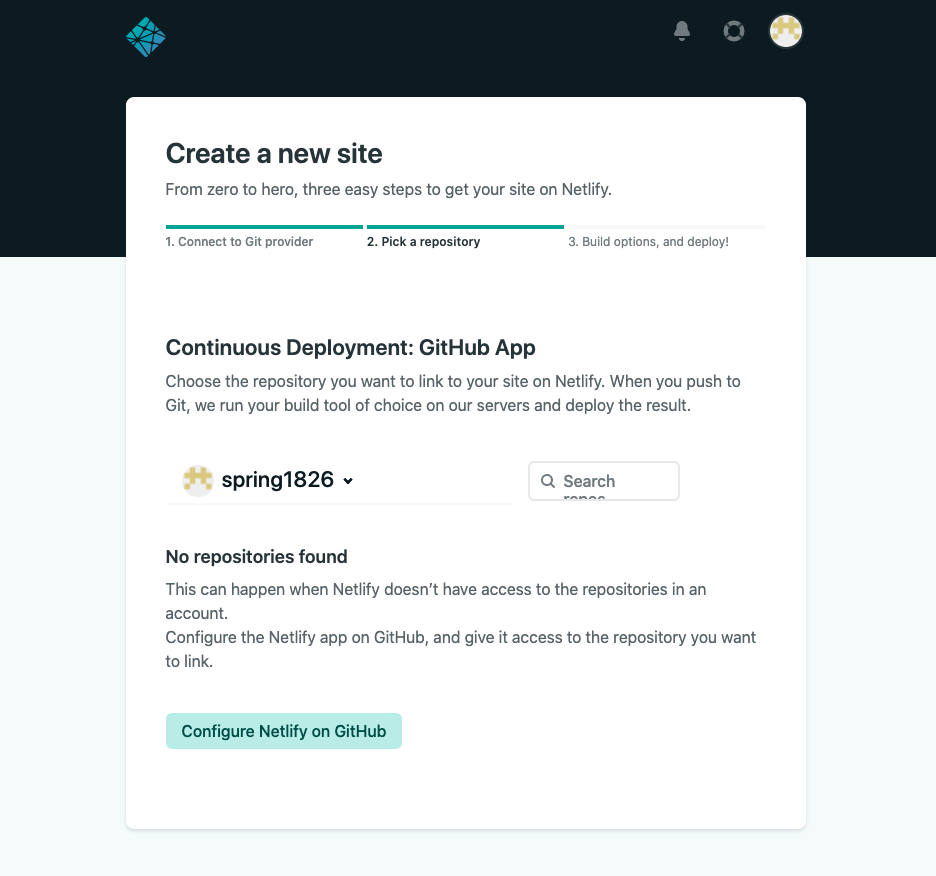
레포가 보이지 않는 경우 아래에 'Configure Netlify on GitHub'버튼을 눌러 레포를 찾아준다.
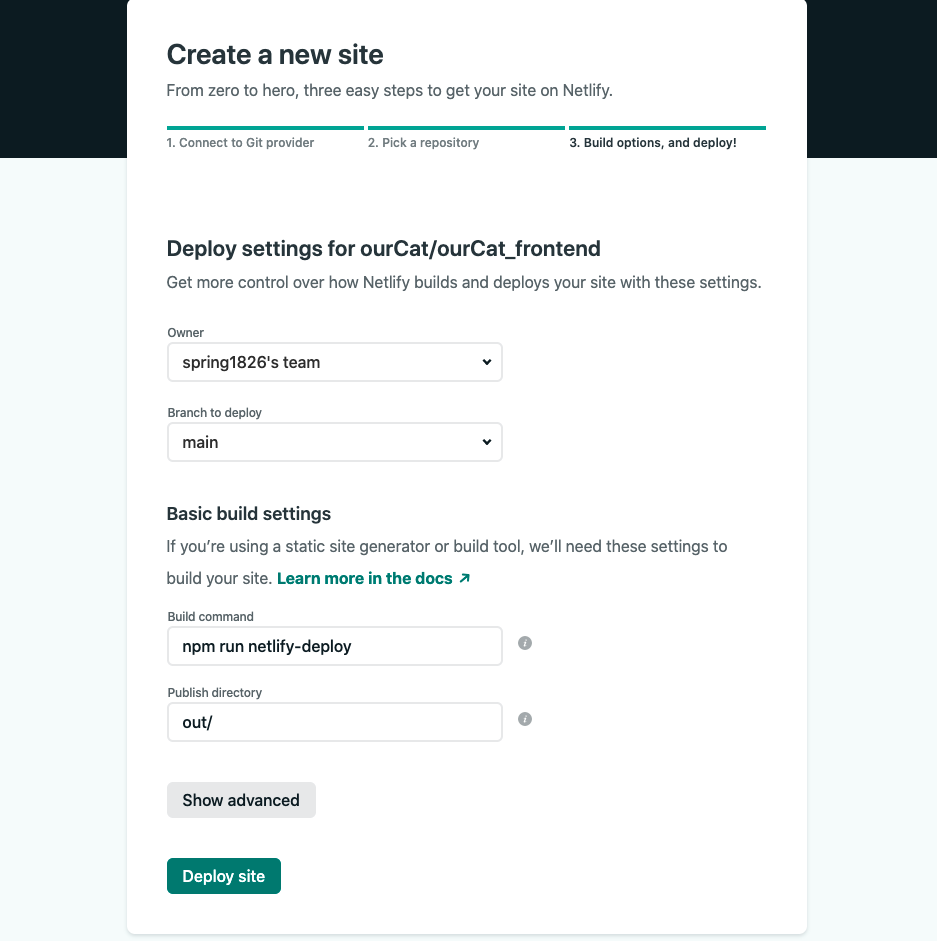
레포를 선택하면 배포환경을 세팅하는 화면이 나온다. 빌드 명령어는 실제 배포시 사용될 명령어를 입력하고 아래의 폴더이름은 아무거나 넣어도 된다고 해서 그대로 적용했다.
이렇게 배포를 하면 완성이다. 처음에는 이상한 도메인을 주는데 'Domain Setting'에 들어가서 도메인은 변경이 가능하다.
Reference

행님 회사 그만두셨습니까