Sanity란?
Sanity는 헤드리스 CMS로, React와 함께 원활하게 사용할 수 있습니다. 콘텐츠는 API를 통해 관리되며, 실시간 협업 기능도 지원합니다. Sanity Studio라는 React 기반의 관리 애플리케이션을 통해 사용자는 직관적인 인터페이스로 콘텐츠를 쉽게 관리할 수 있습니다. Firebase나 MongoDB처럼 NoSQL 데이터베이스와 유사한 구조로 이해할 수 있습니다.
시작하기
-
Sanity 홈페이지에서 로그인 후 Studio 페이지로 이동합니다.
-
Get Started버튼을 클릭하여 프로젝트를 생성합니다.- 프로젝트 이름을 입력하고 생성합니다.
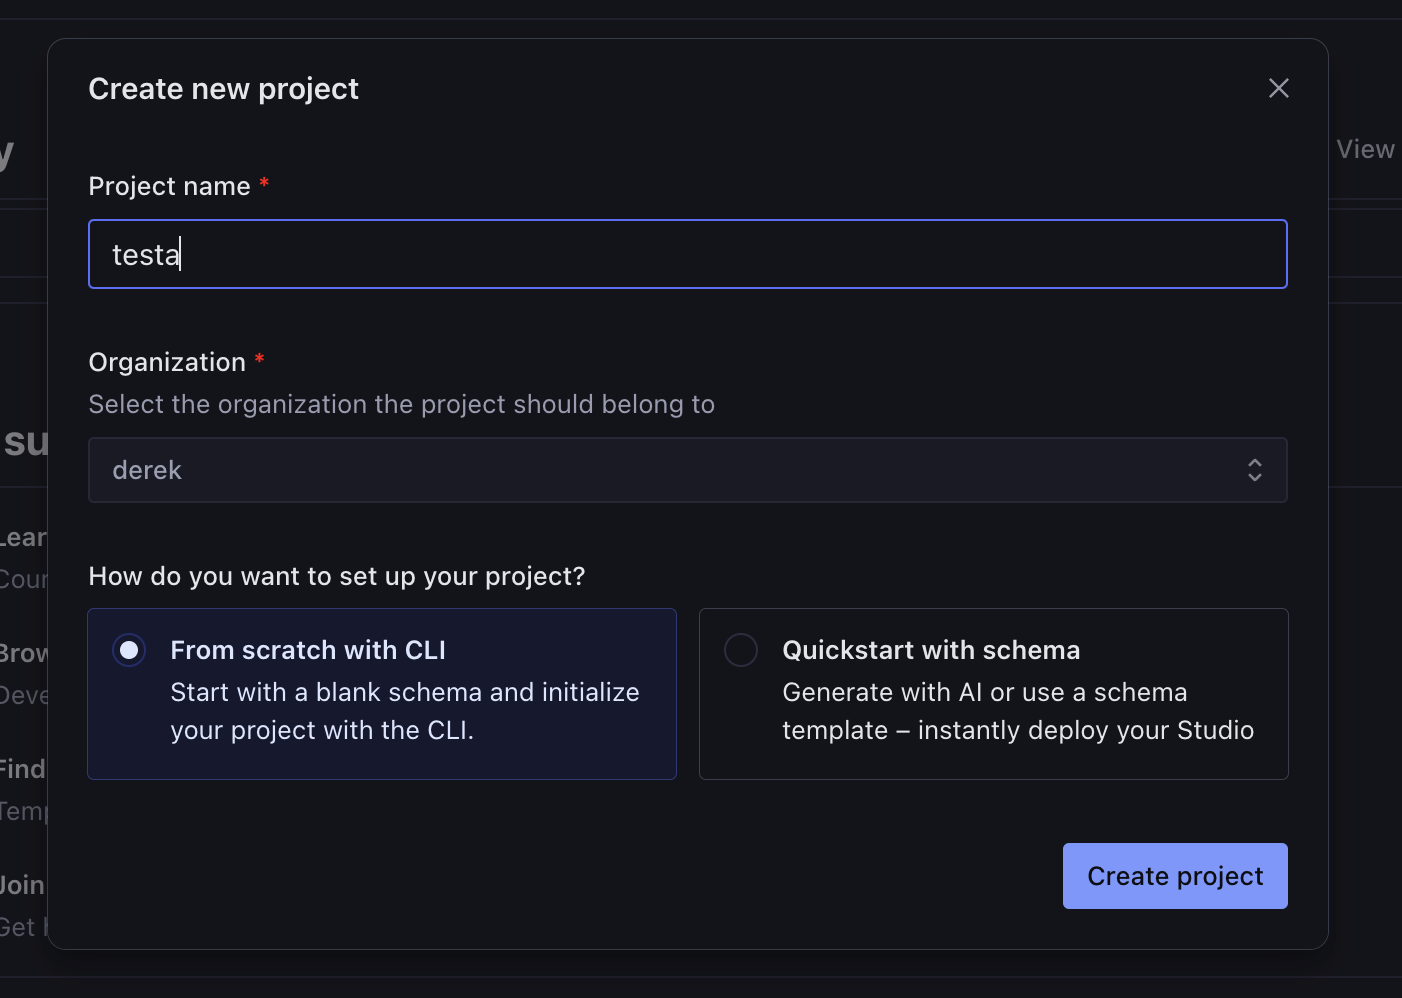
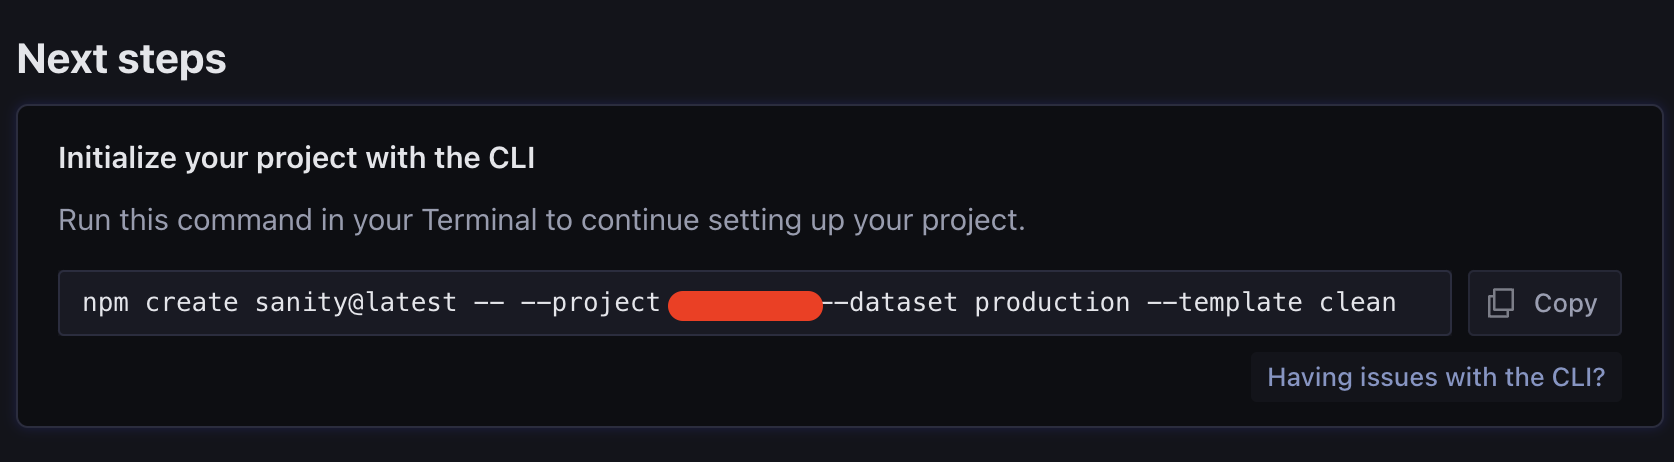
- CLI 명령어가 나타나면, 해당 명령어를 실행하여 프로젝트를 생성합니다.
- 경로 및 TypeScript 사용 여부를 설정한 후,
yarn dev로 실행하면localhost:3333에서 관리 페이지가 열립니다.
- 경로 및 TypeScript 사용 여부를 설정한 후,
TypeScript 설정
만약 Next.js와 함께 사용하는데 아래와 같이 에러가 날 경우에는
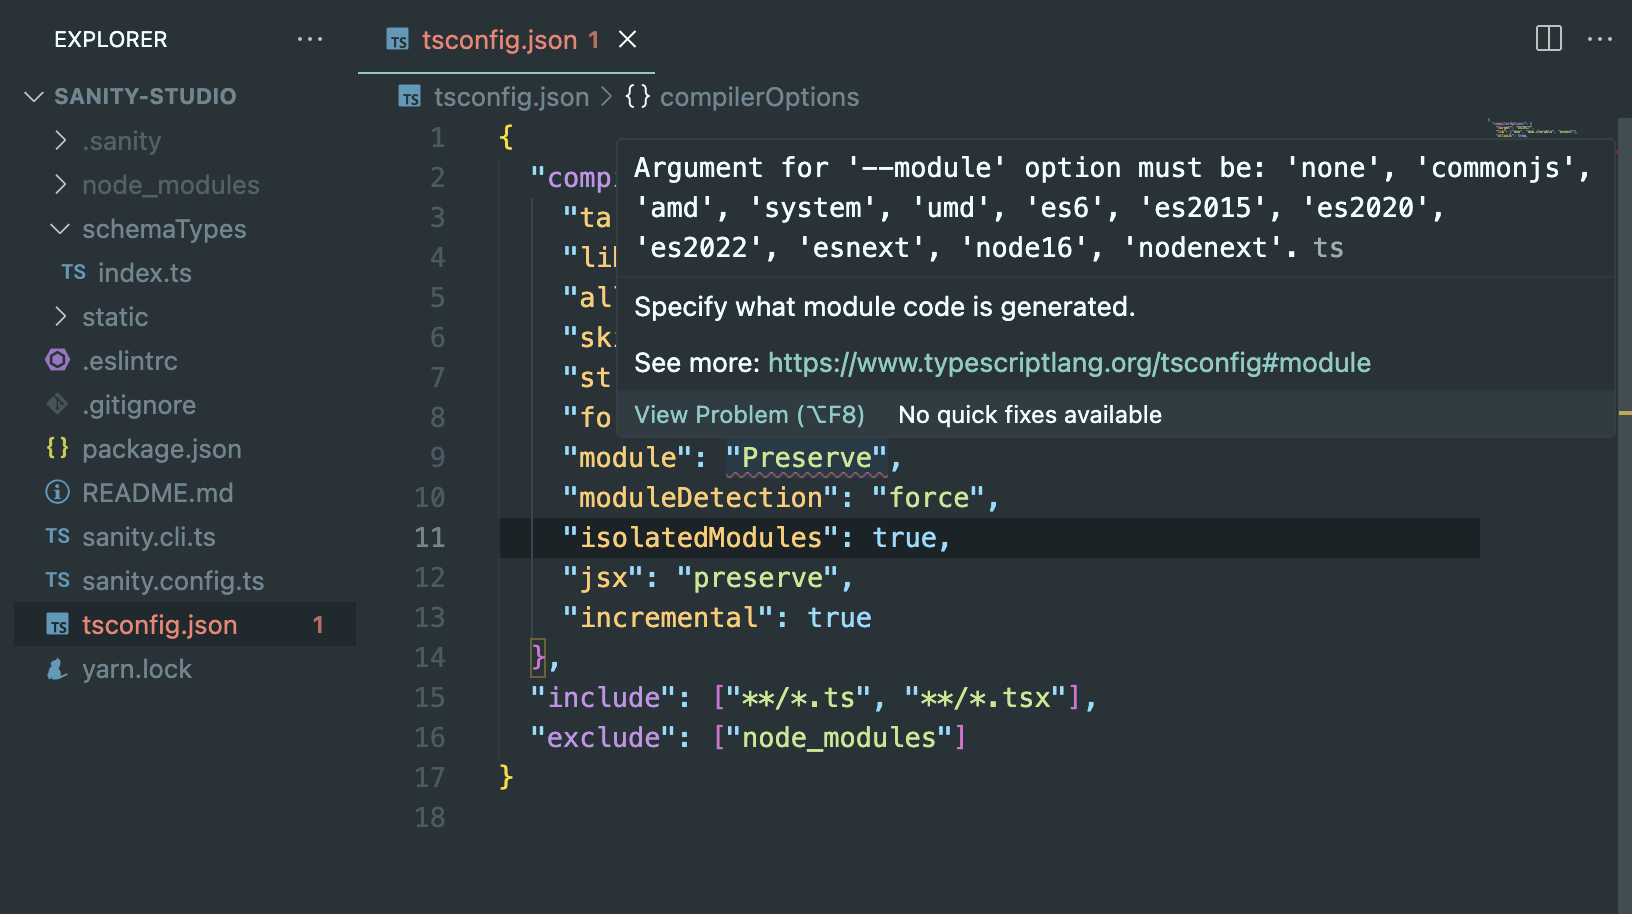
tsconfig.json에 아래의 설정을 추가합니다:
{
  "compilerOptions": {
    "target": "ES2017",
    "lib": ["dom", "dom.iterable", "esnext"],
    "allowJs": true,
    "skipLibCheck": true,
    "strict": true,
    "forceConsistentCasingInFileNames": true,
    "noEmit": true,
    "moduleDetection": "force",
    "module": "NodeNext",
    "moduleResolution": "NodeNext",
    "isolatedModules": true,
    "jsx": "preserve",
    "incremental": true
  },
  "include": ["**/*.ts", "**/*.tsx"],
  "exclude": ["node_modules"]
}
Schema 생성
Sanity는 NoSQL 데이터베이스이므로 처음에 설명드렸던 것처럼 Firebase나 MongoDB와 유사한 구조를 가집니다.
기본 구조를 이해하려면 공식 문서를 참고하세요: Sanity Schema Documentation.
예를 들어, 다음과 같은 ERD를 스키마로 변환하고 싶다고 가정해보겠습니다.
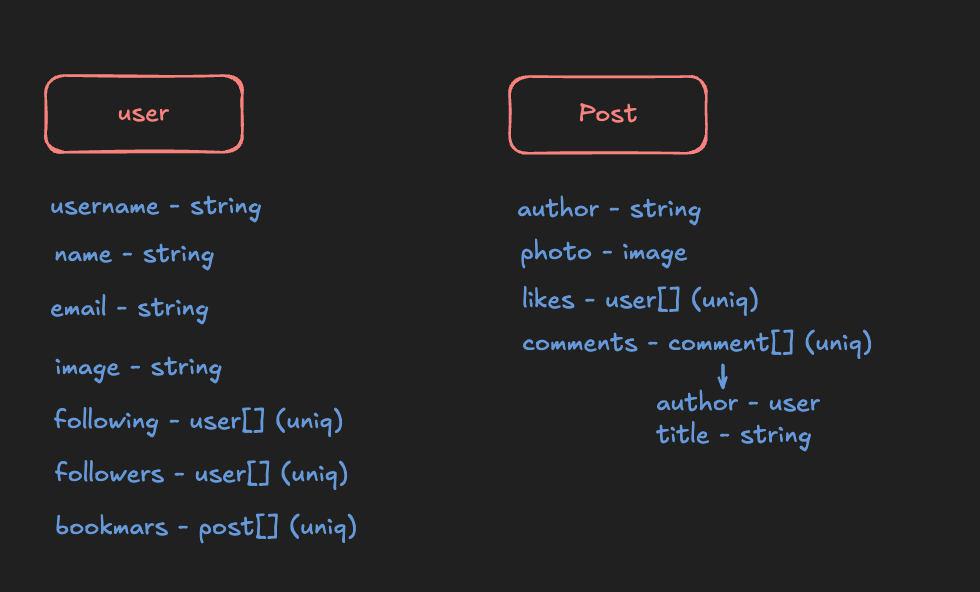
공식 문서를 참고하여 변경하면 다음과 같이 수정할 수 있습니다 :
// ./schemaTypes/user.ts
import {defineType} from 'sanity'

export const userType = defineType({
  name: 'user',  //모델의 이름
  title: 'User', //Sanity에서 보는 이름
  type: 'document', //Array 등의 모델 타입
  fields: [
    {
      title: 'Username',
      name: 'username',
      type: 'string',
    },
    {
      title: 'Name',
      name: 'name',
      type: 'string',
    },
    {
      title: 'Email',
      name: 'email',
      type: 'string',
    },
    {
      title: 'Image',
      name: 'image',
      type: 'string',
    },
    {
      title: 'Following',
      name: 'following',
      type: 'array',
      of: [ // 어떤 배열인지 (필수)
        {
          type: 'reference',
          to: [{type: 'user'}],
        },
      ],
      validation: (Rule) => Rule.unique(), // 유니크함
    },
    {
      title: 'Followers',
      name: 'followers',
      type: 'array',
      of: [
        {
          type: 'reference',
          to: [{type: 'user'}],
        },
      ],
      validation: (Rule) => Rule.unique(),
    },
    {
      title: 'Bookmarks',
      name: 'bookmarks',
      type: 'array',
      of: [
        {
          type: 'reference',
          to: [{type: 'post'}],
        },
      ],
      validation: (Rule) => Rule.unique(),
    },
  ],
})
// ./schemaTypes/user.ts
import {defineType} from 'sanity'
export const postType = defineType({
name: 'post',
title: 'Post',
type: 'document',
fields: [
{
title: 'Author',
name: 'author',
type: 'reference',
to: [{type: 'user'}],
},
{
title: 'Photo',
name: 'photo',
type: 'image',
},
{
title: 'Likes',
name: 'likes',
type: 'array',
of: [
{
type: 'reference',
to: [{type: 'user'}],
},
],
validation: (Rule) => Rule.unique(),
},
{
title: 'Comments',
name: 'comments',
type: 'array',
of: [
{
title: 'Comment',
name: 'comment',
type: 'document',
fields: [
{
title: 'Author',
name: 'author',
type: 'reference',
to: [{type: 'user'}],
},
{
title: 'Comment',
name: 'comment',
type: 'string',
},
],
},
],
},
],
})
스키마를 정의한 후, Sanity Studio에서 추가한 스키마를 확인할 수 있습니다.

Preview 설정
하지만 몇 개를 추가해보면 아래와 같이 미리보기에서는 'empty'로 표시되어 내용을 확인할 수 없고, 클릭해야만 해당 내용을 볼 수 있어 불편합니다.

미리보기를 개선하려면, 스키마에 preview 필드를 추가합니다:
preview: {
  select: { // 고른 항목들이 selection으로 저장됩니다.
    title: 'comments.0.comment',
    authorName: 'author.name',
    authorUsername: 'author.username',
    media: 'photo'
  },
  prepare(selection) {
    const { title, authorName, authorUsername, media } = selection
    return {
      title,
      subtitle: `by ${authorName} (${authorUsername})`,
      media,
    }
  },
}
이렇게 설정하면 아래와 같이 미리보기도 깔끔하게 표시됩니다: