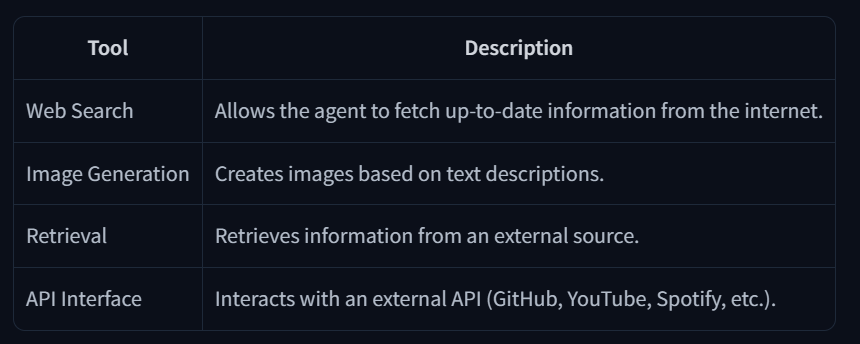
도구(Tool)란 무엇인가?
- 도구(Tool)이란 LLM에게 제공되는 function이다.
-
도구의 예시
-
에이전트가 최신 데이터를 필요로 한다면 이를 제공하는 도구가 필요하다. 예를 들어, 검색 도구 없이 LLM에 직접 오늘의 날씨를 물어본다면, LLM이 무작위 날씨를 생성할 가능성이 있다.
도구는 다음을 포함해야 한다:
- 함수가 수행하는 작업에 대한 텍스트 설명.
- 실행가능한 요소(특정 동작을 수행하는 기능)
- 타입이 지정된 인수(Arguments with typings).
- (선택사항) 타입이 지정된 출력(Outputs with typings)
도구(Tool)은 어떻게 동작 하는가?
LLM은 오직 텍스트 입력을 받고 텍스트 출력을 생성할 수 있으며, 자체적으로 도구를 호출할 수는 없다.
"에이전트에 도구를 제공한다"는 것은 LLM에게 도구의 존재를 알려주고, 필요할 때 해당 도구를 호출하는 텍스트(코드형태)를 생성하도록 가르치는 것을 의미한다.
예를 들어, 특정 위치의 날씨를 인터넷에 조회할 수 있는 도구를 제공한 후, LLM에게"파리의 날씨는 어때?"라고 물으면, LLM은 이 질문이 우리가 제공한 "날씨" 도구를 사용할 적절한 기회라는 것을 인식합니다. 그러면 LLM은 해당 도구를 호출하는 텍스트(코드)를 생성합니다.
이후 에이전트(Agent)가 LLM의 출력을 분석하고, 도구 호출이 필요함을 인식한 후 실제로 도구를 실행합니다. 그리고 도구에서 반환된 출력을 LLM에게 다시 전달하면, LLM은 이를 기반으로 최종 사용자 응답을 구성합니다.
도구 호출의 출력은 대화의 또 다른 메시지 유형으로 처리됩니다. 일반적으로 도구 호출 과정은 사용자에게 직접 표시되지 않습니다. 대신, 에이전트가 대화를 수집하고, 도구를 호출한 후, 그 출력을 새로운 메시지로 추가하여 LLM에게 다시 전달하는 방식으로 작동합니다.
결과적으로 사용자 입장에서는 마치 LLM이 직접 도구를 사용한 것처럼 보이지만, 실제로는 애플리케이션 코드(에이전트)가 이를 수행한 것입니다.
LLM에게 도구(Tool)를 제공하는 방법
완전한 답변은 다소 복잡할 수 있지만, 기본적으로 시스템 프롬프트(System Prompt)를 활용하여 모델에게 사용 가능한 도구에 대한 텍스트 설명을 제공하는 방식으로 이루어집니다.
이를 통해 LLM은 특정 상황에서 어떤 도구를 사용할 수 있는지 학습하고, 필요할 때 해당 도구를 호출하는 적절한 텍스트(코드)를 생성할 수 있습니다.
도구(Tool) 제공 시 유의할 사항
이 방식을 효과적으로 구현하려면 다음 사항을 정확하고 명확하게 정의해야 합니다:
- 도구의 기능 – 도구가 수행하는 작업을 명확하게 설명해야 합니다.
- 필요한 입력 값 – 도구가 기대하는 정확한 입력 데이터를 정의해야 합니다.
이러한 이유로, 도구의 설명은 일반적으로 명확하고 표현력이 풍부한 구조(예: 프로그래밍 언어, JSON 등)를 사용하여 제공됩니다. 반드시 이러한 형식을 사용할 필요는 없지만, 일관되고 정밀한 형식이 필요합니다.
우리는 두 개의 정수를 곱하는 간단한 계산기 도구(Calculator Tool)를 구현할 것입니다. 다음은 해당 기능을 수행하는 Python 코드 예제입니다:
def calculator(a: int, b: int) -> int:
    """Multiply two integers."""
    return a * b
우리의 도구(Tool)는 "calculator"이며, 두 개의 정수를 곱하는 기능을 수행합니다.
이 도구는 다음과 같은 입력(Inputs)을 필요로 합니다:
-
a (int): 하나의 정수(Integer).
-
b (int): 또 다른 정수(Integer).
도구의 출력(Output)은 다음과 같이 정의할 수 있습니다: -
(int): a와 b의 곱.
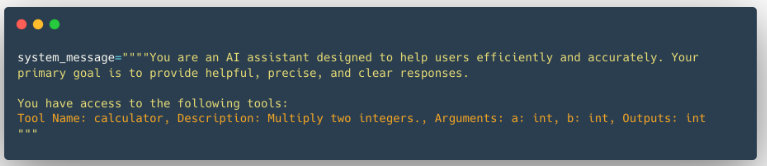
이러한 세부 사항은 매우 중요합니다. 이제, LLM이 이해할 수 있도록 도구를 설명하는 텍스트 문자열을 구성해 보겠습니다.
Tool Name: calculator, Description: Multiply two integers., Arguments: a: int, b: int, Outputs: int중요한 점 : 이 텍스트 설명은 LLM이 도구(Tool)에 대해 알아야 할 정보를 담고 있습니다.
이전 문자열을 LLM의 입력으로 제공하면, 모델은 이를 도구로 인식하고 필요한 입력(Inputs)과 예상 출력(Output)을 이해할 수 있습니다.
추가 도구를 제공할 경우:
일관된 형식(Consistent Format)을 유지해야 합니다.
이 과정은 취약(Flexible)할 수 있으며, 세부 사항을 실수로 놓칠 가능성이 있습니다.
더 나은 방법이 있을까?
이제, 이러한 문제를 해결할 수 있는 더 체계적이고 안정적인 방법을 탐색해 보겠습니다.
자동 포맷팅(Auto-formatting) 도구(Tool) 섹션
우리의 도구(Tool)는 Python으로 작성되었으며, 이미 필요한 정보를 포함하고 있습니다:
- 설명적 이름(Descriptive Name) – calculator
- 자세한 설명(Longer Description) – 함수의 docstring 주석을 통해 제공 (Multiply two integers.)
- 입력(Inputs) 및 타입(Type) – 함수가 두 개의 int를 기대함
- 출력(Output)의 타입(Type) – 반환값이 int임
왜 프로그래밍 언어를 사용할까?
- 표현력(Expressiveness) – 의미를 정확하게 전달
- 간결함(Conciseness) – 불필요한 중복 없이 핵심 정보만 포함
- 정확성(Precision) – 일관된 형식으로 오류를 줄임
이제, 프로그래밍 언어의 이러한 강점을 활용하여 도구를 더 체계적으로 정의하는 방법을 살펴보겠습니다.
우리는 Python 소스 코드를 LLM을 위한 도구 명세(Specification)로 제공할 수 있지만, 도구의 구현 방식 자체는 중요하지 않습니다.
중요한 것은 다음 네 가지 요소입니다:
1. 이름(Name) – 도구의 명칭 (calculator)
2. 기능(What it does) - 수행하는 작업 (Multiply two integers.)
3. 입력(Inputs) – 필요한 값과 데이터 유형 (int, int)
4. 출력(Output) – 반환되는 데이터 유형 (int)
우리는 Python의 Introspection 기능을 활용하여, 소스 코드에서 도구 설명을 자동으로 생성할 수 있습니다.
이를 위해, 도구 함수는 다음 요소를 포함해야 합니다:
- 타입 힌트(Type Hints)
- Docstring (문서화 주석)
- 명확한 함수 이름
완료 후, 단순히 Python 데코레이터(Decorator)를 사용하여 calculator 함수를 도구로 표시하면 됩니다.
아래의 내용은 이를 Python코드로 작성한 것 입니다.
@tool
def calculator(a: int, b: int) -> int:
    """Multiply two integers."""
    return a * b

print(calculator.to_string())
@tool 데코레이터 활용
함수(Function) 정의 앞의 @tool 데코레이터(Decorator)에 주목하세요.
우리가 다음에 살펴볼 구현(Implementation)을 통해, 데코레이터(Decorator)가 제공하는 to_string() 함수(Function)를 사용하여 소스 코드(Source Code)에서 다음과 같은 텍스트를 자동으로 추출할 수 있습니다.
Tool Name: calculator, Description: Multiply two integers., Arguments: a: int, b: int, Outputs: int일반적인 도구(Generic Tool) 구현
우리는 일반적인(Generic) 도구(Tool) 클래스(Class)를 생성하여, 필요할 때마다 재사용(Reuse)할 수 있도록 합니다.
면책 조항(Disclaimer) : 이 예제 구현(Implementation)은 가상의(Fictional) 예제이지만, 대부분의 라이브러리(Libraries)에서 사용되는 실제 구현(Implementation)과 매우 유사합니다.
class Tool:
    """
    A class representing a reusable piece of code (Tool).

    Attributes:
        name (str): Name of the tool.
        description (str): A textual description of what the tool does.
        func (callable): The function this tool wraps.
        arguments (list): A list of argument.
        outputs (str or list): The return type(s) of the wrapped function.
    """
    def __init__(self,
                 name: str,
                 description: str,
                 func: callable,
                 arguments: list,
                 outputs: str):
        self.name = name
        self.description = description
        self.func = func
        self.arguments = arguments
        self.outputs = outputs

    def to_string(self) -> str:
        """
        Return a string representation of the tool,
        including its name, description, arguments, and outputs.
        """
        args_str = ", ".join([
            f"{arg_name}: {arg_type}" for arg_name, arg_type in self.arguments
        ])

        return (
            f"Tool Name: {self.name},"
            f" Description: {self.description},"
            f" Arguments: {args_str},"
            f" Outputs: {self.outputs}"
        )

    def __call__(self, *args, **kwargs):
        """
        Invoke the underlying function (callable) with provided arguments.
        """
        return self.func(*args, **kwargs)
처음에는 복잡해 보일 수 있지만, 하나씩 살펴보면 어떻게 작동하는지 알 수 있습니다.
우리는 도구(Tool) 클래스(Class)를 정의하며, 이 클래스에는 다음과 같은 속성(Attributes)이 포함됩니다:
- name (str): 도구의 이름
- description (str): 도구가 수행하는 작업에 대한 간략한 설명
- function (callable): 도구가 실행하는 함수(Function)
- arguments (list): 예상되는 입력 매개변수(Parameters)
- outputs (str 또는 list): 도구의 예상 출력(Output)
__call__(): 도구 인스턴스를 호출할 때 함수(Function)를 실행to_string(): 도구의 속성을 텍스트(Text) 형식으로 변환
이제, 아래와 같은 코드를 사용하여 이 클래스를 활용해 도구를 만들 수 있습니다.
calculator_tool = Tool(
    "calculator",                   # name
    "Multiply two integers.",       # description
    calculator,                     # function to call
    [("a", "int"), ("b", "int")],   # inputs (names and types)
    "int",                          # output
)
그러나, Python의 inspect 모듈(Module)을 활용하면 이러한 정보를 자동으로 추출할 수도 있습니다!
이것이 바로 @tool 데코레이터(Decorator)가 수행하는 작업입니다.
추가 정보:
만약 @tool 데코레이터(Decorator)의 구현(Implementation)이 궁금하다면, 다음 섹션을 확인해 보세요! 🚀
def tool(func):
    """
    A decorator that creates a Tool instance from the given function.
    """
    # Get the function signature
    signature = inspect.signature(func)

    # Extract (param_name, param_annotation) pairs for inputs
    arguments = []
    for param in signature.parameters.values():
        annotation_name = (
            param.annotation.__name__
            if hasattr(param.annotation, '__name__')
            else str(param.annotation)
        )
        arguments.append((param.name, annotation_name))

    # Determine the return annotation
    return_annotation = signature.return_annotation
    if return_annotation is inspect._empty:
        outputs = "No return annotation"
    else:
        outputs = (
            return_annotation.__name__
            if hasattr(return_annotation, '__name__')
            else str(return_annotation)
        )

    # Use the function's docstring as the description (default if None)
    description = func.__doc__ or "No description provided."

    # The function name becomes the Tool name
    name = func.__name__

    # Return a new Tool instance
    return Tool(
        name=name,
        description=description,
        func=func,
        arguments=arguments,
        outputs=outputs
    )
다시 한번 강조하자면(Reiterating)
이 데코레이터(Decorator)를 적용하면, 도구(Tool)를 다음과 같이 구현할 수 있습니다:
@tool
def calculator(a: int, b: int) -> int:
    """Multiply two integers."""
    return a * b

print(calculator.to_string())
그리고 Tool 클래스의 to_string() 메서드를 사용하면,
LLM에서 도구 설명(Tool Description)으로 활용할 수 있는 텍스트(Text)를 자동으로 생성할 수 있습니다. 🚀
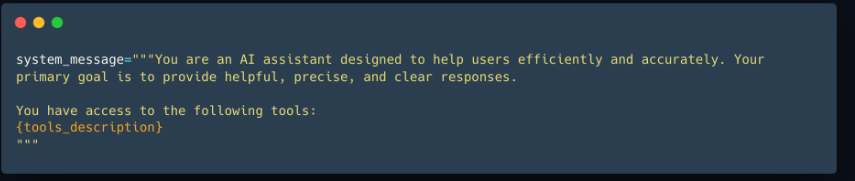
Tool Name: calculator, Description: Multiply two integers., Arguments: a: int, b: int, Outputs: int우리가 이 섹션에서 시작했던 예제를 기반으로 하면,
tools_description을 대체한 후 시스템 프롬프트는 다음과 같은 형태가 됩니다: