SSH key를 발급받아 github에 연동한 뒤 지금까지 작성해 놓은 코드를 푸시해보자👊🏻
- 터미널에 아래 명령어로 ssh key가 발급되어 있는지 먼저 확인한다.
> id_rsa id_rea.pub // 두 디렉토리가 있다면 ssh key가 이미 발급되어 있는것이다. 
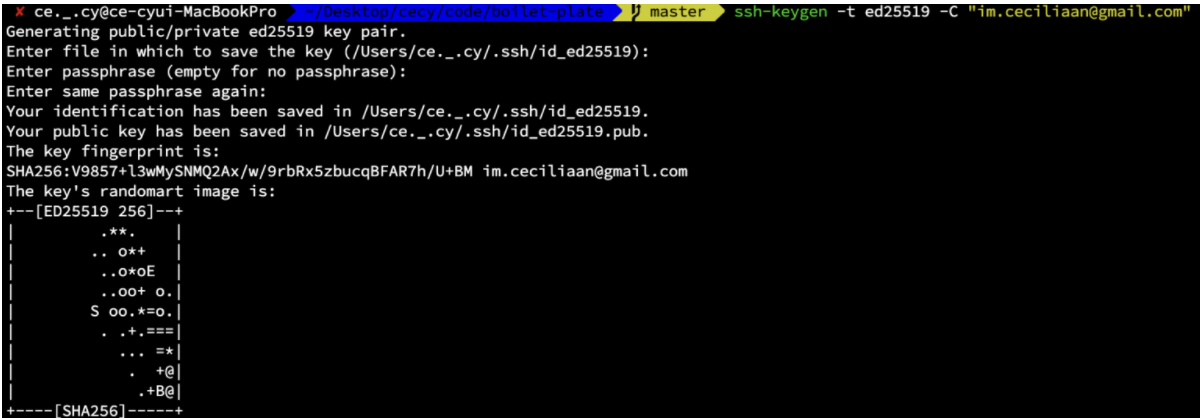
- 없다면 만들어보자! 아래 명령어를 입력한뒤 엔터엔터엔터! 그럼 아래처럼 키의 랜덤아트 이미지가 확인된다.
ssh-keygen -t rsa -b 4096 -C "your_email@example.com"

// ssh-keygen -t ed25519 -C "im.ceciliaan@gmail.com"
- 백그라운드에서 ssh-agent를 시작해준다.
$ eval "$(ssh-agent -s)"
> Agent pid 20016
- macOS Sierra 10.12.2 이상을 사용하는 경우 ~/.ssh/config 파일을 통하여 ssh-agent에 key를 자동으로 로드하고 키체인에 암호를 저장하도록 설정해주어야 한다. 파일 생성전 먼저 해당 파일이 먼저 있나 확인해 줬다.
$ open ~/.ssh.config
> The file /Users/ce._.cy/.ssh/config does not exist.
- 파일이 존재하지 않으므로 하나 만들어준다. 그리고 파일을 열어 Host~ 부터의 코드를 작성해 준다.
$ touch ~/.ssh/config
$ open ~/.ssh.config

// 오픈된 파일에 아래 코드를 넣어준다.
Host *
  AddKeysToAgent yes
  UseKeychain yes
IdentityFile ~/.ssh/id_ed25519- SSH key를 ssh-agent에 추가하고 키체인에 암호를 저장해준다.
$ ssh-add -K ~/.ssh/id_ed25519
> Identity added: ~
- 생성된 SSH key를 확인해보자. 터미널에 아래의 코드를 적고 엔터 치면 response는 없다. 대신 그 상태에서 메모장 같은곳에 붙여넣기를 하면 생성된 자신의 SSH key를 확인할수 있다.
$ pbcopy < ~/.ssh/id_ed25519.pub
-
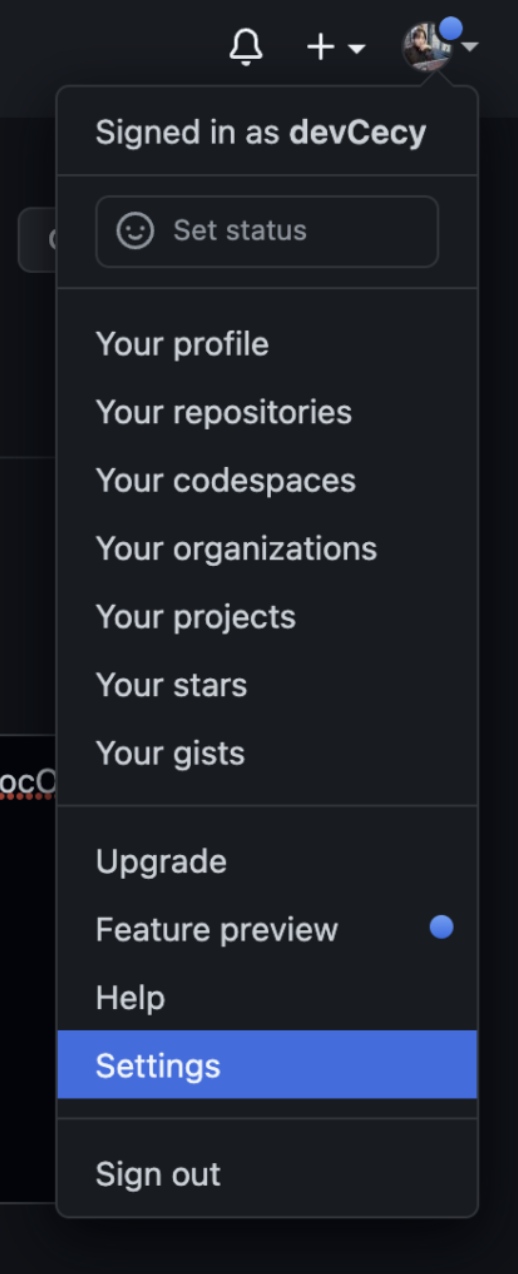
생성된 SSH key를 이제 github에 연동해주어야 한다. github 프로필을 클릭하면 settings가 있고 거기서 SSH and GPGkeys 메뉴를 클릭해 준다.

-
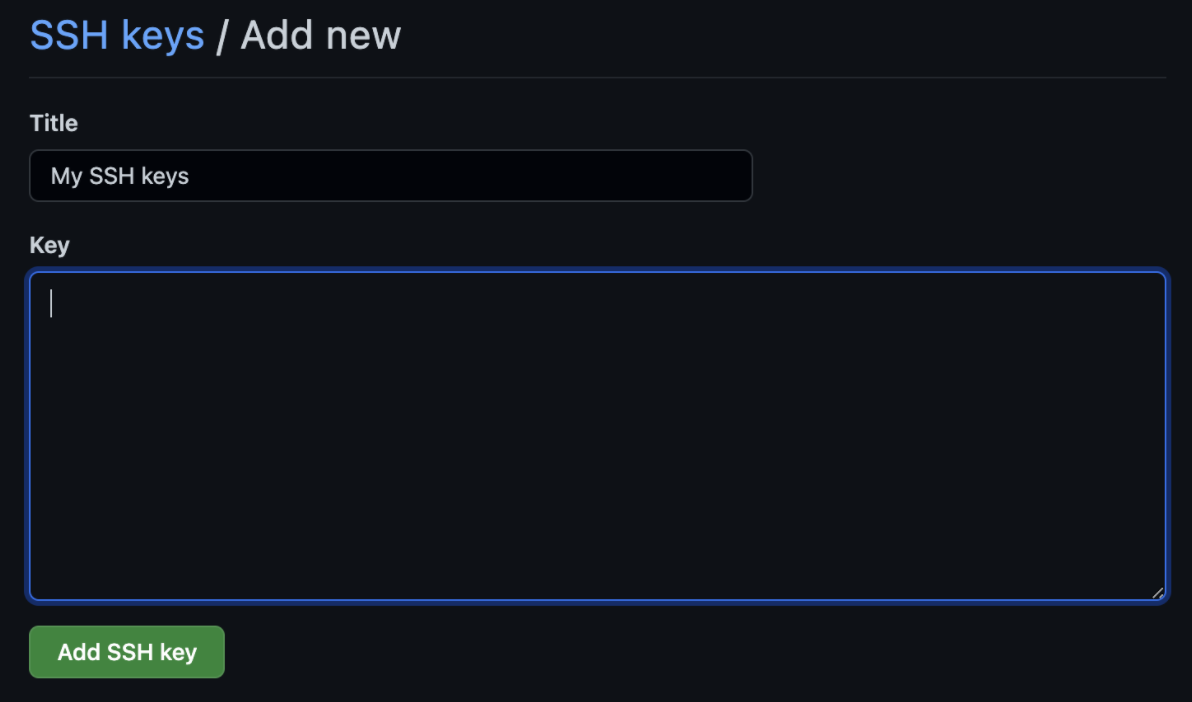
title을 적고, key안에 복사한 자신의 SSH key를 붙여넣어주고 add SSH key 버튼을 클릭해준다.

- 이제 node.js 프로젝트 코드를 안전하게 깃헙에 푸시할 수 있게 되었다! 프로젝트를 로컬에 먼저 저장한 후 remote 저장소인 github에 push 해주자. 그럼 끝 !👊🏻
$ git add .
$ git commit -m "first commit"
$ git branch -M main // 이건 필수는 아니지만 github도 master 브랜치를 main으로 변경해 쓰길권고하기 있기 때문에 변경해주었다.
$ git remote add origin https://github.com/devCecy/boilet-plate-feat.node.js-.git
$ git push -u origin main
John Ahn님의 유튜브 강의와 github에서 제공하는 문서를 바탕으로 글을 작성했습니다.
