
이번에는
props라는 개념을 사용하여 더 생산적인 Component를 만들어 보자.
props
React는 정의해준 컴포넌트로 작성한 요소를 발견하면 JSX의 속성과 속성값을 해당 컴포넌트에 단일 객체로 전달하는데, 이 객체를
props라고 한다.
props를 사용한 Component 생성
- Subject 안에 propsfh title과 sub을 추가하여 Subject라는 class명을 가진 Component에서 적어 주었던 내용을 속성안에 담는다. 아래에서는
title="Web" sub="world wide web"이라는 props를 추가해주었다.
class App extends Component {
  render(){
    return (
      <div className="App">
        <Subject title="Web" sub="world wide web"></Subject>
        <TOC></TOC>
        <Content></Content>
      </div>
  );
  }
}- 추가해준 props을 Subject Component가 전달 받을 수 있도록, 단일 객체의 형태로 추가해준다. 이때, this로 props를 불러온다.
title자리인<h1>태그 안에는{this.props.title}을, sub에 해당하는 자리에는{this.props.sub}을 넣어주었다.
class Subject extends Component {
  render(){
    return (
      <header>
        <h1>{this.props.title}</h1>
        {this.props.sub}
    </header>
    );
  }
}
여기까지 하면, props를 이용하지 않고 만들었던 Component방식과 동일한 결과를 출력한다. 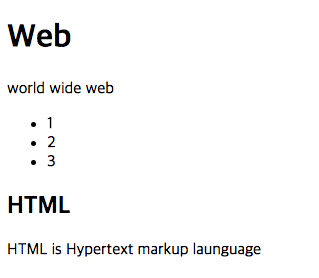
동일한 결과라면 굳이사용해야하나? 라는 생각이 든다. props를 사용한 Component의 진정한 매력을 느끼기위해서는 Component를 여러번 사용해 다른 내용을 만들어 보면 된다😙
- Subject Component의 구조를 사용하되 그 안의 내용만 변경하여 아래와같이 여러번 적어보았다.
class App extends Component {
  render(){
    return (
      <div className="App">
        <Subject title="Web" sub="world wide web"></Subject>
        <Subject title="React" sub="For UI"></Subject>
        <Subject title="JS" sub="I love JS"></Subject>
        <TOC></TOC>
        <Content></Content>
      </div>
  );
  }
}- 그럼 이렇게 동일한 형식이지만 내용은 다른 결과값을 확인할 수 있다.
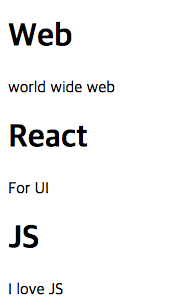
같은형식이지만 다른내용 1억개를 적어줘야한다면? props를 이용한 Component최고시다 👍🏻👍🏻👍🏻

🌈그림으로 기록하는 개발자🌈