FastAPI 애플리케이션 구조화
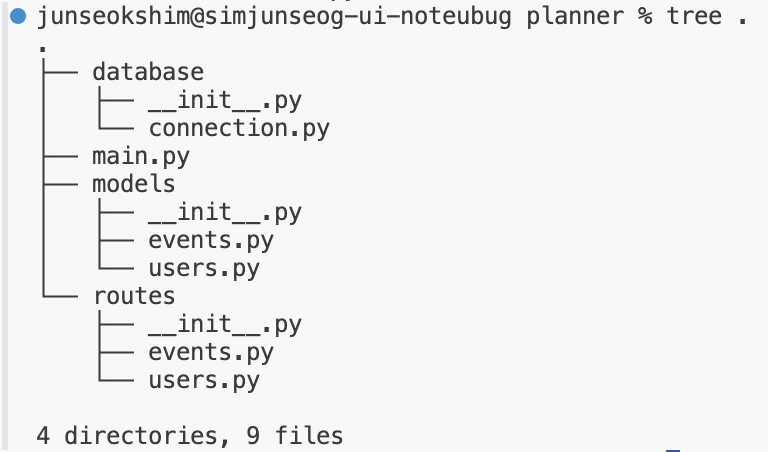
- database 폴더
- connection.py : 데이터베이스 추상화와 설정에 사용하는 파일 - routes 폴더
- events.py : 이벤트 생성, 변경, 삭제 등의 처리를 위한 라우팅- users.py : 사용자 등록 및 로그인 처리를 위한 라우팅
- models 폴더
- events.py : 이벤트 처리용 모델을 정의- users.py : 사용자 처리용 모델을 정의
이벤트 플래너 애플리케이션 개발
등록된 사용자는 이벤트를 추가, 변경, 삭제할 수 있으며 애플리케이션이 자동으로 만든 이벤트 페이지에서 생성된 이벤트를 확인할 수 있다.
등록된 사용자와 이벤트는 모두 고유한 ID를 가지며, 이를 통해 사용자와 이벤트가 중복되는 것을 방지할 수 있다.
먼저 가상환경을 활성화 하자
python3 -m venv venv
source venv/bin/activate
필요한 라이브러리도 설치하고
pip install fastapi uvicorn "pydantic[email]"필요한 라이브러리를 requirements.txt에 저장하자
pip freeze > requirements.txt이제 필요한 라이브러리가 포함된 개발 환경이 모두 준비됐다. 이제 애플리케이션 모델을 구현해보자
모델 구현
모델 구현은 이벤트 모델과 사용자 모델의 정의부터 시작한다. 이 모델들은 데이터가 어떤 방식으로 입력 및 저장되고 애플리케이션에 표현되는지를 정의한다.
이벤트 모델
이벤트 모델은 models 폴더의 events.py에 정의한다.
from pydantic import BaseModel
from typing import List

class Event(BaseModel):
    id: int
    title: str
    image: str
    description: str
    tags: List[str]
location: str- id : 자동 생성되는 고유 식별자
- title : 이벤트 타이틀
- image : 이벤트 이미지 배너의 링크
- description : 이벤트 설명
- tags : 그룹화를 위한 이벤트 태그
- location : 이벤트 위치
Event 클래스 안에 Config 서브 클래스를 추가한다. 이 클래서는 문서화할 때 샘플 데이터를 보여주기 위한 용도이다.
    class Config:
        schema_extra = {
            "example" : {
                "title" : "FastAPI Book Launch",
                "image" : "https://linktomyimage.com/image.png",
                "description" : "We will be discussing the contents of the FastAPI book in this event. Ensure to come with your own copy to win gifts!",
                "tags" : ["python", "fastapi", "book", "launch"],
                "location" : "Google Meet"
            }
        }
이 코드는 샘플 데이터를 정의하며, API를 통해 신규 이벤트를 생성할 때 참고할 수 있다.
사용자 모델
사용자 모델(User)을 models 폴더의 users.py 파일에 정의한다.
from pydantic import BaseModel, EmailStr
from typing import Optional, List
from models.events import Event

class User(BaseModel):
    email: EmailStr
    password: str
    events: Optional[List[Event]]
- email : 사용자 이메일
- password : 사용자 패스워드
- events : 해당 사용자가 생성한 이벤트, 처음에는 비어있다.
데이터를 어떻게 저장하고 설정하는지 보여주는 샘플 데이터를 만든다.
    class Config:
        schema_extra = {
            "example" : {
                "email" : "fastapi@packt.com",
                "passward" : "strong!!!",
                "events" : [],
            }
        }
마지막으로 사용자 로그인 모델(UserSignIn)을 만든다.
class UserSignIn(BaseModel):
    email: EmailStr
    passward: str

    class Config:
        schema_extra = {
            "example" : {
                "email" : "fastapi@packt.com",
                "passward" : "strong!!!",
                "events" : [],
            }
        }
Developer & Publisher 심준석 입니다.