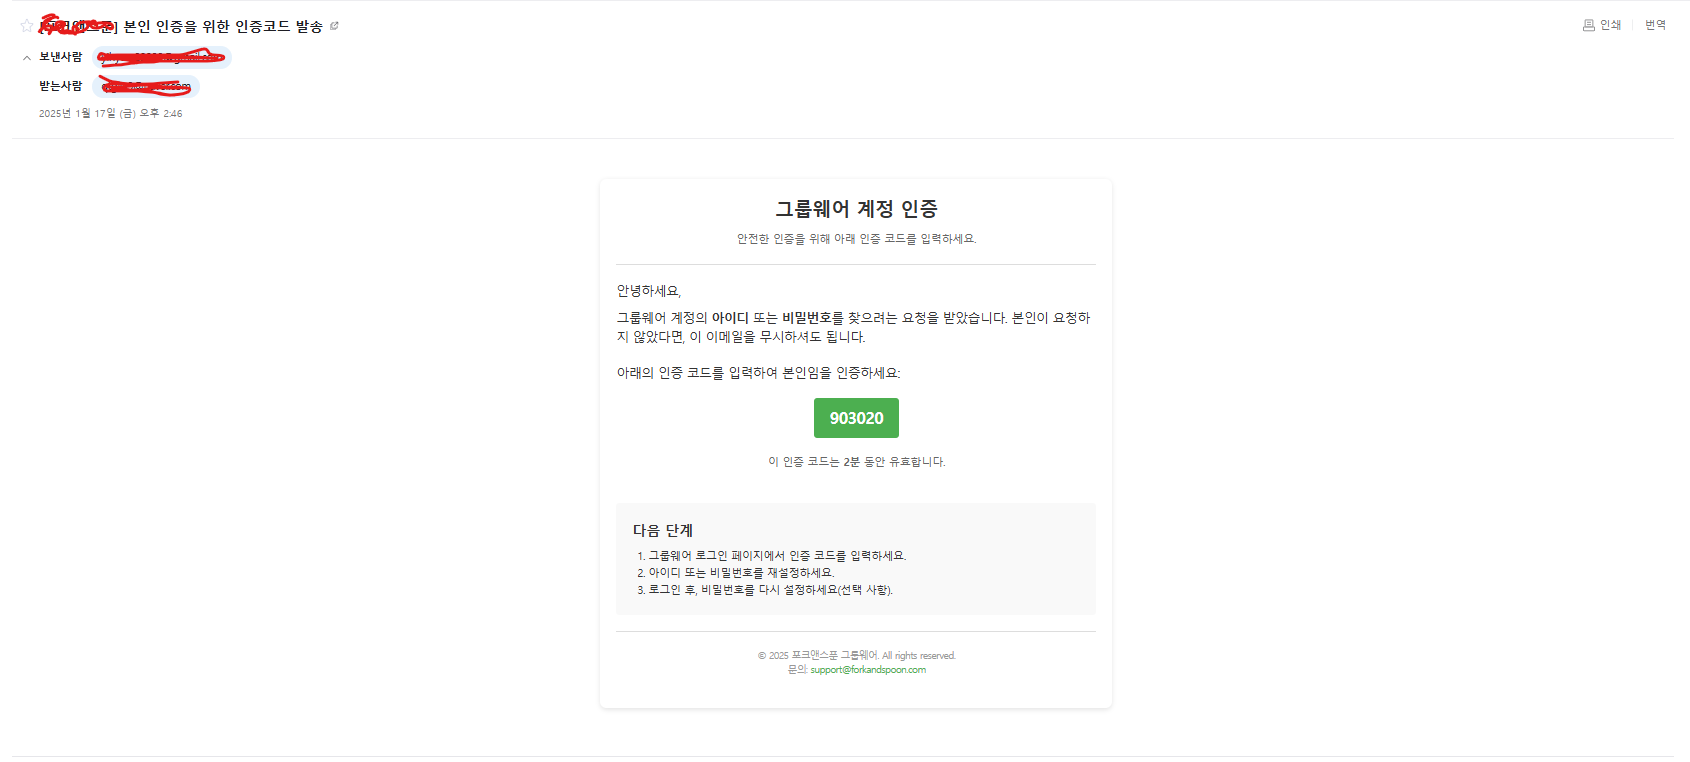
저번 글에서는 Java Api를 사용해 Mail을 발송하는 기능을 다뤄봤다!
이번에는 메일 본문을 꾸며주기 위해서 Thymeleaf 를 사용해보았다.
(너무 많은 오류들을 만나고 해결하는 즐거운 시간이었다... 🤣)
Thymeleaf 설정
먼저 Thymeleaf 사용을 위해 pom.xml에 의존성을 추가해주어야 한다.
<dependency>
    <groupId>org.springframework.boot</groupId>
    <artifactId>spring-boot-starter-thymeleaf</artifactId>
</dependency>
이후 application.properties에 아래 내용을 추가해준다.
# Thymeleaf
spring.thymeleaf.prefix=classpath:/templates/
spring.thymeleaf.suffix=.html
spring.thymeleaf.enabled=true
spring.thymeleaf.cache=false
💣 뷰 리졸버 우선순위 문제
❗ 여기서 발생한 문제!!
나는 JSP 를 사용하고 있기 때문에 application.properties 에 prefix 와 suffix 를 설정해 두었는데, thymeleaf 에 prefix 와 suffix를 설정해 주니 처음 실행될 때 jsp가 아닌 html 파일을 먼저 찾아 에러가 발생했다.
문제가 발생하는 이유는 뷰 리졸버 우선순위 때문인데, Spring Boot는 기본적으로 Thymeleaf View Resolver를 더 높은 우선순위로 등록하기 때문에 html 파일이 먼저 검색되었던 것이다.
이 문제를 해결하기 위해
spring.thymeleaf.view-names=*.html 설정을 추가해준다.
저 설정을 해줄 경우 Thymeleaf Resolver 의 대상 파일을 html 으로만 제한하는 역할을 해주기 때문에 문제가 해결될 수 있었다!
최종 설정
spring.mvc.view.prefix=/views/
spring.mvc.view.suffix=.jsp

# Thymeleaf
spring.thymeleaf.prefix=classpath:/templates/
spring.thymeleaf.suffix=.html
spring.thymeleaf.view-names=*.html
spring.thymeleaf.enabled=true
spring.thymeleaf.cache=false
이렇게 설정 문제를 완료한 이후 메일을 보내기 위한 html을 작성해준다!
※ 이미지와 코드는 아래에 적어둘테니 참고하실 분들은 참고하시기를..!!
html은 경로를 정확히 설정해주는 것이 중요하다.
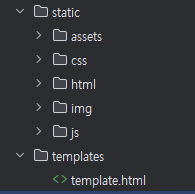
여기까지 작업을 완료 했다면 이전에 작성해 둔 메일 발송 메서드에 아래 코드를 추가해준다.
// Thymeleaf Context 객체 생성 (컨테이너 역할)
Context context = new Context();

// html 템플릿에서 ${authCode} 로 접근 (동적으로 값 전달)
context.setVariable("authCode", authCode);

// 템플릿과 context 결합 (process)
String emailContent = templateEngine.process("template", context);
전체 코드는 다음과 같다.
private void sendMail(UserDTO dto) {

	logger.info("메일 발송");

	String receiverId = dto.getEmail();
	String subject = "[포크앤스푼] 본인 인증을 위한 인증코드 발송";
	String authCode = dto.getAuthentication();

	Properties props = new Properties();
	props.put("mail.smtp.host", "smtp.gmail.com");
	props.put("mail.smtp.port", "465");
	props.put("mail.smtp.auth", "true");
	props.put("mail.smtp.ssl.enable", "true");
	props.put("mail.smtp.ssl.trust", "smtp.gmail.com");

	Session session = Session.getInstance(props, new Authenticator() {
		protected PasswordAuthentication getPasswordAuthentication() {
			return new PasswordAuthentication(emailId, emailPw);
		}
	});

	Context context = new Context();
	context.setVariable("authCode", authCode);
	String emailContent = templateEngine.process("template", context);

	MimeMessage message = new MimeMessage(session);

	try {
		message.setFrom(new InternetAddress(emailId));
		message.addRecipient(Message.RecipientType.TO, new InternetAddress(receiverId));
		message.setSubject(subject);
		message.setContent(emailContent, "text/html; charset=utf-8"); // 메일 content

		Transport.send(message);

	} catch (MessagingException e) {
		e.printStackTrace();
		logger.info("이메일 전송 실패");
	}

}
나의 경우에는 메일에 랜덤 숫자로 구성된 인증코드를 보내주기 때문에 인증코드 생성 메서드도 작성해주었다.
	public Map<String, Object> randomAuthenticationCode(UserDTO dto) {

		logger.info("인증코드 생성");

		Random random = new Random();
		int randomNum = 0;

		String authenticationCode = "";

		// 랜덤 6자리 숫자 생성
		for (int i = 0; i < 6; i++) {
			randomNum = random.nextInt(10);
			authenticationCode += Integer.toString(randomNum);
		}

		dto.setAuthentication(authenticationCode);

		int codeIdx = userService.randomAuthenticationCode(dto);

		Map<String, Object> authCode = new HashMap<>();
		authCode.put("codeIdx", codeIdx);
		authCode.put("authenticationCode", authenticationCode);

		return authCode;
	}
이렇게 작성해준 후 직원을 검증하는 메서드와 함께 실행해보면 아래와 같이 메일이 발송된 것을 확인할 수 있다!
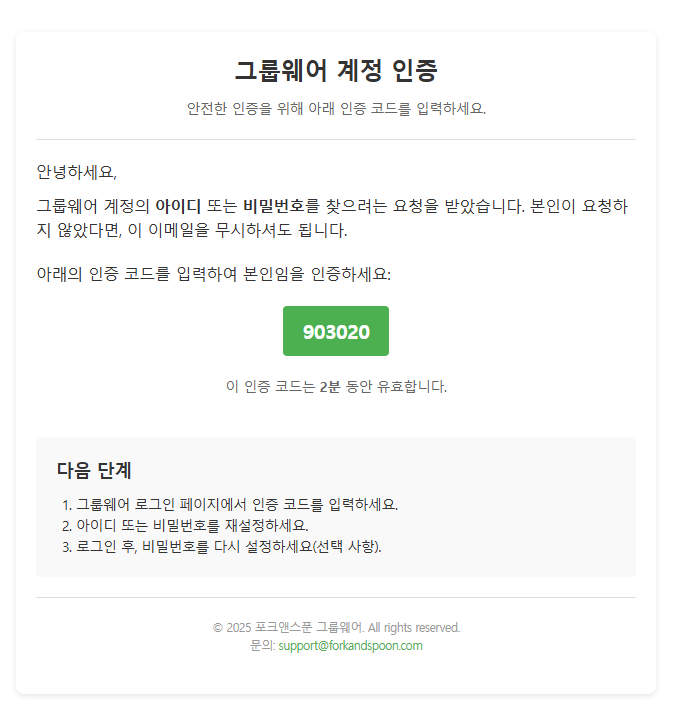
메일 발송 기능을 구현하는건 너무 재미있기도 힘들기도 했다!
하지만 이렇게 결과물을 확인해보니 너무너무 뿌듯하고 즐거웠던 개발이었다 😁
html 코드
※ 스타일을 head에 지정했더니 적용이 되지 않아 인라인 스타일로 적용을 해주었다!
<!DOCTYPE html>
<html xmlns:th="http://www.thymeleaf.org">
<head>
    <title>이메일 인증 코드</title>
</head>
<body style="margin: 0; padding: 0; background: #f4f4f4; font-family: Arial, sans-serif;">
<div style="max-width: 600px; margin: 30px auto; padding: 20px; background: #ffffff; border-radius: 8px; box-shadow: 0 2px 6px rgba(0, 0, 0, 0.1);">
    <!-- Header -->
    <div style="text-align: center; padding-bottom: 20px; border-bottom: 1px solid #dddddd;">
        <h1 style="font-size: 24px; color: #333333; margin: 0;">그룹웨어 계정 인증</h1>
        <p style="font-size: 14px; color: #666666; margin: 10px 0 0;">안전한 인증을 위해 아래 인증 코드를 입력하세요.</p>
    </div>

    <!-- Main Content -->
    <div style="padding: 20px 0;">
        <p style="font-size: 16px; color: #333333; margin: 0 0 10px;">안녕하세요,</p>
        <p style="font-size: 16px; color: #333333; margin: 0 0 20px;">
            그룹웨어 계정의 <strong>아이디</strong> 또는 <strong>비밀번호</strong>를 찾으려는 요청을 받았습니다. 본인이 요청하지 않았다면, 이 이메일을 무시하셔도 됩니다.
        </p>
        <p style="font-size: 16px; color: #333333; margin: 0 0 20px;">
            아래의 인증 코드를 입력하여 본인임을 인증하세요:
        </p>
        <div style="text-align: center; margin: 20px 0;">
            <p style="display: inline-block; padding: 10px 20px; font-size: 20px; font-weight: bold; color: #ffffff; background: #4CAF50; border-radius: 4px;" th:text="${authCode}">[인증 코드]</p>
        </div>
        <p style="font-size: 14px; color: #666666; margin: 0 0 20px; text-align: center;">
            이 인증 코드는 <strong>2분</strong> 동안 유효합니다.
        </p>
    </div>

    <!-- Instructions -->
    <div style="padding: 20px; background: #f9f9f9; border-radius: 4px;">
        <h3 style="font-size: 18px; color: #333333; margin: 0 0 10px;">다음 단계</h3>
        <ol style="margin: 0; padding-left: 20px; font-size: 14px; color: #333333;">
            <li>그룹웨어 로그인 페이지에서 인증 코드를 입력하세요.</li>
            <li>아이디 또는 비밀번호를 재설정하세요.</li>
            <li>로그인 후, 비밀번호를 다시 설정하세요(선택 사항).</li>
        </ol>
    </div>

    <!-- Footer -->
    <div style="padding: 20px 0; text-align: center; font-size: 12px; color: #999999; border-top: 1px solid #dddddd; margin-top: 20px;">
        <p style="margin: 0;">© 2025 포크앤스푼 그룹웨어. All rights reserved.</p>
        <p style="margin: 0;">문의: <a href="mailto:support@forkandspoon.com" style="color: #4CAF50; text-decoration: none;">support@forkandspoon.com</a></p>
    </div>
</div>
</body>
</html>