Firebase Cloud Messaging(FCM)은 무료로 메시지를 안정적으로 전송할 수 있는 크로스 플랫폼 메시징 솔루션이다. 쉽게 이야기하면 서버에서 클라이언트로 메시지를 전달할 수 있는 서비스라고 생각하면 된다.
💡 교차 플랫폼(Cross-Platform)
- 하나의 코드베이스로 여러 운영체제(OS)에서 실행될 수 있도록 개발하는 방식
- 즉, 한 번만 개발하면 여러 환경(Android, iOS, Windows, macOS 등)에서 실행 가능하도록 만드는 기술
특징
- 무료로 메시지를 안정적으로 전송할 수 있다.
- 사용자에게 표시되는 알림 메시지를 전송한다. 혹은 데이터 메시지를 전송하고 애플리케이션 코드에서 임의로 처리할 수 있다.
- 단일 기기, 기기 그룹, 주제를 구독한 기기 등 3가지 방식으로 클라이언트 앱에 메시지를 배포할 수 있다.
구성요소
FCM 구현에는 송수신을 위한 몇가지 구성요소가 있다.
- 메시지를 작성하고 이를 FCM 서버로 전송하기 위한 도구 혹은 환경
- Cloud Functions for Firebase
- Firebase Admin SDK 또는 FCM 서버 프로토콜을 지원하는 신뢰되는 앱 서버(Spring boot, Node.js)
- FCM Backend
- 메시지 요청을 수락하는 등 여러 기능을 수행한다.
- 메시지 ID와 같은 메시지 메타데이터를 생성한다.
- 알림을 수신 받을 클라이언트 앱
- Apple, Android 또는 웹(자바스크립트)
동작 과정
FCM의 동작 과정는 다음과 같다.
-
FCM에서 메시지를 수신하도록 기기를 등록
- FCM을 사용하는 이유는 특정 클라이언트에게 메시지를 전송하기 위해서다. 이를 위해서는 특정 클라이언트를 식별할 수 있는 식별자가 필요하다.
- 클라이언트 앱이 메시지를 수신하도록 등록하여 앱을 고유하게 식별하는 등록 토큰(식별자)을 받는다.
- 앱 서버를 이용할 경우 해당 토큰을 앱 서버가 보관하고 있다가 앱서버가 메시지 알림을 전송할 때 해당 토큰을 꺼내 사용할 수 있다.
-
클라이언트 앱에 메시지 전송
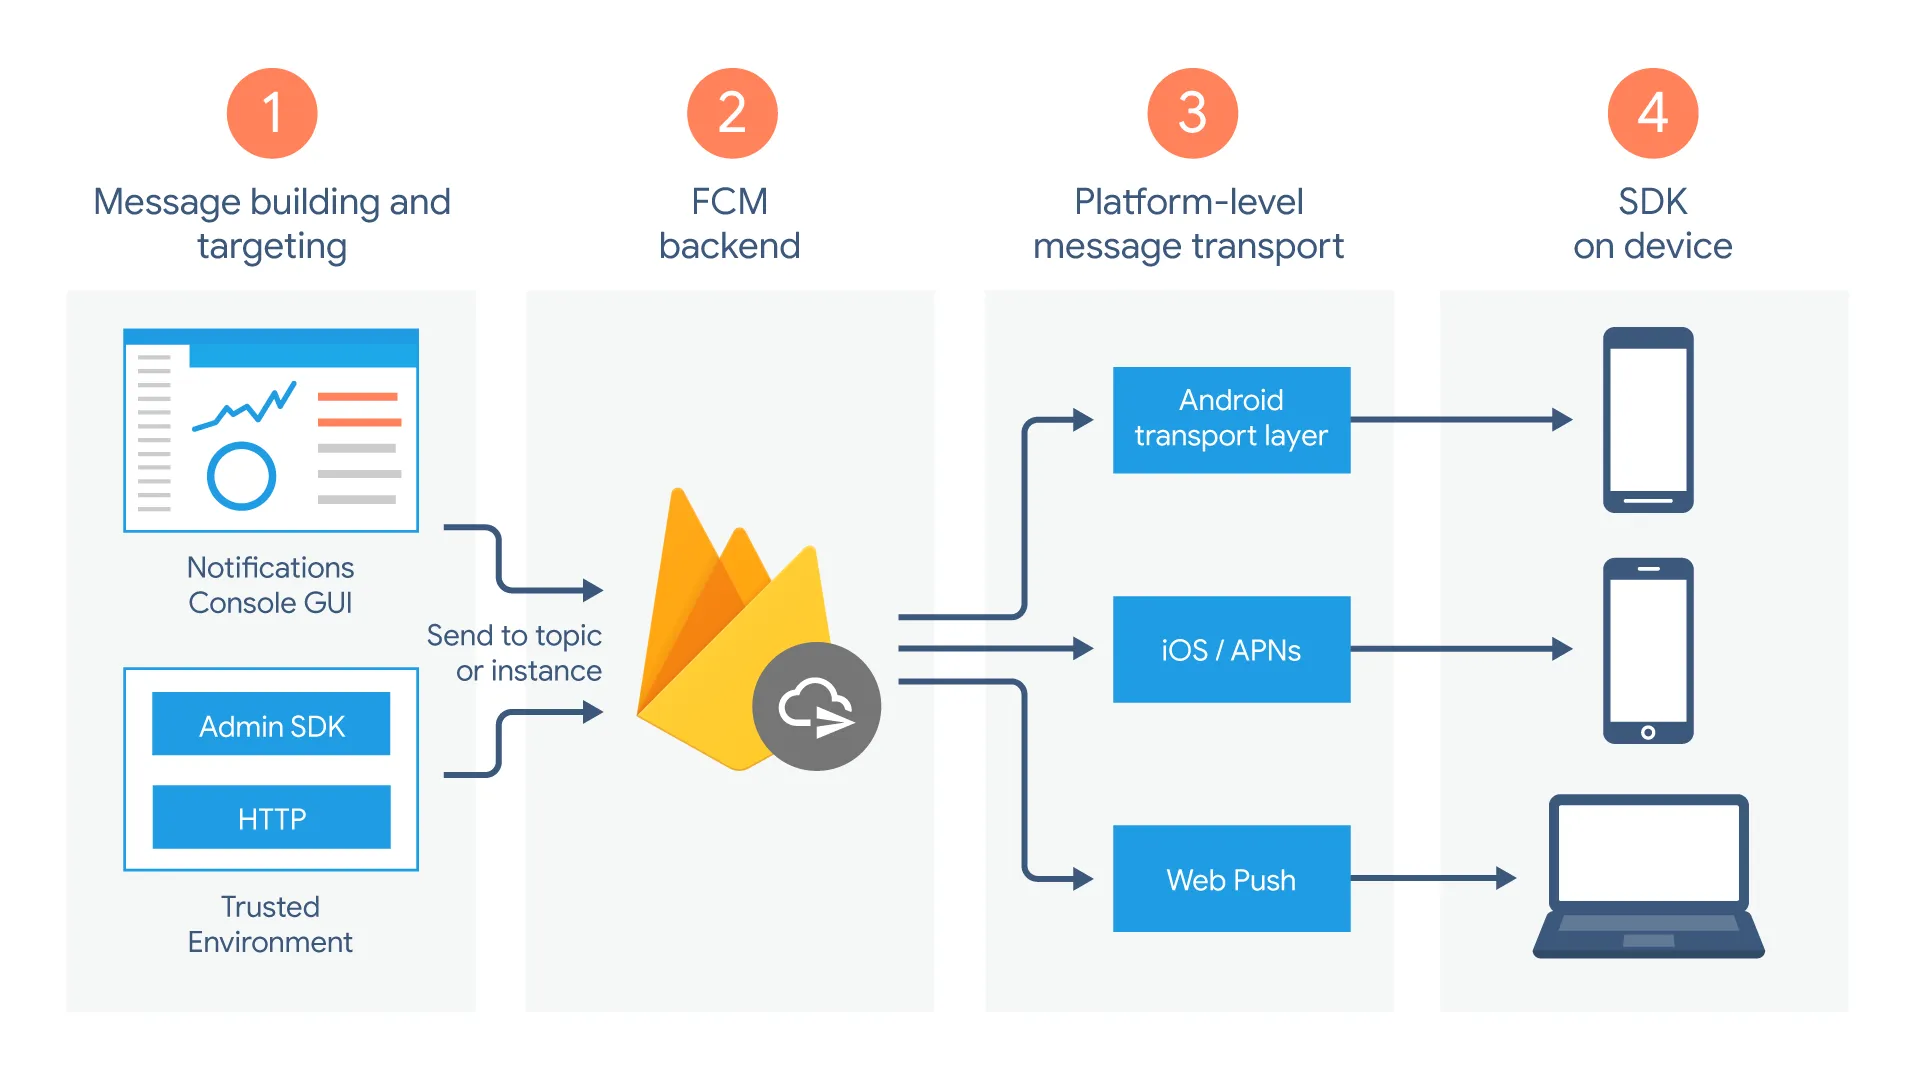
- 메시지를 작성할 수 있는 도구 또는 환경(앱 서버)에서 메시지가 작성되며 메시지 요청이 FCM 백엔드로 전송된다.
- FCM 백엔드는 메시지 요청을 수신하고 메시지 ID와 기타 메타데이터를 생성하여 플랫폼별 전송 레이어로 보낸다.
- 기기가 온라인 상태이면 메시지가 플랫폼별 전송 레이어를 통해 기기로 전송된다.
- 기기에서의 클라이언트 앱이 메시지 또는 알림을 수신한다.
구현
Spring boot로 FCM을 통해 푸시 알림을 전달하는 방법은 다음과 같다.
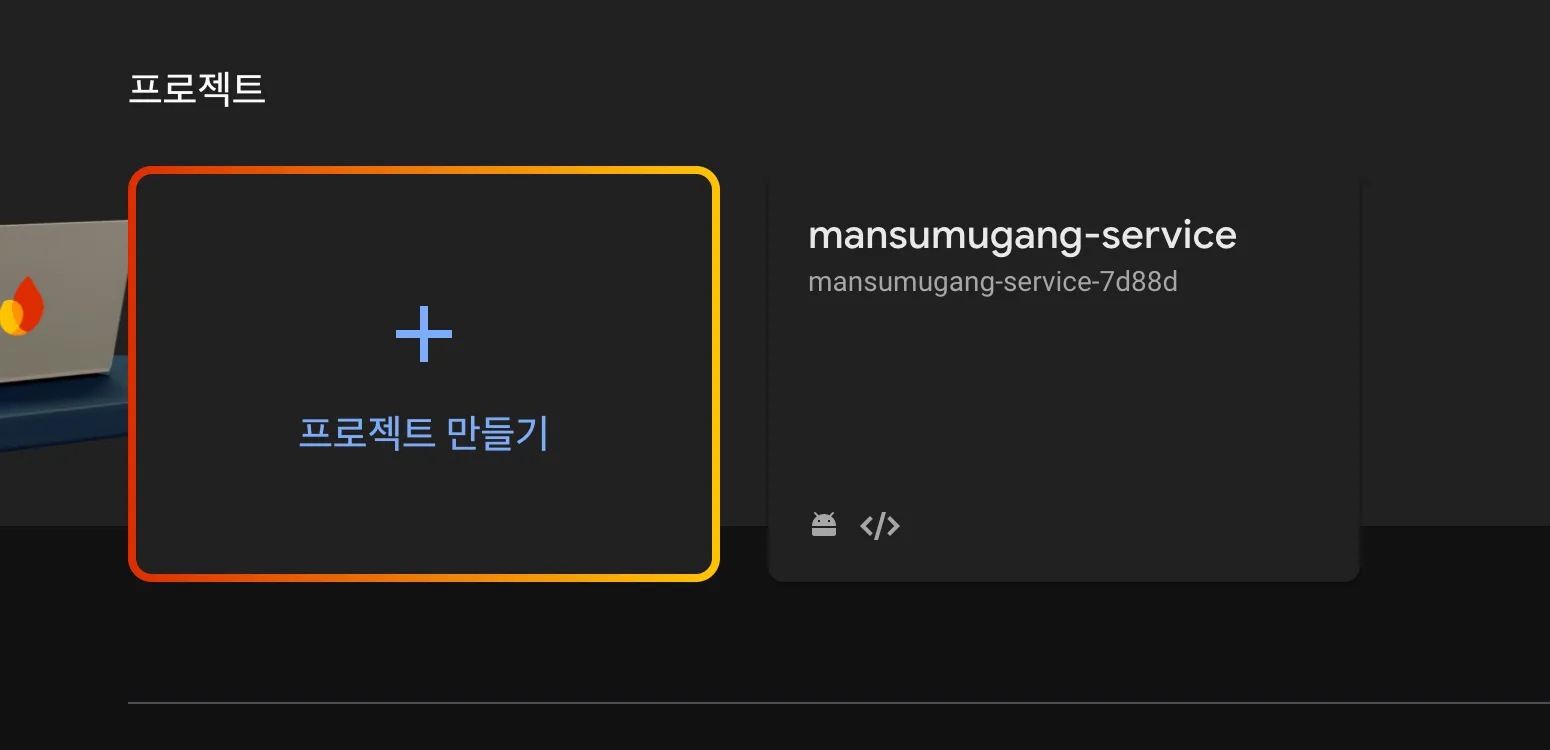
1. Firebase Project 생성
먼저 파이어베이스에 로그인하고 콘솔로 이동하여 프로젝트를 생성한다.
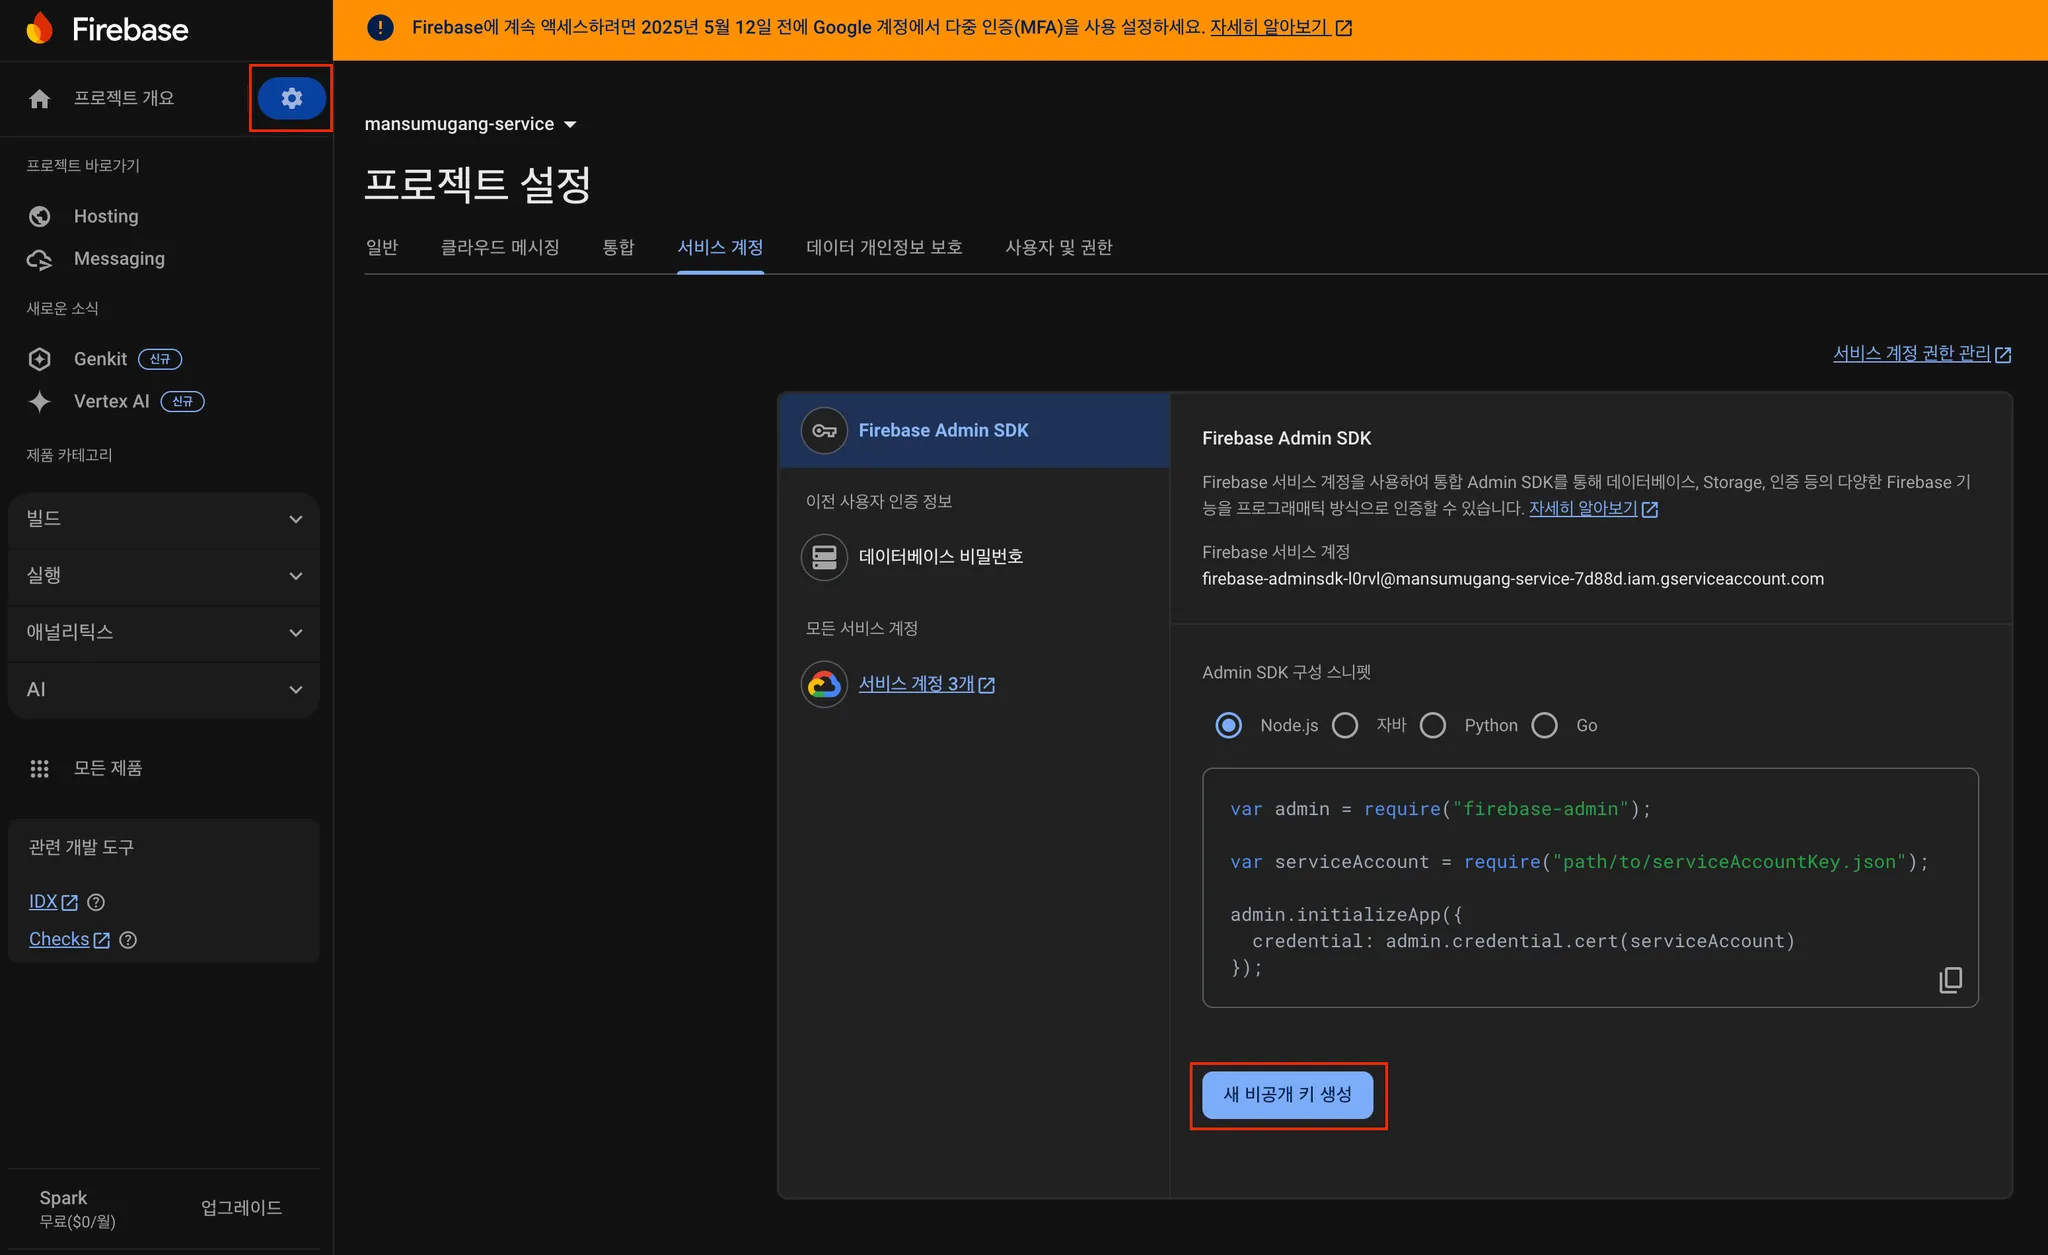
2. 비공개 키 다운로드
- 왼쪽 상단의 톱니바퀴를 클릭하여 프로젝트 설정 페이지로 이동한다.
- 그리고 서비스 계정 탭을 클릭하고 아래 새 비공개 키 생성을 클릭하여 비공개 키인
json파일을 다운받는다.
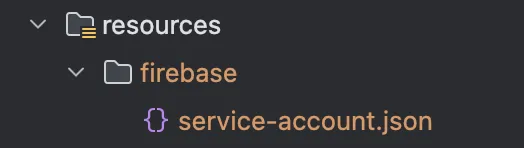
3. 스프링 부트 프로젝트 내 비공개 키 저장
다운 받은 json 파일을 resources/firebase 디렉토리 아래에 service-account.json 이라는 이름으로 저장한다.
4. 파이어베이스 의존성 추가
build.gradle 파일에 firebase 의존성을 추가해준다.
dependencies {
	implementation 'com.google.firebase:firebase-admin:9.2.0'
}
5. Firebase 환경 설정 파일 추가
Spring Boot에서 firebase를 사용하기 위해서는 환경 설정이 필요하다.
먼저 나는 application.yaml에 비공개 키의 경로를 속성으로 추가하여 사용하였다.
firebase:
  service-account:
    path: "/firebase/service-account.json"
이후 FirebaseConfig라는 환경 설정 파일을 만들고 위 경로를 통해 비공개 키를 불러와 Firebase를 초기화하는 코드를 작성하였다.
// FirebaseConfig.java

import com.google.auth.oauth2.GoogleCredentials;
import com.google.firebase.FirebaseApp;
import com.google.firebase.FirebaseOptions;
import com.google.firebase.messaging.FirebaseMessaging;
import lombok.extern.slf4j.Slf4j;
import org.springframework.beans.factory.annotation.Value;
import org.springframework.context.annotation.Bean;
import org.springframework.context.annotation.Configuration;
import org.springframework.core.io.ClassPathResource;

import java.io.IOException;

@Slf4j
@Configuration
public class FirebaseConfig {
    @Value("${firebase.service-account.path}")
    private String SERVICE_ACCOUNT_PATH;

    @Bean
    public FirebaseApp firebaseApp() {
        try {
            FirebaseOptions options = FirebaseOptions.builder()
                    .setCredentials(
                            GoogleCredentials.fromStream(new ClassPathResource(SERVICE_ACCOUNT_PATH).getInputStream())
                    )
                    .build();

            log.info("Successfully initialized firebase app");
            return FirebaseApp.initializeApp(options);

        } catch (IOException exception) {
            log.error("Fail to initialize firebase app{}", exception.getMessage());
            return null;
        }
    }

    @Bean
    public FirebaseMessaging firebaseMessaging(FirebaseApp firebaseApp) {
        return FirebaseMessaging.getInstance(firebaseApp);
    }
}
6. Push 알림 전송
FcmService라는 서비스 클래스를 만들고 sendNotification() 메서드로 특정 FCM토큰을 가진 유저에게 지정된 title과 body를 포함하여 푸시 알림을 전송하도록 구현하였다.
// FcmService.java
import com.google.firebase.messaging.FirebaseMessaging;
import com.google.firebase.messaging.FirebaseMessagingException;
import com.google.firebase.messaging.Message;
import jakarta.transaction.Transactional;
import lombok.RequiredArgsConstructor;
import lombok.extern.slf4j.Slf4j;
import org.springframework.stereotype.Service;
@Service
@RequiredArgsConstructor
@Slf4j
public class FcmService {
private final FirebaseMessaging firebaseMessaging;
public void sendNotification(String title, String body, String fcmToken) {
log.info("Attempting to send Notification (title: {}, body: {}, fcmToken: {})", title, body, fcmToken);
send(createMessage(title, body, fcmToken));
}
private void send(Message message) {
try {
String response = firebaseMessaging.send(message);
log.info("Successfully send Notification: {}", response);
} catch (FirebaseMessagingException e) {
log.error("Fail to send Notification : {}", e.getMessage());
}
}
private Message createMessage(String title, String body, String fcmToken) {
return Message.builder()
.putData("title", title)
.putData("body", body)
.setToken(fcmToken)
.build();
}
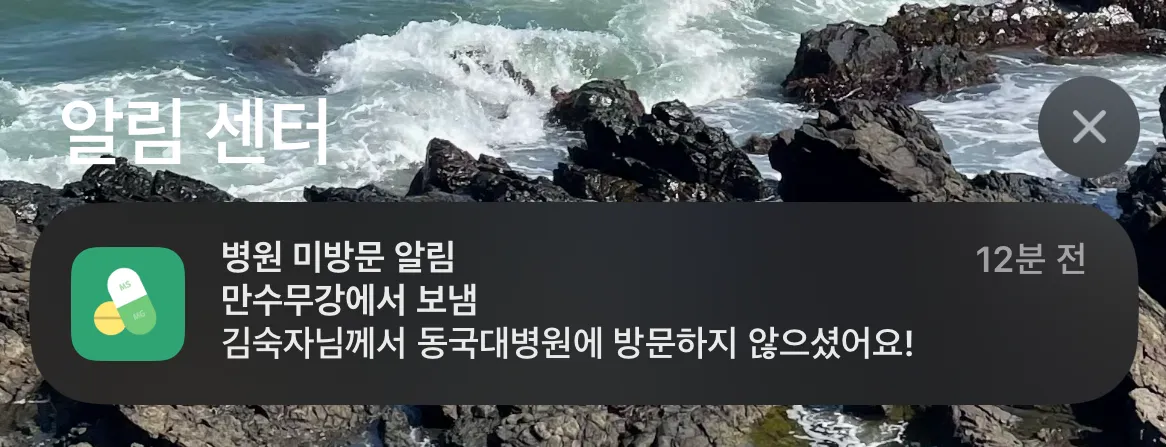
}7. 실행 결과
추가적인 활용
지금까지 간단하게 Spring boot에서 Firebase를 설정하고 간단하게 알림을 보내는 코드를 작성해보았다.
여기서 더 나아가 회원가입 시 유저의 FCM 토큰을 등록하고 특정 이벤트 발생하면 특정 유저의 FCM 토큰을 조회하여 알림을 보내는 로직을 구상하는 듯 해당 코드를 무궁무진하게 활용할 수 있다.