💎 들어가며
코딩테스트 연습겸 Python을 시작하였는데, 레퍼런스를 찾다보니 Pelican이란 신기한걸 발견하여 츄라이~해보면서 소개해보고자 포스팅을 작성하게 되었습니다.
참고로, Pelican은 GitHub Pages로 블로그를 만드는 프로그램으로 유명한 Jekyll과 유사한 프로그램입니다.
최종 목표는 coding test 코드를 작성하면
blog에 자동으로 포스팅을 해주는 것인데,, 가능할런지*^^* ...
이번 포스팅에서는 Pelican과 GitHub Pages로 Blog를 만드는 방법에 대해 소개합니다. 😊
깃허브 링크
혹여나 참고하실 분을 위해 깃허브 링크를 남겨두었습니다.
- Repository: https://github.com/hjkim1004/pelican-demo/
- GitHub Pages: https://twinklekhj.xyz/pelican-demo/
1. Pelican
1.1 Definition
Pelican
Static site generator powered by Python
“Pelican” is an anagram of calepin, which means “notebook” in French.

Pelican은 Python 기반 정적 사이트 생성기 입니다.
왜 이름이 Pelican일까? Pelican은 프랑스어로 notebook을 의미한다고 합니다.
노트, 블로그 같은 느낌으로 이름을 지은것이 아닐런지요 ㅎㅎ
Pelican 공식 사이트를 보시면 다양한 정보를 얻을 수 있습니다.
1.2 Install Dependencies
💡 Prerequisites
pelican은
python기반 프로그램이기 때문에 python이 설치되어 있어야합니다.
다음과 같은 명령이 실행되야합니다
pythonpip
# 기본 설치
pip install pelican

# 추가 설치: markdown
# markdown 형식으로 글을 쓰려면 패키지를 추가로 설치해주세요.
pip install markdown

# 추가 설치: typogrify
# typographically-improved HTML 향상된 HTML을 이용하려면 추가로 설치해주세요.
pip install typogrify
pelican을 설치하면 아래 종속 패키지가 자동으로 설치됩니다.
feedgenerator: Atom feeds 생성기jinja2: Template 엔진pygments: syntax highlightingdocutils: reStructuredText as an input formatblinker: an object-to-object and broadcast signaling systemunidecode: for ASCII transliterations of Unicode text utilitiesMarkupSafe: for a markup-safe string implementationpython-dateutil: date metadata 해석
1.3 New Project
pelican-quickstart 명령어를 통해 skeleton 프로젝트를 생성할 수 있습니다.
mkdir [projectname]
cd [projectname]

pelican-quickstart
저는 pelican-demo이라는 프로젝트를 생성하였습니다.
mkdir pelican-demo
cd pelican-demo
pelican-quickstart
pelican-quickstart
Welcome to pelican-quickstart v4.9.1.
This script will help you create a new Pelican-based website.
Please answer the following questions so this script can generate the files
needed by Pelican.
> Where do you want to create your new web site? [.]
> What will be the title of this web site? Pelican Demo
> Who will be the author of this web site? Heejeong Kim
> What will be the default language of this web site? [Korean]
> Do you want to specify a URL prefix? e.g., https://example.com (Y/n) n
> Do you want to enable article pagination? (Y/n) y
> How many articles per page do you want? [10]
> What is your time zone? [Europe/Rome]
> Do you want to generate a tasks.py/Makefile to automate generation and publishing? (Y/n) y
> Do you want to upload your website using FTP? (y/N) n
> Do you want to upload your website using SSH? (y/N) n
> Do you want to upload your website using Dropbox? (y/N) n
> Do you want to upload your website using S3? (y/N) n
> Do you want to upload your website using Rackspace Cloud Files? (y/N) n
> Do you want to upload your website using GitHub Pages? (y/N) y
> Is this your personal page (username.github.io)? (y/N) n
Done. Your new project is available at D:\Git\pelican-demo아래와 같은 스크립트가 실행되면서 Pelican 프로젝트가 생성됩니다.
1.4 Pelican Structure
pelican-quickstart로 프로젝트를 생성하면 다음과 같은 구조로 생성됩니다.
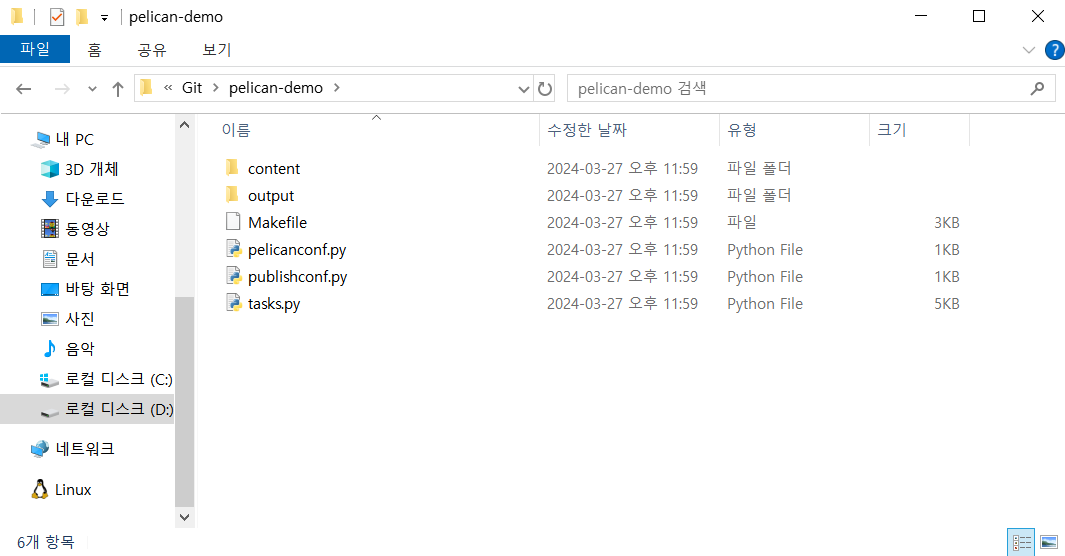
yourproject/
├── content				# 포스팅 디렉터리
│   └── (pages)
├── output				# build 디렉터리
├── tasks.py			# 실행 관련 설정 파일
├── Makefile			# build 파일
├── pelicanconf.py		# 주요 환경 설정 파일
└── publishconf.py		# Settings to use when ready to publish
1.5 Build & Run
build
아래 명령어로 pelican 홈페이지를 빌드할 수 있습니다.
pelican contentrun
아래 명령어로 서버를 실행할 수 있습니다.
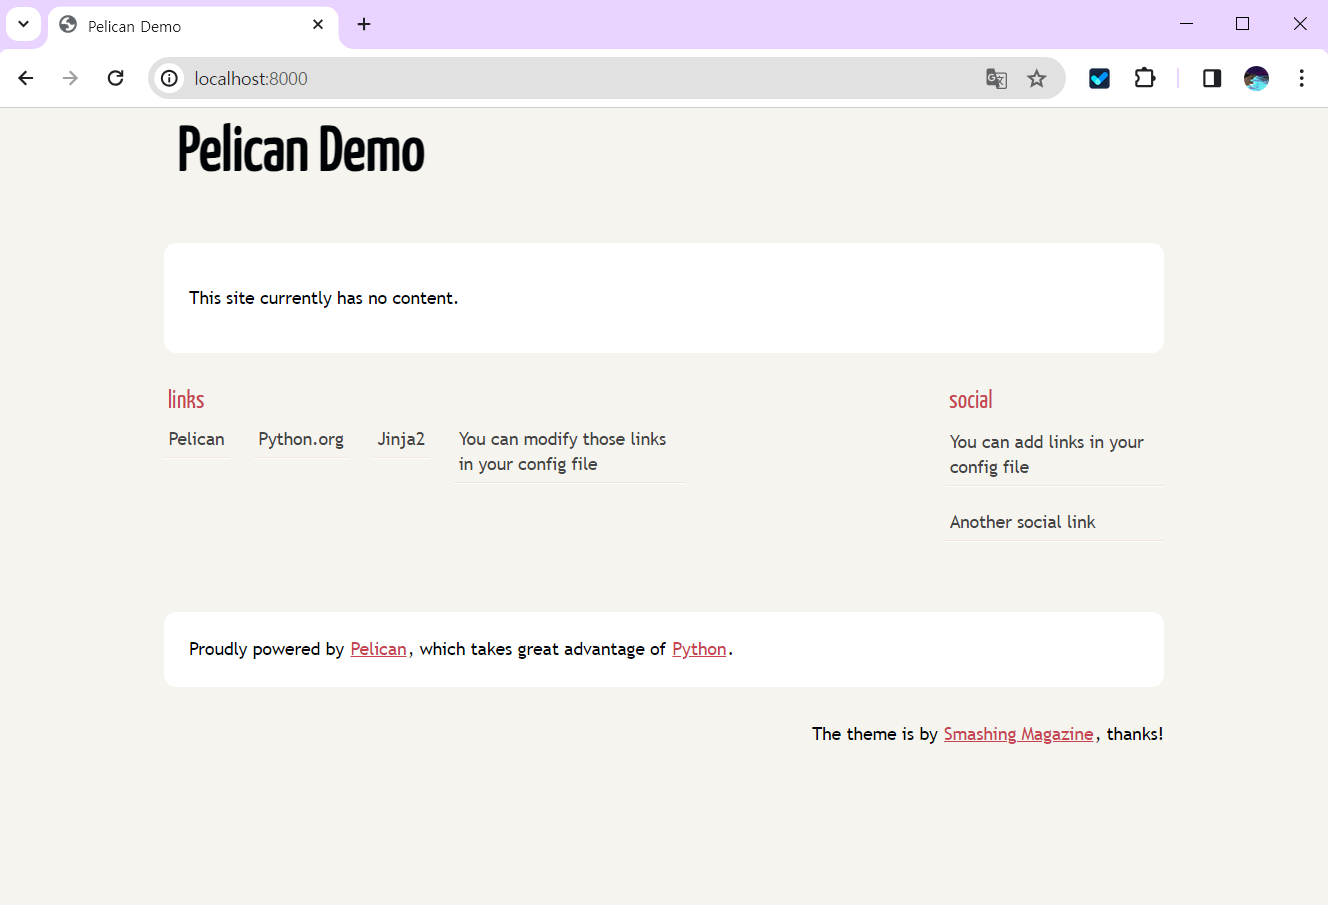
pelican --listen기본 포트는 8000번으로, tasks.py에서 수정할 수 있습니다. http://localhost:8000 에서 접속하실 수 있습니다.
초기 프로젝트 실행화면은 다음과 같습니다.
2. Write Content
Pelican은 기본적으로 HTML 태그 지원을 활성화하기 위해 reStructuredText에 대한 확장을 구현합니다. 하지만 markdown 패키지를 설치하면 markdown 형식으로 포스팅할 수 있습니다.
하지만 저는 markdown을 이용할 것입니다🤣
2.1 Sample
Markdown 게시물의 메타데이터 구문은 다음 패턴을 따라야 합니다.
Title: My super title
Date: 2024-03-27 22:14
Modified: 2024-03-27 22:14
Category: Pelican
Tags: python, pelican
Slug: create pelican site
Authors: Heejeong Kim
Summary: Pelican Posts

This is the content of my super blog post.
Pelican은 Markdown에 기재한 메타데이터와 본문으로 HTML을 생성합니다.
<html>
    <head>
        <title>My super title</title>
        <meta name="tags" content="thats, awesome" />
        <meta name="date" content="2024-03-27 20:14" />
        <meta name="modified" content="2024-03-27 20:14" />
        <meta name="category" content="yeah" />
        <meta name="authors" content="Alexis Métaireau, Conan Doyle" />
        <meta name="summary" content="Short version for index and feeds" />
    </head>
    <body>
        This is the content of my super blog post.
    </body>
</html>
2.2 Metadata
Meta Data 목록은 다음과 같습니다.
Metadata |
Description |
|---|---|
| title | Title of the article or page |
| date | Publication date (e.g., YYYY-MM-DD HH:SS) |
| modified | Modification date (e.g., YYYY-MM-DD HH:SS) |
| tags | Content tags, separated by commas |
| keywords | Content keywords, separated by commas (HTML content only) |
| category | Content category (one only — not multiple) |
| slug | Identifier used in URLs and translations |
| author | Content author, when there is only one |
| authors | Content authors, when there are multiple |
| summary | Brief description of content for index page |
| lang | Content language ID (en, fr, etc.) |
| translation | If content is a translation of another (true or false) |
| status | Content status: draft, hidden, or published |
| template | Name of template to use to generate content (without extension) |
| save_as | Save content to this relative file path |
| url | URL to use for this article/page |
2.3 Link static files
블로그 글에는 역시 사진이 같이 있어야 좋겠죠? 하지만 이미지를 사용하려면 경로 문제가 생기기 때문에 추가적으로 설정해주어야 합니다.
Settings
pelicanconf.py 파일에 아래 항목을 붙여넣습니다.
# 파일 위치: pelicanconf.py

# path-specific metadata
EXTRA_PATH_METADATA = {
    "extra/robots.txt": {"path": "robots.txt"},
}

# static paths will be copied without parsing their contents
STATIC_PATHS = [
    "images",
    "extra/robots.txt",
]
content 폴더에 images와 extra 폴더를 생성합니다.
Usage
md 파일 내부에서 아래와 같이 사용합니다.
3. GitHub Pages
3.1 Repository Settings
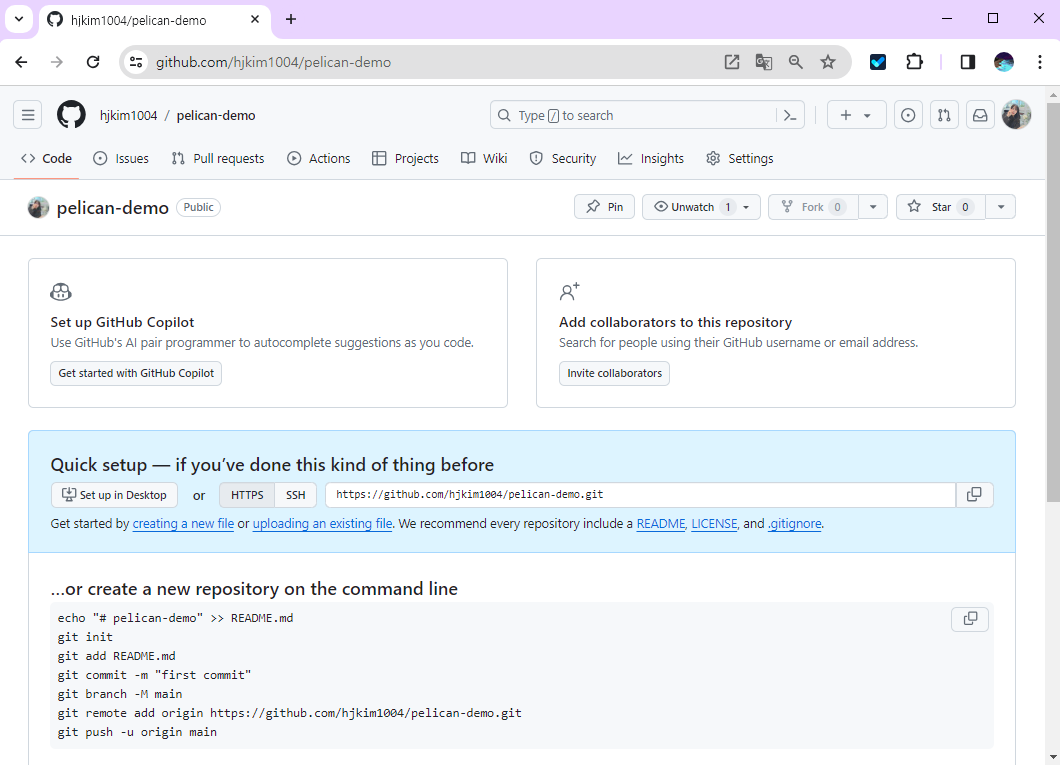
Create Repository
Pages로 올릴 Repository를 생성합니다.
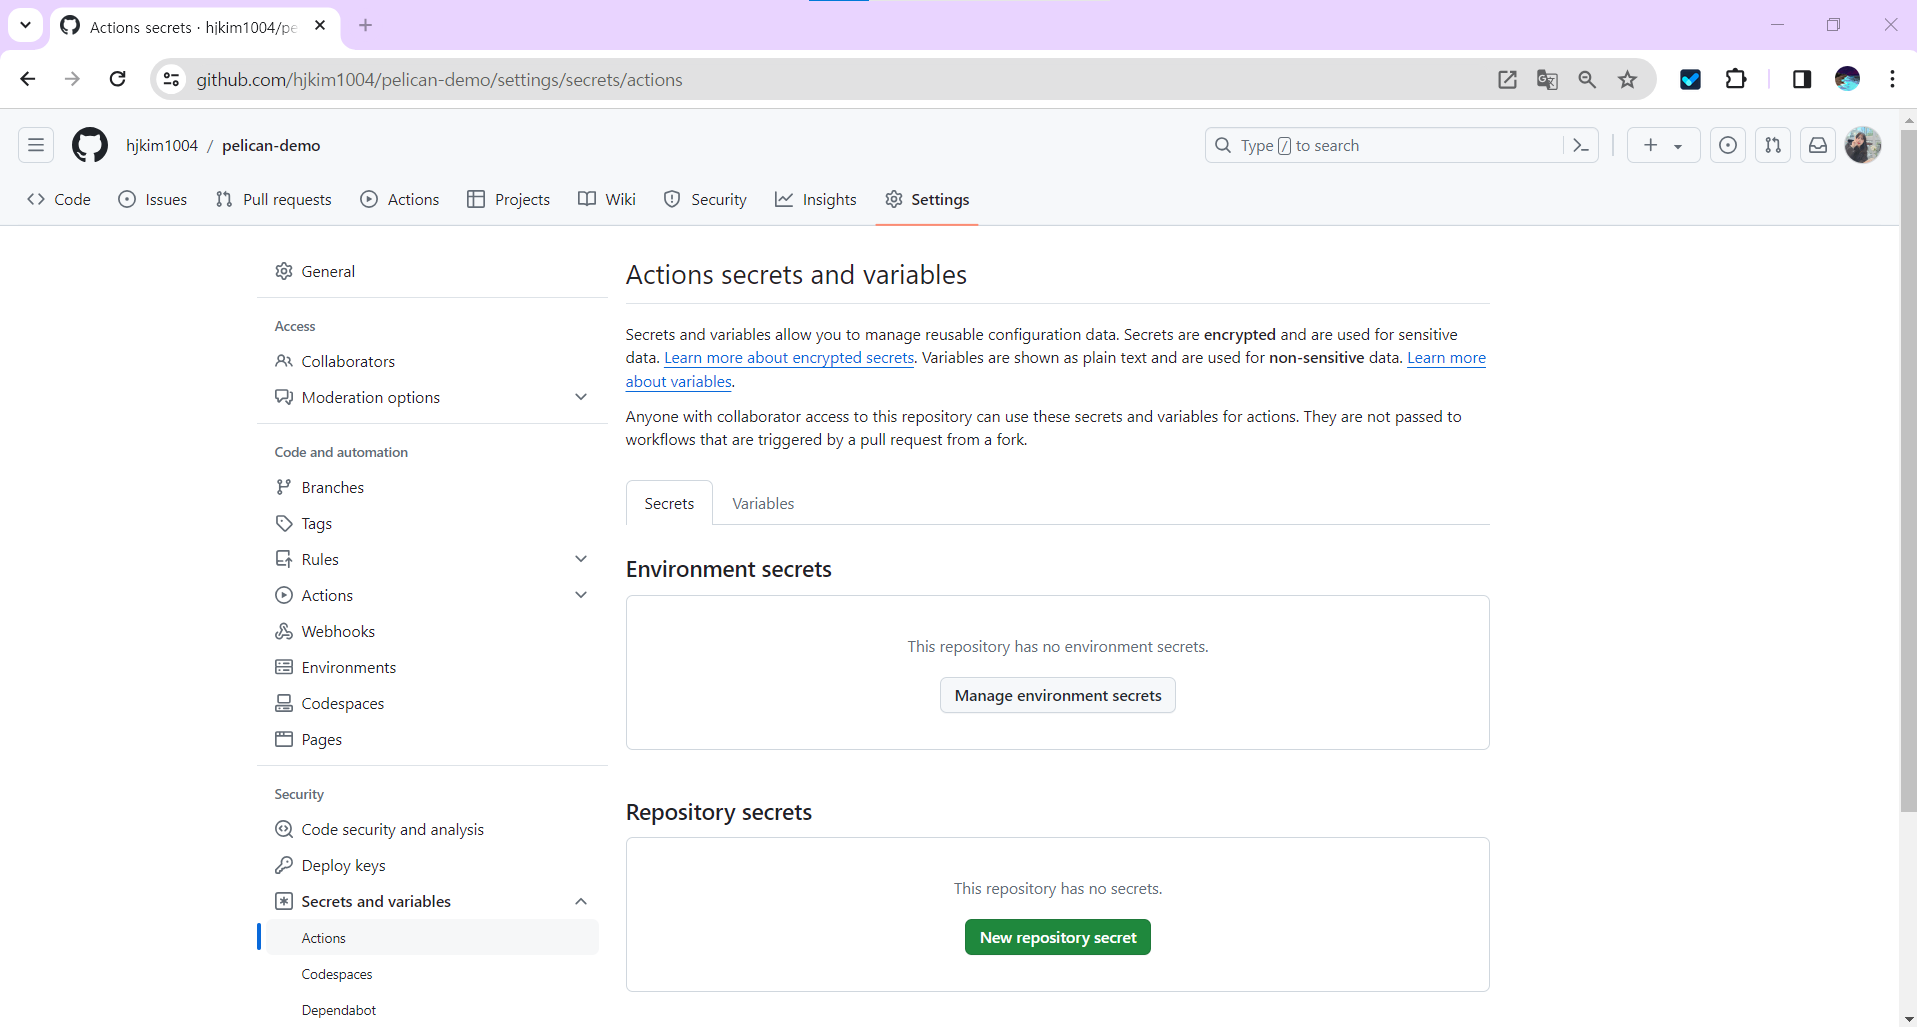
workflow key 세팅
Repository Secrets 세팅에서 workflow에서 사용할 키를 등록해줍니다.
3.2 CI/CD with GitHub Actions
GitHub Actions Marketplace에 등록된 Pelican Action를 이용하여 CI/CD를 구축했습니다.
GitHub Pages Pelican Build Action
https://github.com/marketplace/actions/github-pages-pelican-build-action?version=0.2.0
- action version: 0.2.0
- python version: python:3.12-slim
requirements.txt 생성
pelican
Markdown
typogrify
requirements.txt 파일을 생성하고, 다운로드할 라이브러리들을 적어줍니다.
pelican===4.9.1위와 같이 버전도 명시할 수 있습니다.
Workflow 생성
프로젝트 안에 .github/workflows 폴더를 만들고, pelican.yml 파일을 생성해주고 아래 내용을 복사해 붙여넣습니다. (파일명은 변경하셔도 상관없습니다.)
# 파일 위치: .github/workflows/pelican.yml

name: Pelican CI/CD

on:
  # Trigger the workflow on push or pull request,
  # but only for the master branch
  push:
    branches:
      - master

jobs:
  build:

    runs-on: ubuntu-latest

    steps:
    - uses: actions/checkout@v2
    - uses: nelsonjchen/gh-pages-pelican-action@0.2.0
      env:
        # GH_PAGES_BRANCH: gh-pages
        # GH_PAGES_CNAME: custom domain
        # PELICAN_CONFIG_FILE: pelicanconf.py
        PELICAN_CONFIG_FILE: publishconf.py
        # PELICAN_CONTENT_FOLDER: content
        # PELICAN_THEME_FOLDER: package.json
        # GITHUB_TOKEN: ${{secrets.GITHUB_TOKEN}}
        GITHUB_TOKEN: ${{ secrets.GH_ACTIONS_TOKEN }}
Additional Setting
추가적으로 환경설정을 해주었습니다.
1. SITEURL
# 파일명: publishconf.py
SITEURL = "https://twinklekhj.xyz/coding/"
저는 기본 [username].github.io가 아닌 레포 이름으로 추가할 거라 publishconf.py 파일에 SITEURL 항목을 추가해주었습니다.
2. TIMEZONE
# 파일명: pelicanconf.py
TIMEZONE = 'Asia/Seoul'
프로젝트를 처음 생성하면 TIMEZONE이 Europe/Rome으로 생성되는데, 한국으로 변경해주었습니다.
3. DEFAULT_LANG
# 파일명: pelicanconf.py
DEFAULT_LANG = 'en'
프로젝트를 처음 생성하면 DEFAULT_LANG이 Korea로 생성되는데, 콘솔에서 자꾸 WARNING이 떠서 en으로 변경해주었습니다. (기본 언어를 한국으로 하실 분은 ko로 변경하시면 됩니다.)
3.3 Upload Project
만든 프로젝트를 올려줍니다.
💡 주의
content 폴더 아래의 하나의 포스팅이 꼭 있어야합니다.
# 깃 세팅 방법
git init
git add README.md
git commit -m "first commit"
git branch -M master
git remote add origin [깃 주소]
git push -u origin master
프로젝트 안에 workflow 가 있으니 프로젝트를 올리면 Action이 자동으로 수행됩니다.
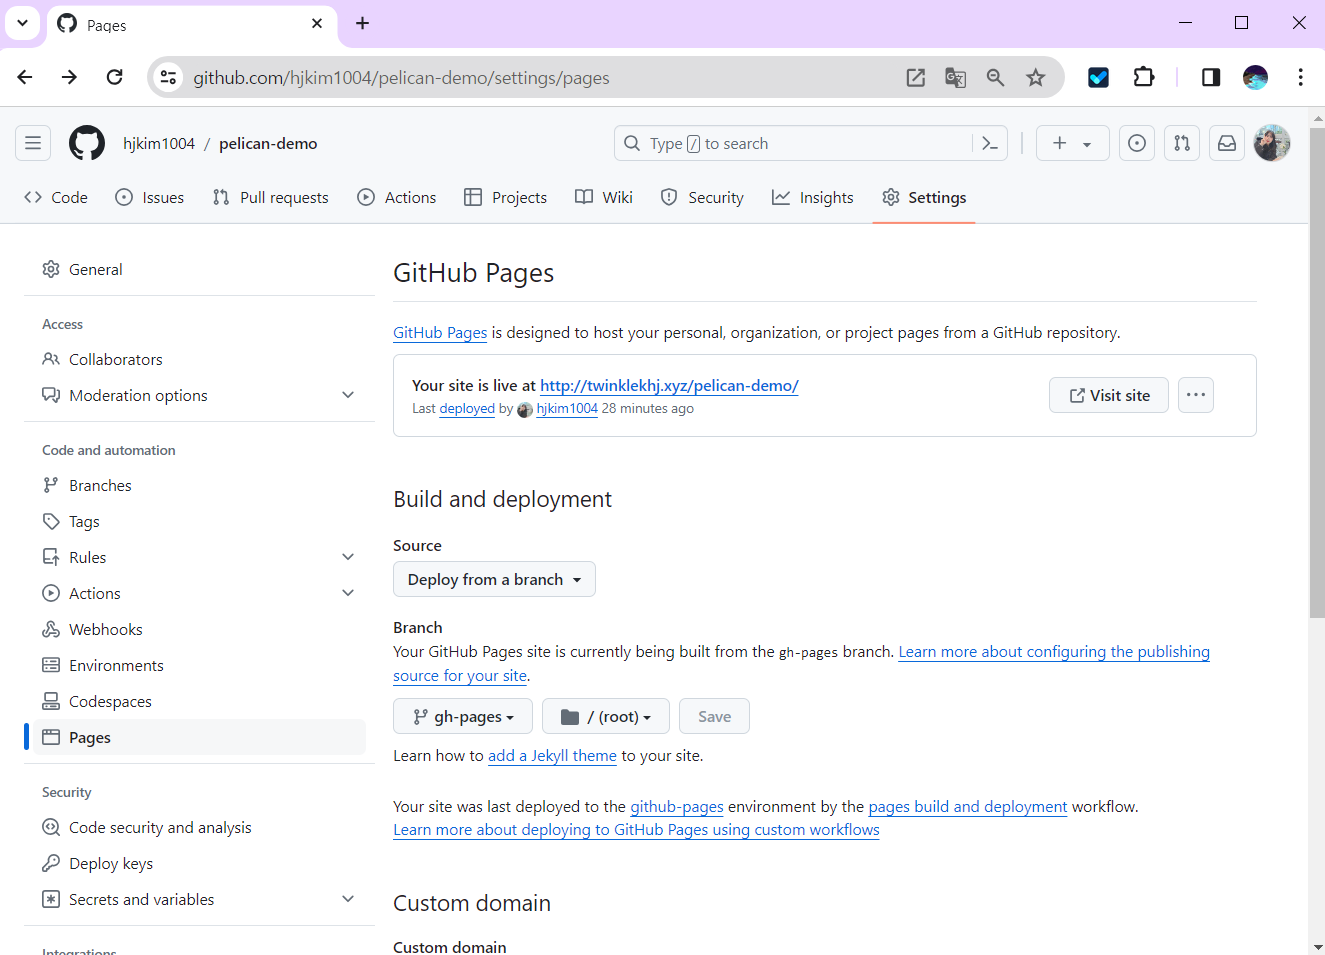
GitHub Pages 를 세팅해준적이 없는데, 알아서 세팅이 되었습니다.🙌
친절한 깃허브씨..😍
3.4 Demo Page
workflow가 잘 실행되어 아래와 같은 화면을 띄웠습니다. 오예~~!!😎
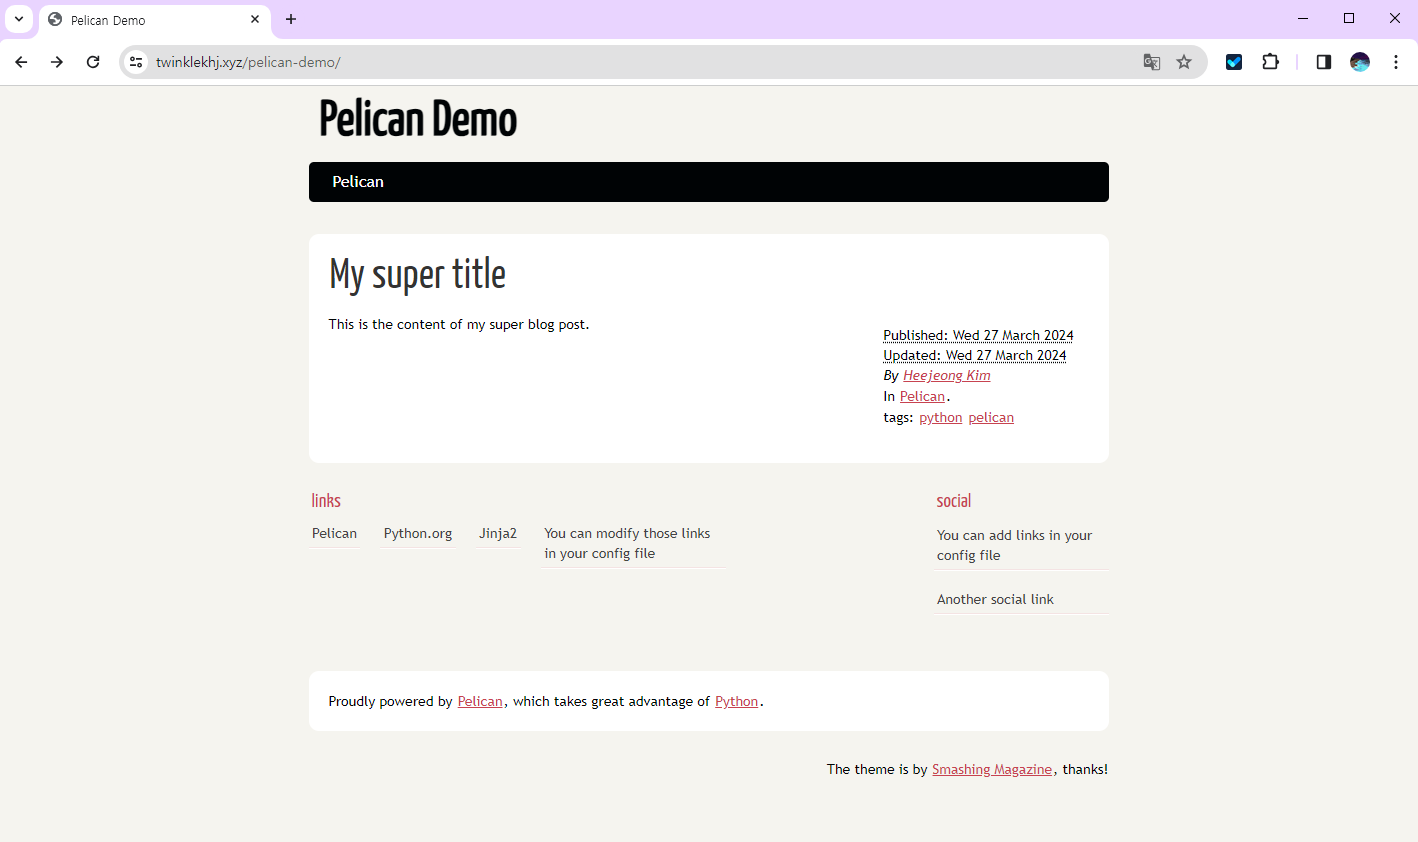
혹여나 참고하실 분을 위해 상단에 깃허브 링크를 남겨두었습니다.
3.5 Trouble Shooting
환경세팅을 따라한답시고, 열심히 했는데 약 3시간동안 지속된 path 에러로 골머리를 썩었습니다. 혹시나 저와 같은 문제를 겪으실 까봐 공유합니다.😢
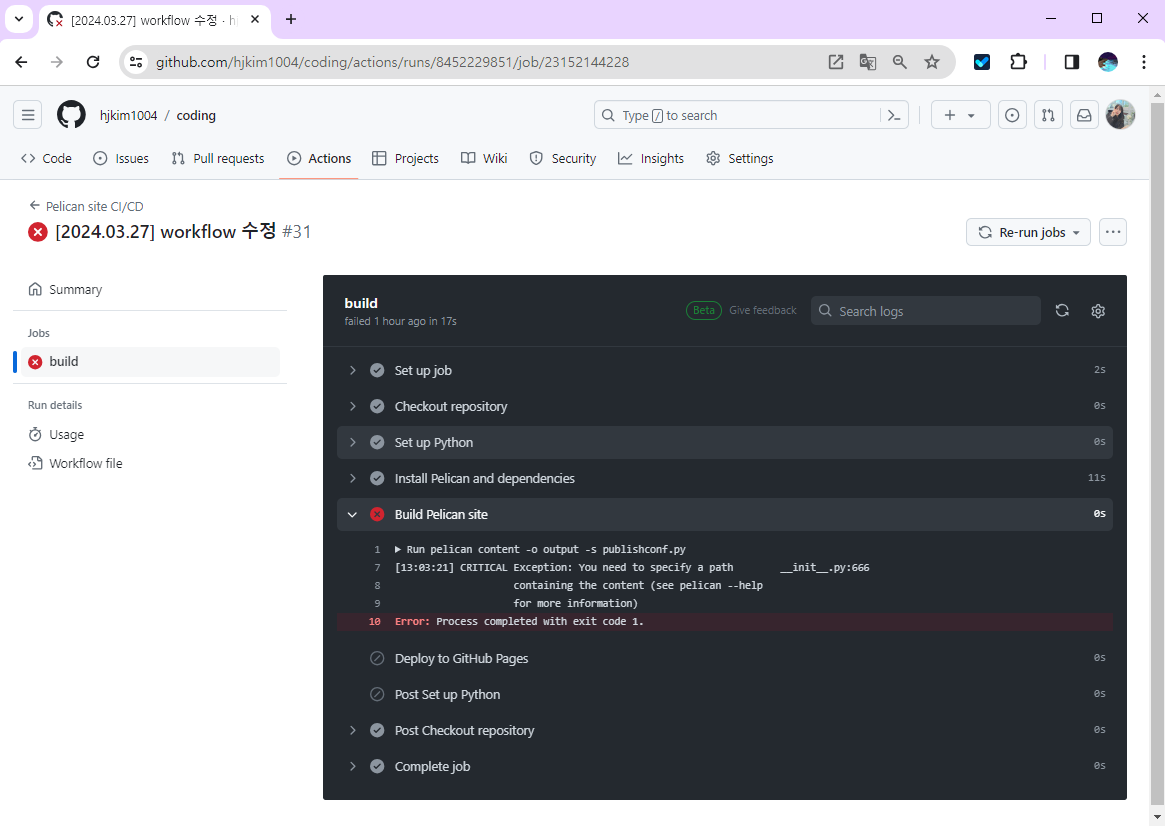
CRITICAL Exception: You need to specify a path __init__.py:666
containing the content (see pelican --help for more information)
역시나 프로그램은 거짓말을 하지 않더군요
무엇이 이상한가 싶으면 내 코드가 문제니라.. 🤦♀️
튜토리얼을 따라해 content 폴더에 아무것도 없어서 문제가 발생한 것이었습니다.
이 짓을 3시간이나 했다니... 타오른 시간🔥🤗
4. Pelican Theme
4.1 Official Theme
아무래도 기본적으로 제공해주는 화면은 매우 매우 불편합니다.
그래서 테마를 적용해보려고 합니다.😊
펠리칸 공식 테마는 아래에서 찾을 수 있습니다.
- Pelican 테마 공식 홈페이지: https://github.com/getpelican/pelican-themes
- Preview 페이지: https://pelicanthemes.com/
4.2 Apply Theme
저는 SVBTLE 테마를 다운받아 적용하였습니다.
⇒ Link: https://github.com/wting/pelican-svbtle
theme 추가
themes 폴더를 하나 생성하고, 폴더 밑에 다운받은 테마를 추가합니다.

pelicanconf.py 수정
pelicanconf.py 파일에서 THEME의 경로와 THEME_STATIC_PATHS 경로를 지정해줍니다.
# THEME settings
# THEME = 'path/to/theme'
THEME = "themes/svbtle"
THEME_STATIC_DIR = 'theme'
4.3 Demo Page
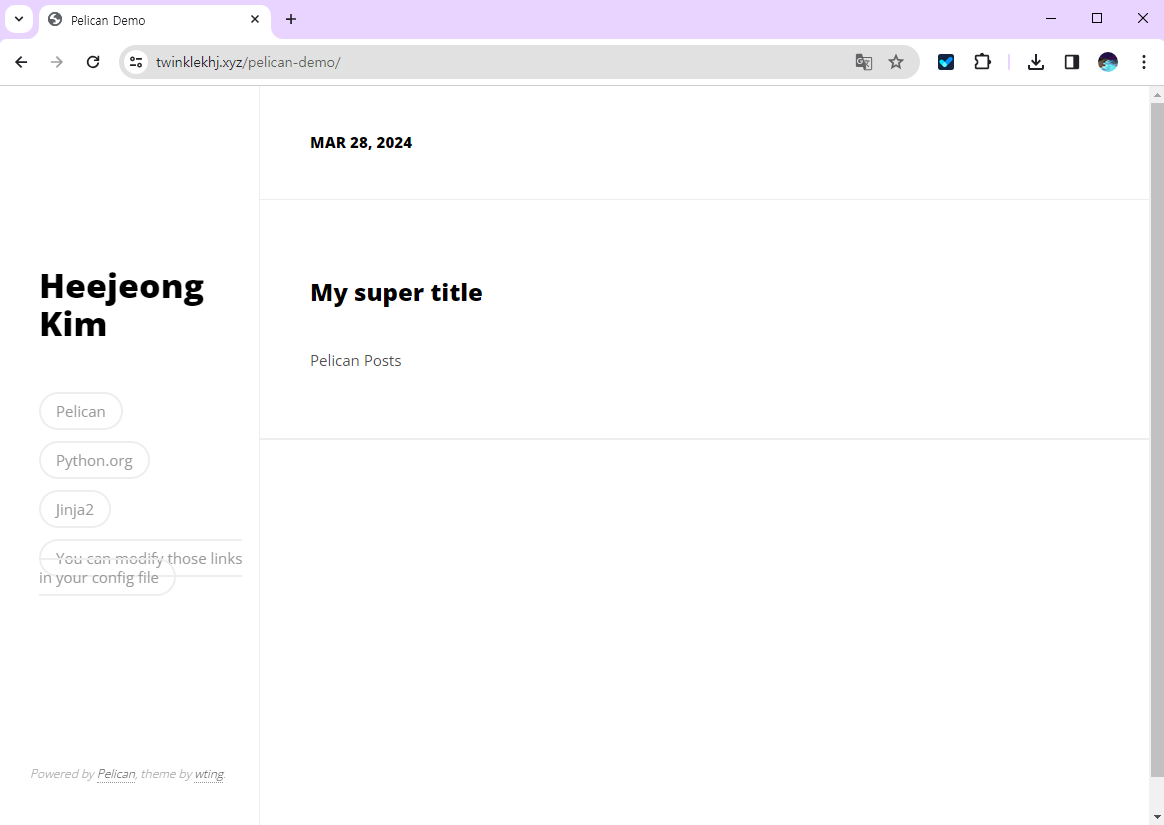
짜잔~! 완성-⭐
테마까지 완벽히 적용되었습니다.💖
감격의 눈물이😂😂
4.4 Custom Theme
Pelican 공식 문서를 참고하시면 나만의 테마를 개발할 수 있습니다. 하지만 그것은 FM! 정석!
쉬운 방법은 그냥 레이아웃 적당한 테마를 하나 골라서 CSS만 변경하면 끝~! (그래도 필요한 변수들은 공식 문서에서 찾을 수 있습니다)
💎 References
💎 마치며
약 12시간동안 Pelican 이란 것에 꽂혀 주구장창 하다보니 어느새 숙달되어버려서 Pelican이란 단어가 귀여워보이네요🤣
다음은 테마 개발을 해볼까합니다🤗🤗
모두 해피 코딩하세요.💖