Responder Chain

이벤트가 발생했을 때 이벤트가 전달되는 체인을 Responder chain이라고 한다. 위의 그림과 같은 순서로 이벤트가 전달되며 다음과 같이 protocol을 통해서 체인 중간에서 이벤트를 잡을 수 있다.
이벤트 보내기
@objc protocol ActivationTileActions {
    func performSetupYourModemAction(sender: Any?)
}

extension ActivationTileViewController: ActivationTileRowButtonViewDelegate {

    func didPressButton(_ sender: Any?) {
        UIApplication.shared.sendAction(#selector(ActivationTileActions.performSetupYourModemAction), to: nil, from: self, for: nil)
    }
}
버튼에 addTarget 메소드에 보면 첫번째 파라미터에 target을 지정하는 부분이 있다. 보통 버튼을 포함하고 있는 뷰 컨트롤러가 이벤트를 잡기 때문에 파라미터에 self를 전달하지만 타겟을 nil로 설정함으로써 responder chain 어느곳에서나 이벤트를 잡을 수 있다.(to: nil)
이벤트 잡기
@objc func performSetupYourModemAction(sender: Any?) {
    presenter?.performSetupYourModemAction()
}
사용법
여러 뷰들을 거쳐서 이벤트를 전달해야 할 때 protocol delegate처럼 뷰 계층에 있는 모든 뷰들을 거치지 않고 바로 원하는 뷰로 이벤트를 전달할 수 있다. 컨테이너 뷰에서 사용하면 좋다!
디버깅
UIResponder에는 next라는 프로퍼티가 있다. 이 프로퍼티는 responder chain에서 이벤트를 받을 다음 뷰를 저장하고 있는데 이 프로퍼티를 이용해서 responder chain을 디버그 콘솔에서 직접 확인할 수 있다.
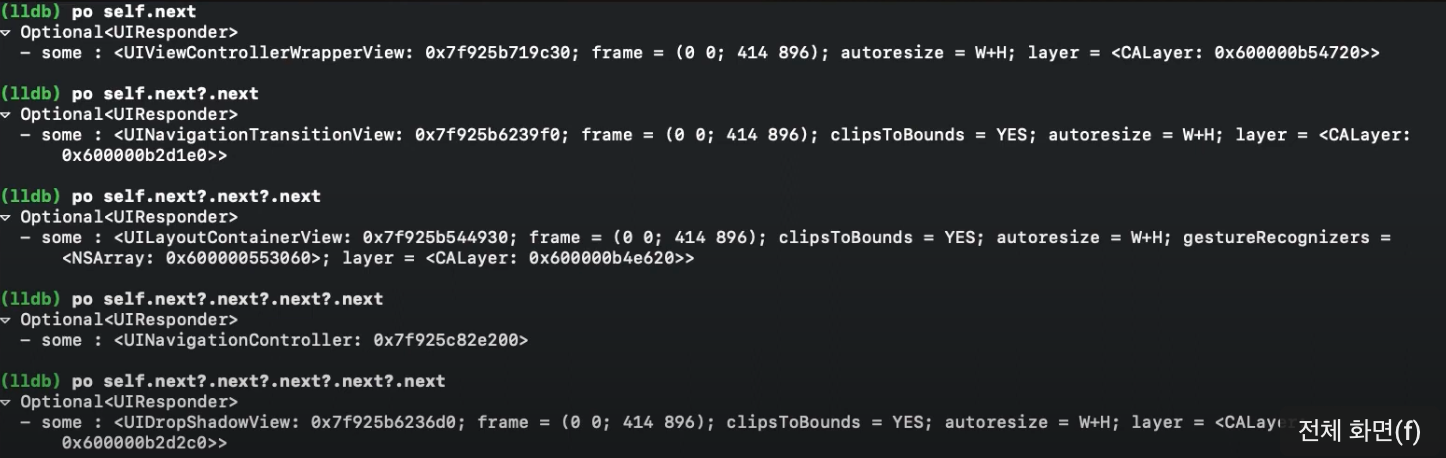
디버그 콘솔에서 po self.next를 입력하면 위와같이 어떤 뷰가 next responder인지 나온다.
First Responder 찾기
// UIResponder+Utils.swift

import UIKit

extension UIResponder {

    private struct Static {
        static weak var responder: UIResponder?
    }

    /// Finds the current first responder
    /// - Returns: the current UIResponder if it exists
    static func currentFirst() -> UIResponder? {
        Static.responder = nil
        UIApplication.shared.sendAction(#selector(UIResponder._trap), to: nil, from: nil, for: nil)
        return Static.responder
    }

    @objc private func _trap() {
        Static.responder = self
    }
}
위의 익스텐션을 이용하면 누가 first responder인지 잡을 수 있다. 코드를 설명하자면 responder chain으로 trap 메소드를 보내는데 trap 메소드에서 Static 구조체의 responder에 self(즉, 텍스트 필드가 first responder라면 텍스트 필드가 self가 된다.)를 저장하고 currenFirst 메소드의 아웃풋으로 보냄으로써 first responder의 참조를 얻을 수 있다.
// ViewController.swift

let currentTextField = UIResponder.currentFirst() as? UITextField else { return }
위와 같이 타입 캐스팅을 하여 사용하면 된다.
참고
https://github.com/jrasmusson/ios-starter-kit/blob/master/advanced/Responder-Chain.md