
Swift Custom Font 적용해보기
Xcode Project에 외부 Custom Font를 적용하는 방법을 알아보자
1. 폰트 다운로드
이번 포스팅에서는 Pretendard 폰트를 사용해서 적용 방법을 알아보자
Pretendard 다운로드 링크
2. 프로젝트에 폰트 추가
Font라는 폴더를 추가해 다운로드 받은 폰트를 드래그해서 추가해준다 (폴더 유무, 폴더 명은 알아서)
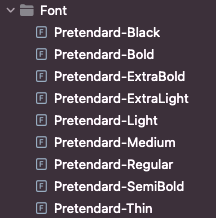
꼭 추가할 때 Target 추가 하는 것을 잊지말자
추가로 Create folder refernces 를 체크하게 되면 폰트 파일을 다운로드 받은 경로를 참조하여 다운받은 폰트 파일의 경로 이동 & 삭제할 경우 Error가 발생하게 되니깐 주의할 것
파일을 추가 했으면 이제 Info.plist를 수정해야한다.
Info.plist에 Fonts provided by application 을 추가하고 아래와 같이 폰트를 추가한다
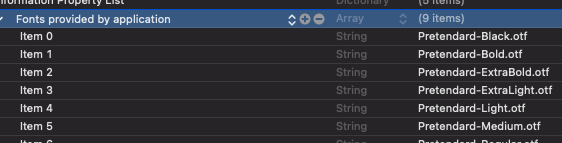
꼭 꼭 확장자 까지 포함해서 추가할 것. (otf, ttf)
폰트 이름이 파일 이름과 다른 경우가 있다 이런 경우에 적용이 안되고 오류를 발생시키는데
func getFontName() {
            for family in UIFont.familyNames {

                let sName: String = family as String
                print("family: \(sName)")

                for name in UIFont.fontNames(forFamilyName: sName) {
                    print("name: \(name as String)")
                }
            }
        }
위 코드를 만들고 viewController viewDidLoad()에서 실행해 폰트명을 확인해보도록 하자.
Info.plist 에 추가를 하지 않아도 시뮬레이터에서는 잘 돌아갈 수 있지만
애플 공식문서를 보면 "프로젝트에 추가하는 각 글꼴 파일은 해당 배열에 나열되어야 합니다. 그렇지 않으면 앱에서 글꼴을 사용할 수 없습니다." 라고 하니 꼭 추가하자
3. 폰트 적용시키기
UIFont(name: "Pretendard-Bold", size: 25.0)이런식으로 하면 사용할 수 있다.
번외 편하게 사용하기
1. 폰트 이름 다 적어주기 귀찮아
라고 한다면
extension UIFont {
    static func pretendard(size fontSize: CGFloat, weight: UIFont.Weight) -> UIFont {
        let familyName = "Pretendard"

        var weightString: String
        switch weight {
        case .black:
            weightString = "Black"
        case .bold:
            weightString = "Bold"
        case .heavy:
            weightString = "ExtraBold"
        case .ultraLight:
            weightString = "ExtraLight"
        case .light:
            weightString = "Light"
        case .medium:
            weightString = "Medium"
        case .regular:
            weightString = "Regular"
        case .semibold:
            weightString = "SemiBold"
        case .thin:
            weightString = "Thin"
        default:
            weightString = "Regular"
        }

        let font = UIFont(name: "\(familyName)-\(weightString)", size: fontSize) ?? .systemFont(ofSize: fontSize, weight: weight)
        return font
    }
}
이렇게 코드를 작성하고
UIFont.predtendard(size: 12.0, weight: .bold)이런식으로 사용할 수 있다.
2. 라벨에 사용할 때
위에 코드를 보고
어 그럼 텍스트, 크기, 두께, 자간 등 이런 옵션을 다 넣어서 사용할 순 없을까? 라고 생각한 사람이 있다면
당연히 있다!
위에 만든 코드 뒤에
extension UILabel {
    func setPretendardFont(text: String, size fontSize: CGFloat, weight: UIFont.Weight, letterSpacing: CGFloat) {
        self.font = UIFont.pretendard(size: fontSize, weight: weight)
        let attributedString = NSMutableAttributedString(string: text)
        attributedString.addAttribute(NSAttributedString.Key.kern, value: letterSpacing, range: NSRange(location: 0, length: attributedString.length))
        self.attributedText = attributedString
        //이 아래부분은 원하는 경우에만 추가
        self.adjustsFontSizeToFitWidth = true
        self.minimumScaleFactor = 0.7
    }
}
이렇게 추가해주면 view에서
let googleSignInTitle = UILabel().then{
        $0.setPretendardFont(text: "Sign in with Google", size: 17.0, weight: .regular, letterSpacing: 1.23)
        }
이런식으로 한번에 사용할 수 있다!
