OpenCV 활용하기
- OpenCV를 사용하기위해 import 시킨다.
import cv2 - 이미지 로딩 및 출력
img = cv2.imread("./egg/1.png", cv2.IMREAD_COLOR) cv2.imshow("image",img) cv2.waitKey(0) cv2.destroyAllWindows()- imread : 이미지 파일을 읽어오는 함수, 파일경로, 컬로or흑백(IMREAD_COLOR or IMREAD_GRAYSCALE) 등으로 읽어들일 속성을 설정한다.
- imshow : 이미지를 창으로 띄어준다, (새로운 창의 타이틀, 실제 사진을 저장한 변수)을 입력한다.
- waitKey(0) : 키를 입력할때까지 계속 보여줌,대기시간(ms), 0: 무한대기
- destroyAllWindows() : 종료시킨다.
- 출력화면

matplotlib를 이용하여 출력하기
- matplotlib를 사용하기위해 import 시키기
import matplotlib.pyplot as plt - 출력하기
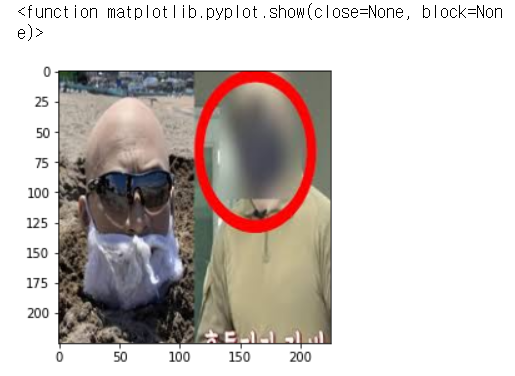
만약에 컬러로 변경하려면 IMREAD_GRAYSCALE를 COLOR_BGR2RGB로 변경한다.img = cv2.imread("./egg/21.png", cv2.IMREAD_GRAYSCALE) plt.imshow(img,cmap='gray') plt.show- 출력화면
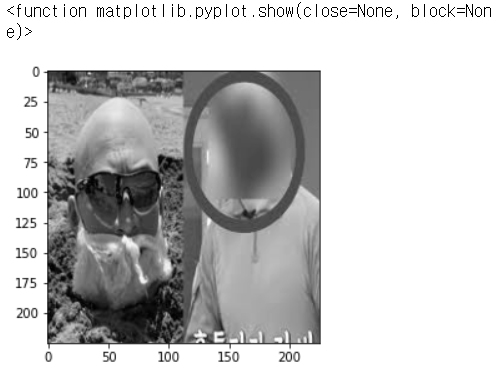
변경 시
- 출력화면
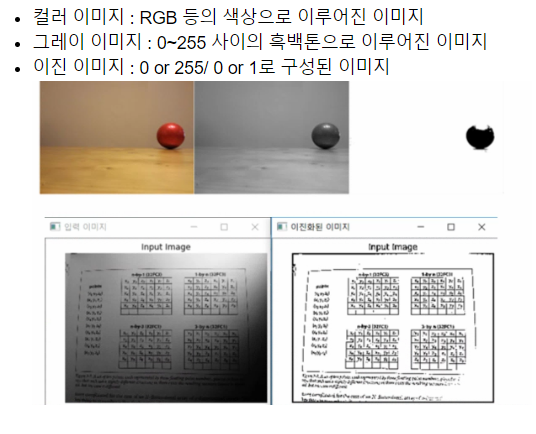
이미지 타입
동영상 로딩 및 출력
-
동영상 로딩 시키기(예외 처리를 위해 try~except문 사용)
try : print("영상로딩을 시작합니다..") video_cap = cv2.VideoCapture("./jung.mp4") except : print("영상로딩 실패") -
영상 frame 읽어오기
 ret, frame = video_cap.read()

 if ret :
     cv2.imshow("video",frame)
     cv2.waitKey(0)
     cv2.destroyAllWindows()

 video_cap.release()
video_cap.release() : 비디오 객체를 메모리에서 해제시키는 기능
-
프레임 단위로 영상을 출력해야되기 때문에 while문을 사용한다.
try :
   print("영상로딩을 시작합니다..")
   video_cap = cv2.VideoCapture("./jung.mp4")
   while True :
       ret, frame = video_cap.read()
       if ret :
           gray_frame = cv2.cvtColor(frame,cv2.COLOR_RGB2GRAY)
           cv2.imshow("video",gray_frame)
           k = cv2.waitKey(51)#초당 프레임수를 맞추기 위함 : 1000/24
       else :
           break;

       if k == 27: #27번은 ecs
           break;
   cv2.destroyAllWindows()
   video_cap.release()
except :
   print("영상로딩 실패")

초보 코딩