To Do
1. Complementing Login Process
Pb.1 : Differentiating DB and Schema ( mongoose.model )
User.js
Q. Is "User" the "Schema" ? or " DB "
A. DB !!
We initially connected to DB by "test
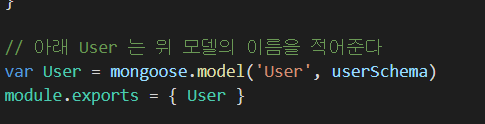
That is. we defined "userSchema" and named it by"User", which is the 1st argument of
mongoose.model"
It means, mongoose.model automatically find the collection named "User" , even if "User" named collection does not exist, it finds similar collection name or even creates a new one.
And the found collection is defined as User, ( var User )
So we export { User }, and it is used as "DB collection" , not the Schema
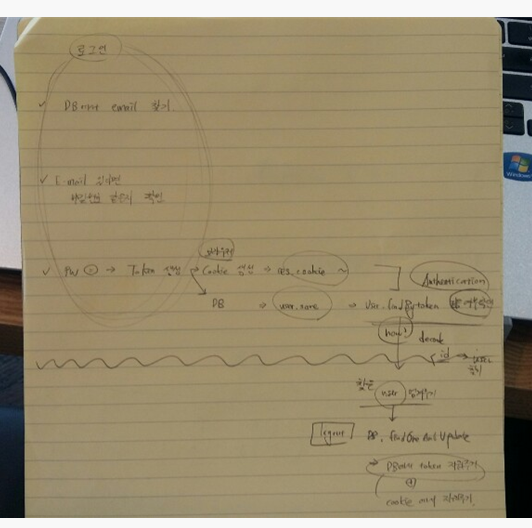
Pb 2. Overall Login, Authentication, Logout Process
2. Studying React for web
1st case : When I failed to login
MongoError: E11000 duplicate key error collection: practice.users index: email_1 dup key: { email: "bjoh1227@naver.com
Below is my User.Model
const mongoose = require("mongoose");
const bcrypt = require('bcrypt');
// Salt를 만들때 10자리 Salt 를 만들어서, 그 Salt를 이용해서 비밀번호를 암호화 할 것이다
const saltRounds = 10
// jsonwebtoken을 import 한다 : token 생성을 위해서
const jwt = require('jsonwebtoken');

const userSchema = mongoose.Schema({
    // user 의 name 은 무엇인지
    name : {
        type : String,
        // maxlength는 자기가 주고 싶은 만큼 주기
        maxlength : 50
    },
    email: {
        type : String,
        // 어떤 분이, john ahn@naver.com 이렇게 쳤고, john 다음에 들어간 빈칸을 사라지게 해준다
        trim : true,
        unique : 1
    },
    password : {
        type : String ,
        minlength : 5
    },
    lastname : {
        type : String,
        maxlength : 50
    },
    // 이렇게 role을 주는 이유는, 어떤 user 는 관리자가 될 수도 있고, 일반 user 가 될 수도 있다
    role : {
        // 예를 들어, number 가 1 이면 관리자 이고, 0이면 일반 user 인 것이다
        role : Number,
        default : 0
    },
    image : String,
    // 아래와 같은 token을 이용해서, 유효성 같은 것들을 관리할 수 있다
    token : {
        type: String
    },
    // token의 유효기간 : token이 사용할 수 있는 기간
    tokenExp : {
        type: Number
    }
})

// 아래와 같이 index.js 에서, 정보를 DB에 save ( user.save((err , doc) 를 하기 전에, 암호화를 거친다
// 아래를 거친 후에 위의 코드 user.save 가 실행되는 원리이다
userSchema.pre('save', function(next){

    //여기서 this는, 위의 userSchema 전체를 가리킨다
    var user = this;

    // 그런데, 우리는 비밀번호 혹은 사용자 정보등을 변경할 때가 있다. 아래와 같은 if 조건을 추가해주지 않으면. 비밀번호가 아니라 email을 변경해주더라도 password를 다시 암호화하는 과정을 거친다. 그것을 원치 않기 때문에, 우리는 비밀번호를 수정할 때만, 비밀번호를 다시 암호화하는 과정을 거치게 하고 싶다
    if(user.isModified('password')){

        // 비밀번호를 암호화 시킨다
        // genSalt : Salt를 만들기, saltRounds 가 필요함
        // err가 나면 바로 user.save로 가서 정보를 저장한다
        bcrypt.genSalt(saltRounds, function( err, salt) {
            if(err) return next(err)

            // 만약 salt가 정상적으로 가져와지게 된다면, bcrypt.hash의 첫번째 argument로는 user.password를 넣는데, 이것은 암호화되지 않은 raw 비밀번호를 의미한다 . 2번째는 salt, 3번째는 call back function 을 넣는다. 여기서 hash란, 암호화된 비밀번호를 말한다
            bcrypt.hash( user.password, salt, function ( err, hash) {
                if( err ) return next(err)
                // user.password를 hash로 교체해준다
                user.password = hash;
                // 완성이 됬으면. index.js 에 있는 user.save로 돌아간다
                next();
            });
        });
    } // isModified
    else{ // 비밀번호를 바꾸는 게 아니라, 다른 것을 바꿀 때는 그냥 next 로 가게 한다
        next();
    }


})

// 비밀번호 match 여부 확인 코드
userSchema.methods.comparePassword = function( plainPassword , cb ) {
    // cb는 콜백함수를 나타낸다
    // plainPassword가 1234567 이라고 한다면, DB에 있는 , 암호화된 비밀번호 $2b$10$VMYu4GJFSoNdMkD/ssnXW.Gy72qF7KNjcPh60z3qI4wjPDfAUJ1B 와 같은지를 확인해야 한다
    // 이를 위해서는 1234567를 암호화 한 이후에 !! 그 다음 비교를 해야 한다

    // 첫번째 인자: 1234567, 두번째 인자: 암호화된 비밀번호

    // 요청한 비밀번호를 암호화 한 이후, 그 다음 , db에 있는 암호화된 데이터와 비교한다
    bcrypt.compare( plainPassword , this.password , function( err, isMatch) {
        if(err) return cb(err)
        cb( null, isMatch)
        // err 가 없다면, null : err가 없다 / isMatch : true 를 출력한다

    })
}

userSchema.methods.generateToken = function(cb){

    var user = this;
    // jsonwebtoken을 이용해서 token을 생성하기
    // 위에서 import 한 jsonwebtoken이 담긴 jwt를 sign을 이용하여 합쳐주면 된다
    // 즉, user._id + 'secretToken' => token을 만들어주는 것이다. 그리고 나중에 token을 해석할 때 secretToken을 넣어주면, user._id가 나오게 된다. 즉 이 사람이 누구인지를 알 수 있게 되는 것이다
    // user._id의 경우는 plain 형태로 넣어주어야 하므로, toHexString으로 넣어준다
    var token = jwt.sign( user._id.toHexString() , 'secretToken')
    // 그리고 생성한 token을 userSchema의 token field에 넣어준다
    user.token = token
    user.save(function(err, user){
        if(err) return cb(err)
        // err가 없다면, error는 없고, user 정보만 전달해준다
        cb(null, user)
    })
}

userSchema.statics.findByToken = function( token, cb){
    var user = this
    // 토큰을 decode 한다 ( verify 이용 )
    // 2번째 인자로는 우리가 추가한 string을 넣는다. 즉, 우리는 user._id + secretToken을 사용했는데, 이때의 secretToken을 넣는다
    jwt.verify(token , 'secretToken' , function( err, decoded){
        // 여기서 decode 된 것은 user._id 일 것이다
        // 유저 아이디를 이용해서 유저를 찾은 다음에
        // 클라이언트에서 가져온 token과 DB에 보관된 토큰이 일치하는지 확인한다

        user.findOne( { "_id": decoded, "token" : token } , function( err, user) {

            if(err) return cb(err);
            cb(null, user)
        })

    })
}


**// 아래 User 는 위 모델의 이름을 적어준다
const User = mongoose.model('users', userSchema)

module.exports = { User }**
If I make "email" "not" unique,
Then the Error is gone,
but After, that 2nd case. error is shown.
module.exports = {
mongoURI : "mongodb+srv://<name>:<password>@nodereactbasic-nwfac.mongodb.net/practice?retryWrites=true&w=majority"
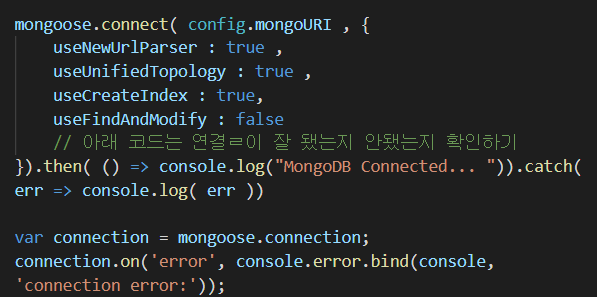
}However, regardless of "email being unique",
The MongoDB is connecting to "practice" collection, and
Since "const User = mongoose.model('users', userSchema )" is working,
it is specifically approaching to "practice > users "
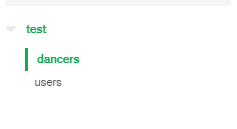
But,
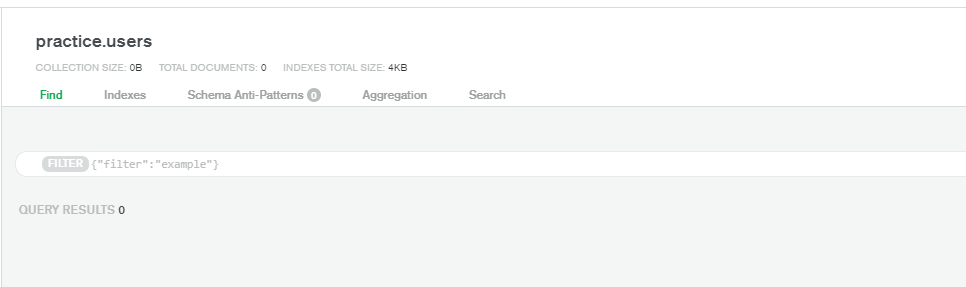
as you see, The DB is empty,
which means, error showing "duplicate error" does not make sense
Solution : ....I was connecting to Different DB...
If you appropriately connect to DB, then problem will disappear
2nd case : When I succeed Login
import Axios from 'axios';
import {
    LOGIN_USER,
    REGISTER_USER
} from './types';

export function loginUser(dataTosubmit){

    // 아래의 내용은 loginUser 라는 action이다

    // request에는 결과적으로 response.data 가 담기고, 이는 request에 따른, server에서 보내준 response 정보가 들어있다
    const request = Axios.post('/api/users/login', dataTosubmit).then(response =>  response.data )

    // 현재 우리는 request를 reducer에 넘겨주는 역할을 하고 있다

    return {
        type : LOGIN_USER,
        payload : request
    }
}

export function RegisterUser(dataTosubmit){

    // 아래의 내용은 loginUser 라는 action이다

    // request에는 결과적으로 response.data 가 담기고, 이는 request에 따른, server에서 보내준 response 정보가 들어있다
    const request = Axios.post('/api/users/register', dataTosubmit).then(response =>  response.data )

    // 현재 우리는 request를 reducer에 넘겨주는 역할을 하고 있다

    return {
        type : REGISTER_USER,
        payload : request
    }
}
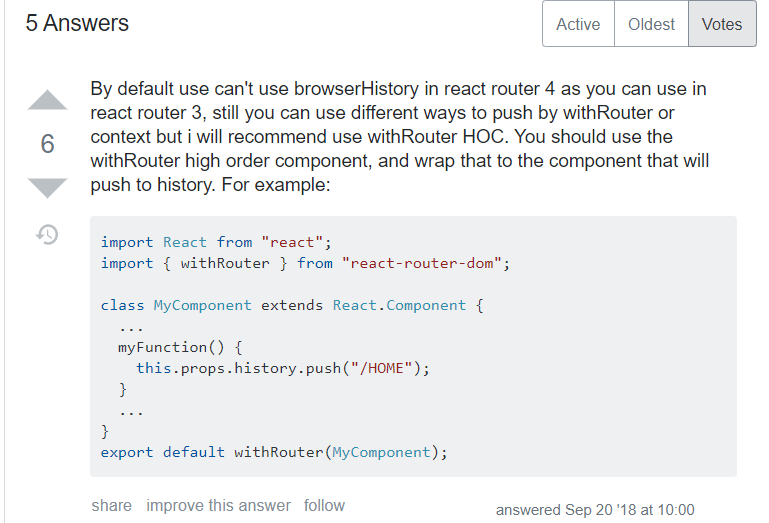
Solution
import React, { useEffect, useState } from 'react';
import { useDispatch } from 'react-redux';
import Axios from 'axios';
import { RegisterUser } from '../../../_actions/user_action';
import { withRouter} from 'react-router-dom';
function RegisterPage(props){
const dispatch = useDispatch()
// 실제 type이 가능하게 하기 위해서 state을 정의해주어야 한다
const [Email, setEmail] = useState("")
const [Password, setPassword] = useState("")
const [Name, setName] = useState("")
const [ConfirmPassword, setConfirmPassword] = useState("")
const onEmailHandler = (event) => {
// setEmail을 통해서 state을 바꿔준다
setEmail(event.currentTarget.value)
}
const onPasswordHandler = (event) => {
setPassword(event.currentTarget.value)
}
const onNameHandler = (event) => {
setName(event.currentTarget.value)
}
const onConfirmPasswordHandler = (event) => {
setConfirmPassword(event.currentTarget.value)
}
// form에도 submit 관련 기능을 정의해주어야, login button을 클릭하는 순간 기능이 수행된다
const onSubmitHandler = (event) => {
// 아래와 같은 코드를 넣어주어야만, login buton을 클랙해도 새로고침되는 것이 아니라, 화면 그대로에서 login 기능이 수행되도록 할 수 있다
event.preventDefault();
if( Password !== ConfirmPassword){
return alert("비밀번호와 비밀번호 확인은 같아야 합니다")
}
let body = {
email : Email,
password : Password,
name : Name,
}
// 형태 : dispatch( action ( 데이터 ))
// loginUser 라는 action을 또 정의해주어야 한다
// action 폴더에 정의한다
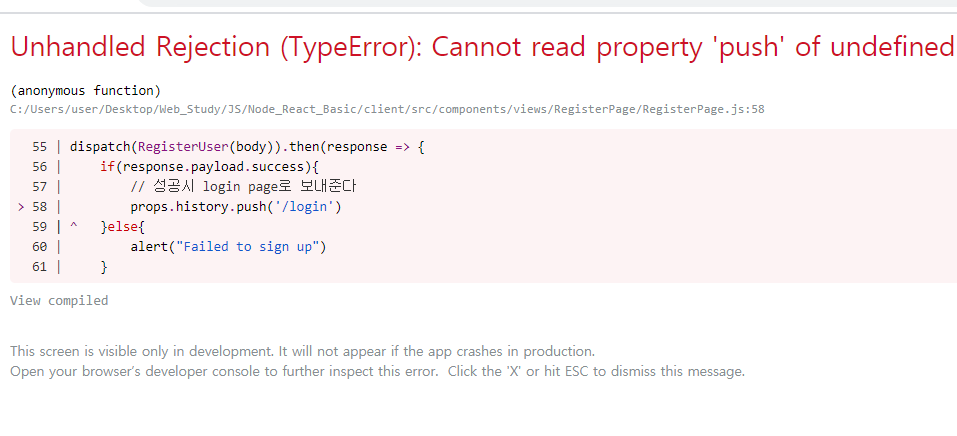
dispatch( RegisterUser(body) ).then(response => {
if(response.payload.success){
// 성공시 login page로 보내준다
props.history.push('/login')
}else{
alert("Failed to sign up")
}
})
// redux를 쓰지 않는 경우, 아래의 코드를 써서 서버로 정보를 보내주어야 하지만, Axios를 통해 서버에 정보를 보내는 작업은 action 함수에 넣으면 된다
// Axios.post('/api/users/login', body ).then(response => {
// })
}
return(
<div style = {{ display: 'flex' , justifyContent : 'center', alignItems : 'center', width : '100%', height : '100vh'}}>
{/* onChange가 아니라 onSubmt이라는 것이 중요하다 */}
<form style = {{ display : 'flex', flexDirection : 'column'}}
onSubmit = {onSubmitHandler}>
<label>Email</label>
<input type = "email" value ={Email} onChange = {onEmailHandler}/>
<label>Name</label>
<input type = "text" value ={Name} onChange = {onNameHandler}/>
<label>Password</label>
<input type = "password" value ={Password} onChange = {onPasswordHandler}/>
<label>Confirm Password</label>
<input type = "password" value ={ConfirmPassword} onChange = {onConfirmPasswordHandler}/>
<br />
<button type = "submit">
Register
</button>
</form>
</div>
)
}
export default withRouter(RegisterPage)